Implement Progressive Delivery with Argo Rollout
This article introduces how to implement progressive delivery based on the open-source Argo Rollout.
Prerequisites
-
The images in the example need to access the public network: argoproj/rollouts-demo:yellow and argoproj/rollouts-demo:blue.
-
Only applicable to DCE 5.0 platform deployed via installer with metallb.
-
The use of canary deployment capabilities requires the installation of Istio and Argo Rollout components in the cluster.
Steps
The entire process is divided into four steps: building an application by image, configuring Istio-related resources, creating a canary delivery job, and verifying the effect.
Building an application by image
-
Select Container Image as the entry point in the wizard.
-
Fill in the basic information:
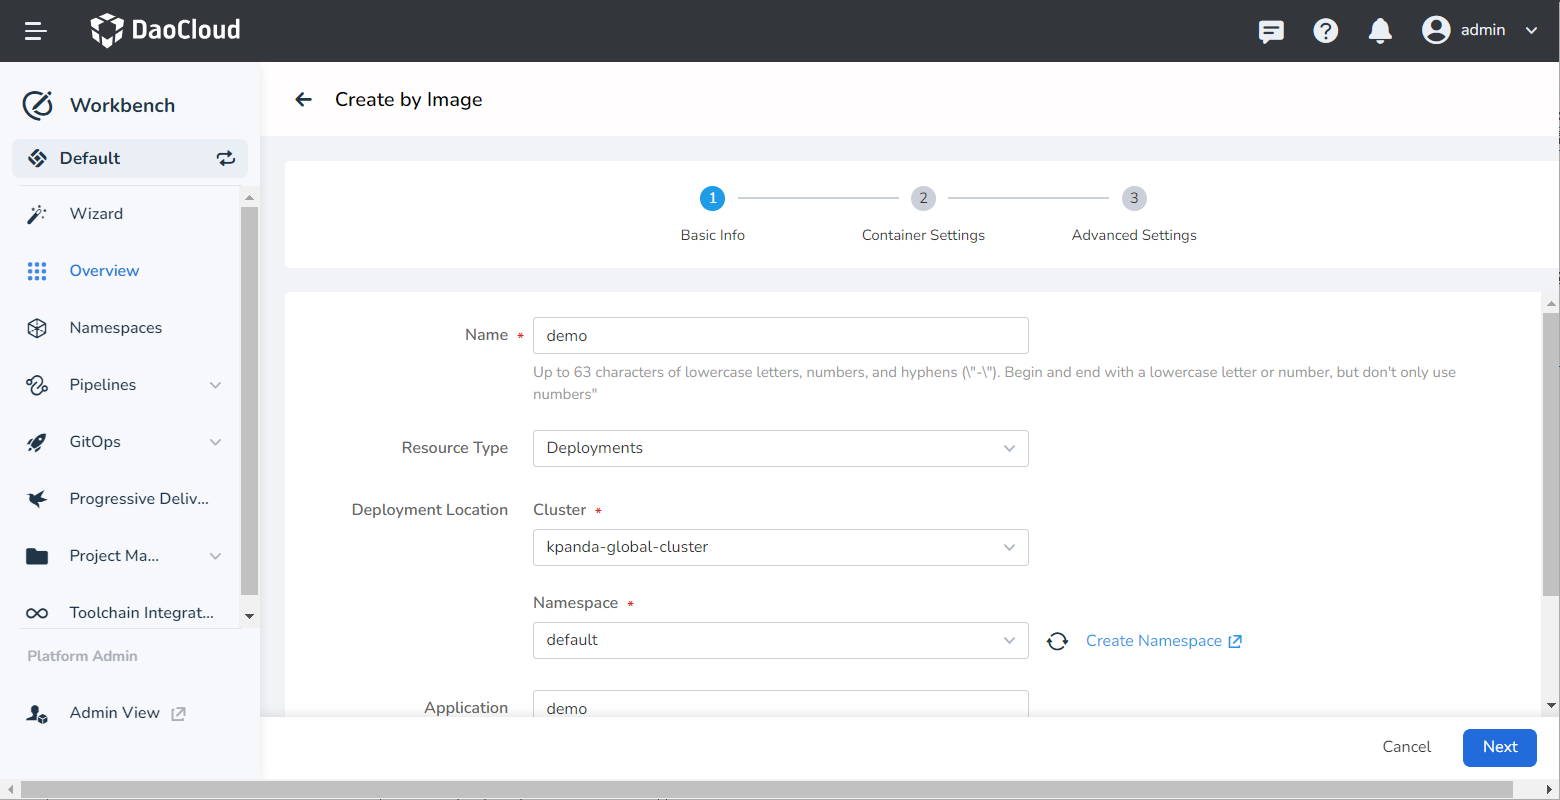
-
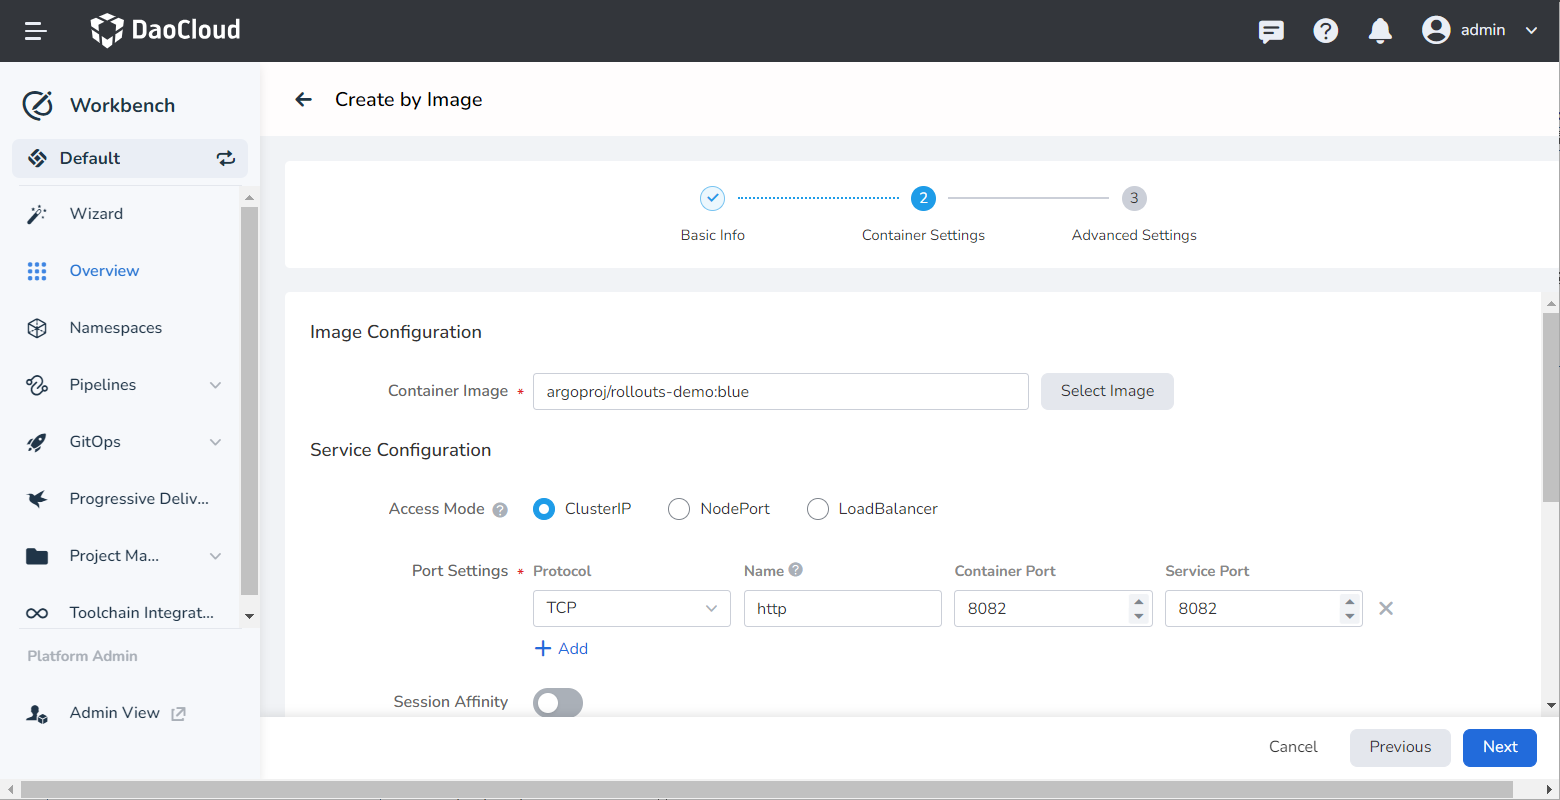
Fill in the container settings. For example:
- Container Image: argoproj/rollouts-demo:blue
- Port Settings: Name is http , container port is 8082 , and service port is 8082 .
-
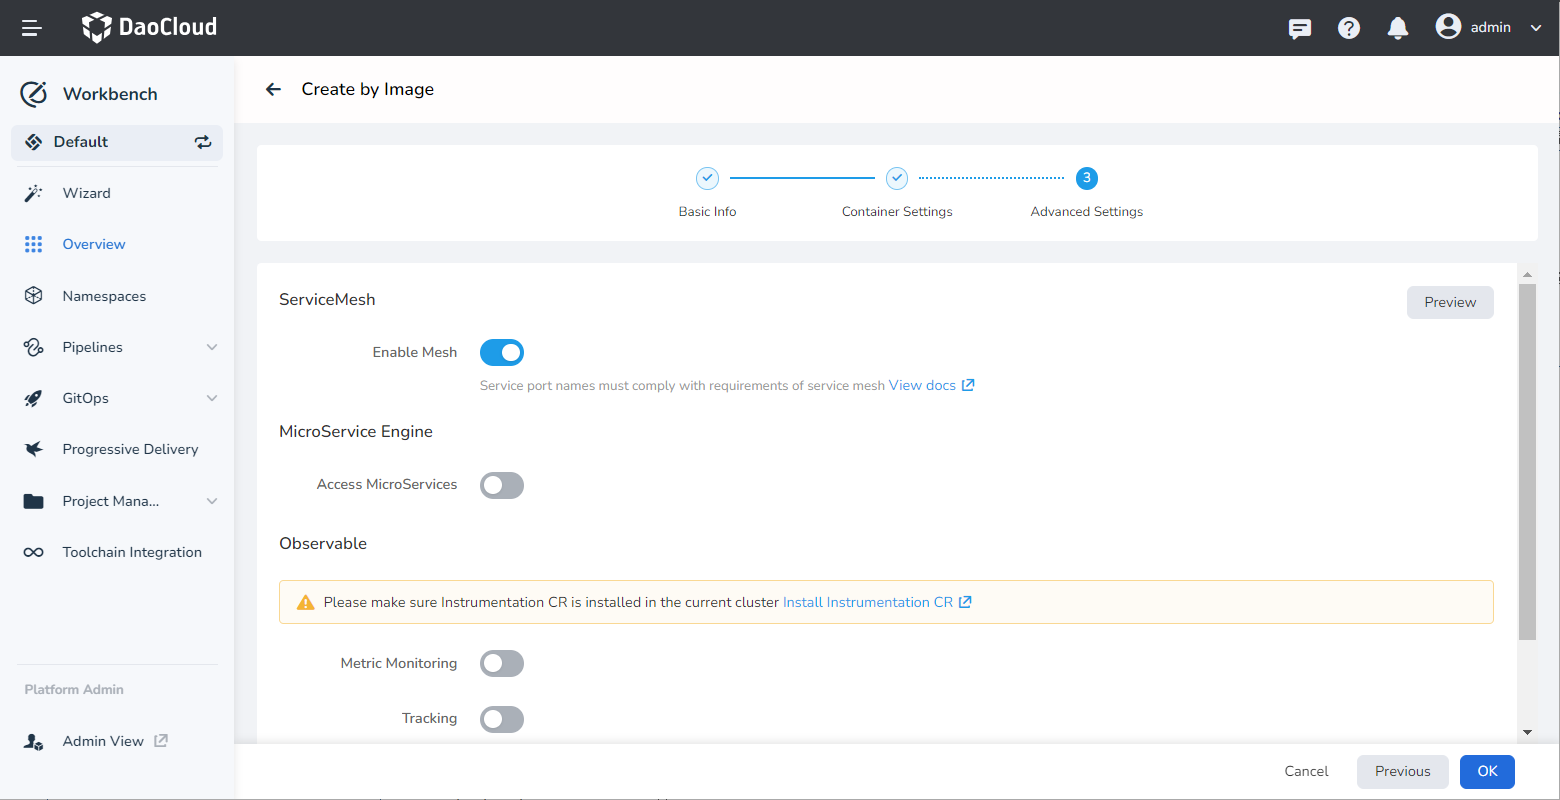
Fill in the advanced settings and enable Enable Mesh .
-
After creation, an application record will be generated in Overview -> Applications .
Configurating Istio related resource
Create the following resources in the Service Mesh module or console.
-
Create Gateway
gateway.yamlapiVersion: networking.istio.io/v1beta1 kind: Gateway metadata: name: rollout-demo namespace: rollout-demo # (1) spec: selector: istio: ingressgateway servers: - hosts: - '*' port: name: http number: 8082 protocol: HTTP- Namespace where the application is deployed.
-
Deploy Gateway
-
Modify VirtualService
Only need to modify the prompted fields, and other fields do not need to be modified.
apiVersion: networking.istio.io/v1beta1 kind: VirtualService metadata: creationTimestamp: "2022-11-07T10:46:23Z" generation: 84 name: demo01 namespace: default resourceVersion: "5741370" uid: 8109f754-aa9d-49f1-b8a9-d4daf5108032 spec: gateways: - rollout-demo # (1) hosts: - '*' # (2) http: - name: primary route: - destination: host: demo01 subset: stable weight: 100 - destination: host: demo01 subset: canary weight: 0- Modify here, you need to add a new gateway, which points to the name of the gateway created in the previous step.
- Modify here, the original host was the name of the virtual service, which needs to be deleted and changed to ‘*’ .
-
Configure istio-ingressgateway
Only need to modify the prompted fields, and other fields do not need to be modified.
apiVersion: v1 kind: Service metadata: labels: app: istio-ingressgateway app.kubernetes.io/managed-by: Helm app.kubernetes.io/name: istio-ingressgateway app.kubernetes.io/version: 1.15.0 helm.sh/chart: gateway-1.15.0 istio: ingressgateway name: istio-ingressgateway namespace: istio-system resourceVersion: "5775680" uid: 53bd7344-ba45-4547-b695-aca2c4dd713d spec: allocateLoadBalancerNodePorts: true clusterIP: 100.66.222.131 clusterIPs: - 100.66.222.131 externalTrafficPolicy: Cluster internalTrafficPolicy: Cluster ipFamilies: - IPv4 ipFamilyPolicy: SingleStack ports: - name: status-port nodePort: 32384 port: 15021 protocol: TCP targetPort: 15021 # Add this content - name: rollout-demo port: 8082 protocol: TCP targetPort: 8082 # -------------- selector: app: istio-ingressgateway istio: ingressgateway sessionAffinity: None type: LoadBalancer -
Create AuthorizationPolicy Resource
The purpose of this step is to ensure that js-related resources can be accessed normally when accessing through a browser.
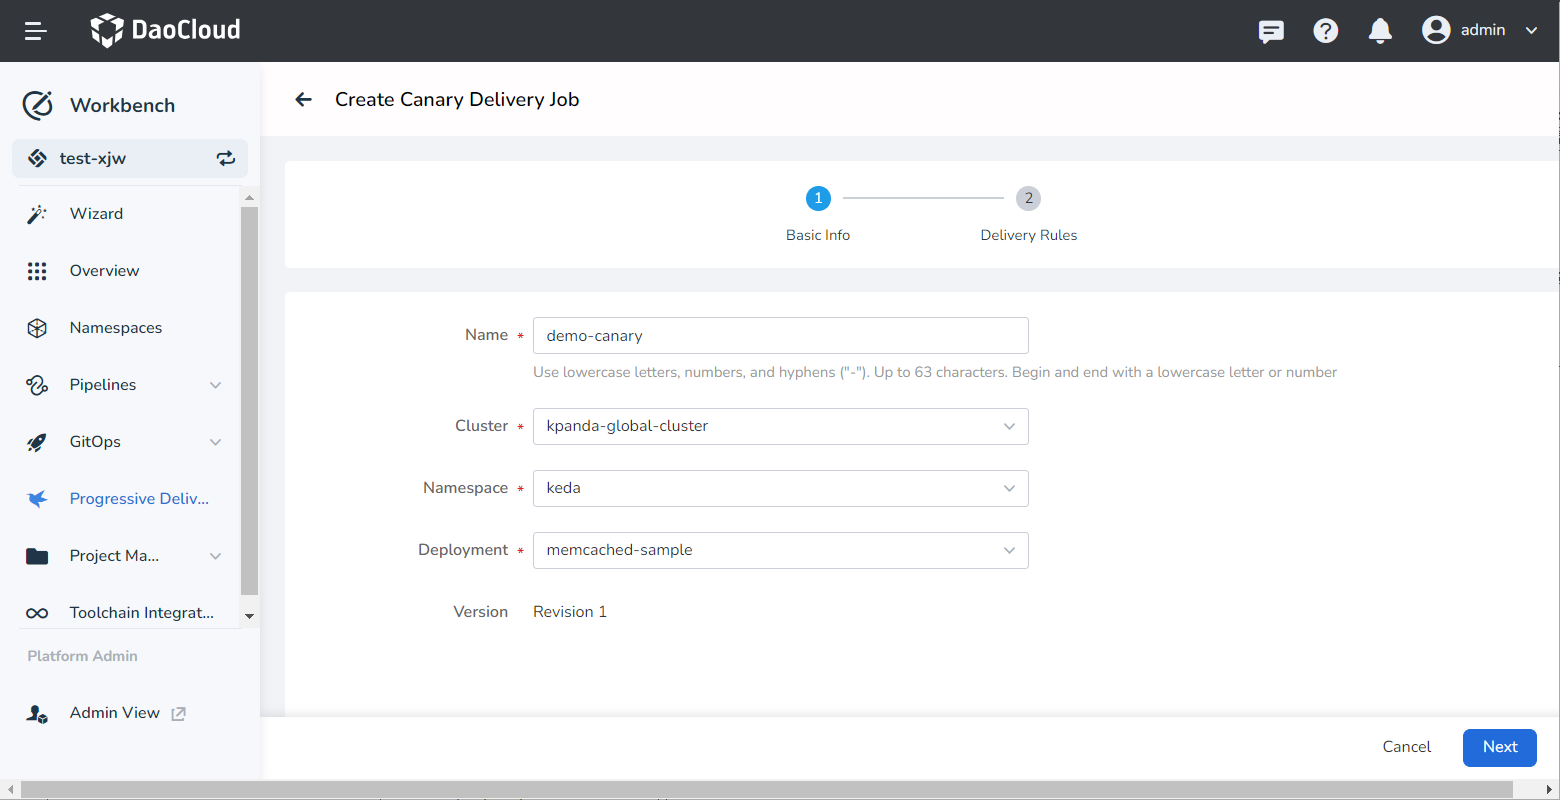
Creating a Canary delivery job
Create a canary delivery job in Workbench. For more detailed creation instructions, refer to Create a Canary Delivery Job.
-
Select the application for which you want to enable canary deployment.
-
Set the release rules, select the traffic management type as Istio, and the traffic scheduling type as Based on Weight.
-
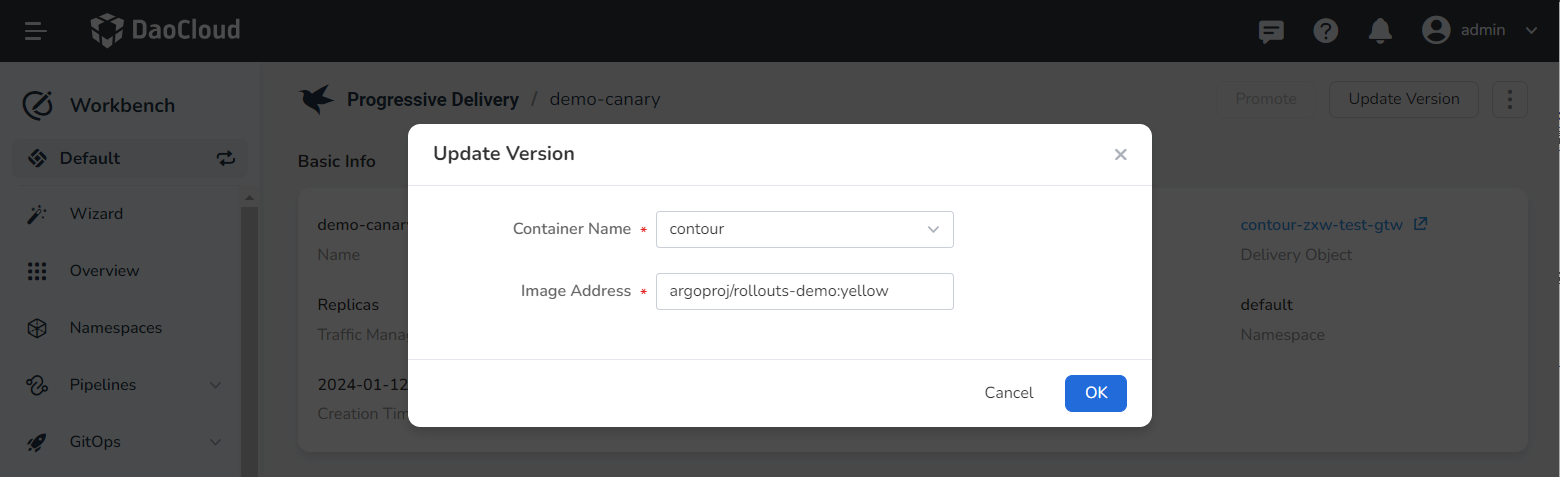
Click Create and Update App . In the pop-up dialog, enter the image address: argoproj/rollouts-demo:yellow .
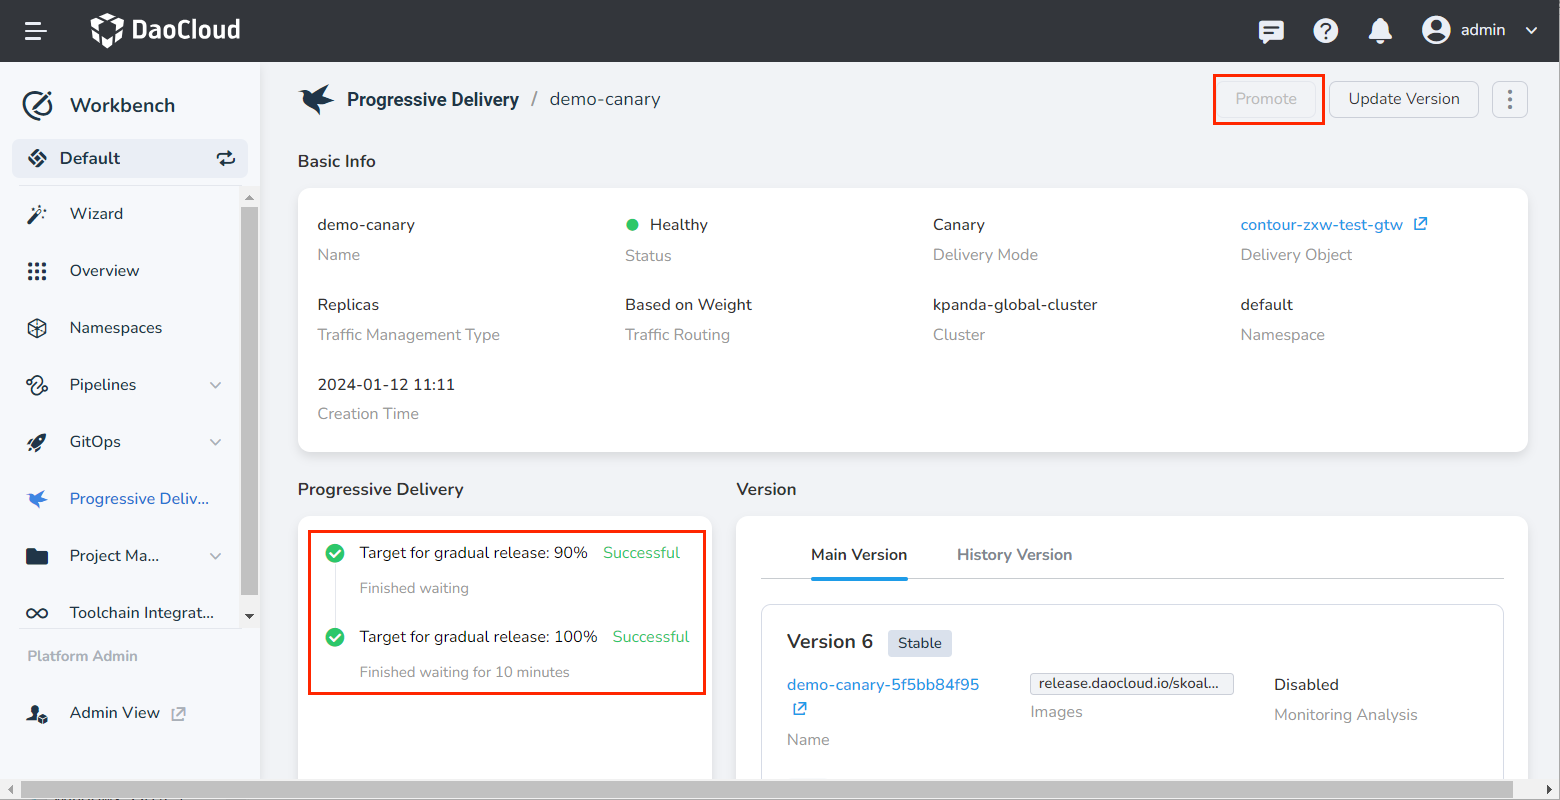
Verifying effects
Access the address: http://{istio-ingressgateway LB IP}:8082, and the following access effect will be obtained.
This interface will concurrently call http://{istio-ingressgateway LB IP}:8082/color, and fill the obtained color information into the grid. In the canary deployment object, the specified colors are blue, yellow, which will be displayed according to the defined rule 1:9 traffic ratio.

At this time, you can adjust the traffic ratio in the canary deployment module of Workbench and continue to release the application until the final successful release.