Building Microservices Apps from Git Repo
The Workbench supports building applications using four methods: Git repo, Jar packages, container images, and Helm charts. This article explains how to build a traditional microservices application from a Git repo source code, enabling features such as traffic governance, log viewing, monitoring, and tracing.
Prerequisites
- You need to create a workspace and a user who is added to the workspace with the workspace edit role. Refer to Creating a Workspace and Users and Roles.
- Create two credentials that can access the code repo and image repo. See Credential Management.
- Prepare a GitLab repo and a Harbor repo.
Create Credentials
Following Credential Management, create two credentials:
-
On the Credentials page, create two credentials:
- git-credential: Username and password for accessing the code repo.
- registry-credential: Username and password for accessing the image repo.
-
Once created, you can view the credentials on the Credential List page.
Create Microservices App from Git
-
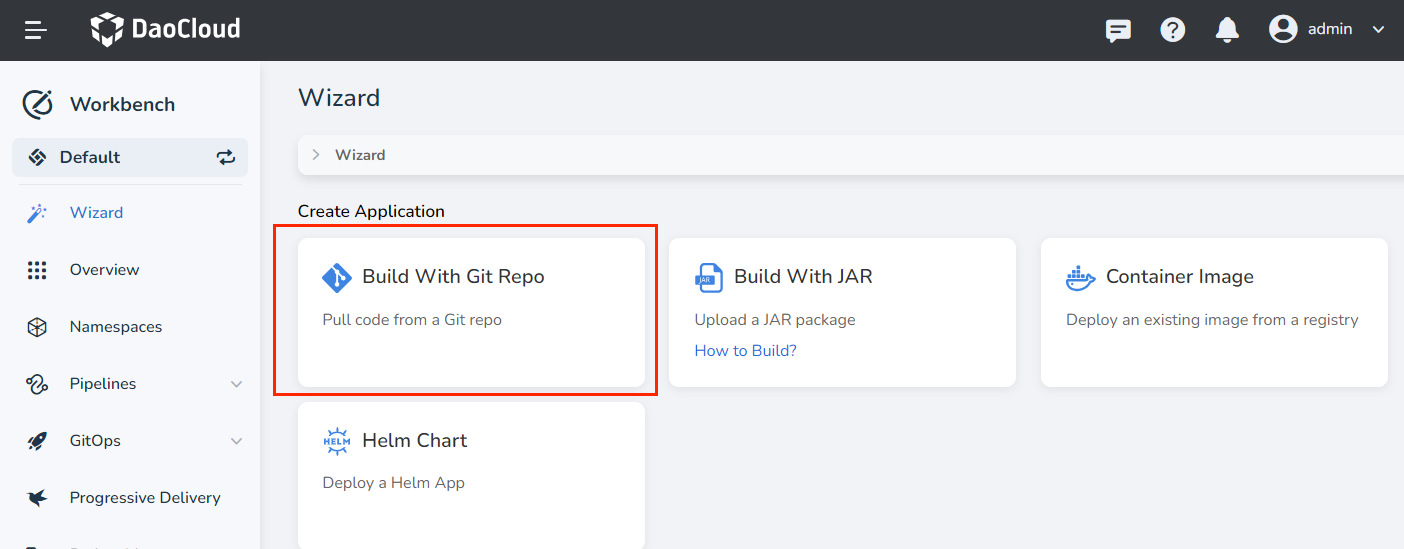
In the Workbench -> Wizard page, click Build With Git Repo .
-
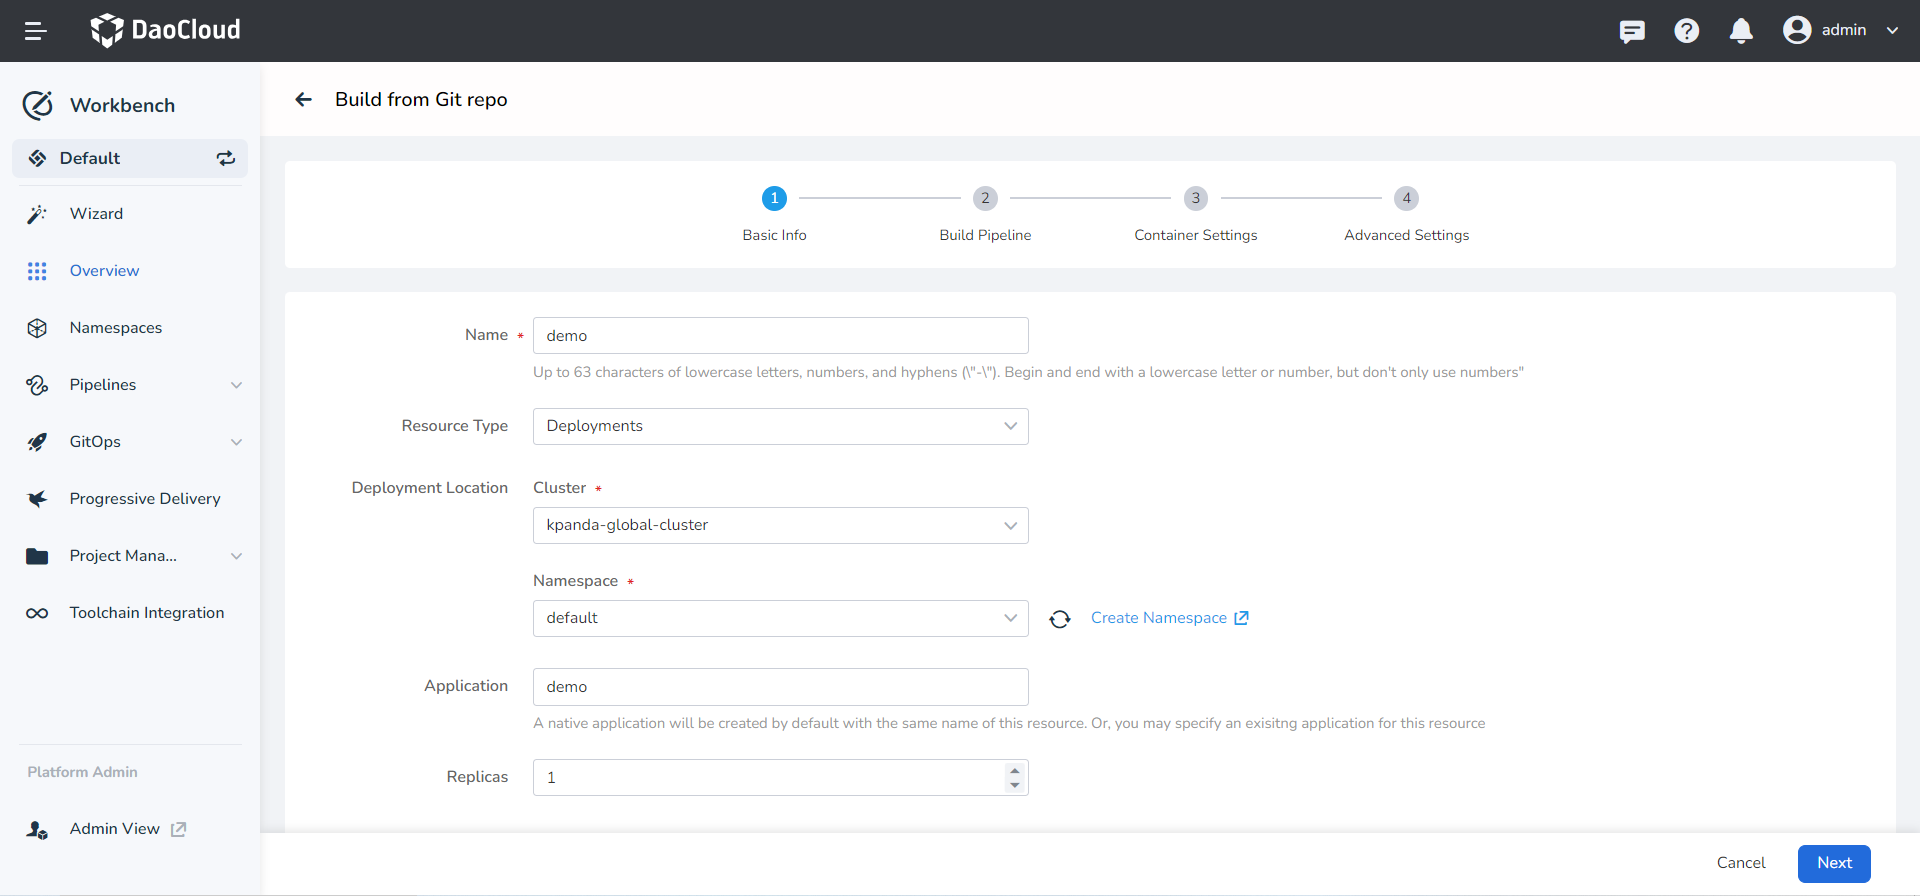
Fill in the basic information as per the instructions and click Next :
- Name: Specify the name of the resource workload.
- Resource Type: Currently, only deployments are supported.
- Deployment Location: Choose the cluster and namespace where the application will be deployed. If you want to integrate with microservices, make sure you have created a registry in the current workspace.
- Application: Specify the name of the native application. You can select from an existing list or create a new one, which by default will have the same name as specified.
- Replicas: Set the number of Pods for the application.
-
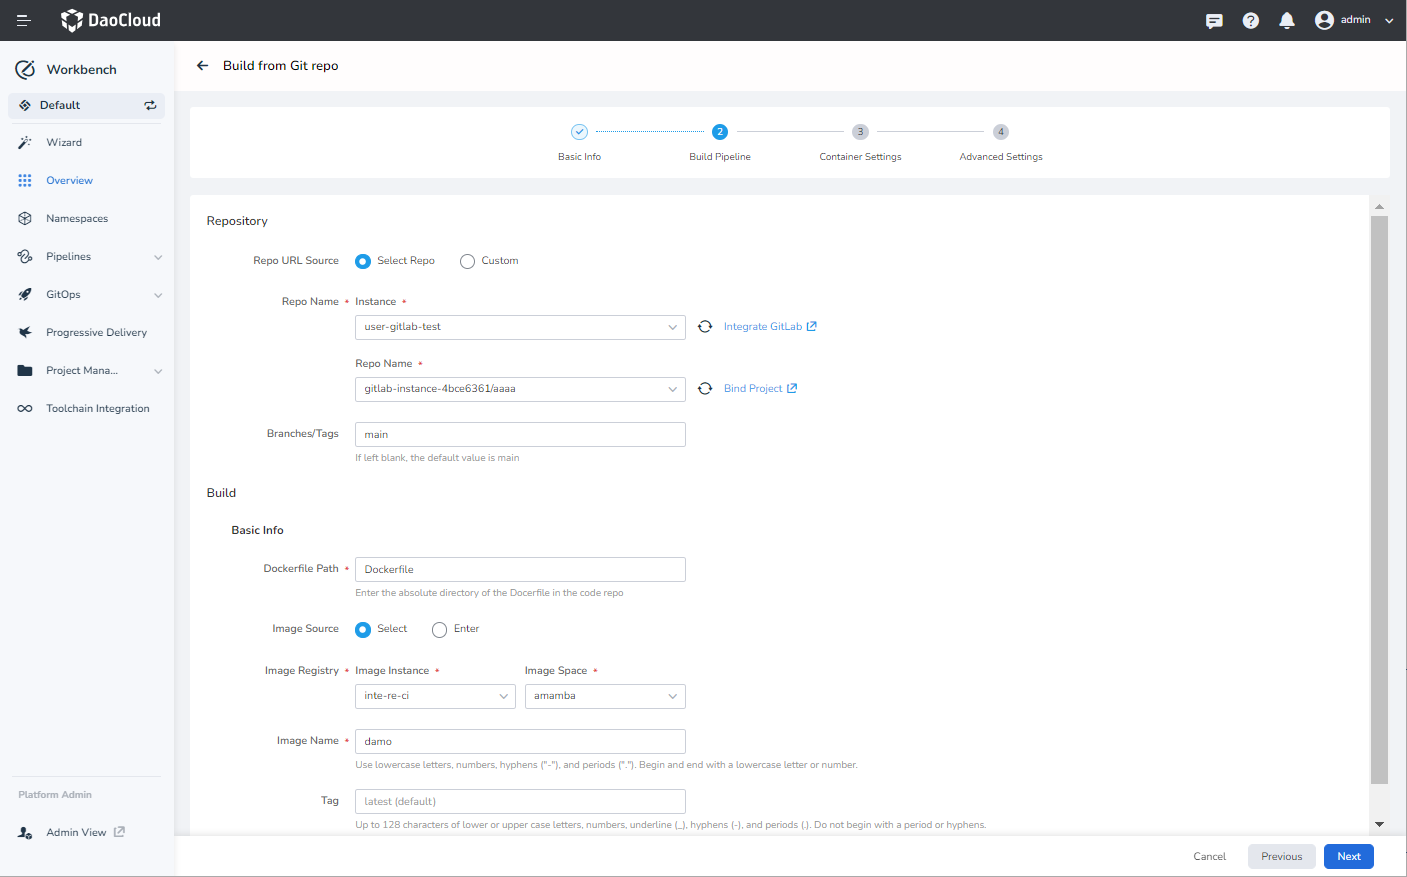
Fill in the pipeline configuration details based on the instructions and click Next .
- Repo: Select a repo or enter the Git repo address. In this example, the Git repo address is
https://gitlab.daocloud.cn/ndx/skoala.git, which should be replaced with the actual address. The choice of repo is from the GitLab instance integrated by the user. - Branch: The default branch is main and can be left unchanged.
- Credentials: Select the credential ( git-credential ) for accessing the code repo. If it is a public repo, no need to fill this field.
- Dockerfile Path: Enter the absolute path of the Dockerfile in the code repo. For example, demo/integration/springcloud-nacos-sentinel/code/Dockerfile .
- Target Image Name: Select or enter the target image name. In this example, the address is release-ci.daocloud.io/test-lfj/fromgit, which should be replaced with the actual address. The choice of image repo is from the image repo instance integrated and bound to the current workspace.
- Tag: Enter the version of the image repo, for example, v2.0.0 .
- Credentials: Select the credentials for accessing the image repo, for example, registry-credential .
- ContextPath: Set the context path for the docker build command execution. Specify the relative path to the root of the code directory, such as target . If left blank, it defaults to the directory where the Dockerfile is located.
- Build Arguments: The build arguments are passed to the build command in the form of --build-arg . You can set the upstream artifact download address, upstream image download address as parameters and also define custom parameters.
- Repo: Select a repo or enter the Git repo address. In this example, the Git repo address is
-
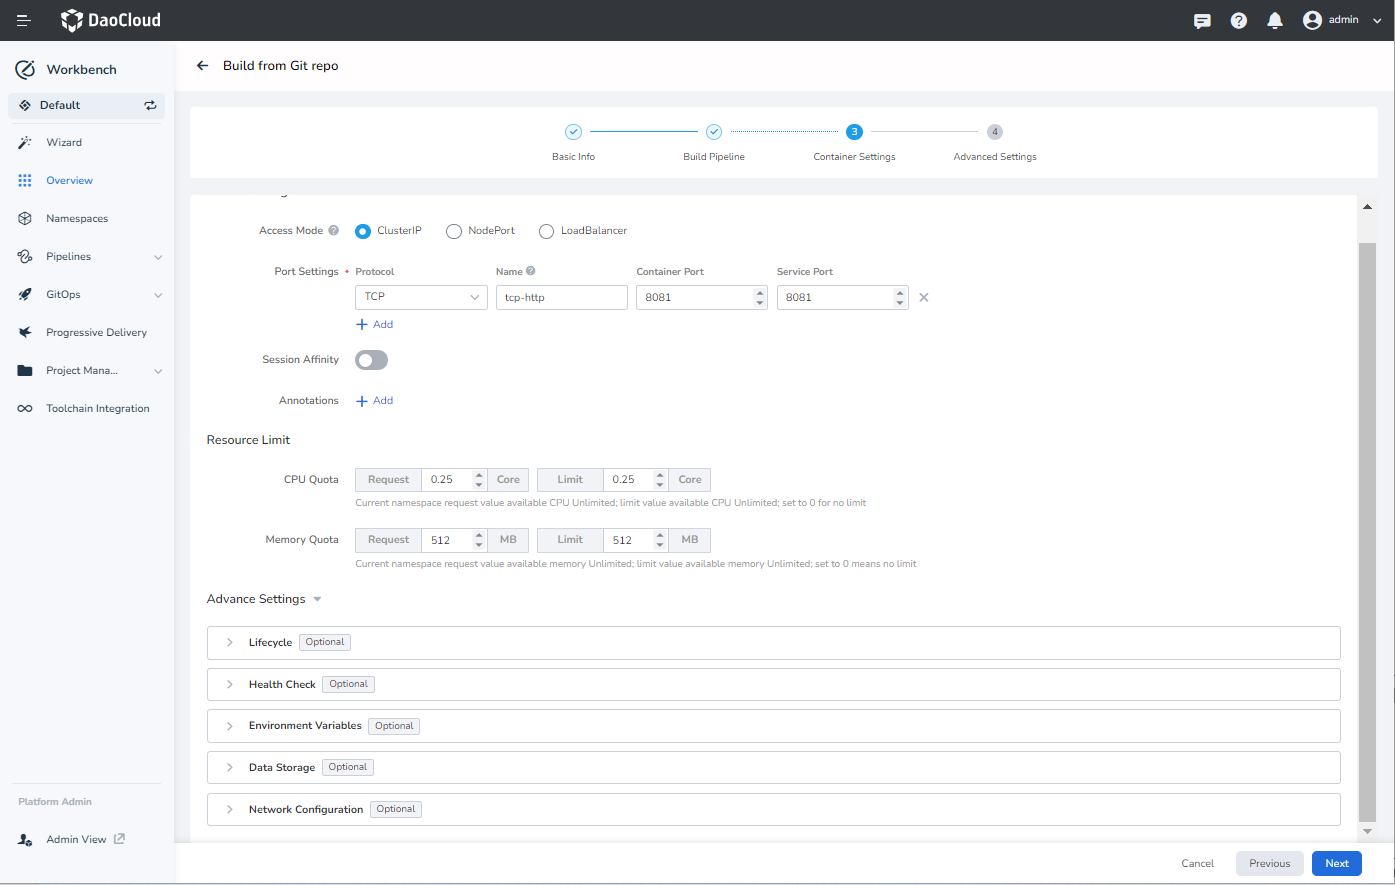
Fill in the container configuration details based on the instructions and click Next .
-
Service Configuration: Specify how the service can be accessed within the cluster, node, or load balancer. Example values:
name protocol port targetPort http TCP 8081 8081 health-http TCP 8999 8999 service TCP 9555 9555 For more detailed information about service configuration, refer to Creating Services.
-
Resource Limits: Specify the resource limits for the application, including CPU and memory.
-
Lifecycle: Set commands that need to be executed during container startup, after startup, and before shutdown. For more details, refer to Container Lifecycle Configuration.
-
Health Checks: Define health checks to determine the health status of the container and application, improving availability. For more details, refer to Container Health Check Configuration.
-
Environment Variables: Configure container parameters, add environment variables, or pass configurations to the Pod. For more details, refer to Container Environment Variable Configuration.
-
Data Storage: Configure data volume mounting and data persistence for containers.
-
-
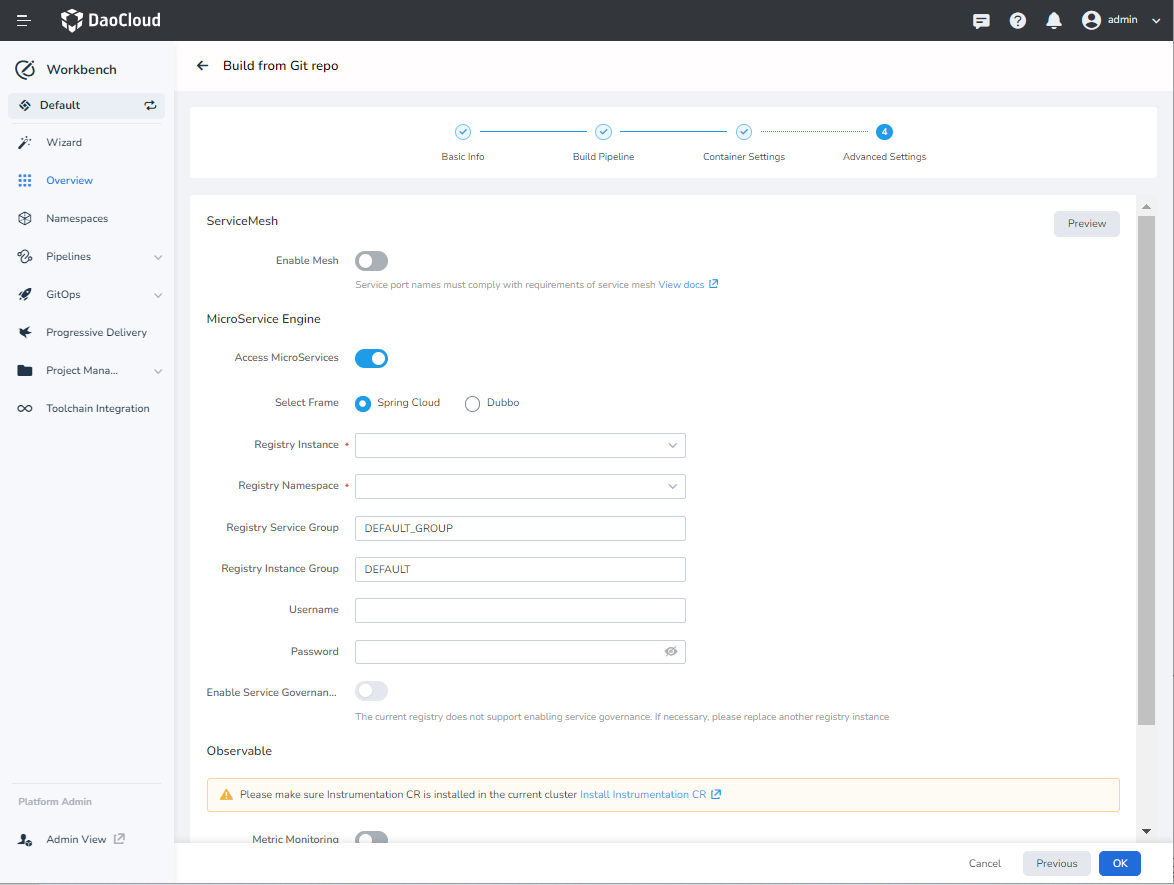
On the Advanced Settings page, click Access MicroServices . Configure the parameters as per the instructions and click OK .
- Framework Selection: Choose between Spring Cloud and Dubbo . In this case, select Spring Cloud .
- Registry Instance: Currently, only hosted Nacos registry instances from the Microservices Engine are supported.
- Registry Namespace: The Nacos namespace for the microservices application.
- Registry Service Group: The service group for the microservices application.
- Username/Password: If the registry instance requires authentication, enter the username and password.
- Enable Service Governance: The selected registry instance should have Sentinel or Mesh governance plugins enabled.
Viewing and Accessing Microservices Information
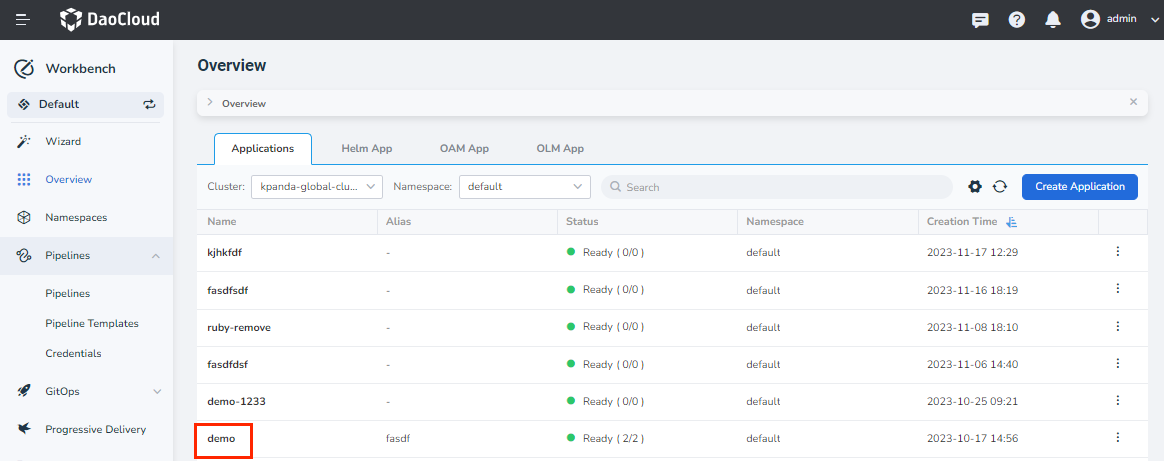
-
On the left navigation bar, click Overview , and within the Applications tab, select the native application to view its details.
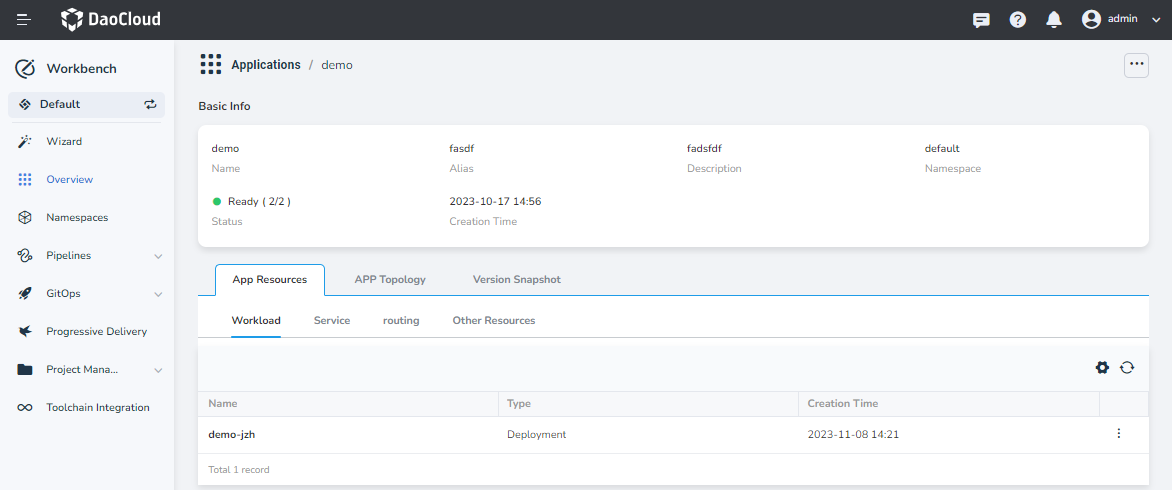
-
In the details page, under the Application Resources tab, select the resource with the Service Mesh label and click it.
-
You will be redirected to the Microservices Engine where you can view the service details.