Deploy Java Applications Based on Jar Packages
Workbench supports building applications in four ways: Git Repo, Jar package, container image, and Helm chart. This article describes how to deploy a Java application via a Jar file.
Prerequisites
-
Create a workspace and a User. The user needs to join this workspace and have the Workspace Editor role.
-
Create a credential for accessing the container registry, such as registry .
-
Prepare an container registry, like a Harbor repository.
-
Download daocloud-demo.jar.
Steps
-
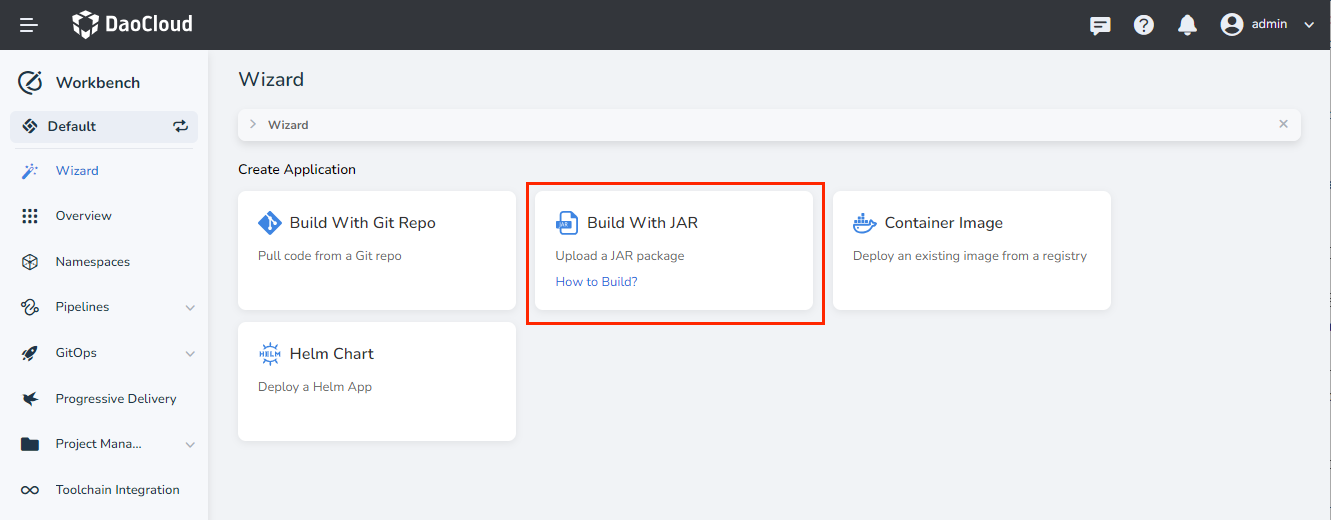
Click Wizards on the left navigation bar, and then select Build With Jar .
-
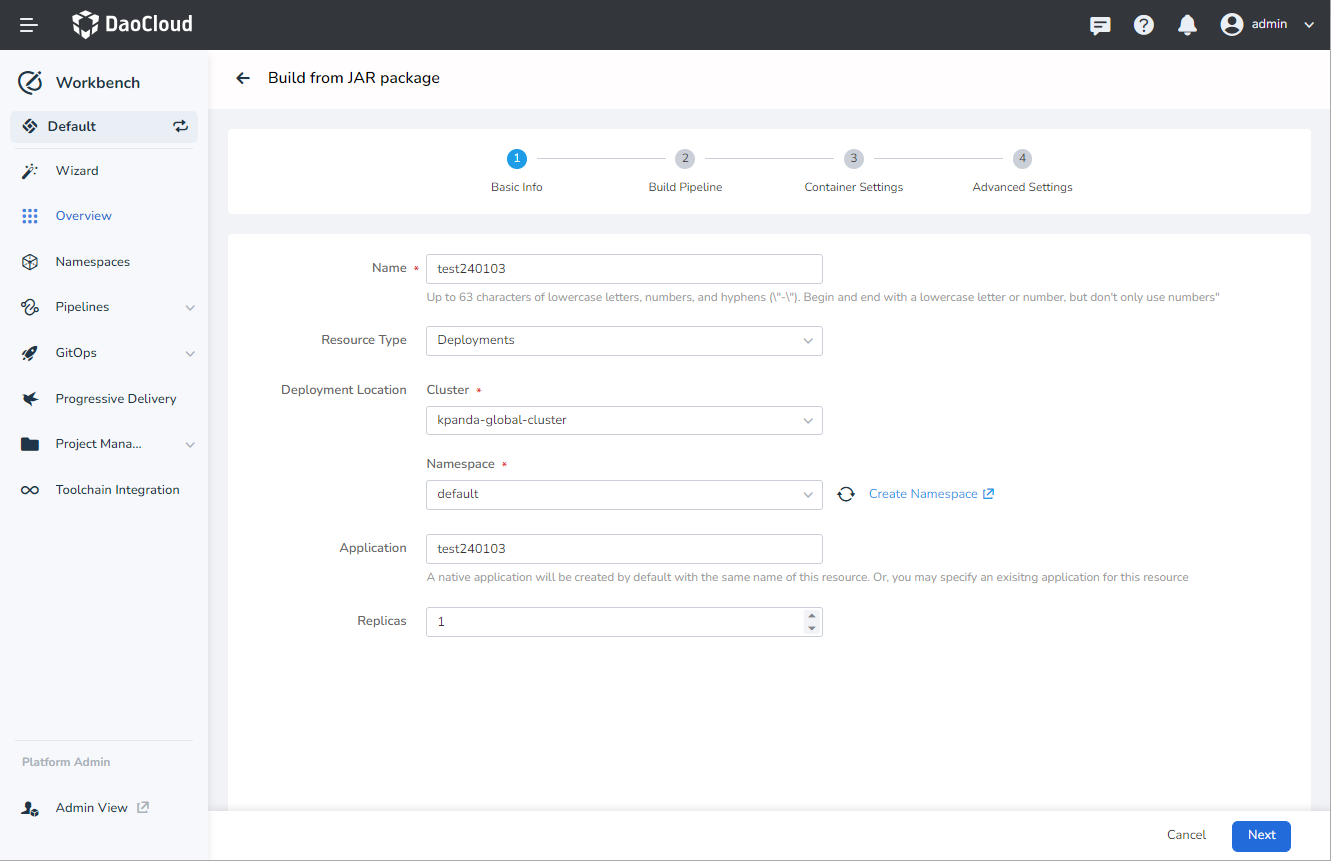
Fill in the basic information with reference to the following requirements, and then click Next .
- Name: Maximum 63 characters, can only contain lowercase letters, numbers, and a separator ("-"), and must start and end with a lowercase letter or number.
- Resource Type: Currently, only deployments are supported.
- Deployment Location: Select which namespace under which cluster to deploy the application. Only clusters that exist in the current workspace can be selected.
- Application: Select the group to which the application belongs. Empty means do not group this app.
- Replicas: Set the number of Pods for the application.
-
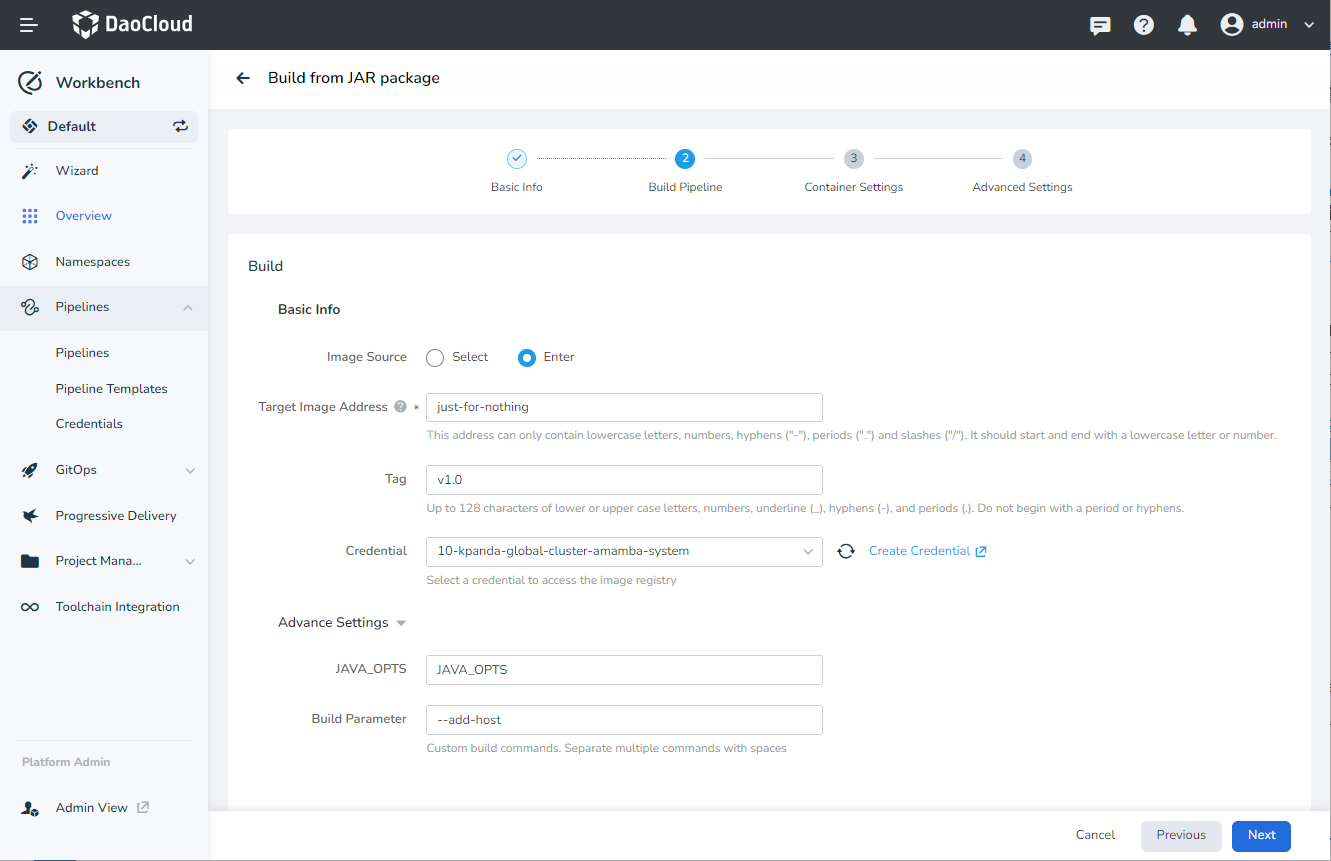
Refer to the following requirements to configure the pipeline, and then click Next .
- Target Image Address: Name the target image, including the storage path of the target image, for example release-ci.daocloud.io/test-lfj/fromjar
- Tag: Tag the target image, such as the version number v1.0
- Credential: Select the credential to access the registry, such as registry-credential
- JAVA_OPTS: Variables used to set JVM-related operating parameters, such as -server -Xms2048m -Xmx2048m -Xss512k
- Build Parameters : Pass parameters to the
docker buildcommand, such as--add-host
-
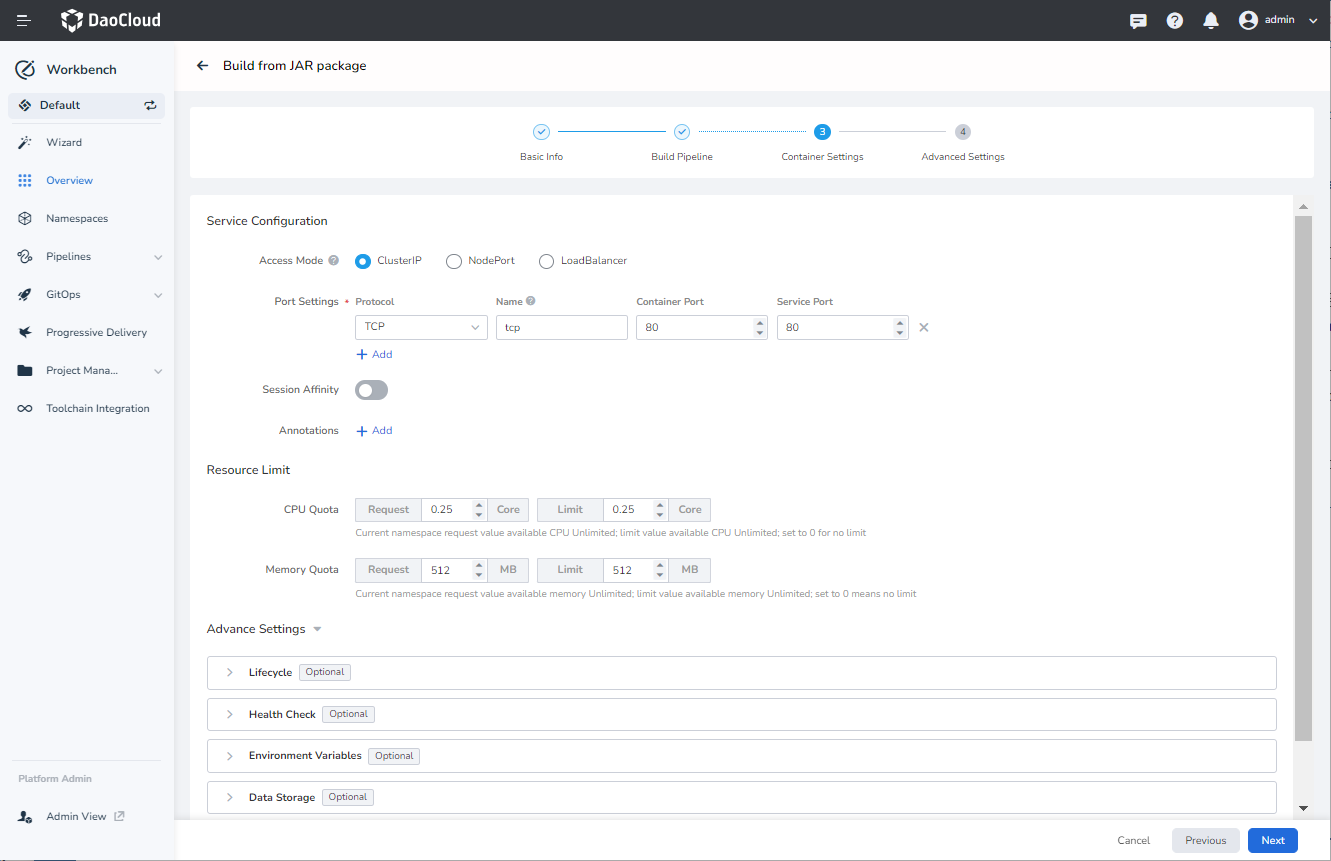
Fill in the container configuration with reference to the following requirements, and click Next .
- Access Mode: Support access to the application only within the cluster through clusterIP, or allow access outside the cluster through NodePort, or access through a load balancer.
-
Port Settings: fill in the port number that needs to be exposed according to the actual business scenario.
For more detailed instructions on service configuration, refer to Create Service.
-
Resource Limit: CPU and memory quotas must not exceed the remaining resources in the current workspace of the application's namespace.
-
Lifecycle: Set the commands that need to be executed when the container starts, after it starts, and before it stops. For details, refer to Container Lifecycle Configuration.
-
Health Check: used to judge the health status of containers and applications, which helps to improve the availability of applications. For details, refer to Container Health Check Configuration.
-
Environment Variables: Configure container parameters in Pods, add environment variables or pass configurations to pods. For details, refer to Container environment variable configuration.
-
Data Storage: Configure the settings for container mounted data volumes and data persistence.
-
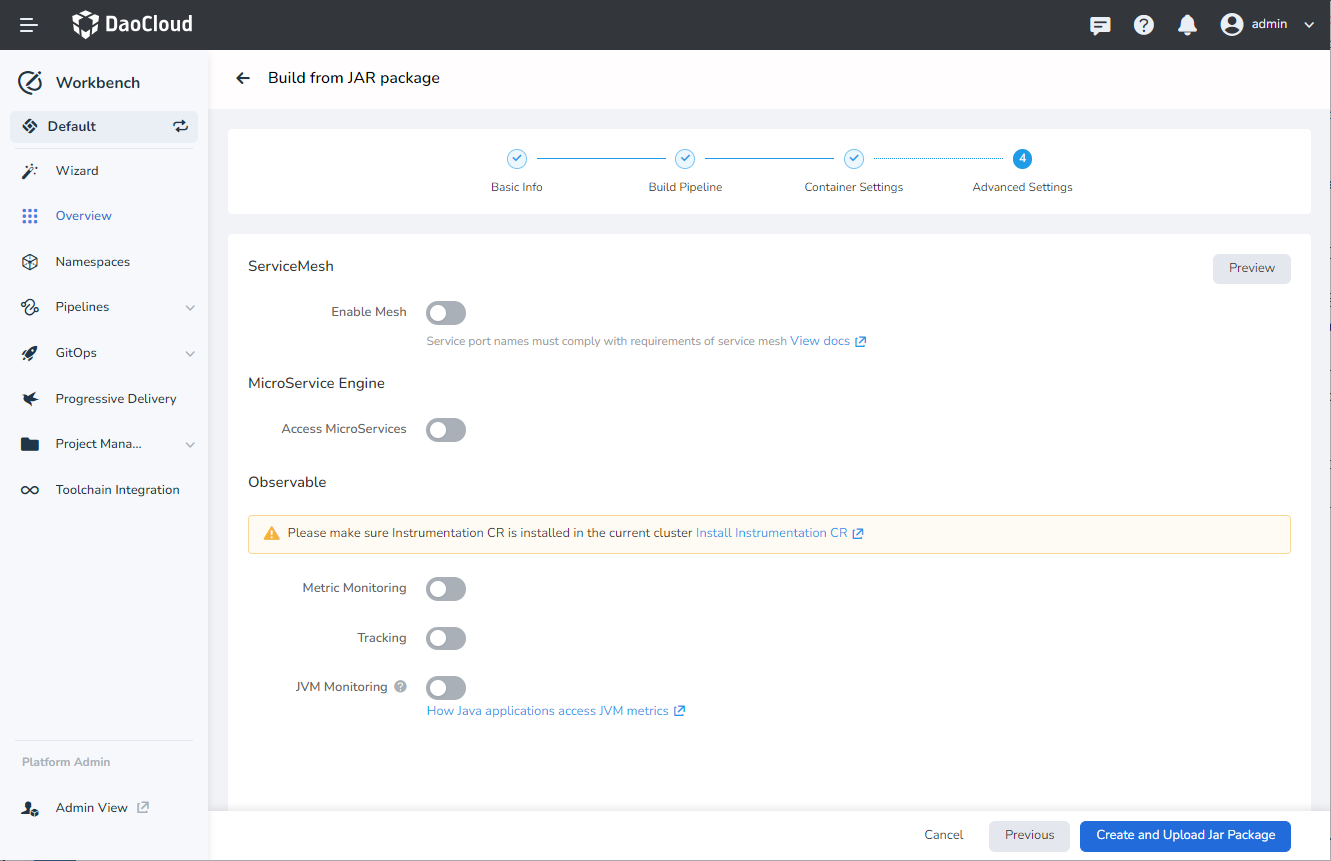
Refer to the following instructions to choose whether to enable advanced features, and then click Create and Upload Jar Package .
- Service Mesh: Choose whether to enable the Service Mesh for DCE 5.0 module to govern microservice traffic.
-
Microservice Engine: Whether to connect the newly created application to the DCE 5.0 Microservice Engine module.
For the configuration of the microservice engine, refer to Build Microservice Application Based on Git Repository.
-
Observable: Select whether to enable grayscale publishing. For more information about canary release, refer to Canary Release.
-
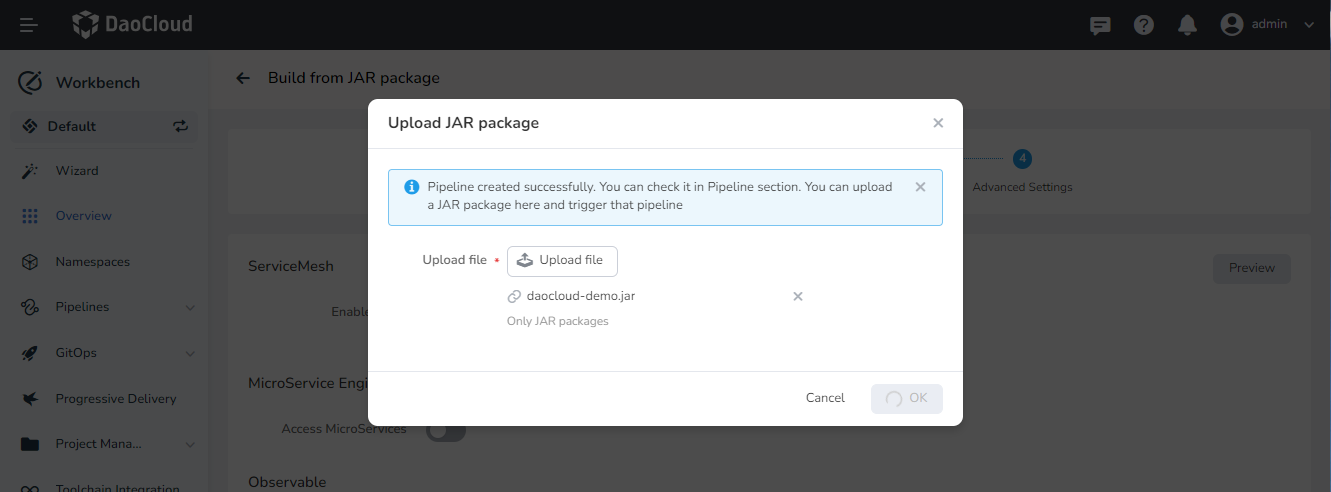
Select the file to be uploaded and click OK .
-
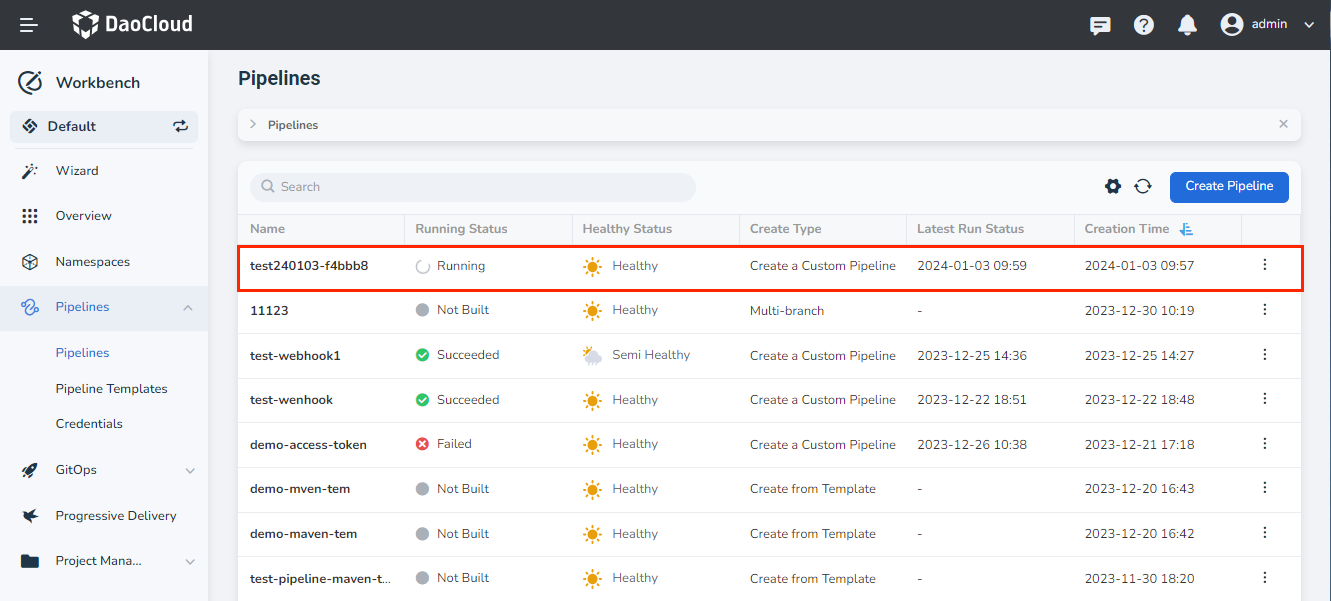
After the creation is successful, the corresponding pipeline will be triggered to run. Click Pipelines in the left navigation bar to view its running status.
The naming rule of the pipeline is "corresponding application name-random number". For example, the corresponding application name is demo through the pipeline name demo-4615a8 .
-
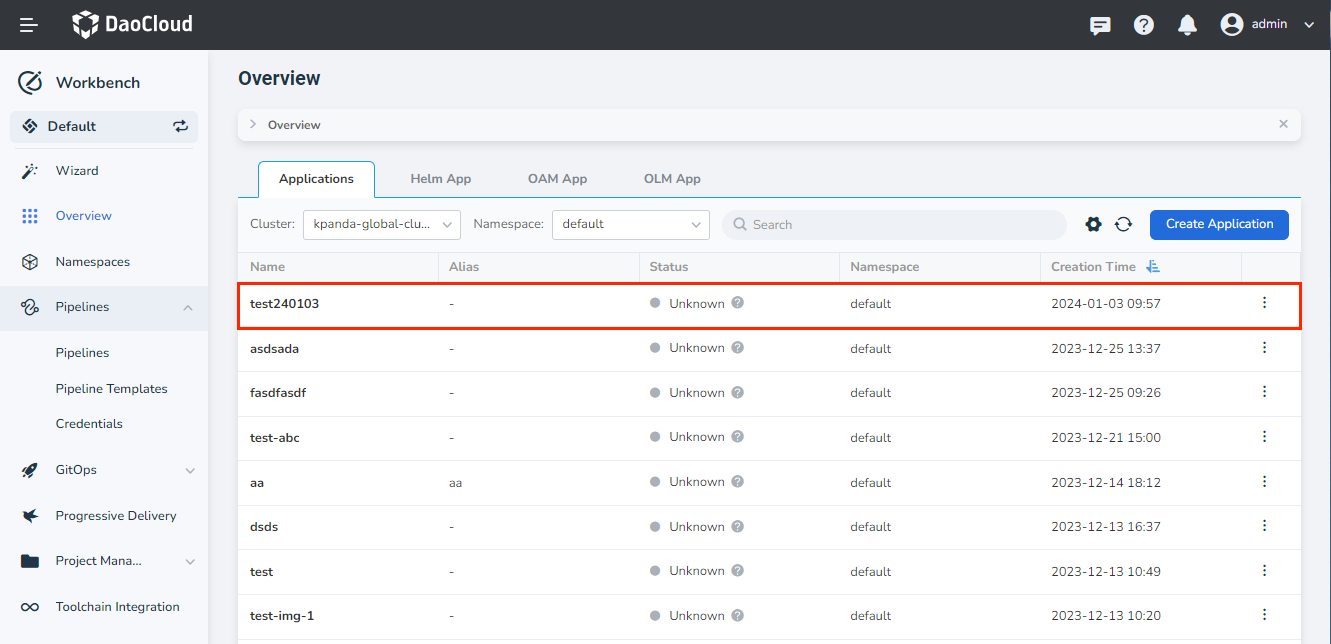
After the pipeline is successfully executed, click Overview on the left navigation bar and select the Applications tab to view the newly created app.