Nanny install DCE Community
This article completes the installation of DCE Community from 0 to 1 in a cluster of 3 nodes, including K8s cluster, dependencies, network, storage and other details and more considerations.
At this stage, the iteration of the version is relatively fast. The installation method of this article may be different from the latest version. Please refer to the Installation Instructions of the product documentation.
Cluster Planning
Use 3 UCloud VMs, all configured with 8-core 16G.
| Role | Hostname | Operating System | IP | Configuration |
|---|---|---|---|---|
| control-plane | k8s-master01 | CentOS 8.3 | 10.23.* | 8-core 16G system disk 200GB |
| worker-node | k8s-work01 | CentOS 8.3 | 10.23.* | 8-core 16G system disk 200GB |
| worker-node | k8s-work02 | CentOS 8.3 | 10.23.* | 8-core 16G system disk 200GB |
The components used in this example are:
- Kubernetes: 1.25.8
- CRI: containerd (because the new version of K8s no longer directly supports Docker)
- CNI: Calico
- StorageClass: local-path
- DCE Community: v0.5.0
prepare node
All actions described in this section are required.
Node configuration
Before installation, make some necessary settings for the three nodes.
-
Configure the hostname. Modify the host name (optional) to avoid duplicate host names.
hostnamectl set-hostname k8s-master01
hostnamectl set-hostname k8s-work01
hostnamectl set-hostname k8s-work02
It is recommended to exit the SSH session after modification and log back in to display the new hostname.
-
Disable Swap
-
Turn off the firewall (optional)
-
Set kernel parameters and allow iptables for bridging traffic
Load the br_netfilter module:
cat <<EOF | tee /etc/modules-load.d/kubernetes.conf
br_netfilter
EOF

# load the module
sudo modprobe overlay
sudo modprobe br_netfilter
Modify kernel parameters such as ip_forward and bridge-nf-call-iptables :
Install container runtime (containerd)
-
If it is CentOS 8.x, you must first uninstall the Podman pre-installed in the system, otherwise there will be a version conflict
-
Install dependencies
-
Install containerd, either binary or yum package (yum is maintained by the docker community, yum package is used in this example)
-
Modify the configuration file of containerd
# Delete the built-in config.toml to avoid errors in subsequent kubeadm CRI v1 runtime API is not implemented for endpoint mv /etc/containerd/config.toml /etc/containerd/config.toml.old # Reinitialize configuration sudo containerd config default | sudo tee /etc/containerd/config.toml # Update the content of the configuration file: use systemd as the cgroup driver, and replace the pause mirror address sed -i 's/SystemdCgroup\ =\ false /SystemdCgroup\ =\ true/' /etc/containerd/config.toml sed -i 's/k8s.gcr.io\/pause/k8s-gcr.m.daocloud.io\/pause/g' /etc/containerd/config.toml # old pause address sed -i 's/registry.k8s.io\/pause/k8s-gcr.m.daocloud.io\/pause/g' /etc/containerd/config.toml sudo systemctl daemon-reload sudo systemctl restart containerd sudo systemctl enable containerd -
Install CNI
-
Install nerdctl (optional)
Install k8s cluster
Install k8s binary components
The following operations are required on all three nodes:
-
Install the Kubernetes software source (the source acceleration of domestic Alibaba Cloud is used here)
cat <<EOF | sudo tee /etc/yum.repos.d/kubernetes.repo [kubernetes] name=Kubernetes baseurl=https://mirrors.aliyun.com/kubernetes/yum/repos/kubernetes-el7-x86_64/ enabled=1 gpgcheck=1 repo_gpgcheck=1 gpgkey=https://mirrors.aliyun.com/kubernetes/yum/doc/yum-key.gpg https://mirrors.aliyun.com/kubernetes/yum/doc/rpm-package-key.gpg EOF -
Set SELinux to permissive mode (equivalent to disabling it)
-
Install Kubernetes components, take version 1.25.8 as an example
kubeadm installs the first master node
-
Pre-download the image to speed up the installation, using DaoCloud's accelerated registry
-
Call kubeadm to initialize the first node (using DaoCloud to accelerate the registry)
!!! note
The following Pod CIDR cannot coincide with the network segment of the host physical network (the CIDR needs to be consistent with the configuration of Calico in the future).sudo kubeadm init --kubernetes-version=v1.25.8 --image-repository=k8s-gcr.m.daocloud.io --pod-network-cidr=192.168.0.0/16After more than ten minutes, you can see the successful printing information as follows (please remember the kubeadm join command and the corresponding token that were printed last, which will be used later 🔥)
Your Kubernetes control-plane has initialized successfully! To start using your cluster, you need to run the following as a regular user: mkdir -p $HOME/.kube sudo cp -i /etc/kubernetes/admin.conf $HOME/.kube/config sudo chown $(id -u):$(id -g) $HOME/.kube/config Alternatively, if you are the root user, you can run: export KUBECONFIG=/etc/kubernetes/admin.conf You should now deploy a pod network to the cluster. Run "kubectl apply -f [podnetwork].yaml" with one of the options listed at: https://kubernetes.io/docs/concepts/cluster-administration/addons/ Then you can join any number of worker nodes by running the following on each as root: kubeadm join 10.23.207.16:6443 --token p4vw62.shjjzm1ce3fza6q7\ --discovery-token-ca-cert-hash sha256:cb1946b96502cbd2826c52959d0400b6e214e06cc8462cdd13c1cb1dc6aa8155 -
Configure the kubeconfig file to make it easier to manage the cluster with kubectl
-
Install CNI, take Calico as an example
[Please refer to the official installation plan. Refer to official Calico installation documentation]
-
Install calico-operator first
-
Send the modified/configured CR again
# Download the configuration file template curl -LO https://raw.githubusercontent.com/projectcalico/calico/v3.25.1/manifests/custom-resources.yaml grep cidr custom-resources.yaml #Print out the default CIDR # Please make sure that the CIDR in the calico configuration file is consistent with the CIDR in the previous kubeadm init! ! ! Otherwise please edit!!!⚠️ vim custom-resources.yaml kubectl apply -f custom-resources.yaml -
Wait for the deployment to succeed
-
Connect to other worker nodes
Finally run the join command on other worker nodes. When the above master node executes kubeadm init , it will be printed on the screen at the end (note that the three parameters are related to the environment, please do not copy them directly)
After a successful join, the output is similar to:
This node has joined the cluster:
* Certificate signing request was sent to apiserver and a response was received.
* The Kubelet was informed of the new secure connection details.

Run 'kubectl get nodes' on the control-plane to see this node join the cluster.
Confirm that all nodes are connected on the master node, and wait for them to become Ready.
Install default storage CSI (use local storage)
# Reference: https://github.com/rancher/local-path-provisioner
wget https://raw.githubusercontent.com/rancher/local-path-provisioner/v0.0.24/deploy/local-path-storage.yaml
sed -i "s/image: rancher/image: docker.m.daocloud.io\/rancher/g" local-path-storage.yaml # replace docker.io with the actual image
sed -i "s/image: busybox/image: docker.m.daocloud.io\/busybox/g" local-path-storage.yaml
kubectl apply -f local-path-storage.yaml
kubectl get po -n local-path-storage -w # Wait for Pods to be running

# Set local-path to default SC
kubectl patch storageclass local-path -p '{"metadata": {"annotations":{"storageclass.kubernetes.io/is-default-class":"true"}}}'
kubectl get sc # You can see the shape as: local-path (default)
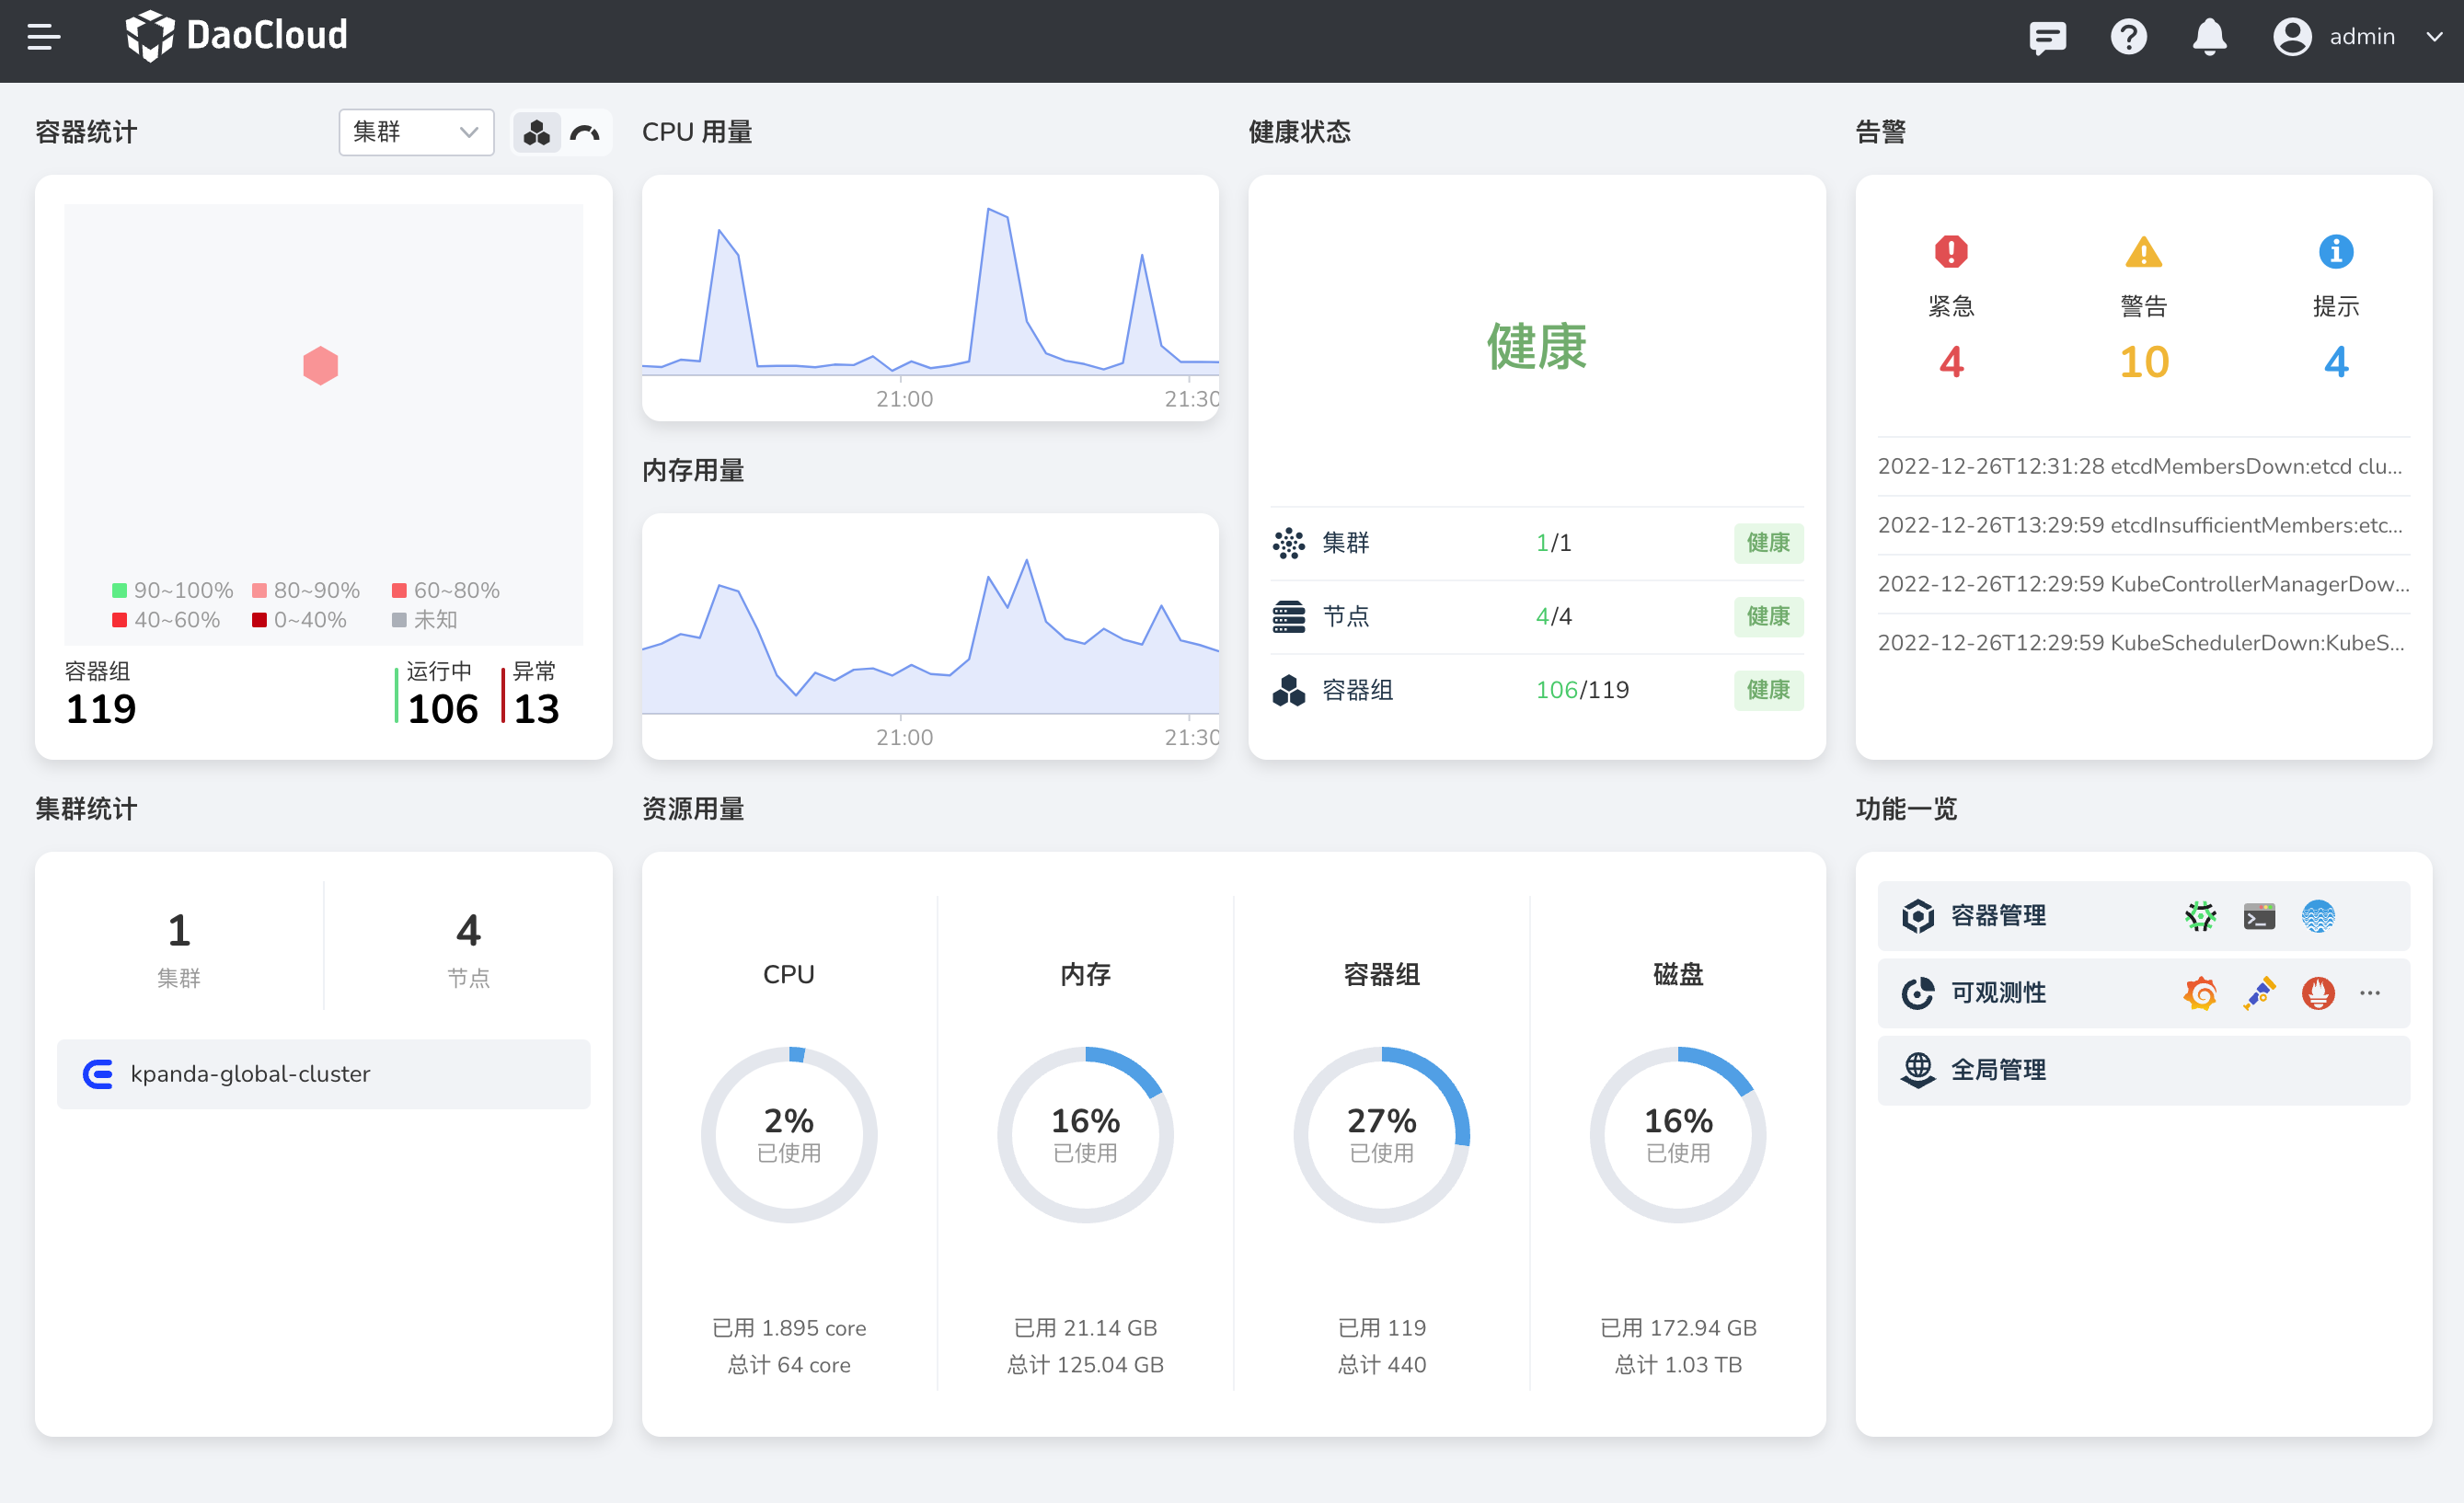
Install DCE Community
Now everything is ready to install DCE Community.
Install basic dependencies
curl -LO https://proxy-qiniu-download-public.daocloud.io/DaoCloud_Enterprise/dce5/install_prerequisite.sh
bash install_prerequisite.sh online community
Download dce5-installer
export VERSION=v0.5.0
curl -Lo ./dce5-installer https://proxy-qiniu-download-public.daocloud.io/DaoCloud_Enterprise/dce5/dce5-installer-$VERSION
chmod +x ./dce5-installer
Confirm the node's externally reachable IP address
-
If your browser is directly connected to the IP of the master node, no additional operations are required.
-
If the IP of the master node is an intranet (such as the public cloud machine in this example):
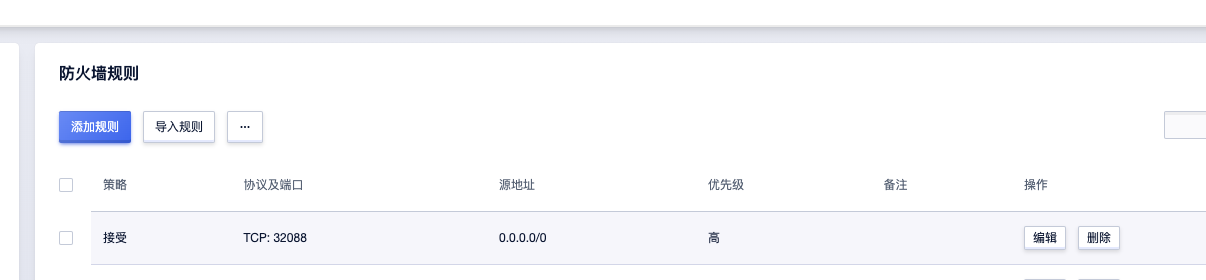
- Please create an IP reachable from the external network in the public cloud
- Please allow port 32088 in and out of the host's firewall rules in the public cloud configuration
- The above port 32088 is the NodePort port of kubectl -n istio-system get svc istio-ingressgateway
Run the installation
-
If your browser is directly connected to the IP of the master node, run directly
-
If the IP of the master node is an internal network (such as the public cloud machine in this example), please confirm that the above external IP and firewall configurations are complete, and then run the following command:
Note: The above 32088 is the NodePort port of kubectl -n istio-system get svc istio-ingressgateway
-
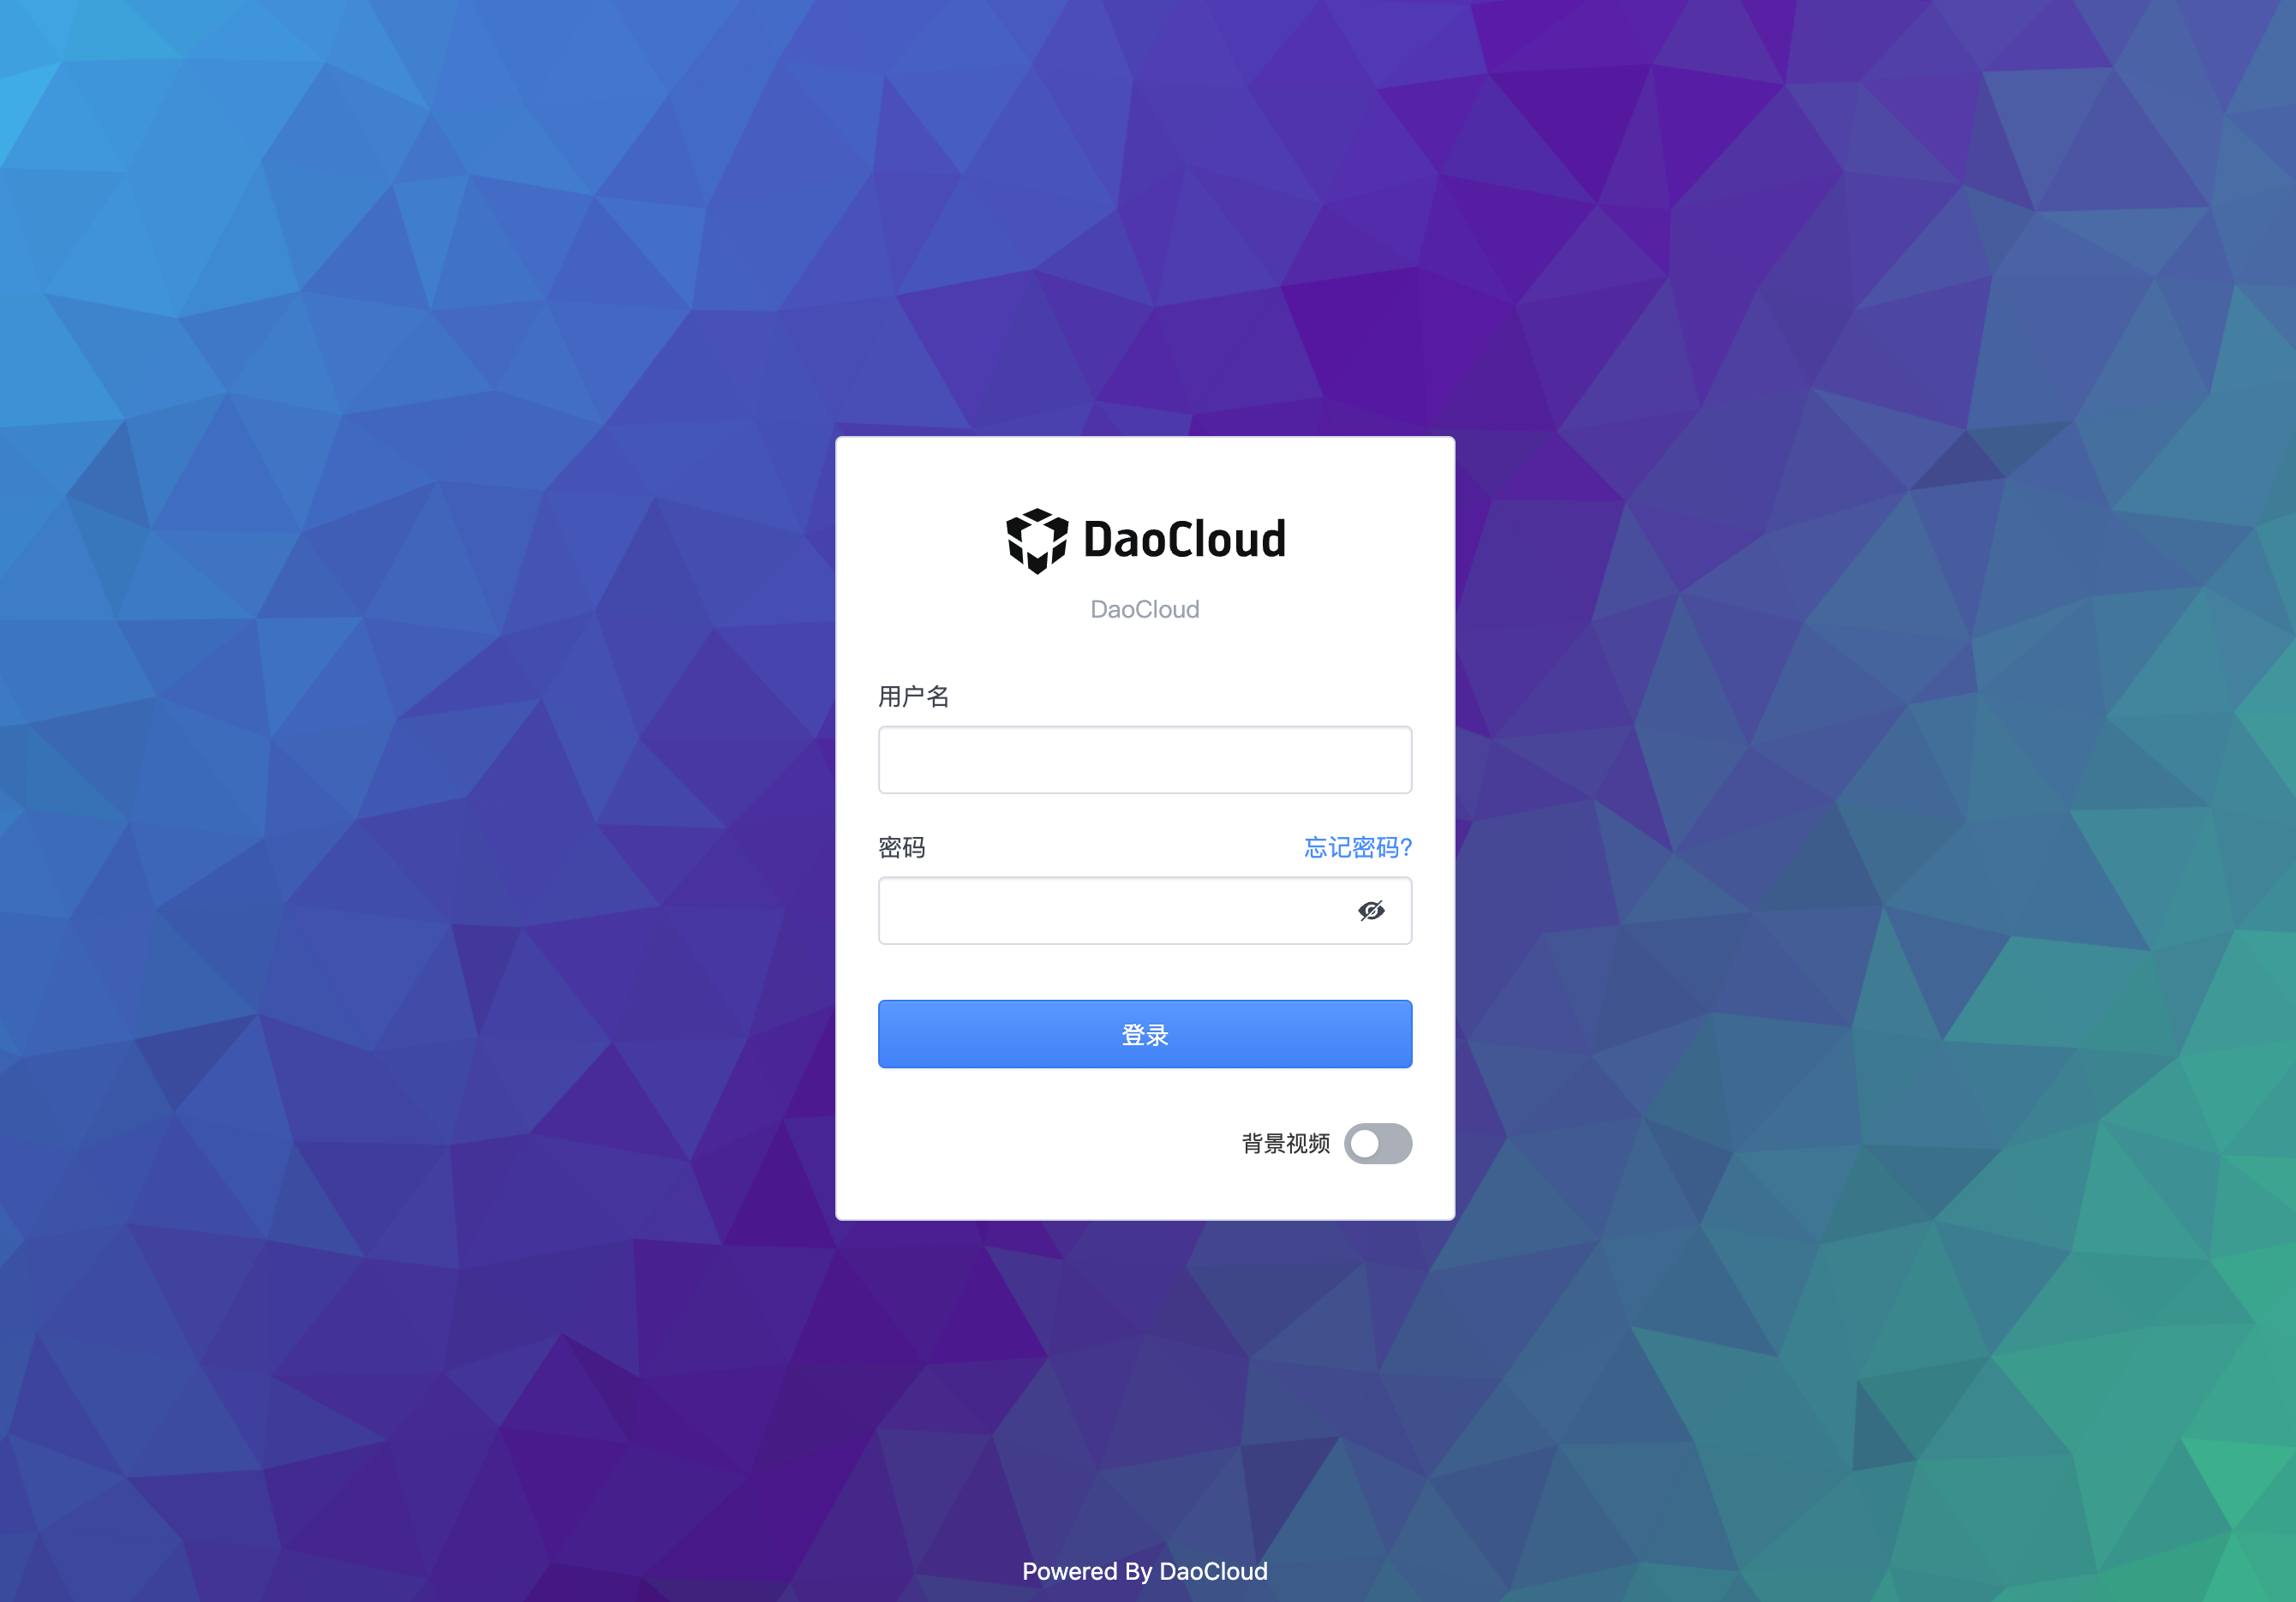
Open the login interface in your browser.
-
Log in to DCE 5.0 with username admin and password changeme .
Download DCE 5.0 Install DCE 5.0 Free Trial