How to Develop Device Driver Mapper
This page introduces the development and deployment process of the device driver mapper.
-
Go to the kubeedge/staging/src/github.com/kubeedge/mapper-framework directory in the KubeEdge repository and execute the
make generatecommand:-
The protocol here needs to be filled in when creating deviceModel later
-
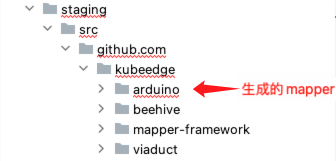
After execution, a mapper code directory with the same name as the protocol will be generated in the same level directory of mapper-framework.
-
You can copy this directory for mapper development, focusing mainly on the code under the driver directory:
This file corresponds to the operations of the mapper on devices, mainly implementing InitDevice (initialize device), GetDeviceData (get device data), SetDeviceData (assign value to device), StopDevice (stop device).
package driver import ( "github.com/tarm/serial" "log" "os" "os/signal" "sync" "syscall" ) func NewClient(protocol ProtocolConfig) (*CustomizedClient, error) { client := &CustomizedClient{ ProtocolConfig: protocol, deviceMutex: sync.Mutex{}, // TODO initialize the variables you added } return client, nil } func (c *CustomizedClient) InitDevice() error { // TODO: add init operation // you can use c.ProtocolConfig return nil } func (c *CustomizedClient) GetDeviceData(visitor *VisitorConfig) (interface{}, error) { // TODO: add the code to get device's data // you can use c.ProtocolConfig and visitor // Open serial port device return "ok", nil } func (c *CustomizedClient) SetDeviceData(data interface{}, visitor *VisitorConfig) error { // TODO: set device's data // you can use c.ProtocolConfig and visitor // Open serial port device config := &serial.Config{ Name: "/dev/ttyACM0", // Replace with your serial port name, such as "/dev/ttyUSB0" (Linux) or "COM1" (Windows) Baud: 9600, } port, err := serial.OpenPort(config) if err != nil { log.Fatal(err) } defer port.Close() // Listen for operating system interrupt signals to close the serial port connection before the program terminates signalCh := make(chan os.Signal, 1) signal.Notify(signalCh, os.Interrupt, syscall.SIGTERM) go func() { <-signalCh port.Close() os.Exit(0) }() _, err = port.Write([]byte(data.(string))) if err != nil { log.Fatal(err) } return nil } func (c *CustomizedClient) StopDevice() error { // TODO: stop device // you can use c.ProtocolConfig return nil } -
To debug, modify the protocol field in the config.yaml file to the protocol name defined earlier
config.yamlgrpc_server: socket_path: /etc/kubeedge/arduino.sock common: name: arduino-mapper version: v1.13.0 api_version: v1.0.0 protocol: arduino # (1)! address: 127.0.0.1 edgecore_sock: /etc/kubeedge/dmi.sock- add your protocol name
-
-
Deploy the mapper application
== "Binary Deployment"
1. In the project's main directory, use `go build ./cmd/main.go` to compile the binary file for the proper architecture, such as compiling the binary file in a Linux environment ```shell GOOS=linux GOARCH=amd64 go build ./cmd/main.go -o {output filename} # (1)! ``` 1. The -o parameter can be omitted 2. Upload the binary file to the node bound to the device, making sure to place the config.yaml file in the same directory as the binary file, otherwise it will result in a file not found error ```shell # The directory should contain the following two files, where main is the binary file and config.yaml is the configuration file root@nx:~/device-test# ls config.yaml main # Next, execute ./main in this directory ```-
Use the provided Dockerfile for compilation
-
After compilation, deploy using the ConfigMap and deployment resources in the resource directory
Note
Modify the image in the deployment to the actual compiled image name, and also modify the protocol field in the ConfigMap.
-
The development of the device driver mapper is now complete.