Connect Edge Nodes
Connecting and managing edge nodes refers to the process of installing the EdgeCore software on actual edge nodes based on the installation guide obtained from batch registering edge nodes. This allows the edge nodes to establish a connection with the platform and be managed within it.
When a new edge node is connected, the latest version of the EdgeCore software is automatically installed.
Note
The batch tasks registered on the platform can be used on multiple actual edge nodes. One set of installation files and access commands from a batch task can be used on multiple edge nodes.
Prerequisites
- The nodes have been prepared according to the requirements and the node environment has been configured as specified in the Edge Node Access Requirements.
- The batch task for registering the nodes has been successfully created, and the installation guide has been obtained as described in Batch Registration of Edge Nodes.
Connect Edge Nodes
-
Log in to the edge node with a user account that has sudo privileges.
-
Depending on the runtime environment of the node, execute the corresponding commands to retrieve the installation files from the container registry.
-
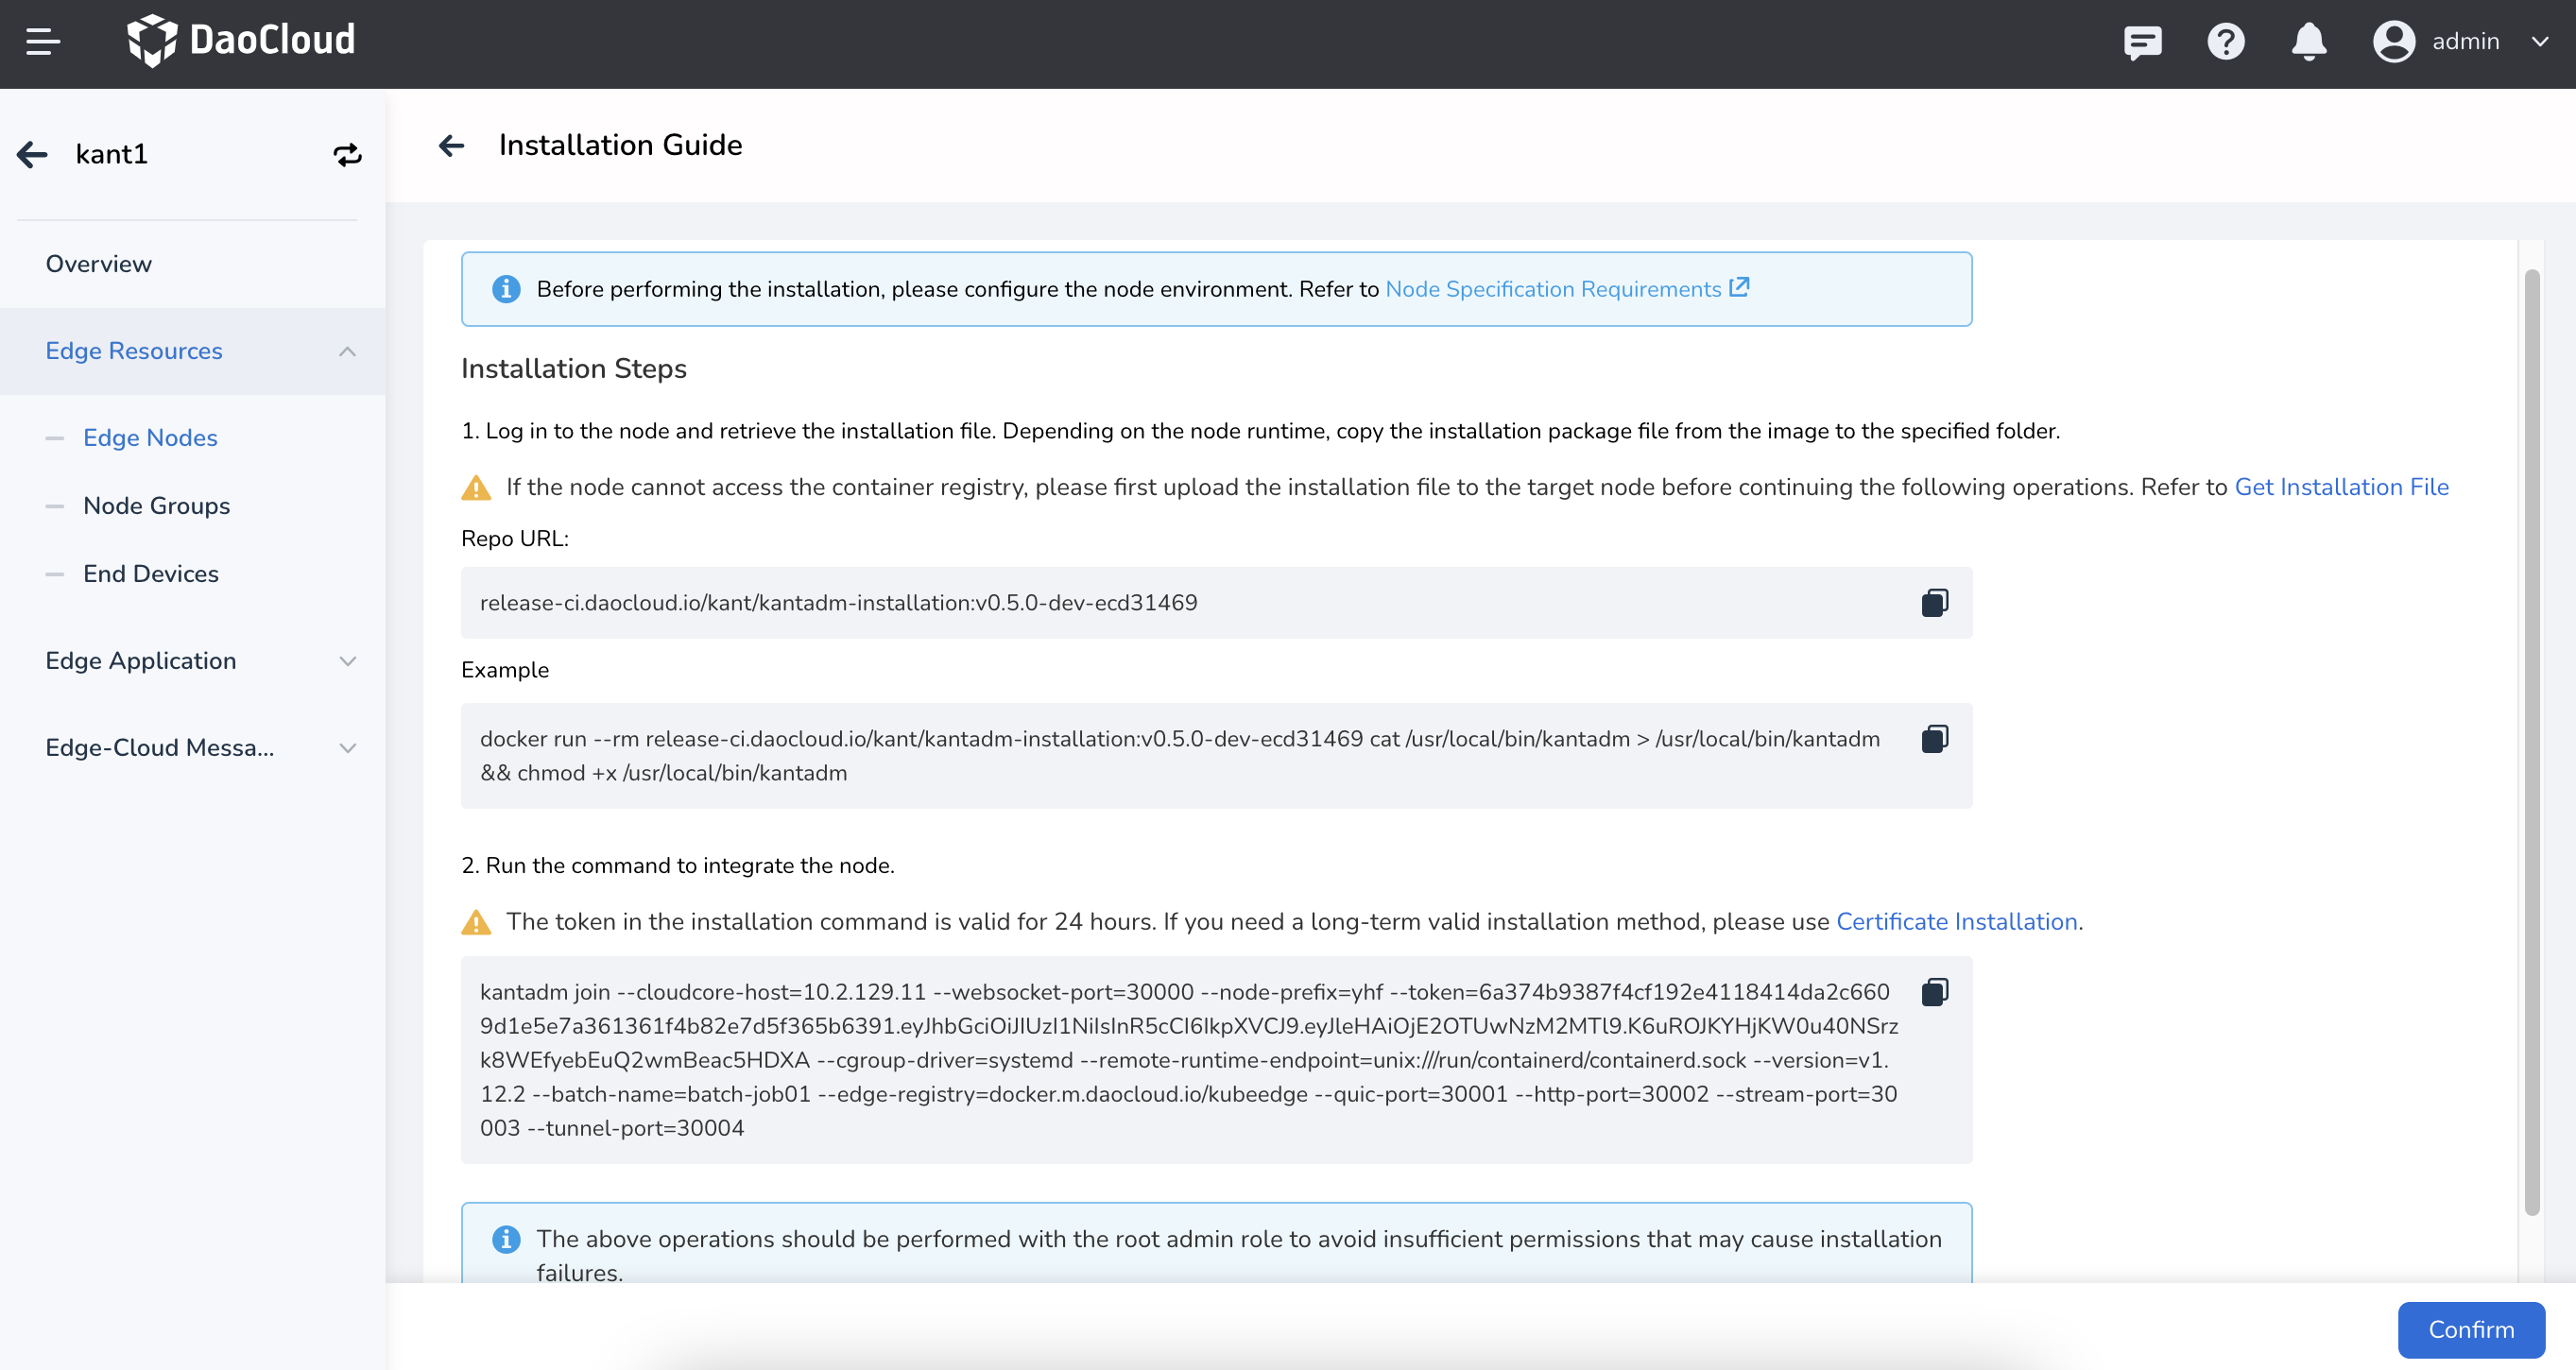
Case 1: The edge node can directly access the container registry. The operation is as follows.
Copy the image address directly from the installation guide::
To obtain the installation file, you can refer to the following example:
-
Case 2: The edge node cannot access the container registry. The operation is as follows.
-
On the installation guide interface, click the Get Installation File button in the first step, and the Get Installation File drawer will pop up on the right.
-
Depending on the runtime environment of the node, copy the following image installation package file to the specified folder.
For the image of Kant installation package:
For the KubeEdge Mosquitto image:
For the KubeEdge container sandbox image:
For the image of KubeEdge installation package:
Here is an example of the operations:
-
On a machine that can access the container registry, run the command to get the edge installation resource image.
-
Package the resource image and upload it to the target node after completion.
-
Log in to the node and load the uploaded resource image package.
-
-
-
-
Run the following command to connect the edge node.
-
Register via token.
kantadm join --cloudcore-host=10.31.226.14 --websocket-port=30000 --node-prefix=edge --token=b2d6bb5d9312c39ffac08ecfd5030bed006b8b67d0799d632d381f19fca9e765.eyJhbGciOiJIUzI1NiIsInR5cCI6IkpXVCJ9.eyJleHAiOjE2OTQ2NTk3NDV9.0sdaWbYSTURmAYmQwDn_zF7P9TwcRTSMhwPw6l87U7E --cgroup-driver=cgroupfs --remote-runtime-endpoint= --version=v1.12.2 --batch-name=edge --edge-registry=docker.m.daocloud.io/kubeedge --quic-port=30001 --http-port=30002 --stream-port=30003 --tunnel-port=30004 --labels=test=1,test1=1 -
Register via certificate.
-
On the installation guide page, click Certificate Installation in Step 2 to display the installation prompt information.
-
Click the Download Certificate button to download the certificate to your local machine.
-
Save the certificate and run the following command:
-
Connect the managed node by executing the following command:
kantadm join --cloudcore-host=10.31.226.14 --websocket-port=30000 --node-prefix=edge --remote-runtime-endpoint= --cgroup-driver=cgroupfs --version=v1.12.2 --batch-name=edge --edge-registry=docker.m.daocloud.io/kubeedge --quic-port=30001 --http-port=30002 --stream-port=30003 --tunnel-port=30004 --labels=test=1,test1=1
-
-
-
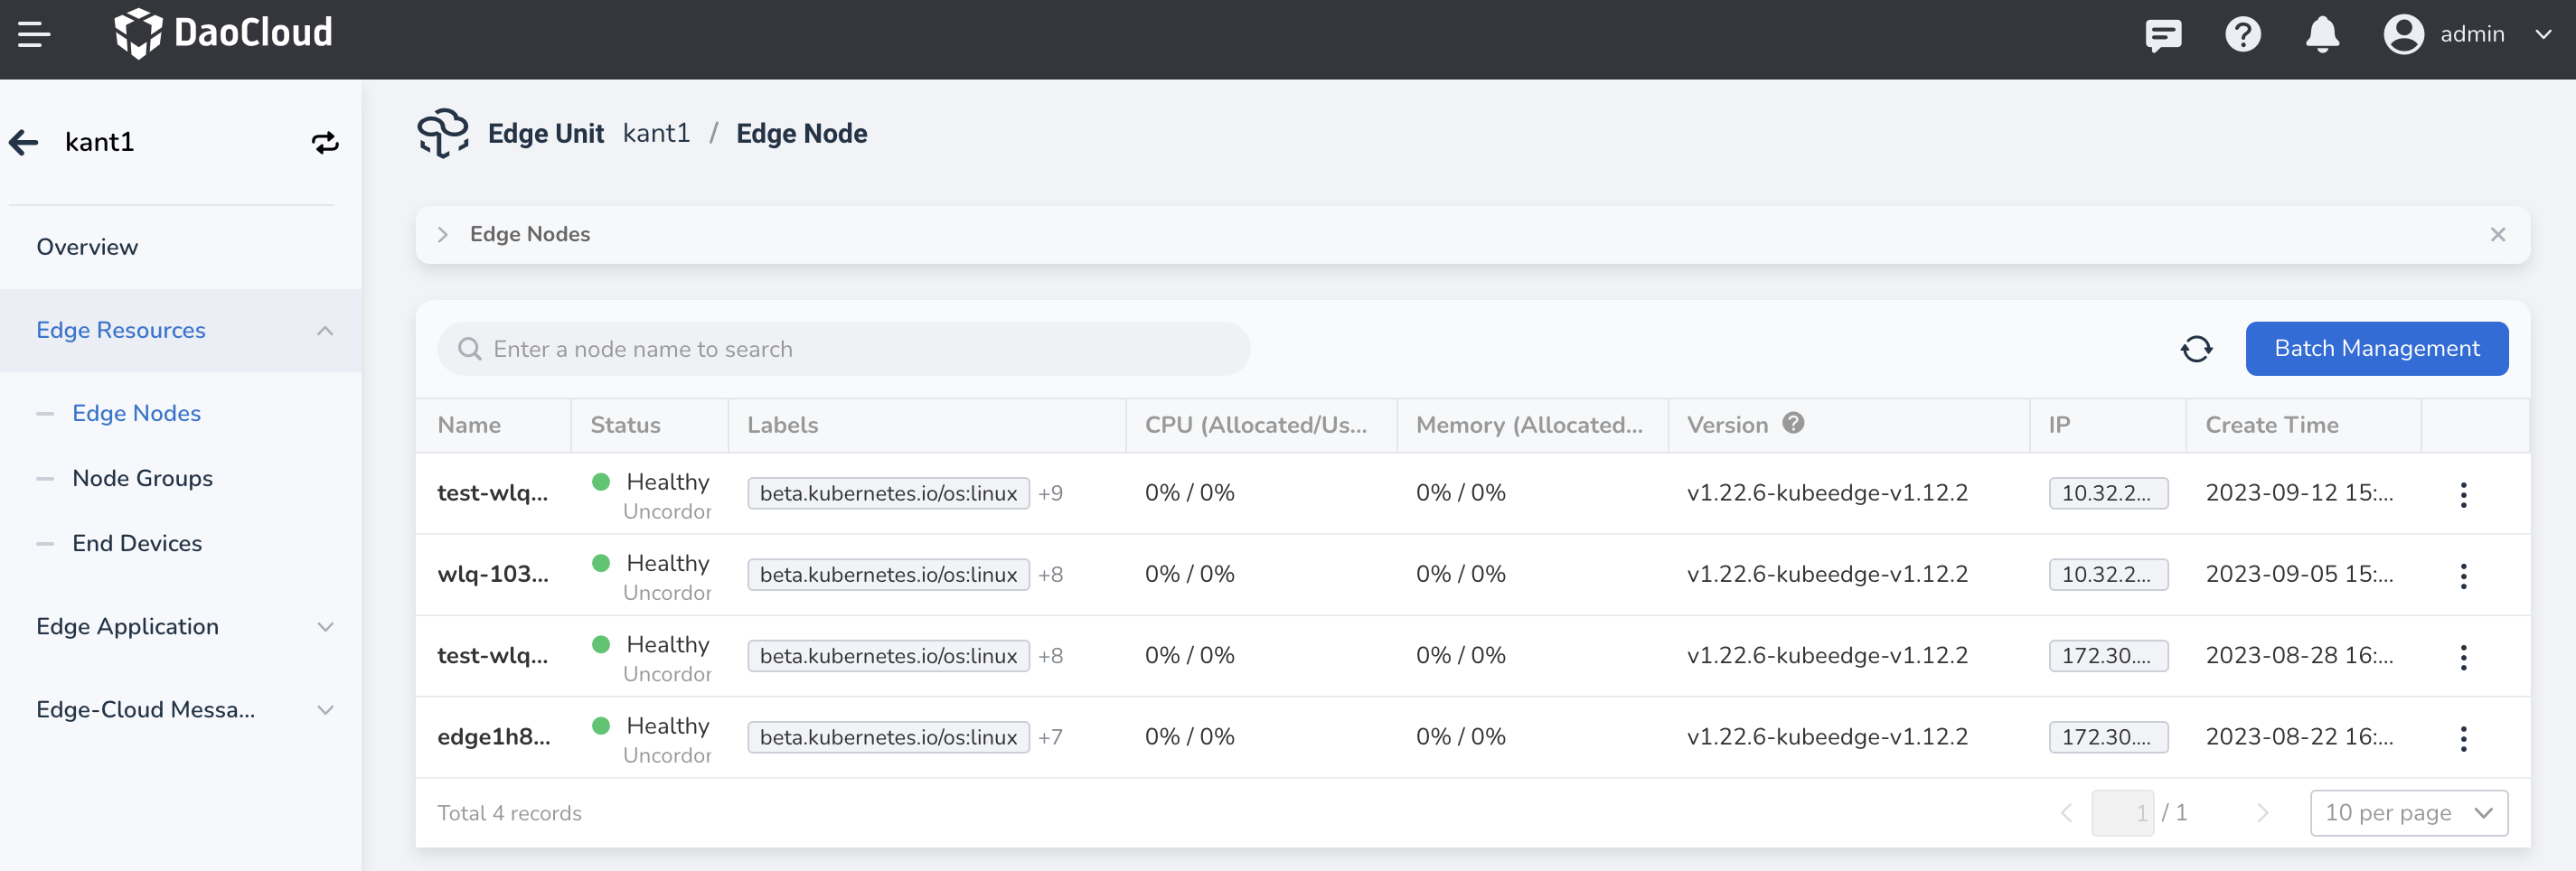
Verify if the edge node has been successfully connected.
-
Select Edge Computing -> Cloud Edge Collaboration from the left navigation bar to access the Edge Unit list page.
-
Click the name of an edge unit to view its details.
-
Select Edge Resources -> Edge Nodes from the left navigation bar to access the Edge Node list page.
-
Check the status of the edge node. If the current status is "Healthy," it indicates a successful connection.
-