Install the Velero Plugin
velero is an open source tool for backing up and restoring Kubernetes cluster resources. It can back up resources in a Kubernetes cluster to cloud storage services, local storage, or other locations, and restore those resources to the same or a different cluster when needed.
This section introduces how to deploy the Velero plugin in DCE 5.0 using the Helm Apps.
Prerequisites
Before installing the velero plugin, the following prerequisites need to be met:
- Integrated the Kubernetes cluster or created the Kubernetes cluster, and you can access the UI interface of the cluster.
- Created a velero namespace.
- You should have permissions not lower than NS Editor. For details, refer to Namespace Authorization.
Steps
Please perform the following steps to install the velero plugin for your cluster.
-
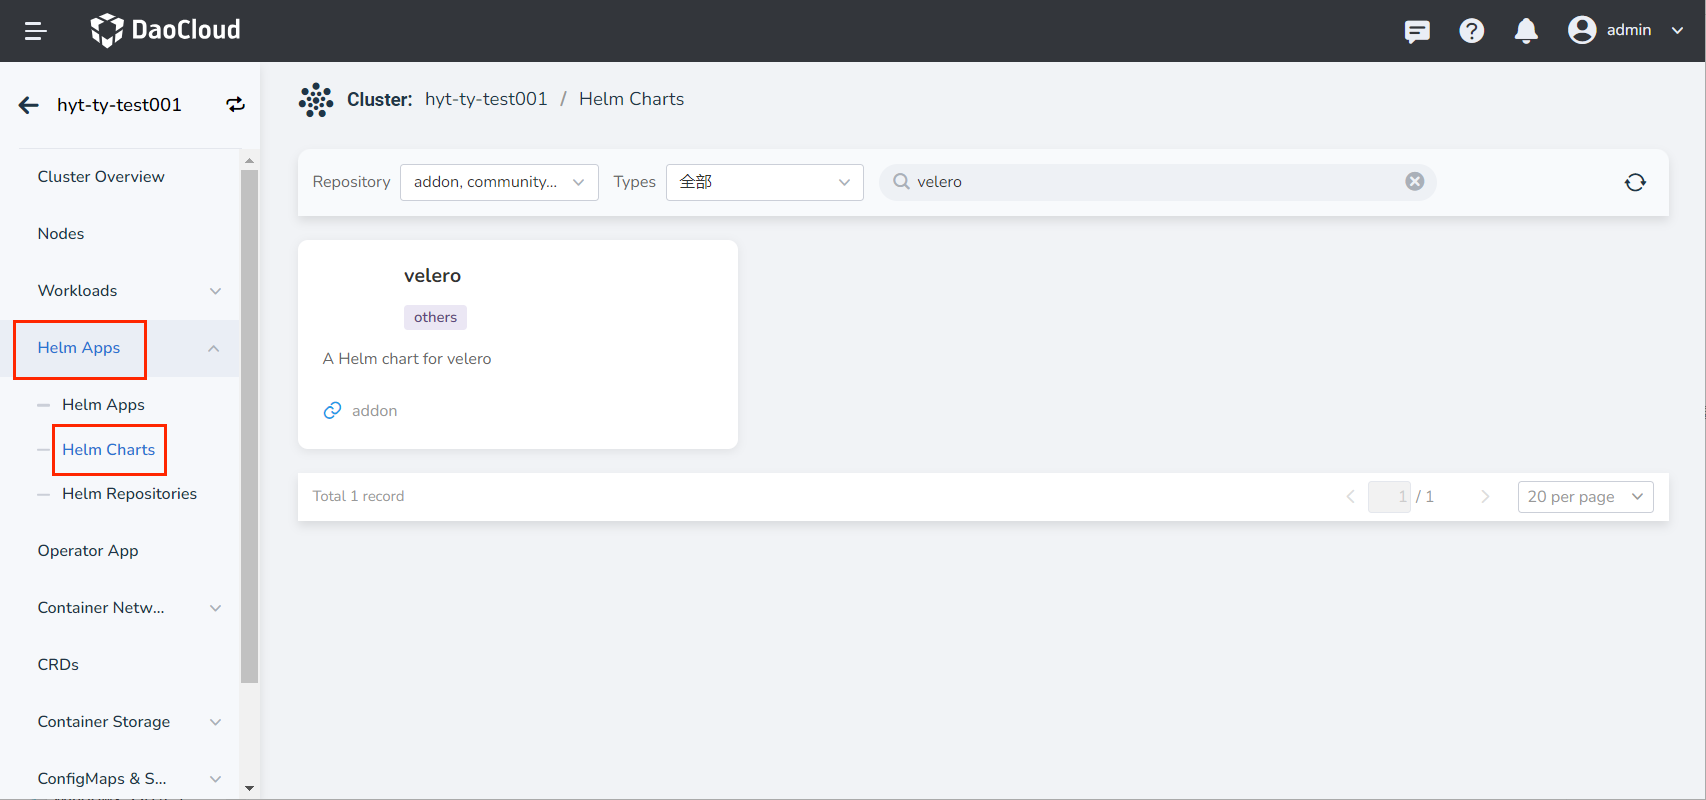
On the cluster list page, find the target cluster that needs to install the velero plugin, click the name of the cluster, click Helm Apps -> Helm chart in the left navigation bar, and enter velero in the search bar to search .
-
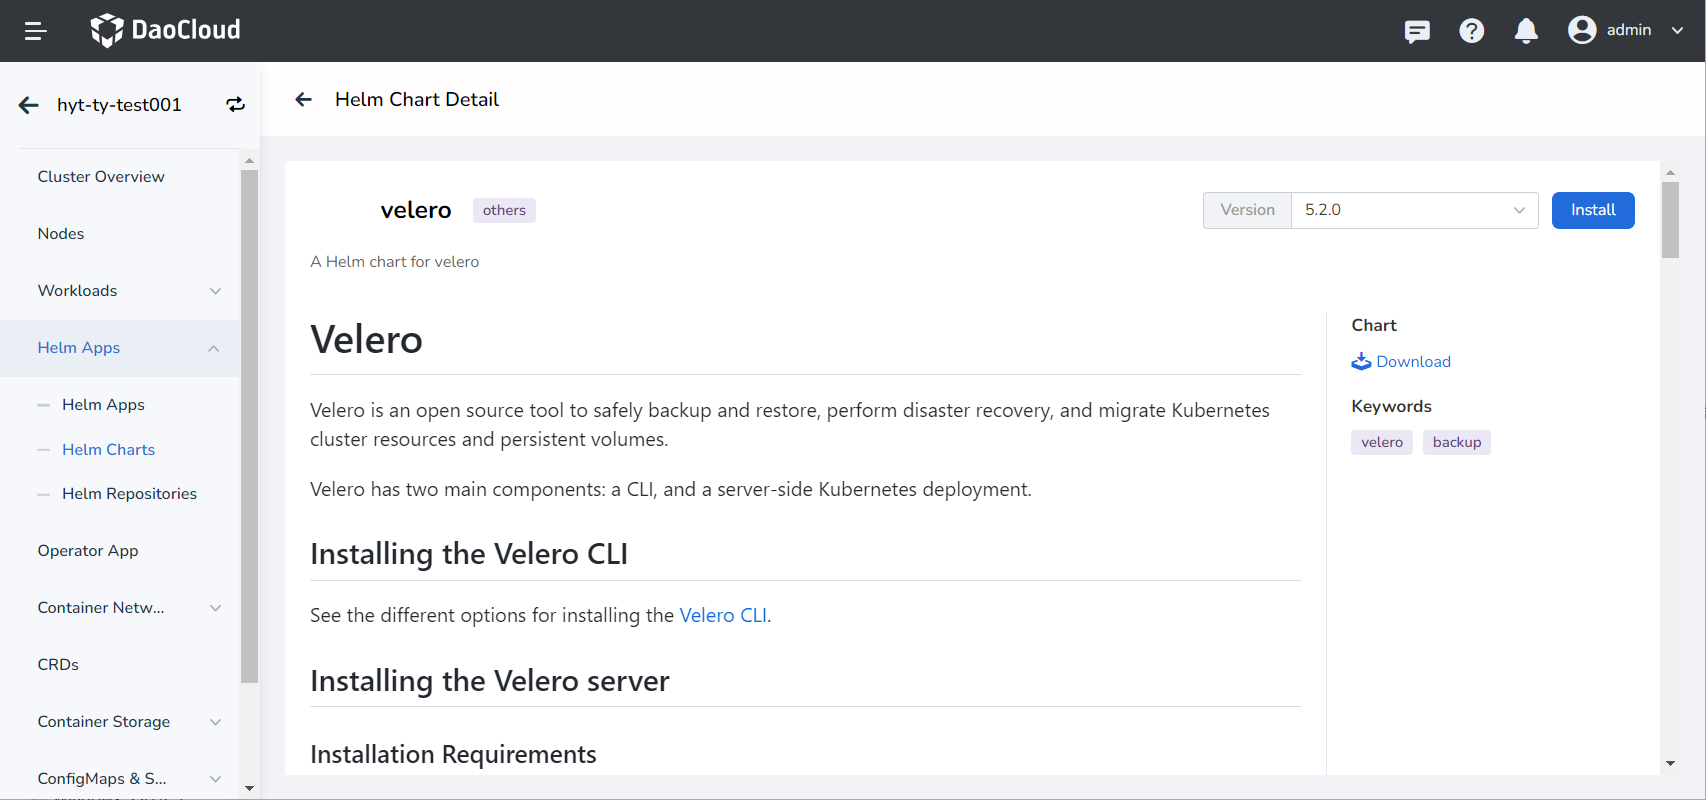
Read the introduction of the velero plugin, select the version and click the Install button. This page will take 5.2.0 version as an example to install, and it is recommended that you install 5.2.0 and later versions.
-
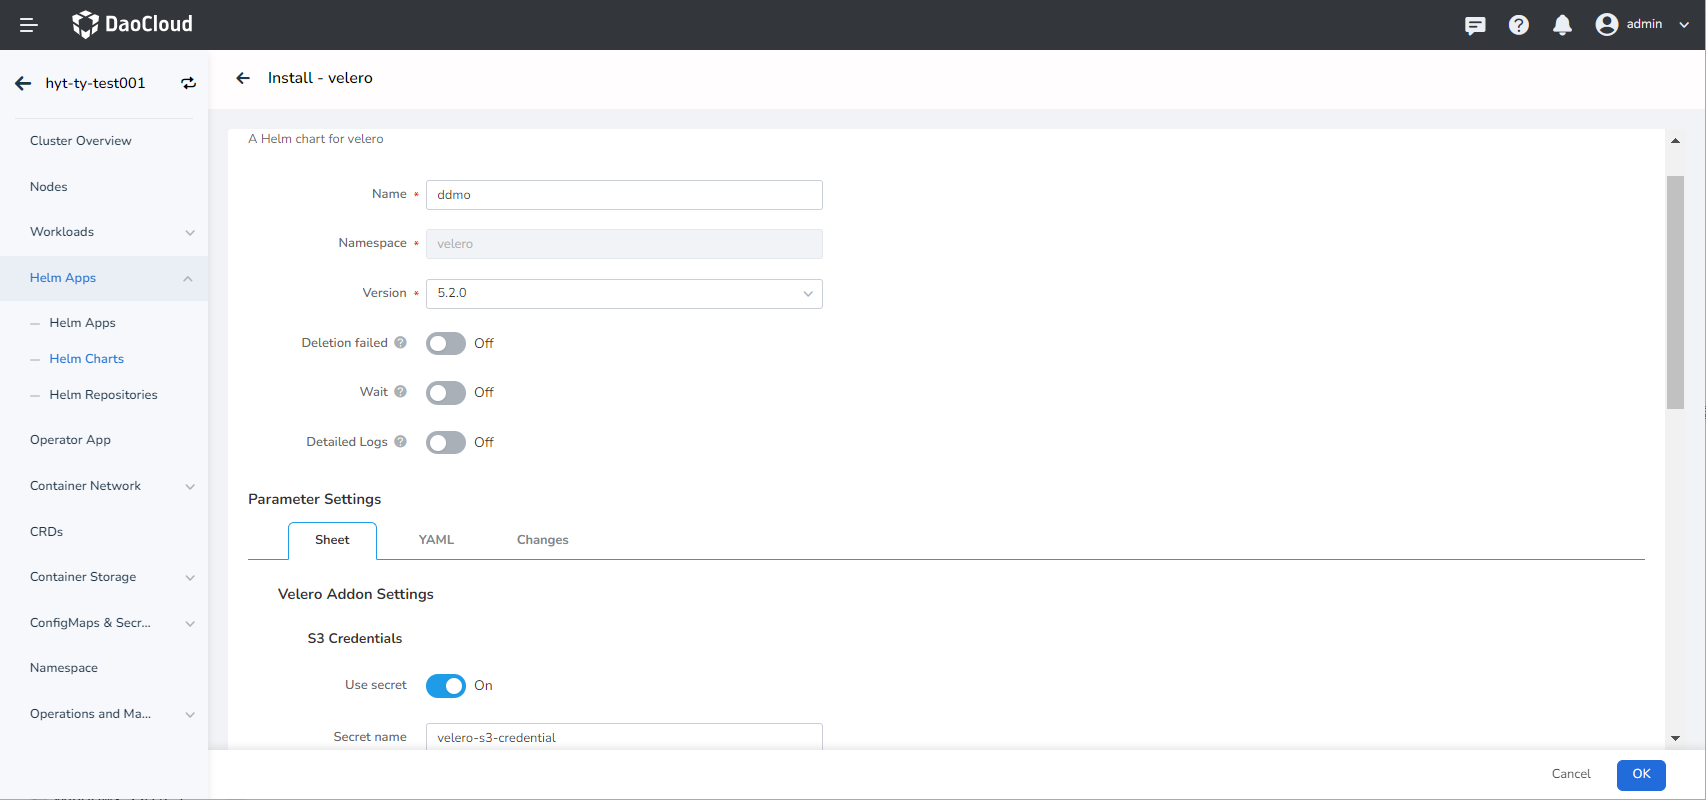
Configure basic info .
- Name: Enter the plugin name, please note that the name can be up to 63 characters, can only contain lowercase letters, numbers and separators ("-"), and must start and end with lowercase letters or numbers, such as metrics-server-01.
- Namespace: Select the namespace for plugin installation, it must be velero namespace.
- Version: The version of the plugin, here we take 5.2.0 version as an example.
- Wait: When enabled, it will wait for all associated resources under the application to be ready before marking the application installation as successful.
- Deletion Failed: After it is enabled, the synchronization will be enabled by default and ready to wait. If the installation fails, the installation-related resources will be removed.
- Detailed Logs: Turn on the verbose output of the installation process log.
!!! note
After enabling __Ready Wait__ and/or __Failed Delete__ , it takes a long time for the app to be marked as __Running__ . -
Configure Velero chart Parameter Settings according to the following instructions
-
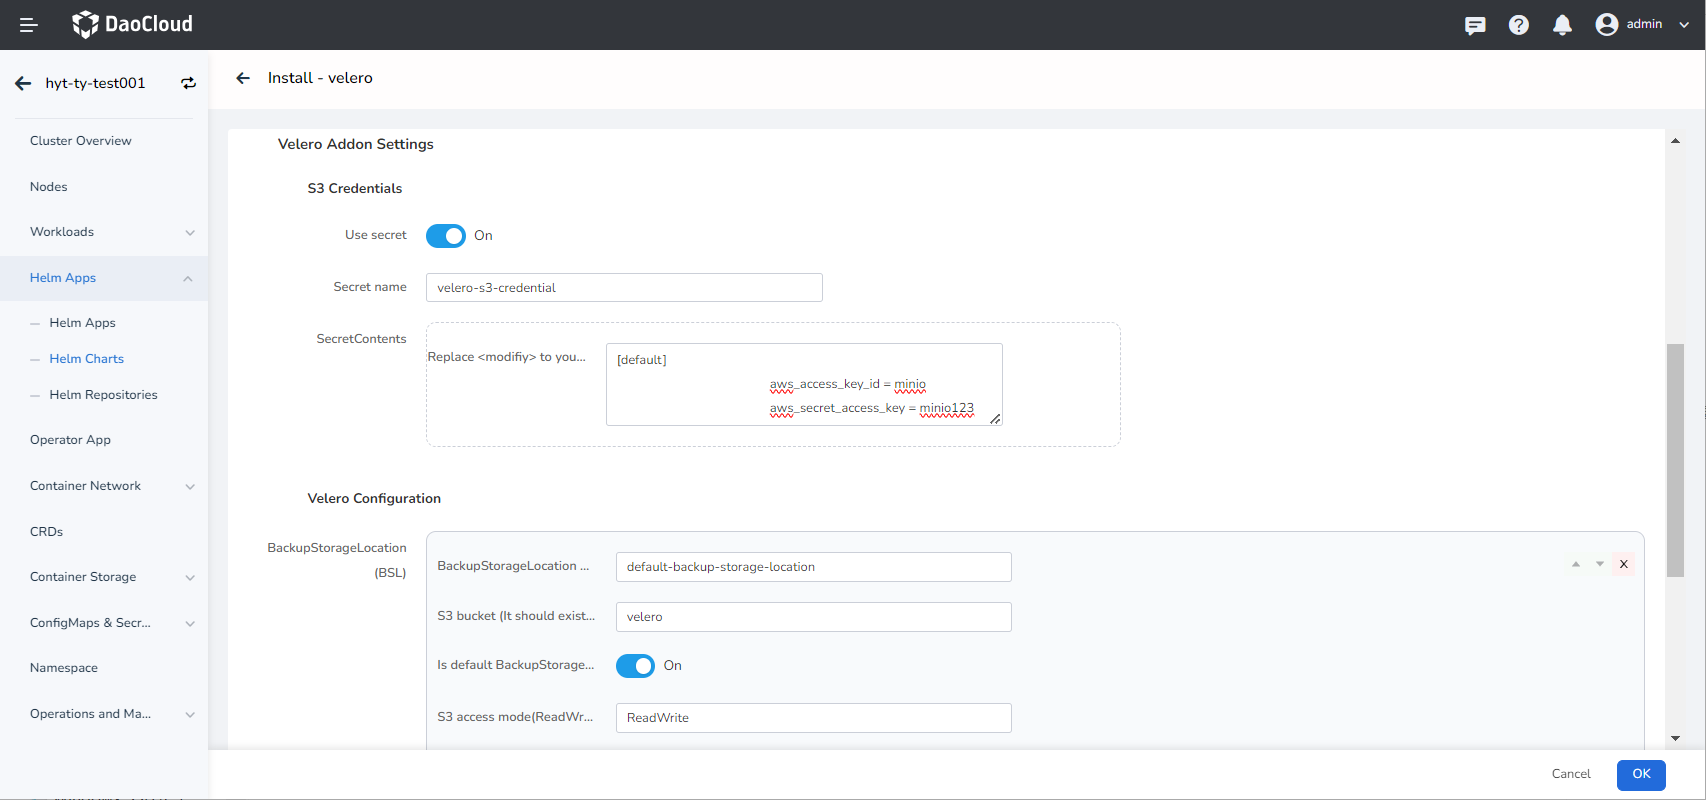
S3 Credentials: Configure the authentication information of object storage (minio).
- Use secret: Keep the default configuration true.
- Secret name: Keep the default configuration velero-s3-credential.
- SecretContents.aws_access_key_id =
: Configure the username for accessing object storage, replace with the actual parameter. - SecretContents.aws_secret_access_key =
: Configure the password for accessing object storage, replace with the actual parameter.
Use existing secret parameter example is as follows:
-
BackupStorageLocation: The location where Velero backs up data.
- S3 bucket: The name of the storage bucket used to save backup data (must be a real storage bucket that already exists in minio).
- Is default BackupStorage: Keep the default configuration true.
- S3 access mode: The access mode of Velero to data, which can be selected
- ReadWrite: Allow Velero to read and write backup data;
- ReadOnly: Allow Velero to read backup data, but cannot modify backup data;
- WriteOnly: Only allow Velero to write backup data, and cannot read backup data.
-
S3 Configs: Detailed configuration of S3 storage (minio).
- S3 region: The geographical region of cloud storage. The default is to use the us-east-1 parameter, which is provided by the system administrator.
- S3 force path style: Keep the default configuration true.
- S3 server URL: The console access address of object storage (minio). Minio generally provides two services, UI access and console access. Please use the console access address here.
-
-
Click the OK button to complete the installation of the Velero plugin. The system will automatically jump to the Helm Apps list page. After waiting for a few minutes, refresh the page, and you can see the application just installed.