Install vpa
The container vertical scaling strategy (Vertical Pod Autoscaler, VPA) can make the resource allocation of the cluster more reasonable and avoid the waste of cluster resources. vpa is the key component to realize the vertical expansion and contraction of the container.
This section describes how to install the vpa plugin.
In order to use VPA policies, not only the __vpa__ plugin needs to be installed, but also [install the __metrics-server__ plugin](install-metrics-server.md).
Prerequisites
Before installing the vpa plugin, the following prerequisites need to be met:
-
In the Container Management module Access Kubernetes Cluster or Create Kubernetes Cluster, and can access the cluster UI interface.
-
Create a namespace.
-
The current operating user should have
NS Editor higher permissions, for details, refer to Namespace Authorization.
Steps
Refer to the following steps to install the vpa plugin for the cluster.
-
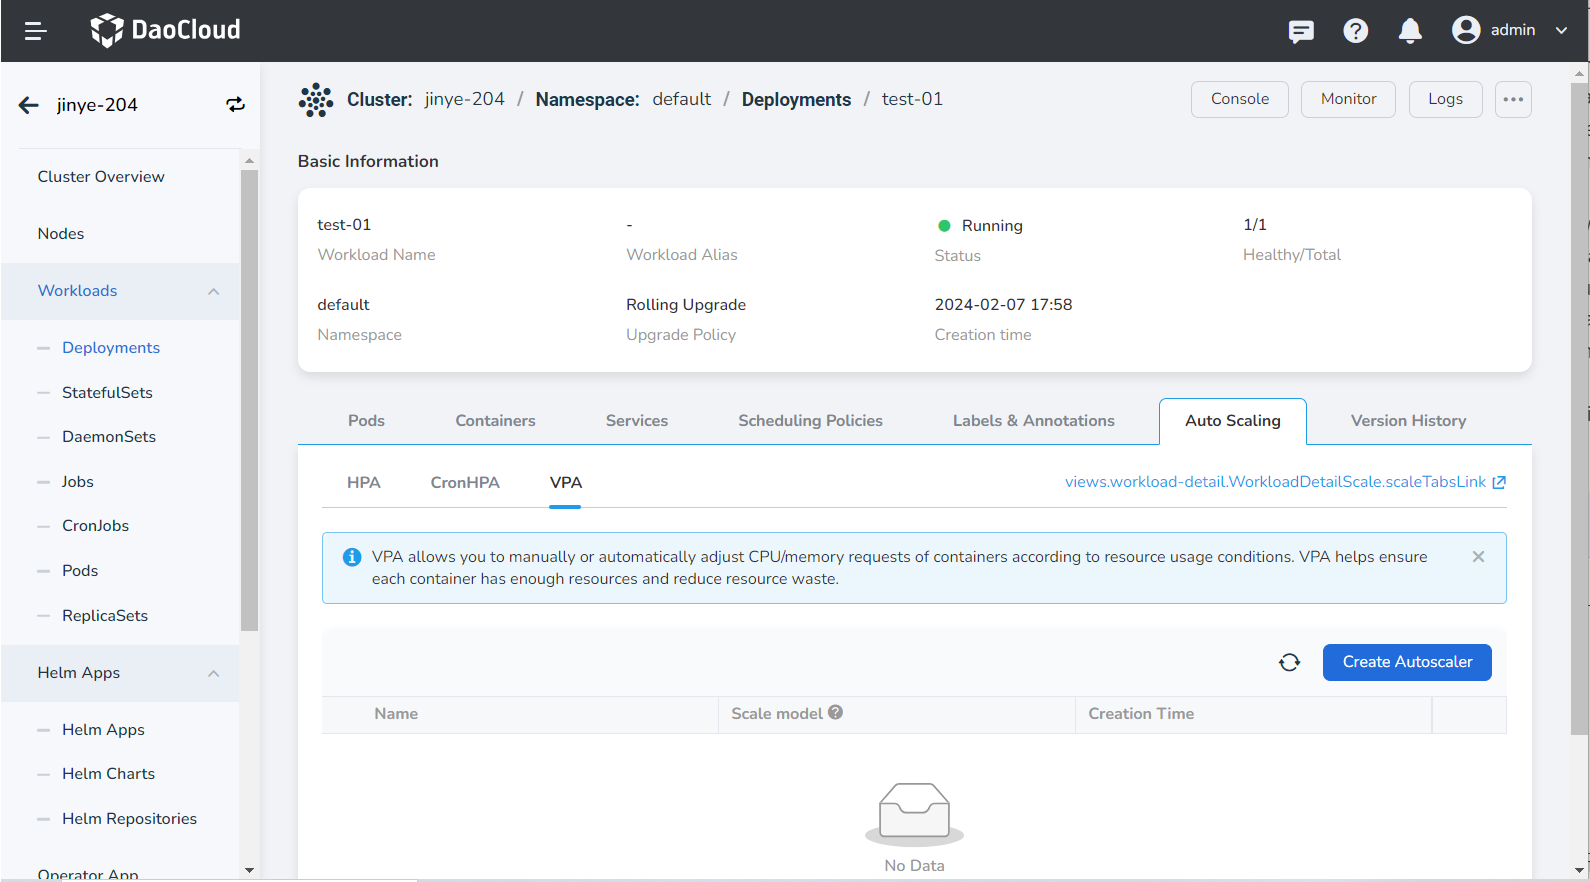
On the Clusters page, find the target cluster where the plugin needs to be installed, click the name of the cluster, then click Workloads -> Deployments on the left, and click the name of the target workload.
-
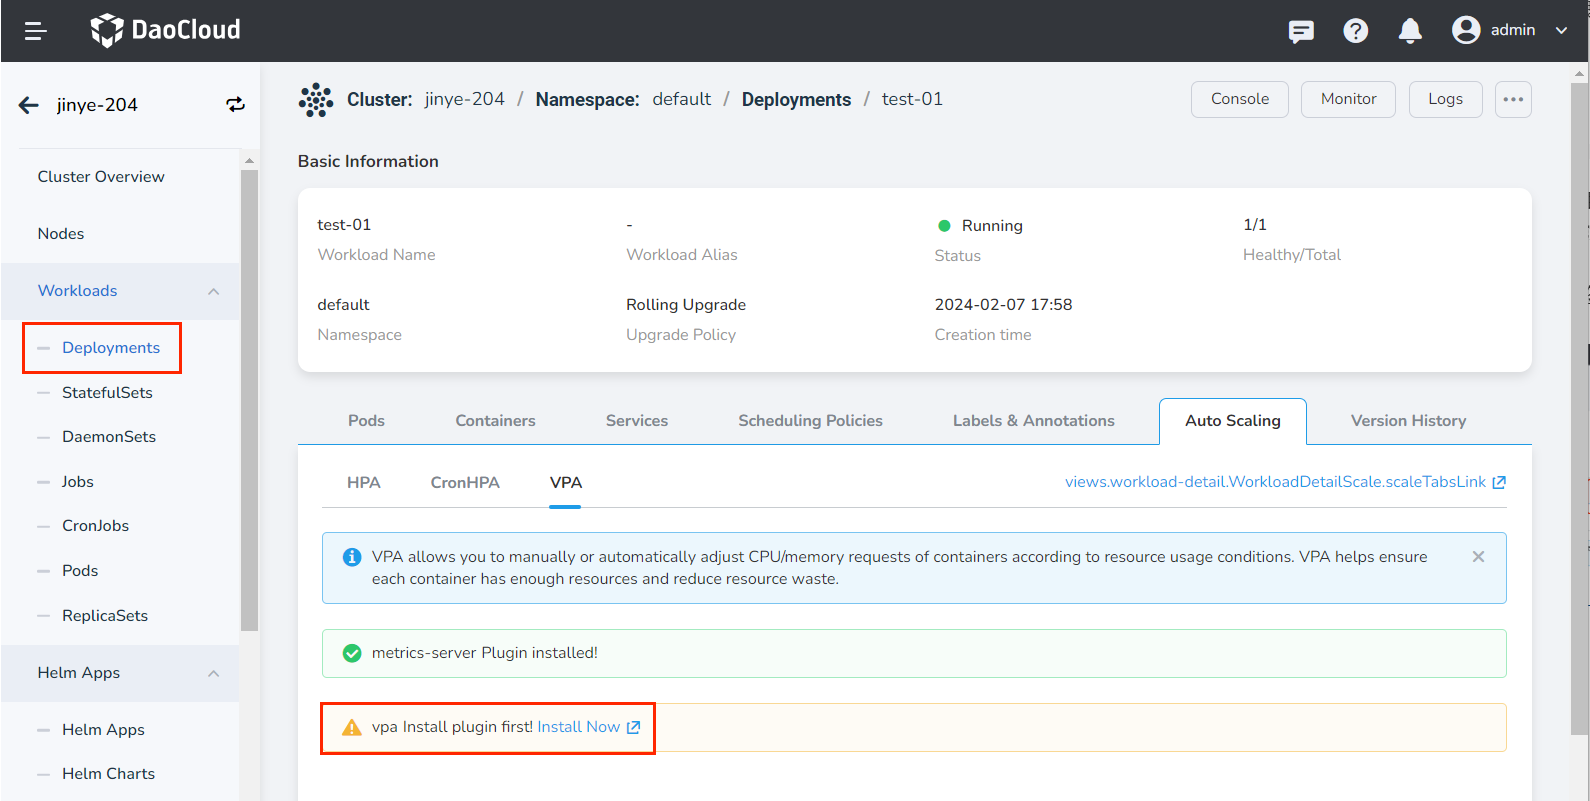
On the workload details page, click the Auto Scaling tab, and click Install on the right side of VPA .
-
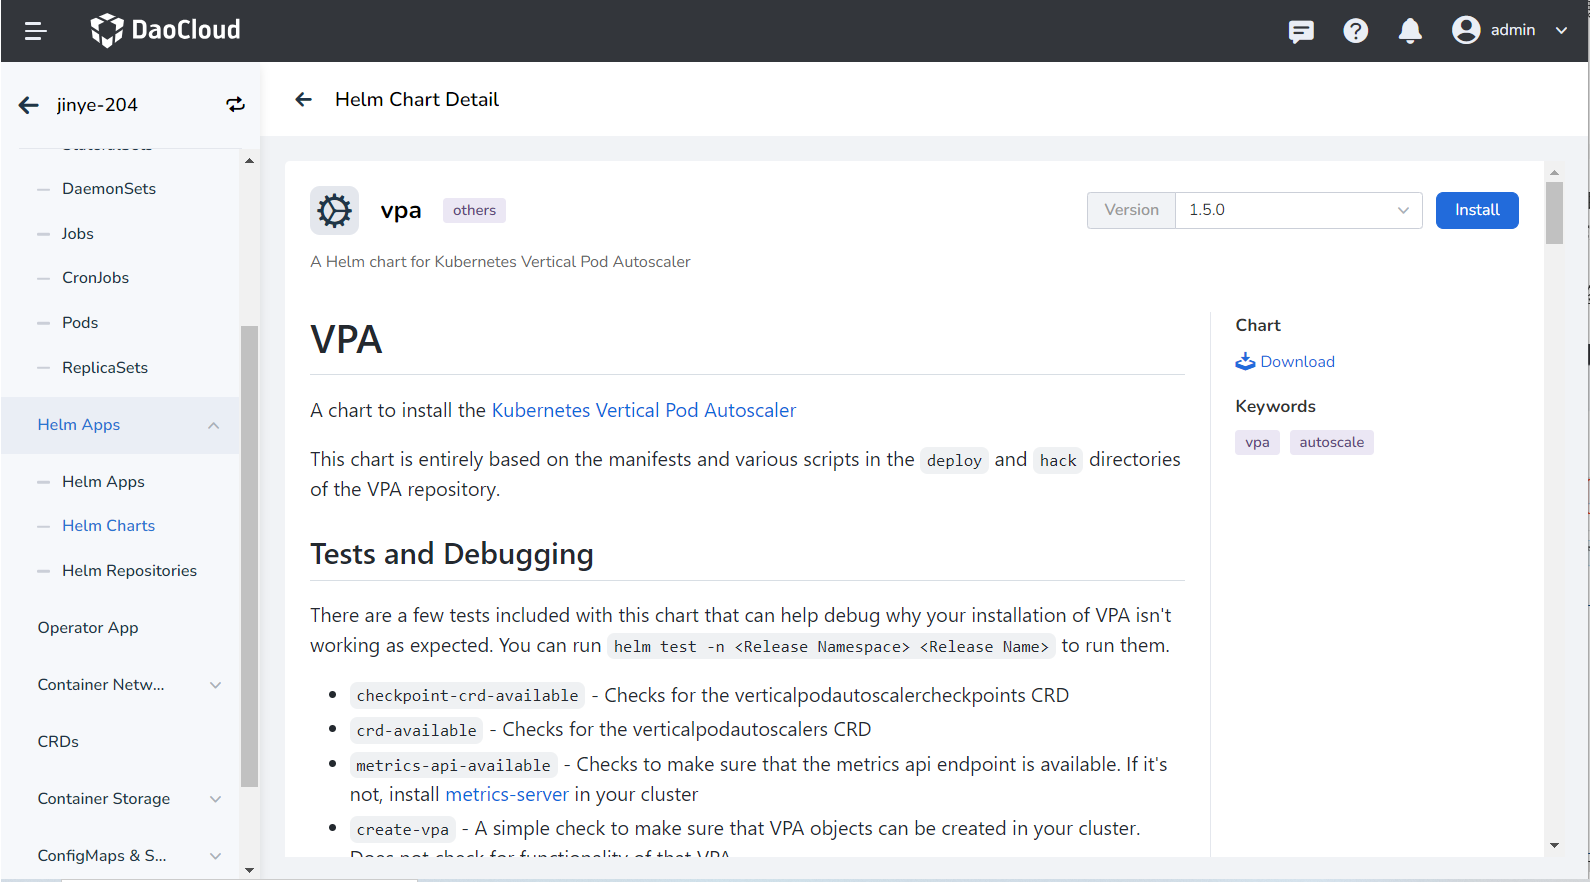
Read the relevant introduction of the plug-in, select the version and click the Install button. It is recommended to install 1.5.0 or later.
-
Review the configuration parameters described below.
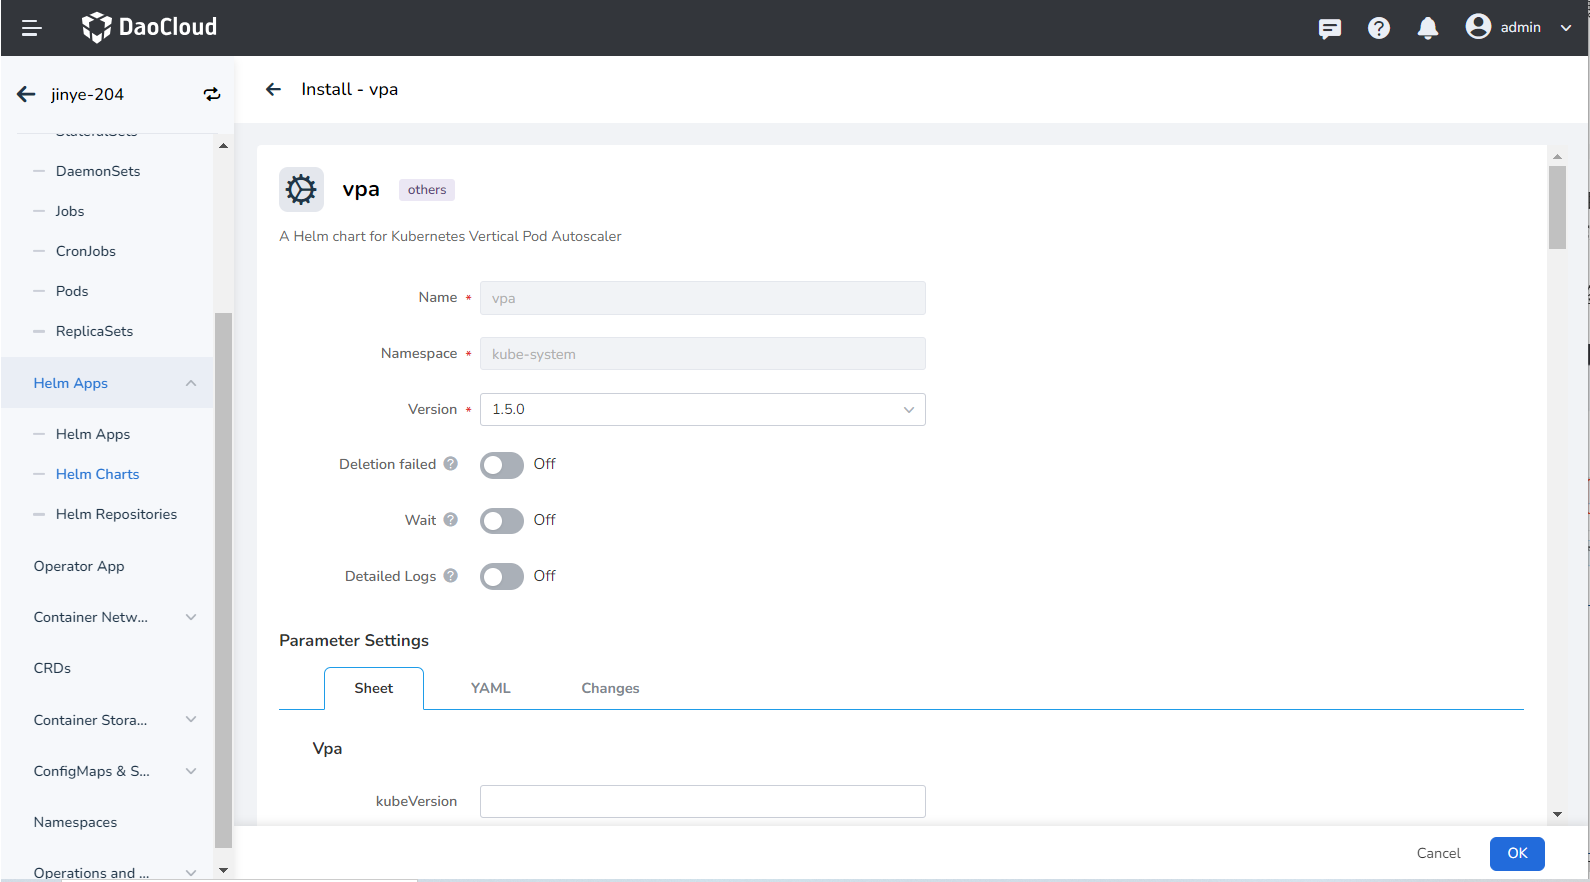
- Name: Enter the plugin name, please note that the name can be up to 63 characters, can only contain lowercase letters, numbers, and separators ("-"), and must start and end with lowercase letters or numbers, such as kubernetes-cronhpa-controller.
- Namespace: Select which namespace the plugin will be installed in, here we take default as an example.
- Version: The version of the plugin, here we take the 1.5.0 version as an example.
- Ready Wait: When enabled, it will wait for all associated resources under the application to be in the ready state before marking the application installation as successful.
- Failed to delete: If the plugin installation fails, delete the associated resources that have already been installed. When enabled, Wait will be enabled synchronously by default.
- Detailed log: When enabled, a detailed log of the installation process will be recorded.
Note
After enabling Wait and/or Deletion failed , it takes a long time for the application to be marked as running .
-
Click OK in the lower right corner of the page, and the system will automatically jump to the Helm Apps list page. Wait a few minutes and refresh the page to see the application you just installed.
Warning
If you need to delete the vpa plugin, you should go to the Helm Apps list page to delete it completely.
If you delete the plug-in under the Auto Scaling tab of the workload, this only deletes the workload copy of the plug-in, and the plug-in itself is still not deleted, and an error will be prompted when the plug-in is reinstalled later.
-
Go back to the Auto Scaling tab under the workload details page, and you can see that the interface displays Plug-in installed . Now you can start Create VPA policy.