Usage
This page demonstrate how to install a Kubernetes cluster with kubeadm on Alibaba Cloud and also have Terway as the cluster's CNI plugin.
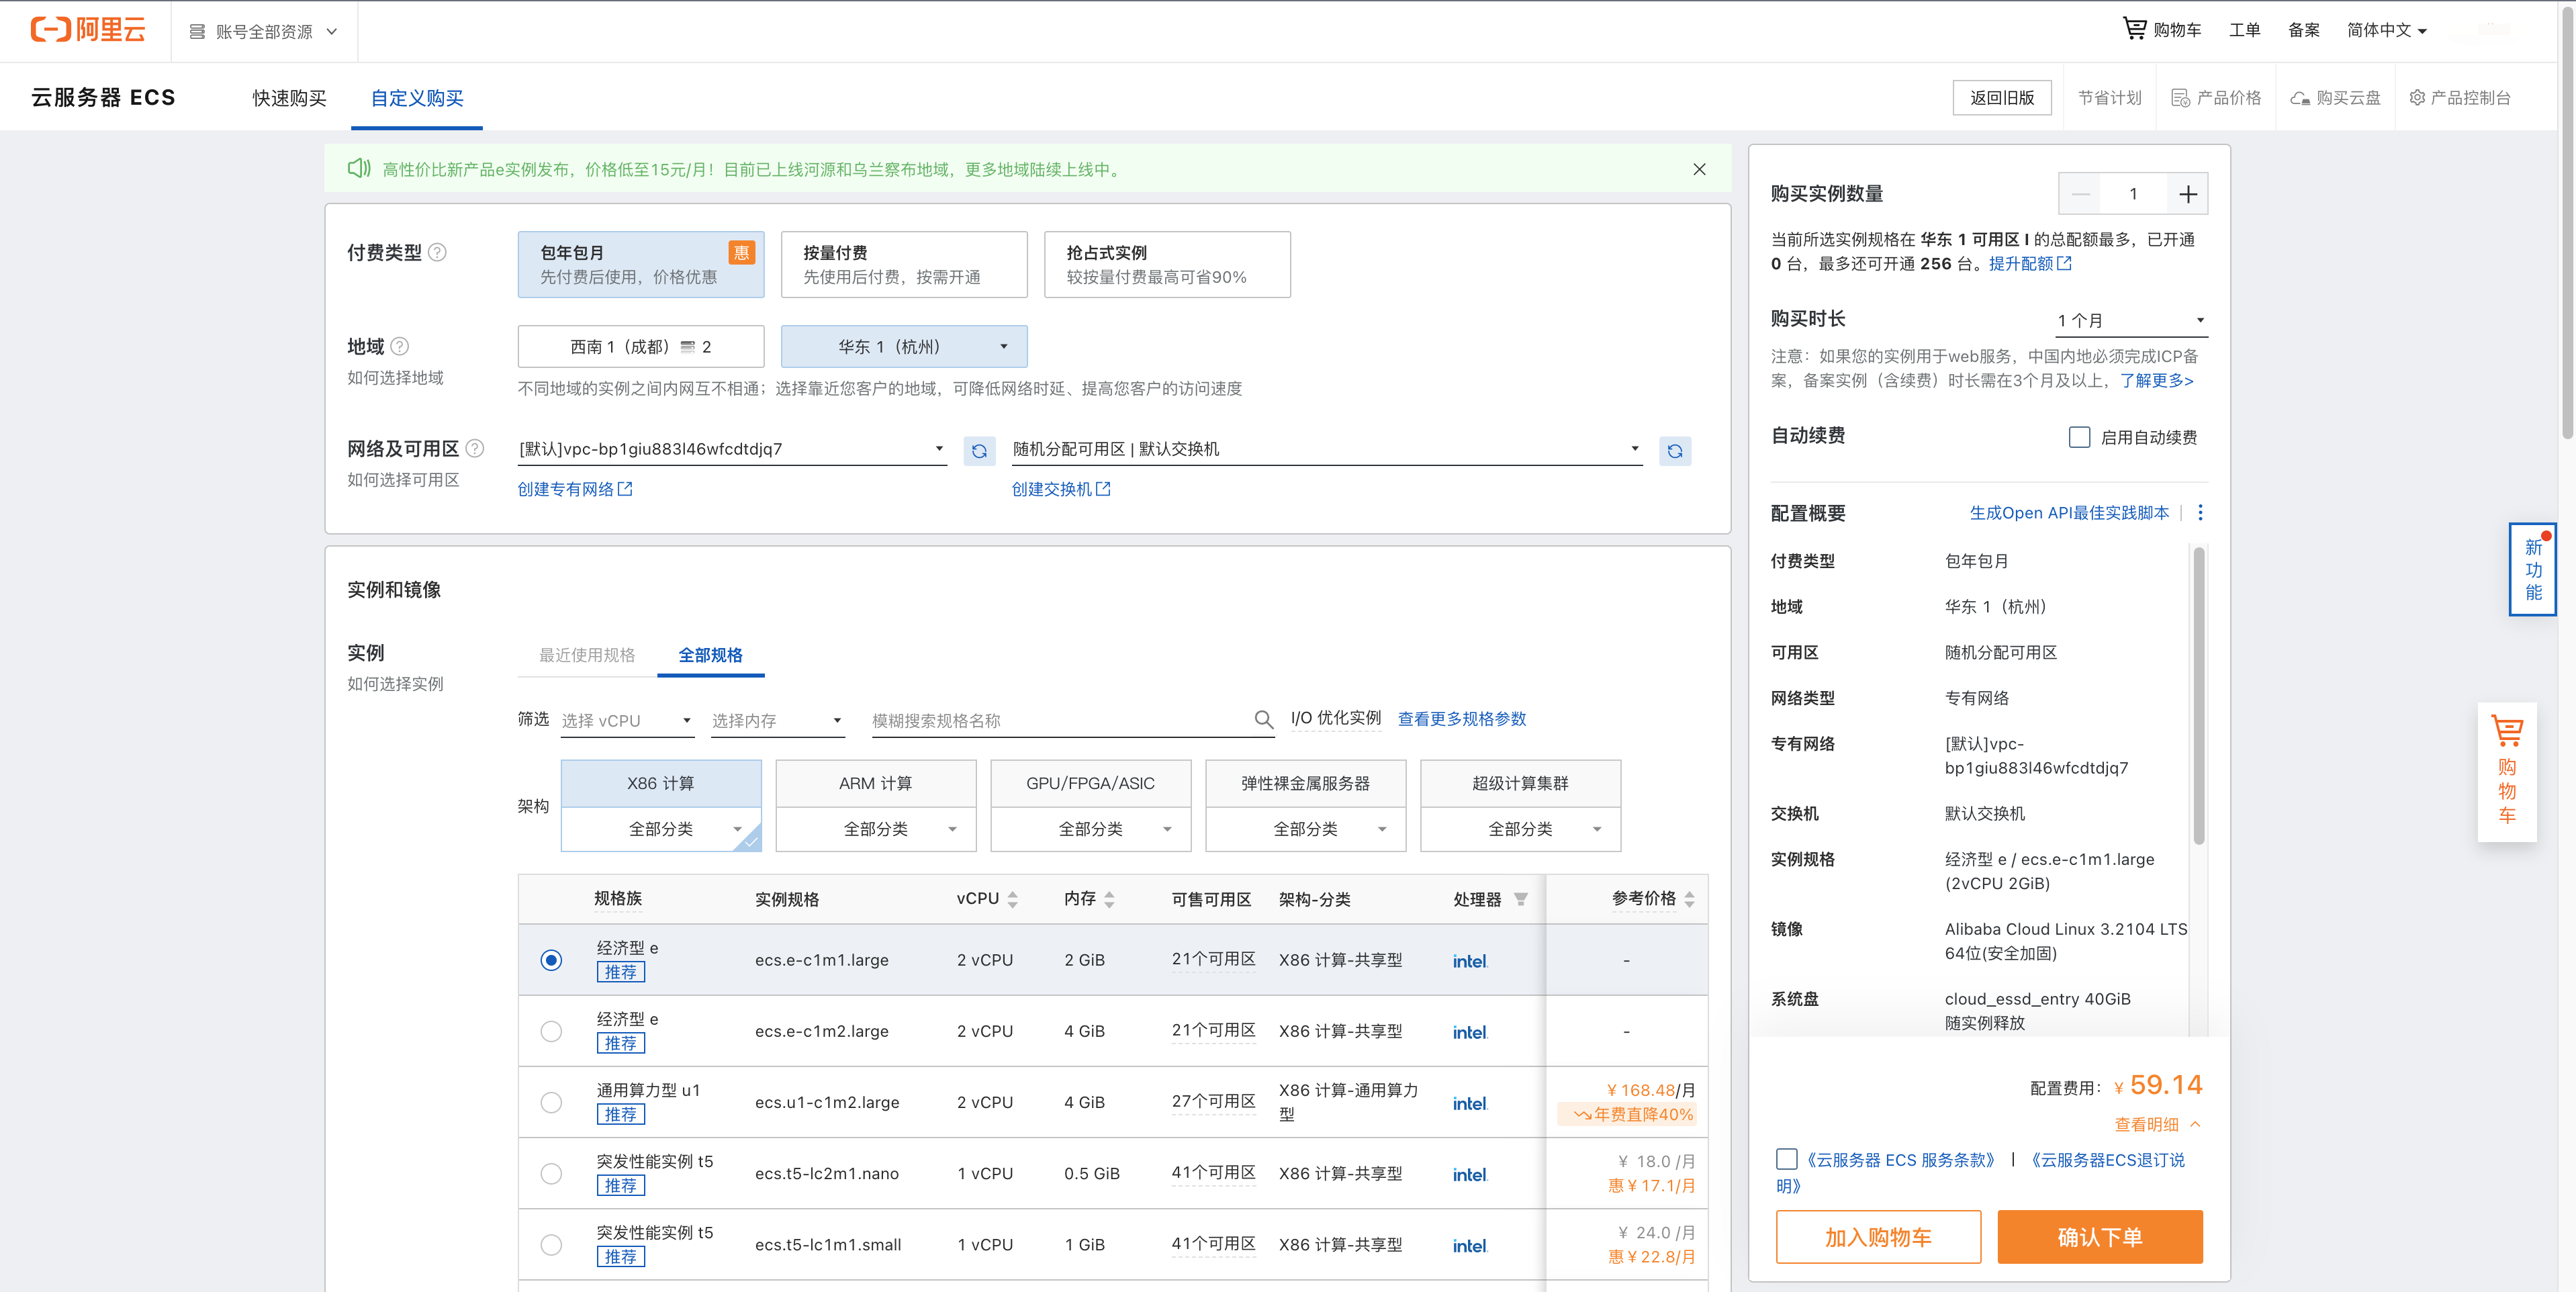
Create ECS Instances
For detailed instructions, please refer to the Alibaba Cloud documentation, and keep in mind the following points:
- Choose a region closer to your location to reduce network latency and improve access speed.
- If no VPC exists, create a VPC and select an available zone. This VPC will be used for node and Pod communication.
- Select the appropriate instance specifications based on your requirements. These specifications determine the number of ENIs and secondary IPs available on the ECS instances, which affects the number of Pods that can be run (in non-VPC mode).
Note
When installing a Kubernetes cluster, each node is required to have a minimum of 2 CPUs and 2 GB of memory.
Set up the Kubernetes Cluster
Refer to the official documentation to install kubeadm and kubectl on the control plane node. Install kubelet and a container runtime (e.g., containerd) on both the control plane and worker nodes.
Note
Modify the kubelet configuration file (/usr/lib/systemd/system/kubelet.service.d/10-kubeadm.conf) and configure --provider-id on each node:
Taking containerd as an example for the container runtime, use the following configuration to install the cluster:
apiVersion: kubeadm.k8s.io/v1beta3
bootstrapTokens:
  - groups:
      - system:bootstrappers:kubeadm:default-node-token
    token: abcdef.0123456789abcdef
    ttl: 24h0m0s
    usages:
      - signing
      - authentication
kind: InitConfiguration
localAPIEndpoint:
  bindPort: 6443
nodeRegistration:
  criSocket: unix:///var/run/containerd/containerd.sock
  imagePullPolicy: IfNotPresent
  taints: null
  kubeletExtraArgs:
    cloud-provider: "external"
---
apiServer:
  timeoutForControlPlane: 4m0s
apiVersion: kubeadm.k8s.io/v1beta3
certificatesDir: /etc/kubernetes/pki
clusterName: kubernetes
controllerManager: {}
dns: {}
etcd:
  local:
    dataDir: /var/lib/etcd
imageRepository: k8s.m.daocloud.io
kind: ClusterConfiguration
kubernetesVersion: 1.28.0
networking:
  dnsDomain: cluster.local
  serviceSubnet: 172.21.0.0/24
  podSubnet: 10.244.0.0/16
$ kubeadm init --config cluster.yaml
Note
Plan the serviceSubnet and podSubnet to avoid conflicts.
You can use k8s.m.daocloud.io as a mirror acceleration site.
After creating the cluster, use kubeadm join on join the worker node to the cluster.
Install Network Plugin
Install Terway CNI Plugin
-
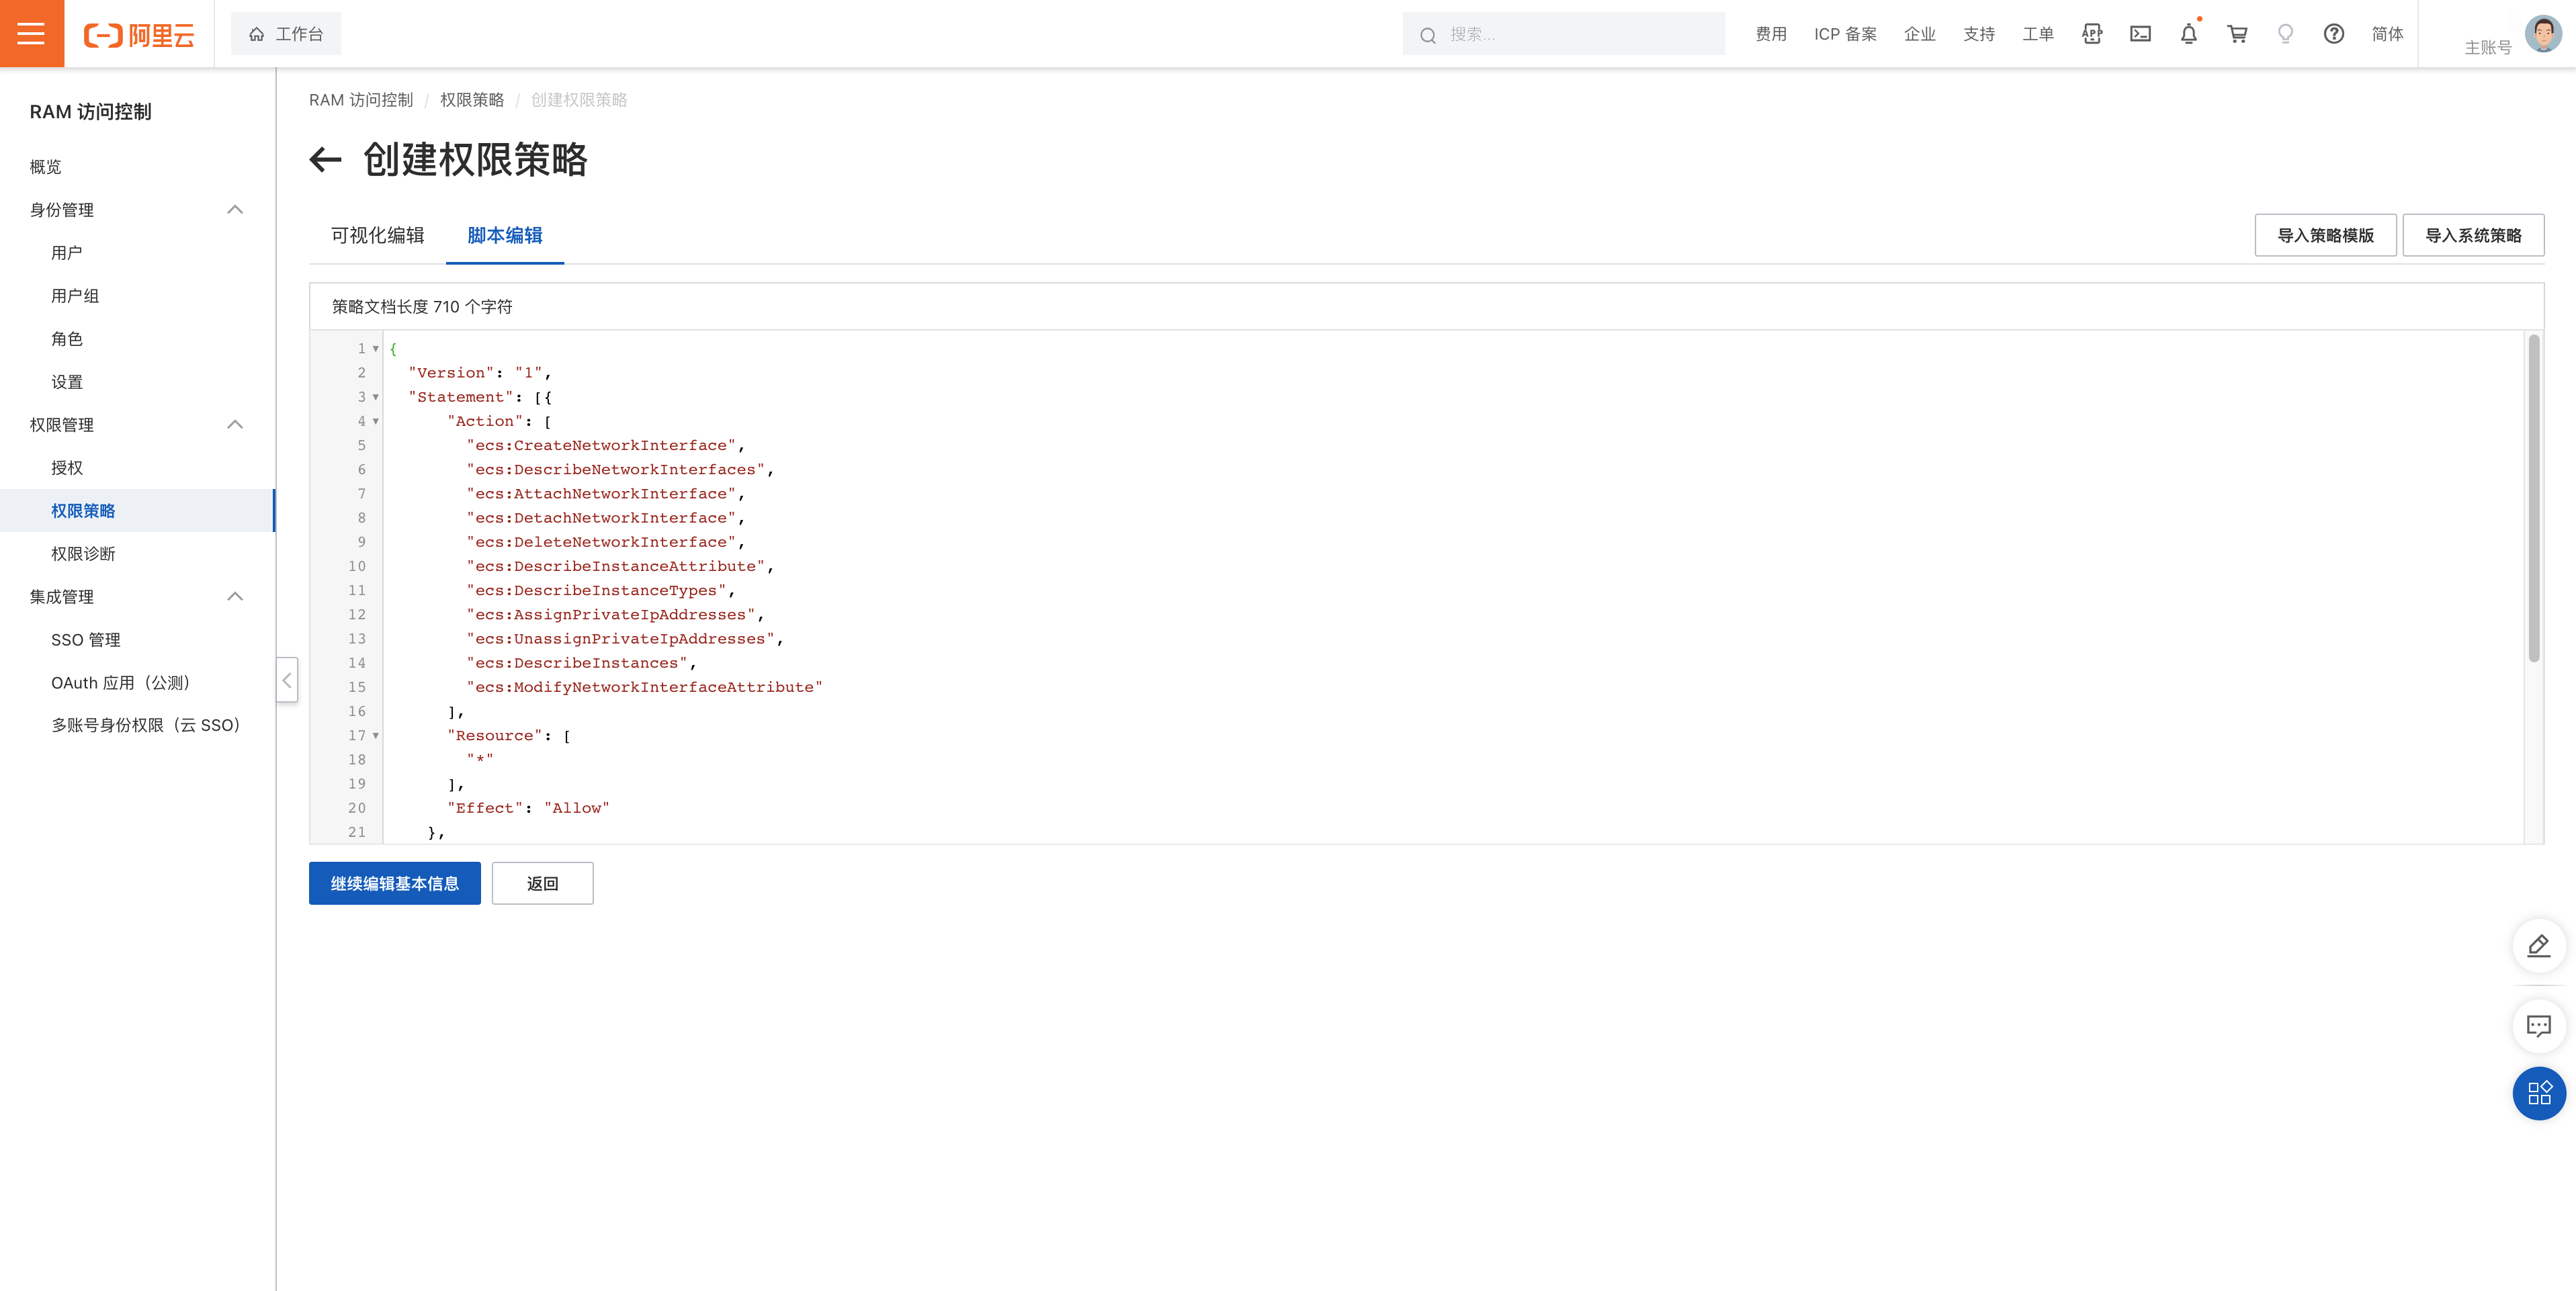
Before installation, Terway requires access to Alibaba Cloud OpenAPI using the
access_idandaccess_keyof a RAM role. Create a custom permission policy script granting Terway the necessary permissions:{ "Version": "1", "Statement": [{ "Action": [ "ecs:CreateNetworkInterface", "ecs:DescribeNetworkInterfaces", "ecs:AttachNetworkInterface", "ecs:DetachNetworkInterface", "ecs:DeleteNetworkInterface", "ecs:DescribeInstanceAttribute", "ecs:DescribeInstanceTypes", "ecs:AssignPrivateIpAddresses", "ecs:UnassignPrivateIpAddresses", "ecs:DescribeInstances", "ecs:ModifyNetworkInterfaceAttribute" ], "Resource": [ "*" ], "Effect": "Allow" }, { "Action": [ "vpc:DescribeVSwitches" ], "Resource": [ "*" ], "Effect": "Allow" } ] }Note
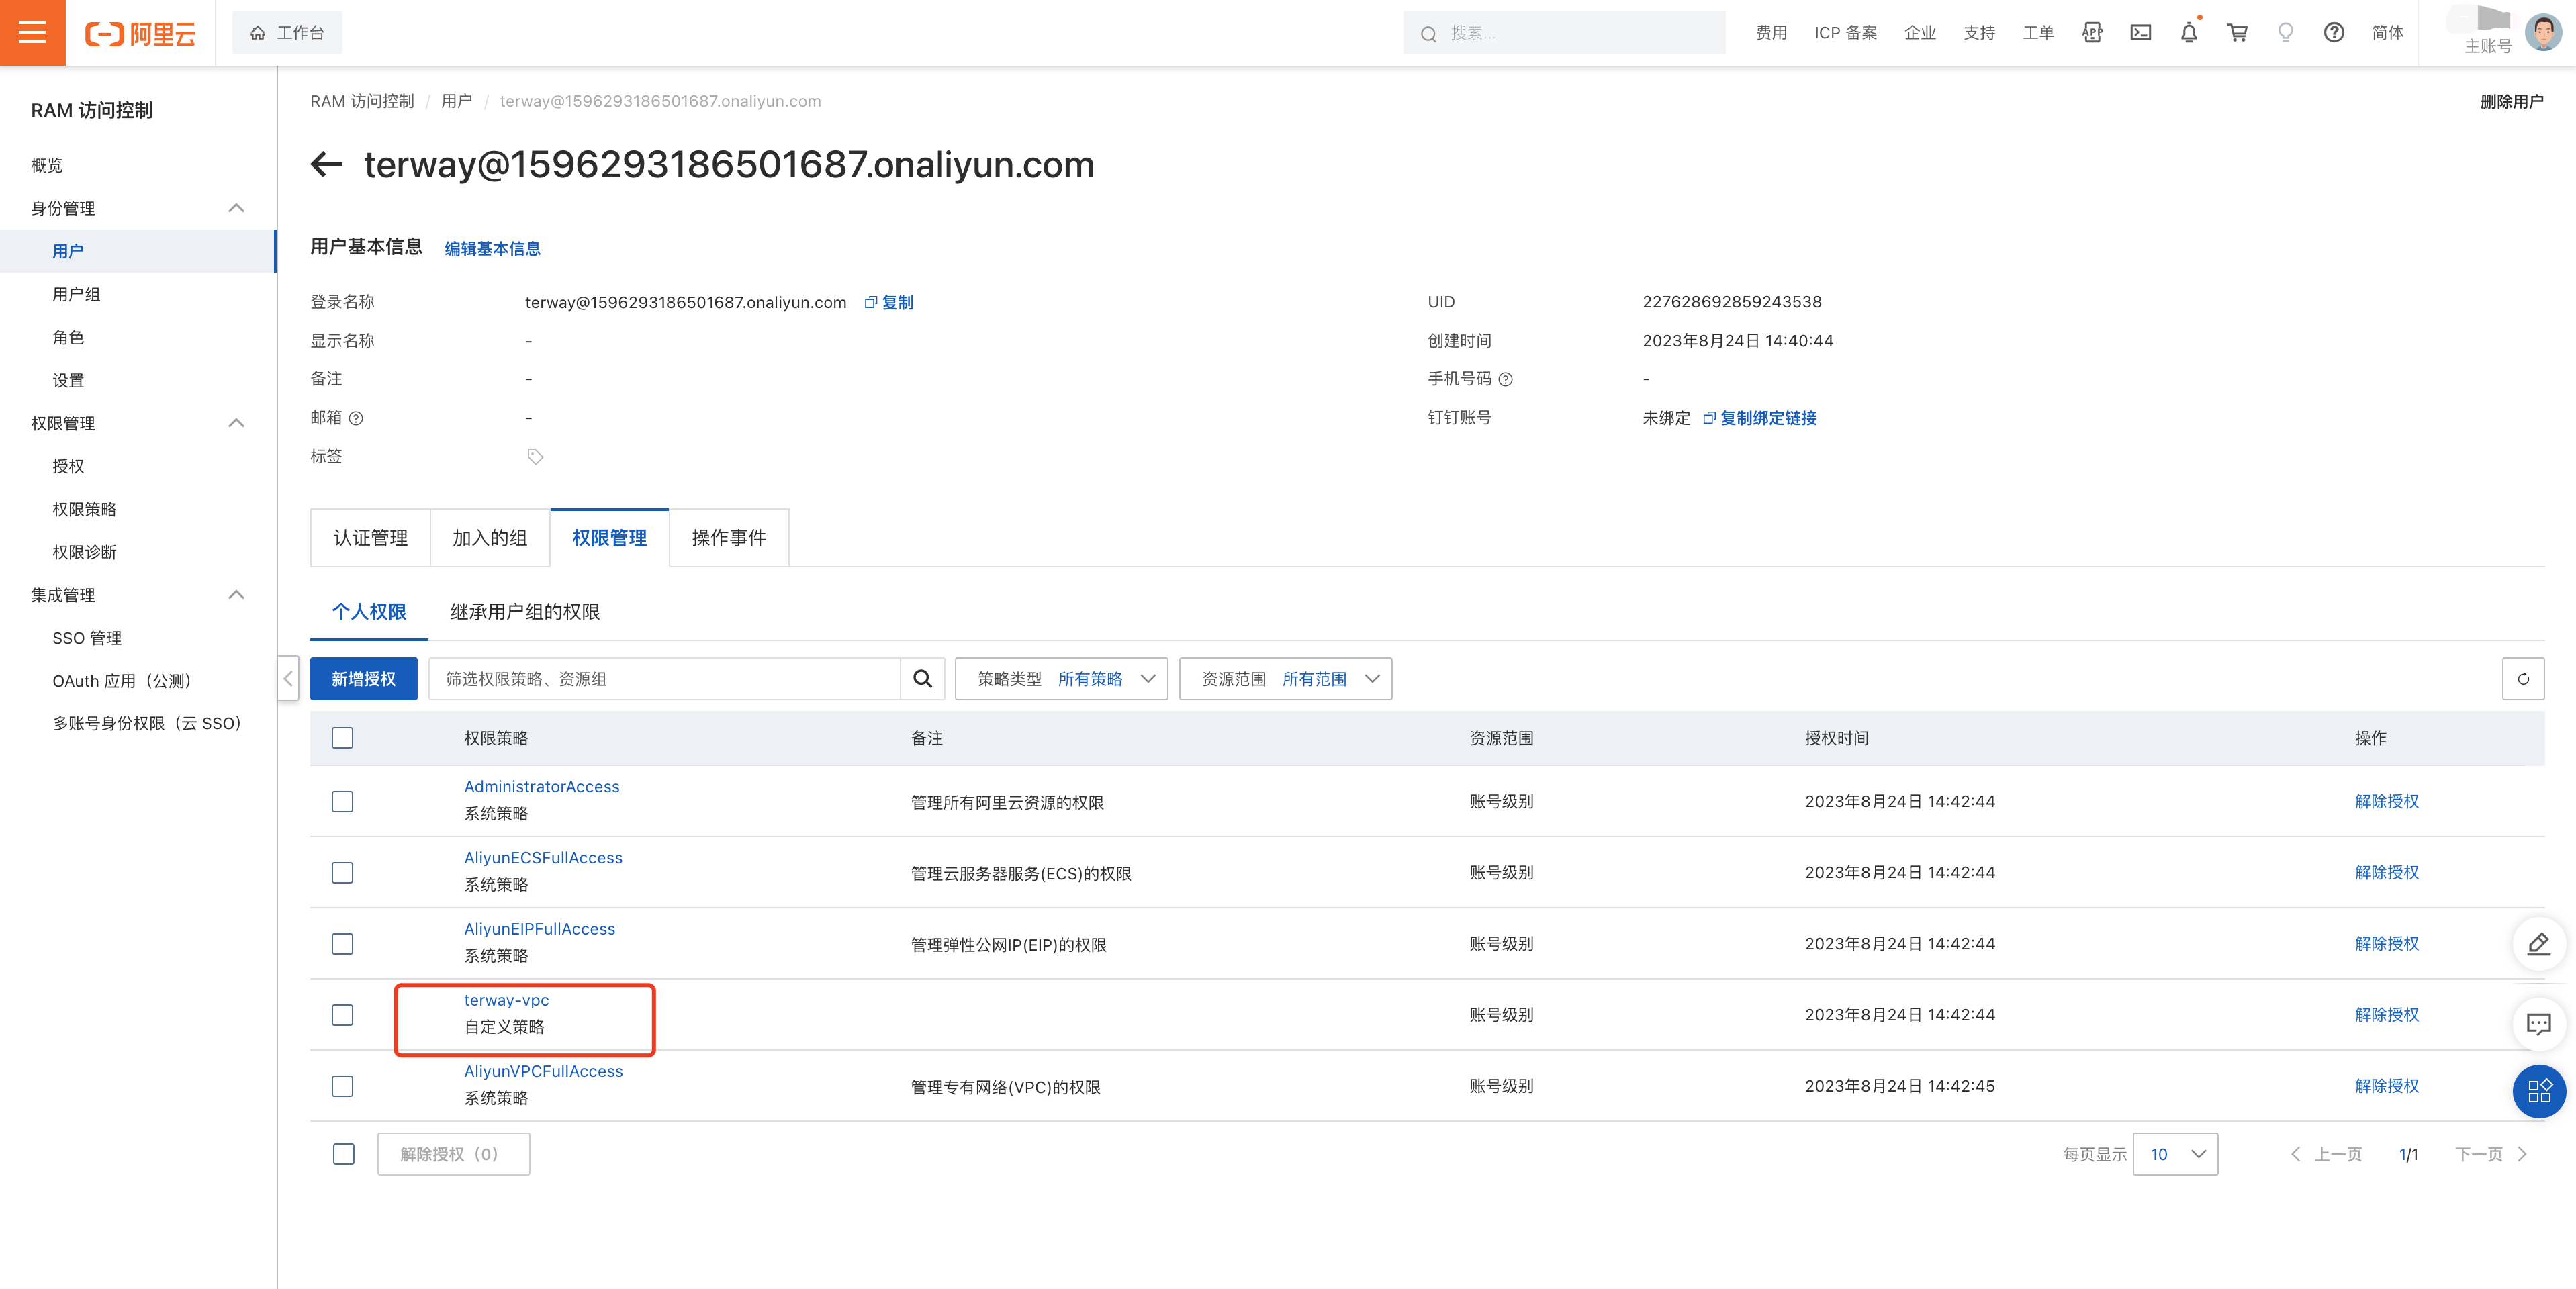
To ensure that the RAM user used in the subsequent steps has sufficient permissions, grant the RAM user the AdministratorAccess and AliyunSLBFullAccess permissions.
Once created, bind the custom permission policy to the user or user group:
Finally, create an AccessKey and save the
access_secretandaccess_key, as you will need them during the Terway installation. -
Install Terway CNI Plugin.
Before installation, update the configMap of eni-config in the deployment file:
- Update the
access_secretandaccess_key - Update the vswitches to determine the virtual switch responsible for assigning Pod addresses in ENI mode. The format is: "vswitches": {"cn-chengdu-a":["vsw-xxxx"]}, representing a list of virtual switches in a specific availability zone.
- Update the security_group by providing the security group ID for cluster-wide effect.
- Ensure that service_cidr matches the cluster's service_subnet.
Run the installation:
- Update the
Install the CCM Component and Publish VPC Routes
The CCM component is used to publish Pod-to-Pod routes across nodes and implement LoadBalancer Service:
-
Install the configMap cloud-config for CCM. Encode the access credentials using base64:
$ accessKeyIDBase64=`echo -n "$ACCESS_KEY_ID" |base64 -w 0` $ accessKeySecretBase64=`echo -n "$ACCESS_KEY_SECRET"|base64 -w 0` cat <<EOF | kubectl apply -f - apiVersion: v1 kind: ConfigMap metadata: name: cloud-config namespace: kube-system data: cloud-config.conf: |- { "Global": { "accessKeyID": "$accessKeyIDBase64", "accessKeySecret": "$accessKeySecretBase64" } } EOF -
Install the CCM component with the manifests provided in cloud-controller-manager.yaml.
Note
It requires to modify
cluster_cidrto match your actual podSubnet(10.244.0.0/16).Run the installation:
-
After installation, verify that the VPC routes have synchronized by checking the Alibaba Cloud management console:

The next hop for accessing Pod subnets points to the node.
Verification
VPC Mode
To verify the installation by creating a test application:
cat << EOF | kubectl apply -f -
apiVersion: apps/v1
kind: Deployment
metadata:
  name: dao2048
spec:
  replicas: 2
  selector:
    matchLabels:
      app: dao-2048
  template:
    metadata:
      labels:
        app: dao-2048
    spec:
      containers:
      - image: ghcr.m.daocloud.io/daocloud/dao-2048:v1.2.0
        imagePullPolicy: IfNotPresent
        name: dao-2048
        resources:
          limits:
            cpu: 250m
            memory: 512Mi
          requests:
            cpu: 250m
            memory: 512Mi
EOF
After creation, the tests show normal network connectivity, including Pod -> Pod, Pod -> Service, nodePort, LoadBalancer Service. and network policies and other features are working as expected.
ENI Mode
In VPC mode, Pods obtain their IP addresses from the virtual subnet without using any ENIs. If you want a Pod to exclusively use an ENI, you can achieve this with the following way in VPC mode:
cat << EOF | kubectl apply -f -
apiVersion: apps/v1
kind: Deployment
metadata:
  name: dao2048-eni
spec:
  replicas: 2
  selector:
    matchLabels:
      app: dao-2048
  template:
    metadata:
      labels:
        app: dao-2048
    spec:
      containers:
      - image: ghcr.m.daocloud.io/daocloud/dao-2048:v1.2.0
        imagePullPolicy: IfNotPresent
        name: dao-2048
        resources:
          limits:
            aliyun/eni: 1
            cpu: 250m
            memory: 512Mi
          requests:
            aliyun/eni: 1
            cpu: 250m
            memory: 512Mi
EOF
Note
Declare aliyun/eni: 1 in the resources configuration to make the Pod exclusively use the ENI network card.
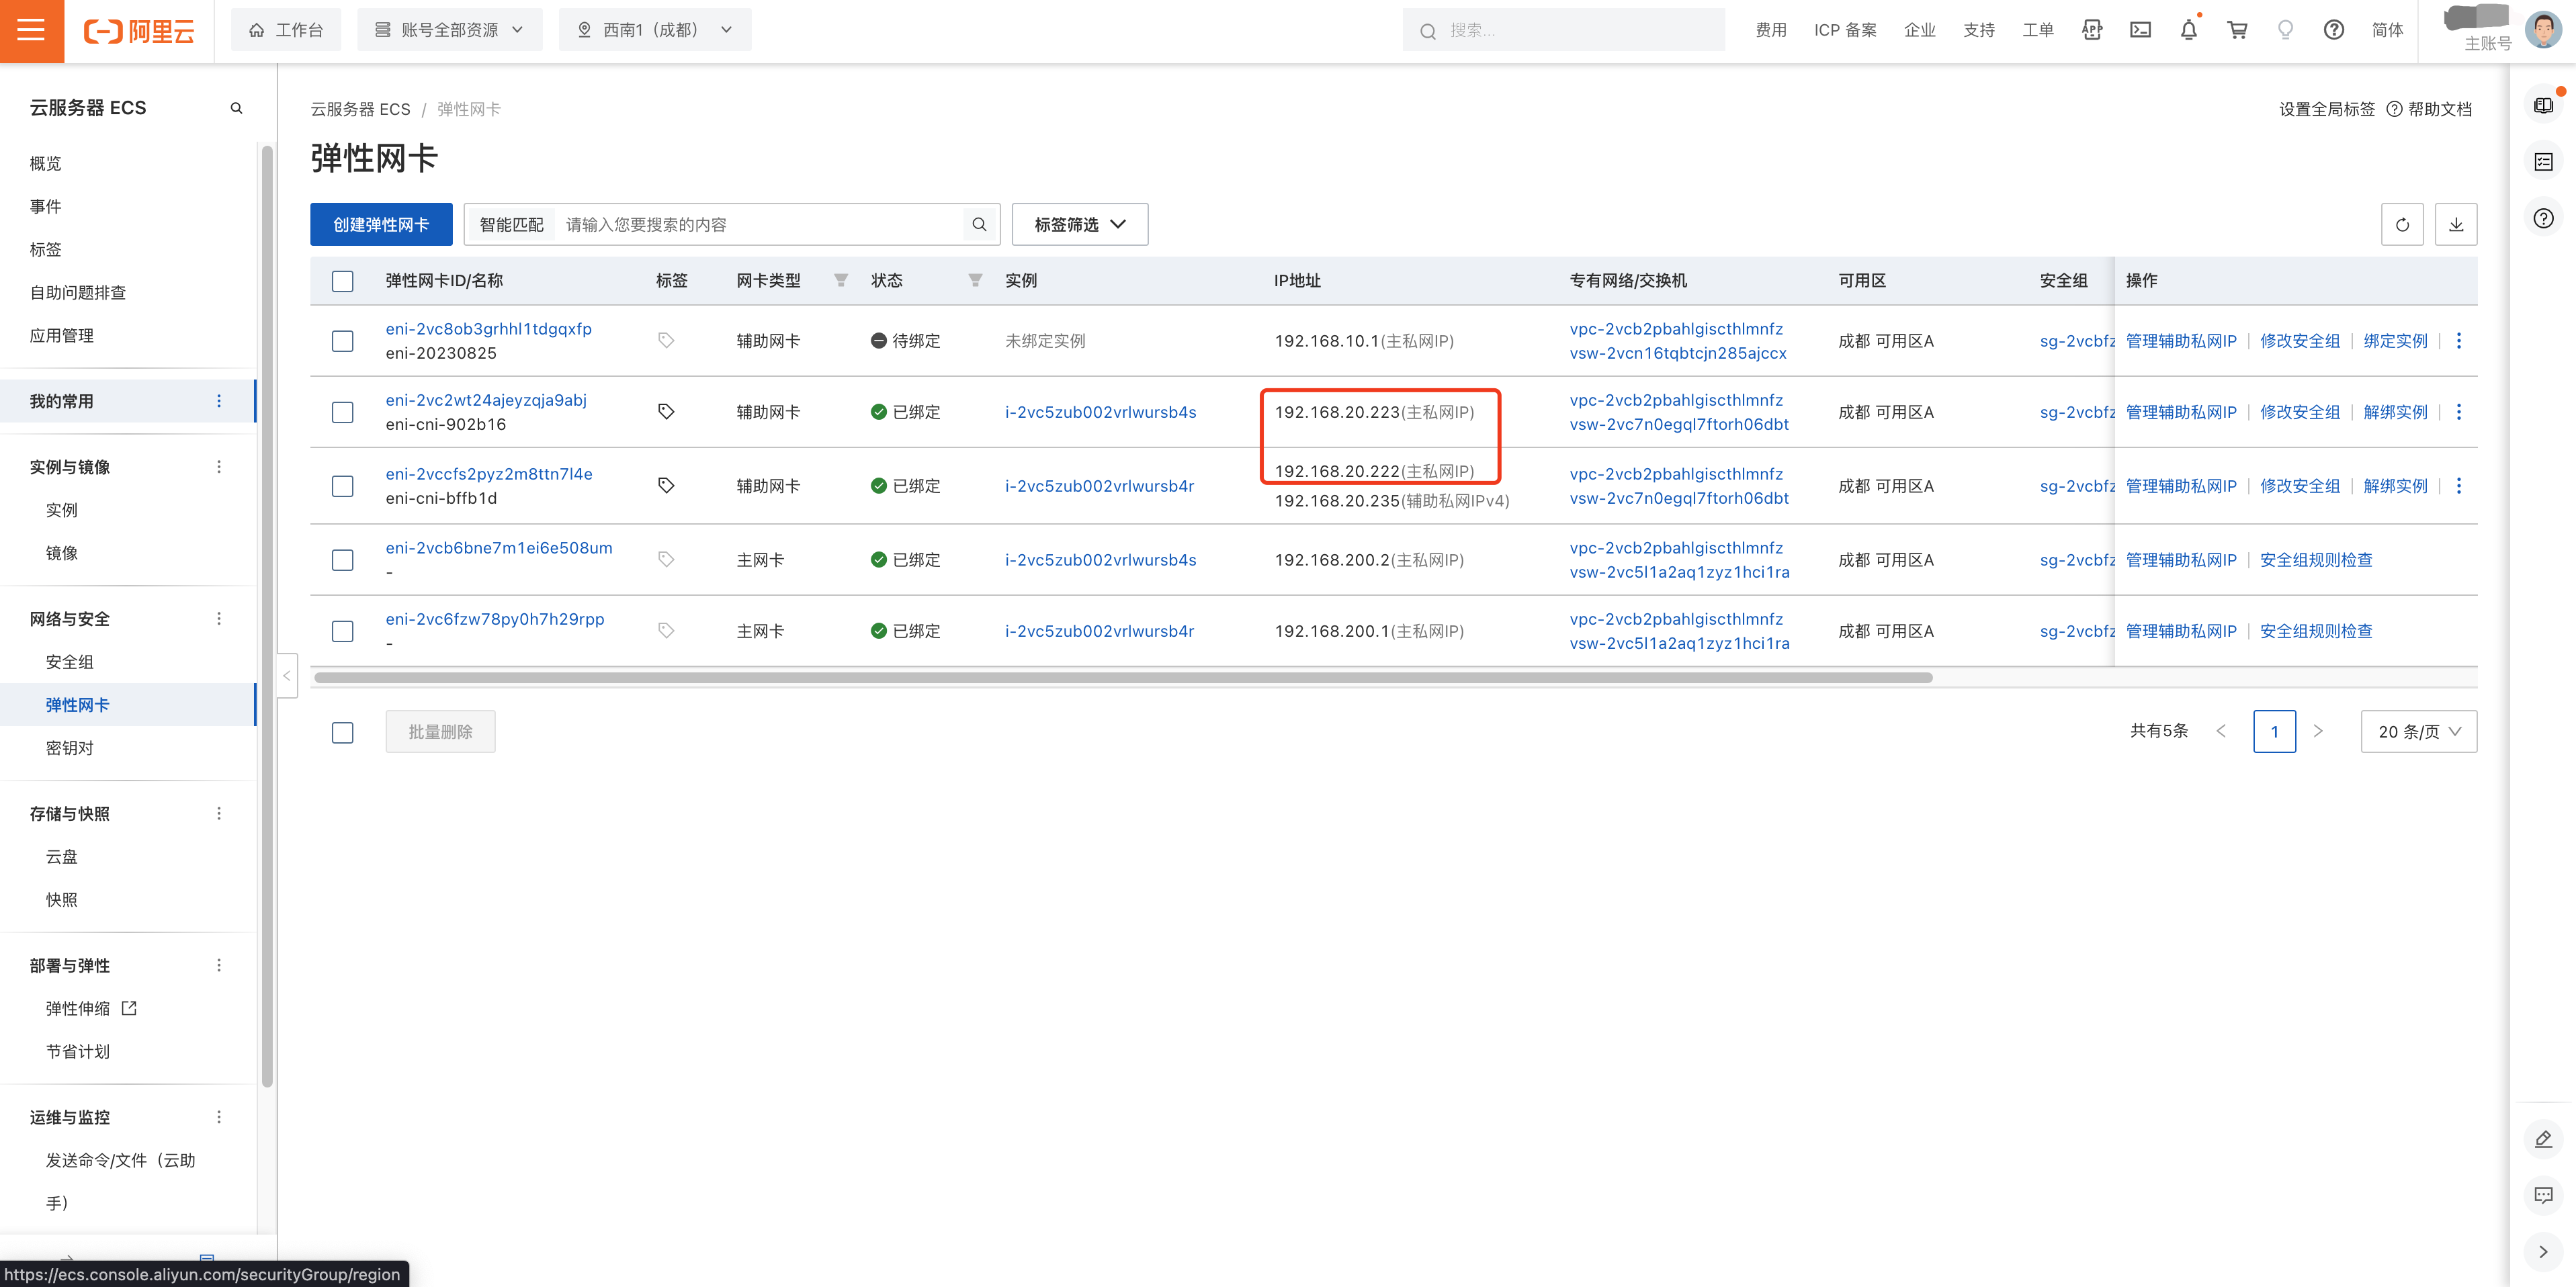
$ kubectl get po -o wide | grep eni
dao2048-eni-7f85b8dcc4-6v97q   1/1     Running   0              15s   192.168.20.222   cn-chengdu.i-2vcxxxxxxxx   <none>           <none>
dao2048-eni-7f85b8dcc4-mvjbs   1/1     Running   0              15s   192.168.20.223   cn-chengdu.i-2vcxxxxxxxx   <none>           <none>
You will notice that the Pod's IP address is in the same subnet as the node, belonging to the same VPC network card, and its IP is the primary private IP of the ENI.
During testing, it was observed that setting the ExternalTrafficPolicy to Local for LoadBalancer/NodePort Services may cause communication issues. Refer to the issue for details.
ENIIP Mode (Limited support for self-built clusters)
- Installation of the Veth mode might fail in self-built clusters. Refer to #Issue 524 for details. Therefore, Veth mode is not recommended.
- After installing the ipvlan mode in self-built clusters, various communication issues may arise, such as Node being unable to access Pods or LoadBalancer Service. Refer to #Discussion 306 for more information. Therefore, this mode is not recommended.