Cilium Network Communication Acceleration
Introduction
This page describes how to configure Cilium's communication acceleration capability. There are two optional configuration methods.
Prerequisites
Please make sure the Linux Kernel version >= 4.9.17 with 5.10+ recommended. To view and install the latest version, you can do the following:
-
To view the current kernel version:
-
Install the ELRepo repository, which provides the latest Linux kernel version:
-
Install the latest Linux kernel version:
kernel-mlis the latest documented version of the kernel. You can also choose another version. -
Update the GRUB configuration to use the new kernel version at boot time:
Note that manually updating the kernel may be risky and should be done with caution in production environments.
First method:configure when creating the cluster
-
Click
Container Management→Clusters. On the page ofCreate Cluster, enter the cluster'sbasic informationandnode configuration, then go toNetwork Configurationto configure as follows:
-
Select
ciliumfor the cluster's CNI plugin -
Add
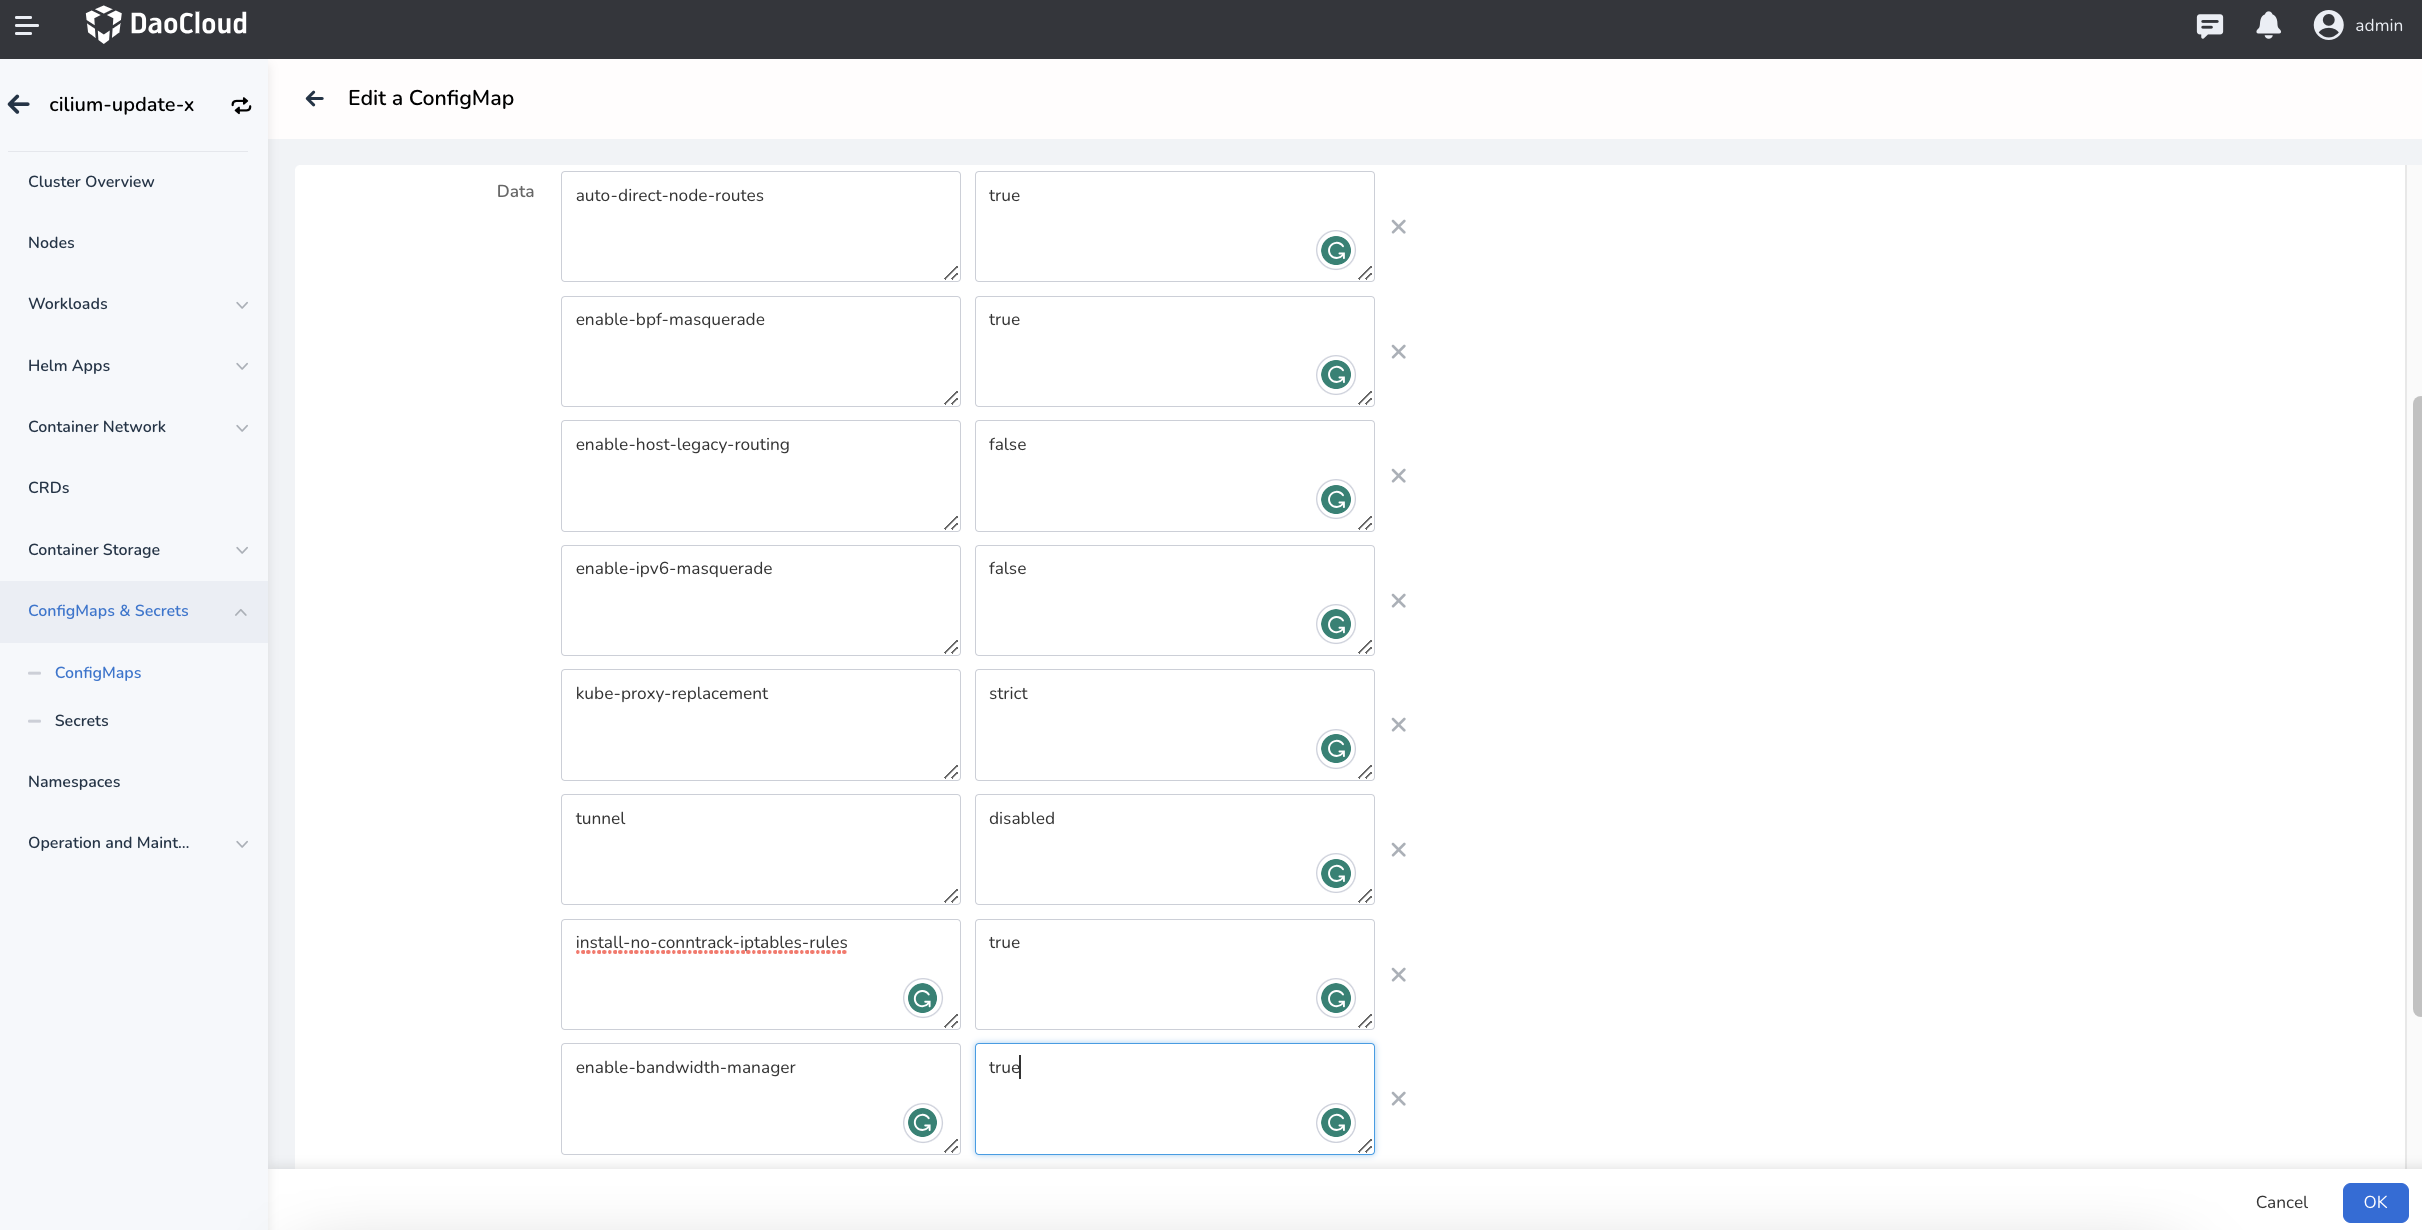
other parametersas follows:# Auto direct node routes must be set to be true, otherwise cross-node traffic cannot be routed cilium_auto_direct_node_routes: "true" # If masquerading is used, it will replace the iptables implementation based on eBPF. # Require kernel 5.10 and later. # Otherwise it will be downgraded to the iptables implementation even if enabled cilium_enable_bpf_masquerade: "true" # When doing source address translation for Pod access to outside traffic, enable it if using tunnel mode. # Disable it if BGP is used to connect to the physical network. cilium_enable_ipv6_masquerade: "false" # Disable the ability for hosts to bypass their kernel stack when processing packets to speed up data forwarding. # Enable it by default, but fallback to legacy behavior if the host kernel does not support it. cilium_enable_host_legacy_routing: "false" # Turn on bandwidth-manager to improve the performance of tcp, udp cilium_enable_bandwidth_manager: "true" # Kube-proxy replacement feature can be enabled after removing kube-proxy component cilium_kube_proxy_replacement: strict # Disable tunnel mode cilium_tunnel_mode: disabled # (optional) bbr network blocking control, with the requirement of kernel > 5.18 cilium_enable_bbr: "true" -
Use the default ConfigMaps for everything else
-
-
Click
Create Clusterto complete the creation.
Second method: modify Cilium ConfigMaps
If the cluster has been created and you need to enable acceleration parameters, you can modify the Cilium-Config file.
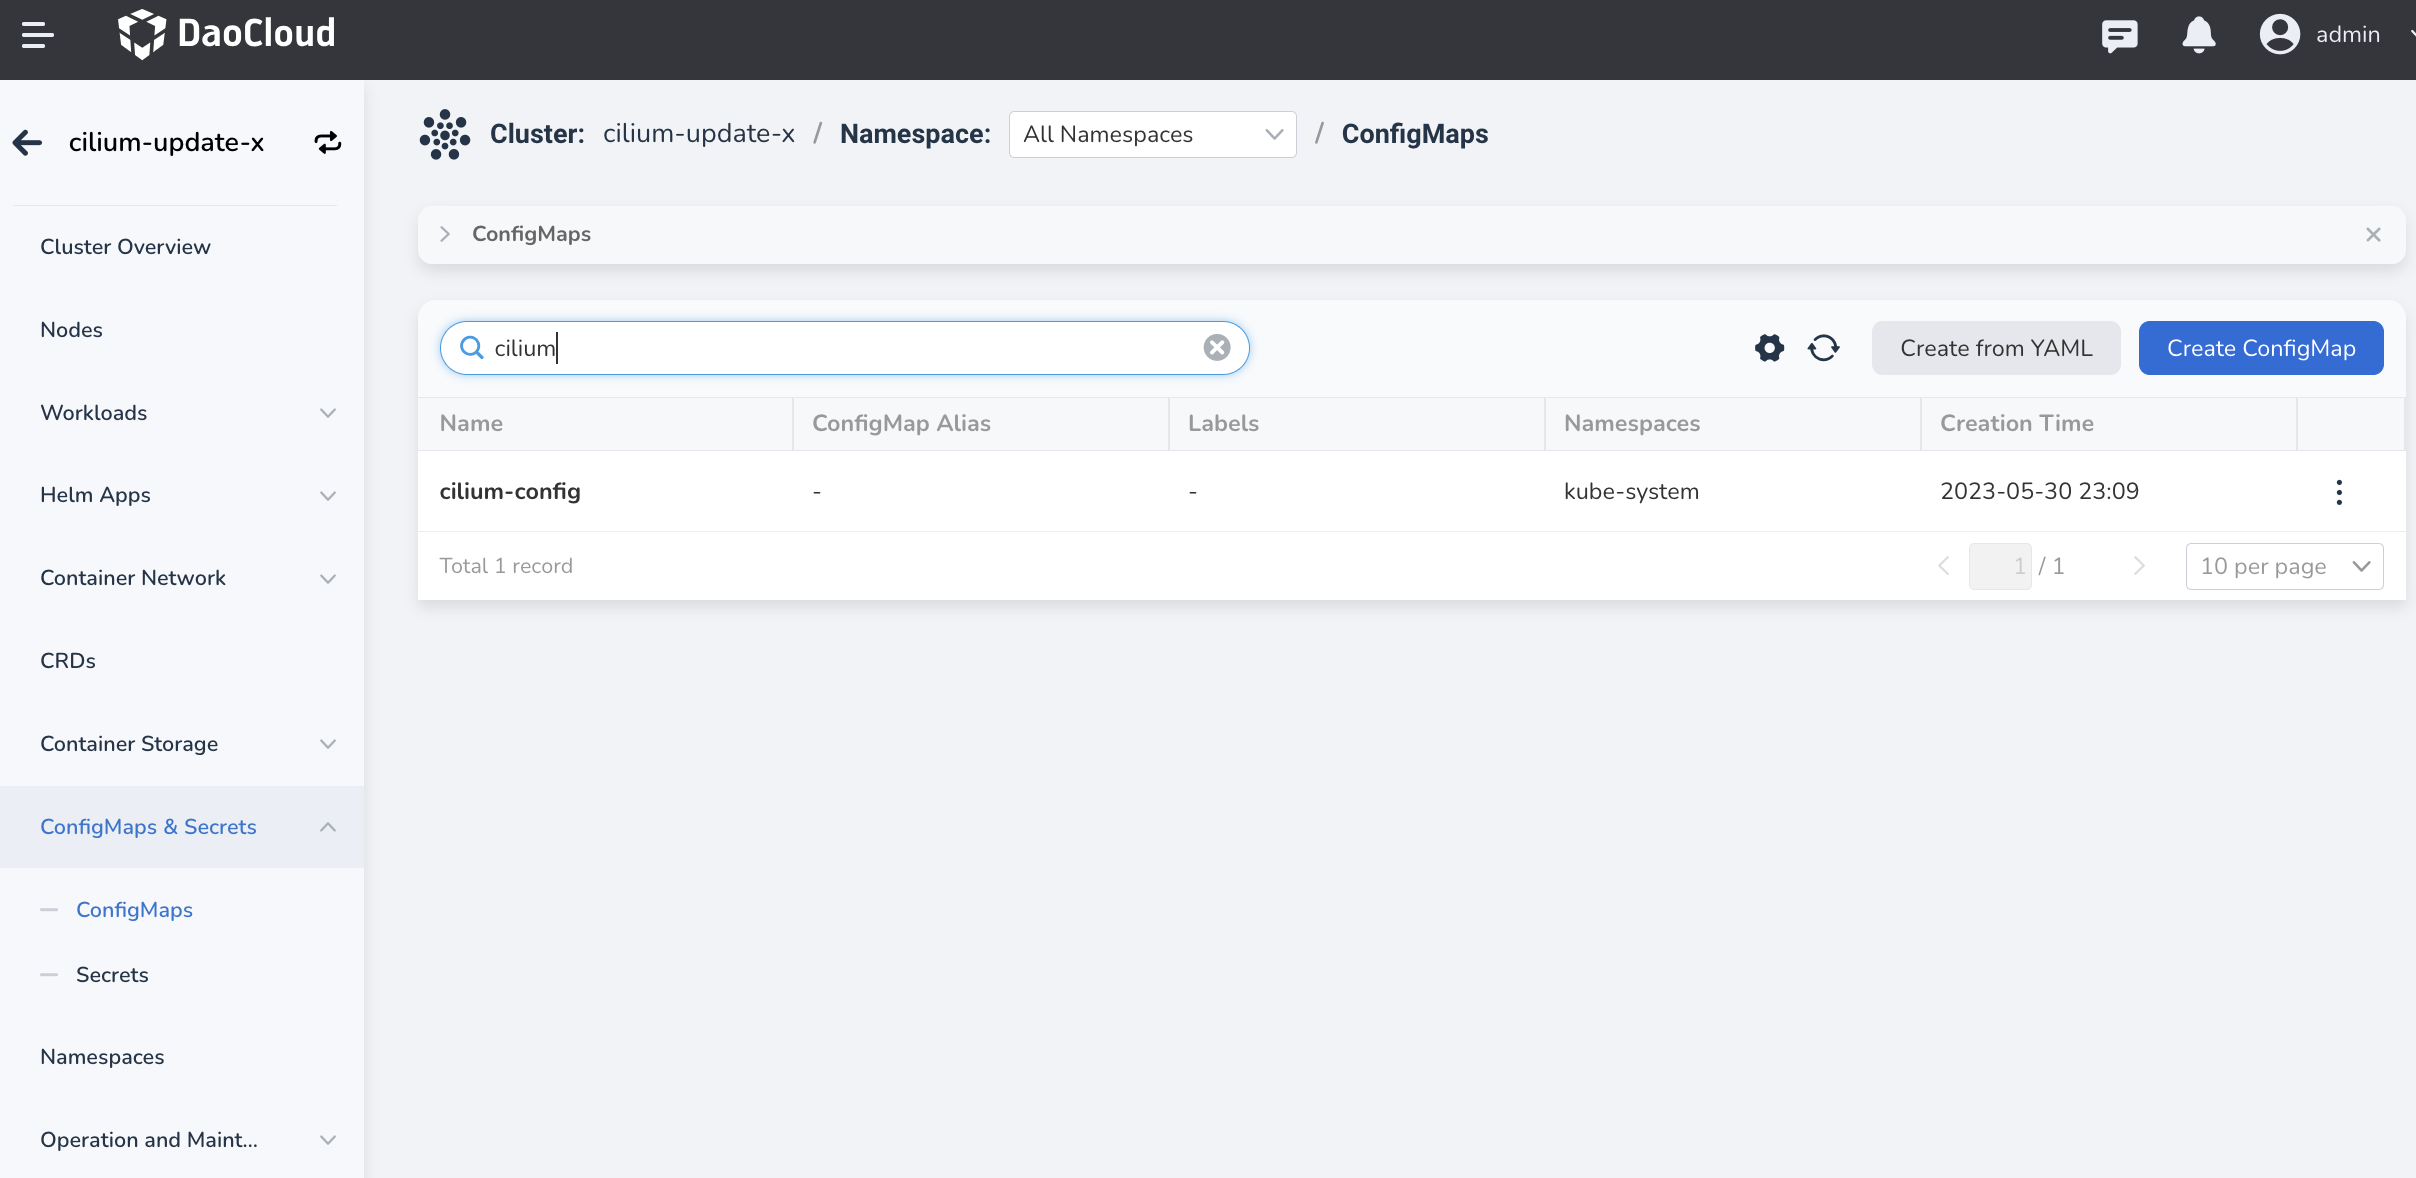
Click Container Management→ Clusters. Go to the created cluster and click ConfigMaps & Secrets. Select Config Items, find Cilium-config, and then click Edit to enter the following acceleration parameters:
Once the parameters are written, Check if the following ENV exists for cilium agent Daemonset (containers for cilium-agent), if not, you need to add it manually:
        - name: KUBERNETES_SERVICE_HOST
          value: <YOUR_K8S_APISERVER_IP
        - name: KUBERNETES_SERVICE_PORT
          value: “6443”
Restart the Cilium agent pods after adding them.