Install Multus-underlay
This page describes how to install Multus-underlay.
Prerequisites
- Default CNI: before installing Multus-underlay, you need to check if there is a default CNI for the current cluster, such as Calico or Cilium, otherwise Multus may not work.
- Spiderpool: Multus-underlay relies on Spiderpool as
ipam. To installSpiderpool, please refer to Install Spiderpool. - To install SR-IOV CNI, verify that the node is a physical host and that the node has a physical NIC that supports SR-IOV. If the node is a VM or does not have an SR-IOV-capable NIC, then SR-IOV will not work. Refer to sriov-device-plugin for details.
- It is not recommended to install both MacVLAN and SR-IOV.
How to install Multus-underlay
Make sure your cluster is successfully connected to the container management platform, and then perform the following steps to first install Multus-underlay.
-
Click
Container Management->Clustersin the left navigation bar, then find the cluster name where you want to install Multus-underlay. Then, in the left navigation bar, selectHelm Apps->Helm Charts, find and clickmultus-underlay.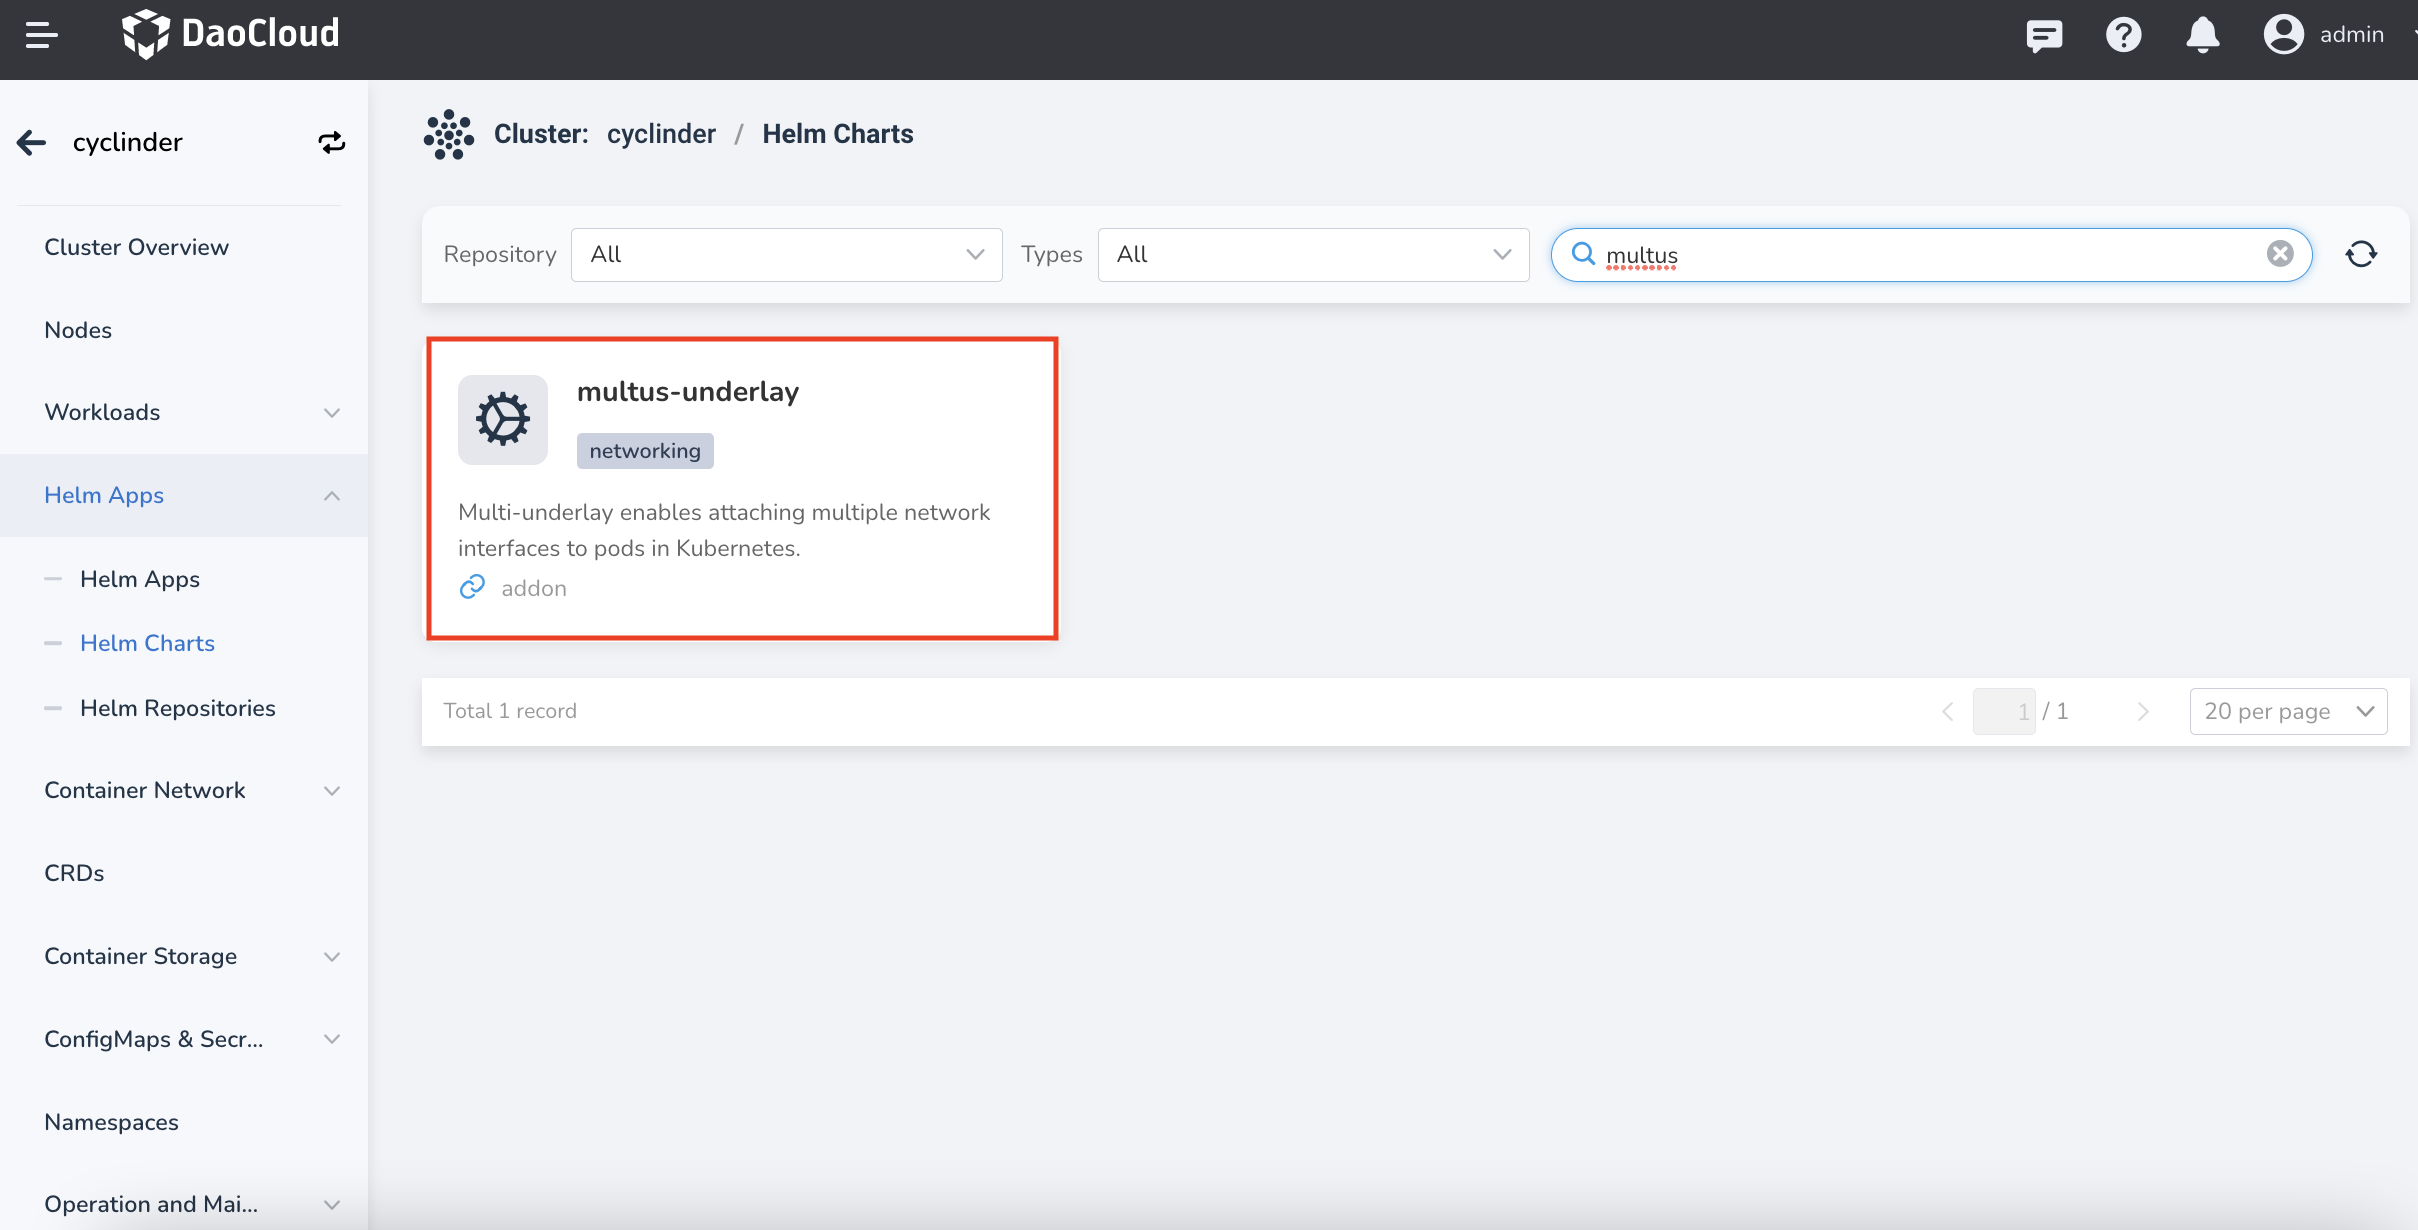
-
Go to the installation screen and fill in the basic configuration information. Select
kube-systemfor the namespace, and enableWait.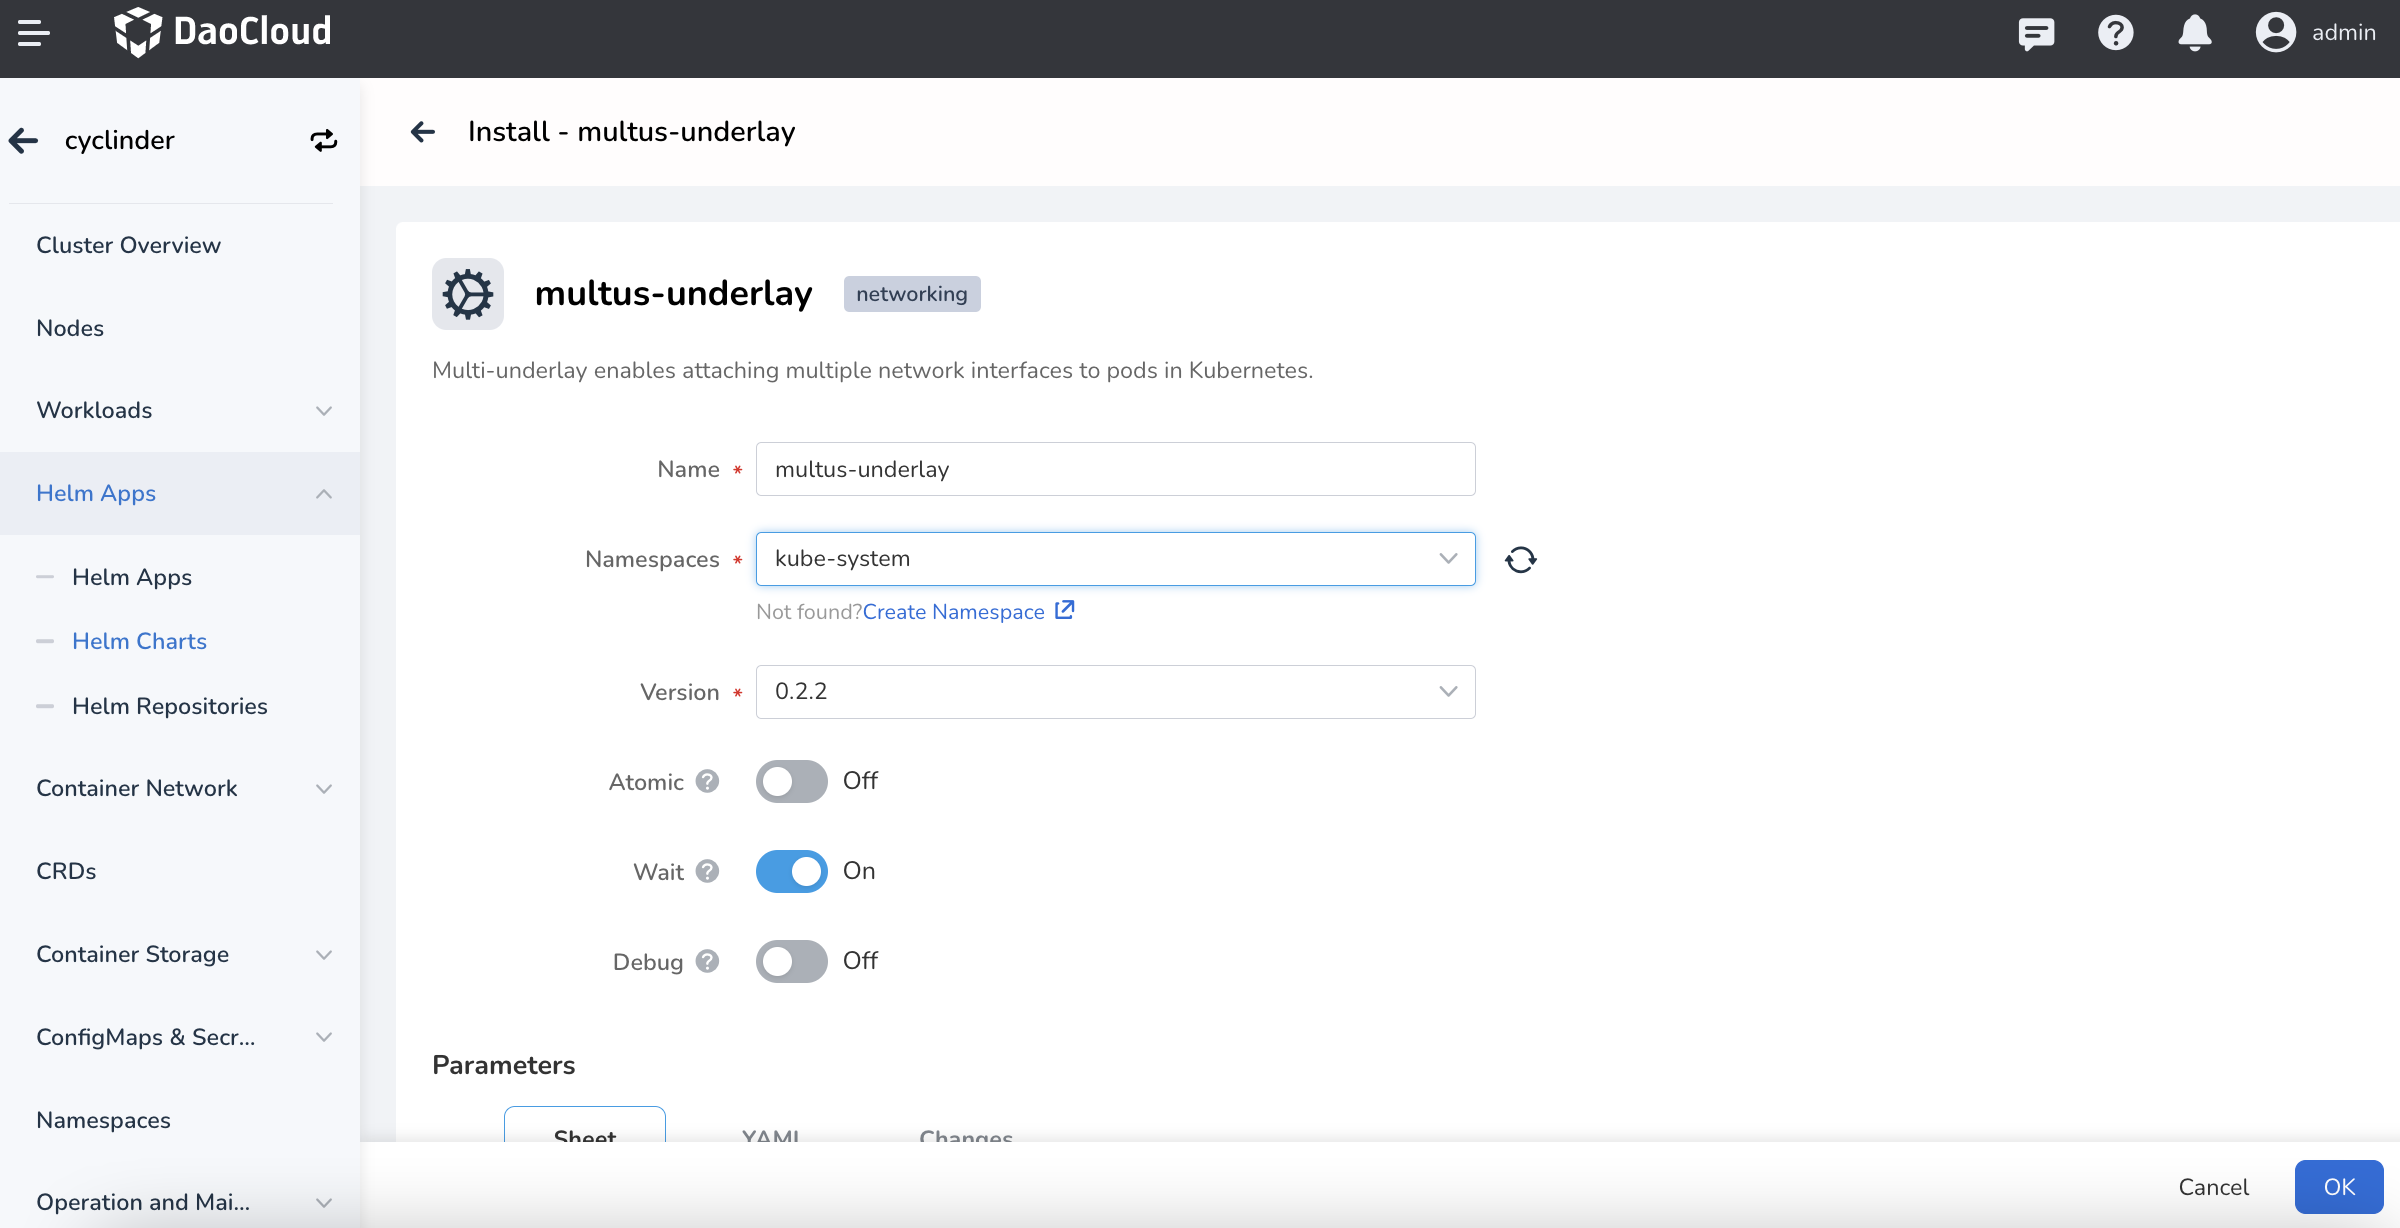
-
Set Multus as the default CNI:
Before installing Multus, you must install a CNI as the default CNI. Make sure that the Value selected must be the same as the default CNI currently installed in the cluster.
Note
If the cluster is currently installed via kubean, then the value is either calico or cilium. Or by looking at the host:
/etc/cni/net.d/path, the Value corresponding to thenamekey of the first CNI profile in dictionary order is the default CNI. For example:root@master:~# ls /etc/cni/net.d/ 10-calico.conflist calico-kubeconfig root@master:~# cat /etc/cni/net.d/10-calico.conflist { "name": "k8s-pod-network". "cniVersion": "0.3.1". ...If the value of
nameisk8s-pod-network, thenk8s-pod-networkshould be selected here.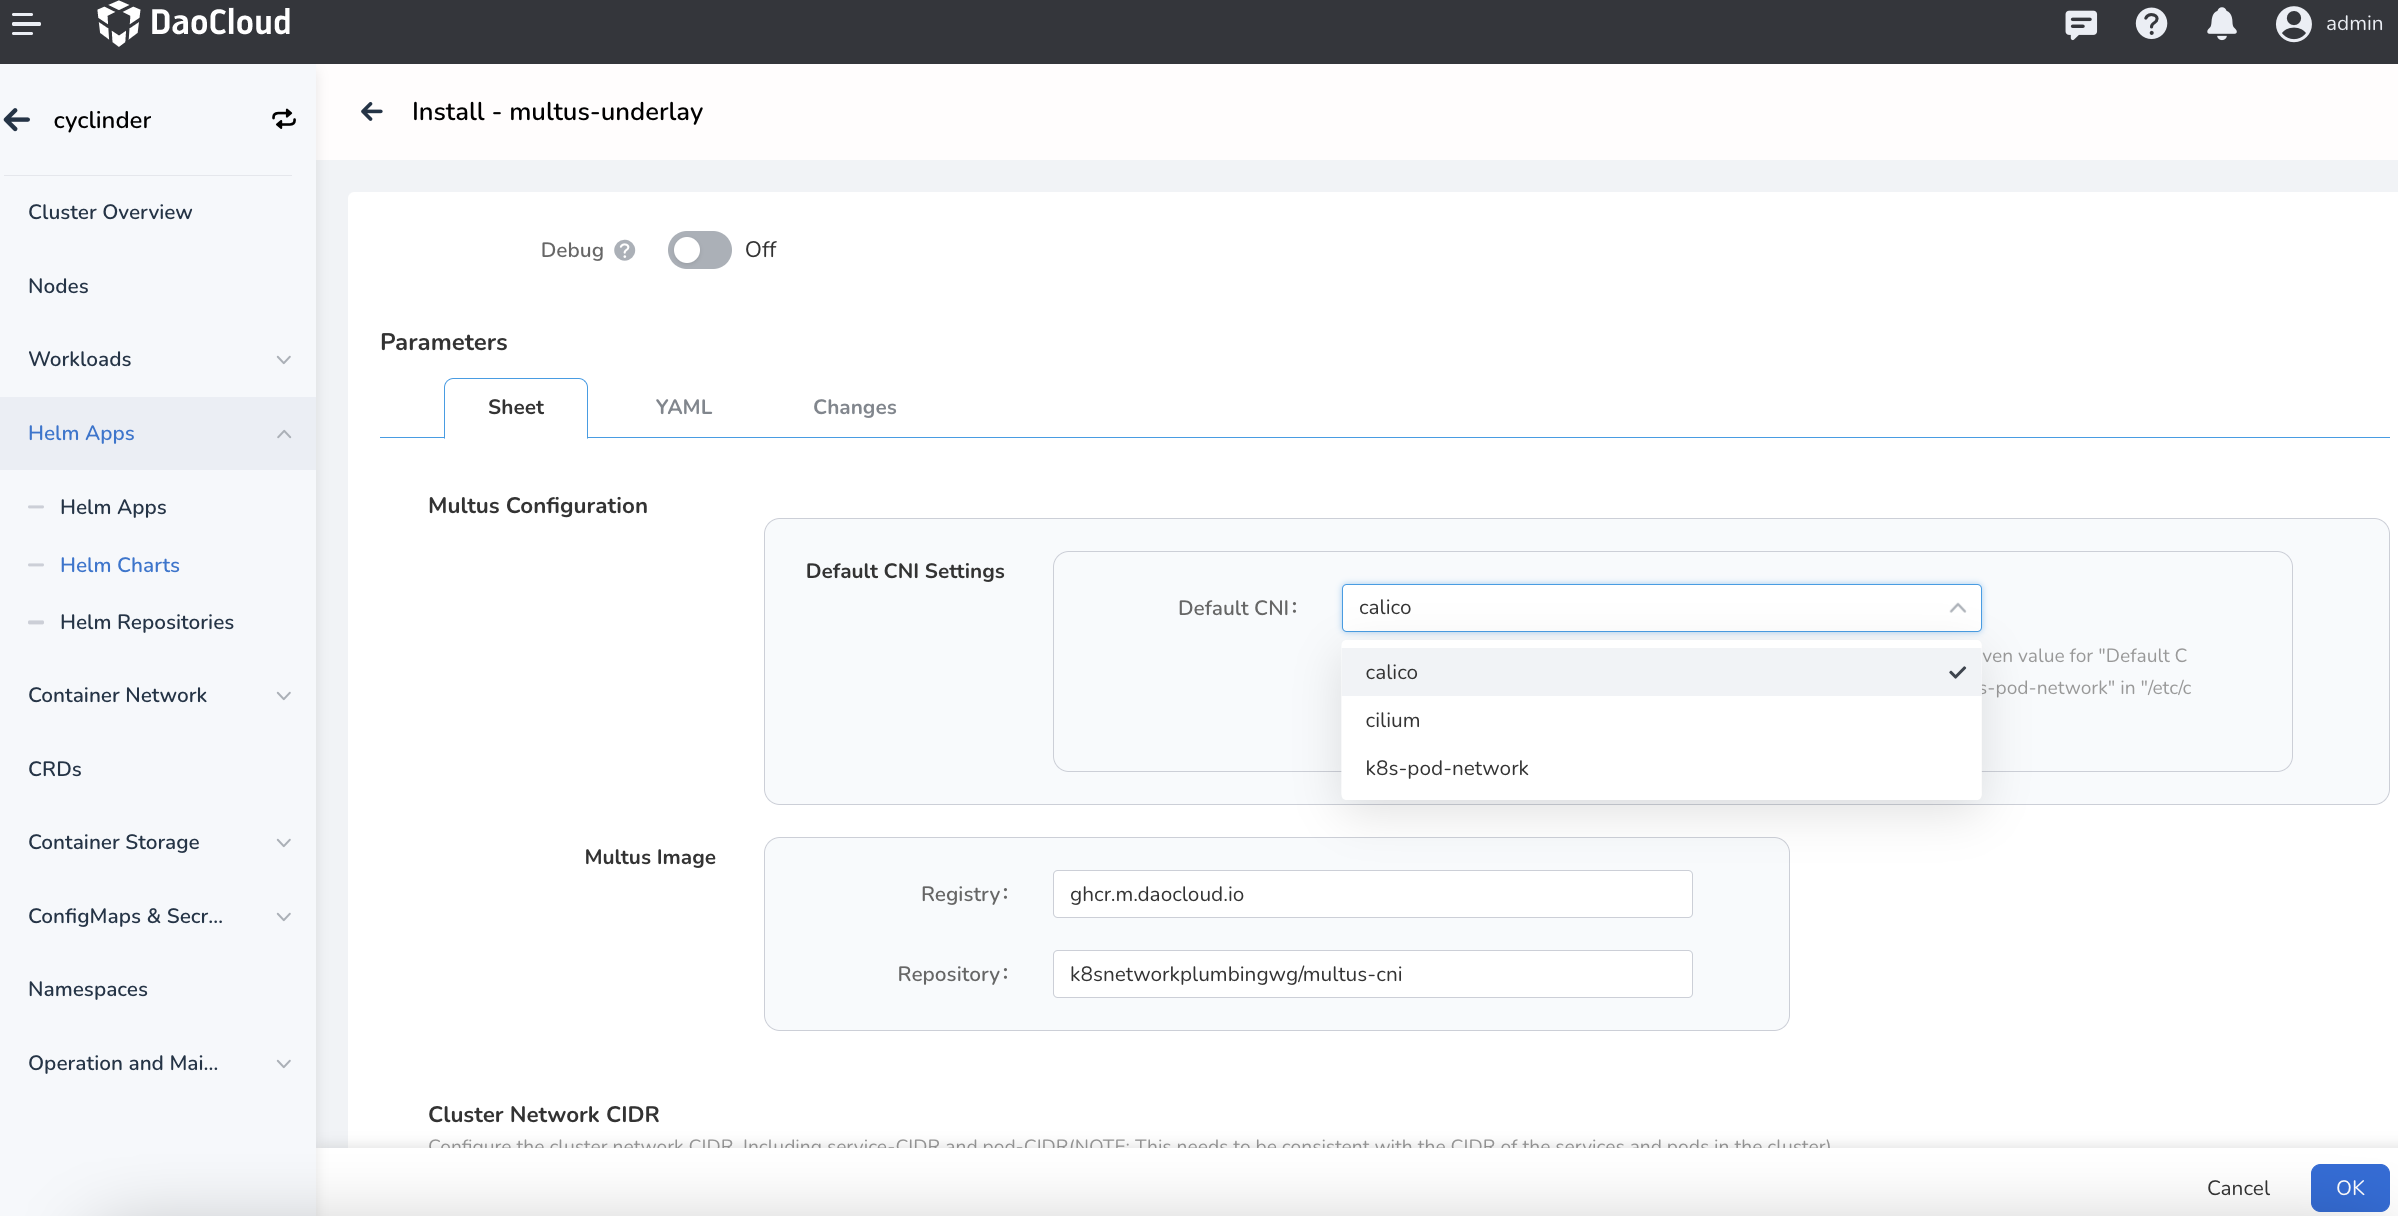
If the current cluster is a third-party cluster with Calico as CNI, thenk8s-pod-networkshould be selected here. Again, this can be confirmed by looking at the/etc/cni/net.dfile on the host. -
Configure the CIDR of the current cluster Service and Pod.
The purpose of this step is to tell Meta-Plugins the CIDR of the cluster and Meta-Plugins will create the corresponding routing rules to solve the cluster east-west communication problem for Underlay CNI.
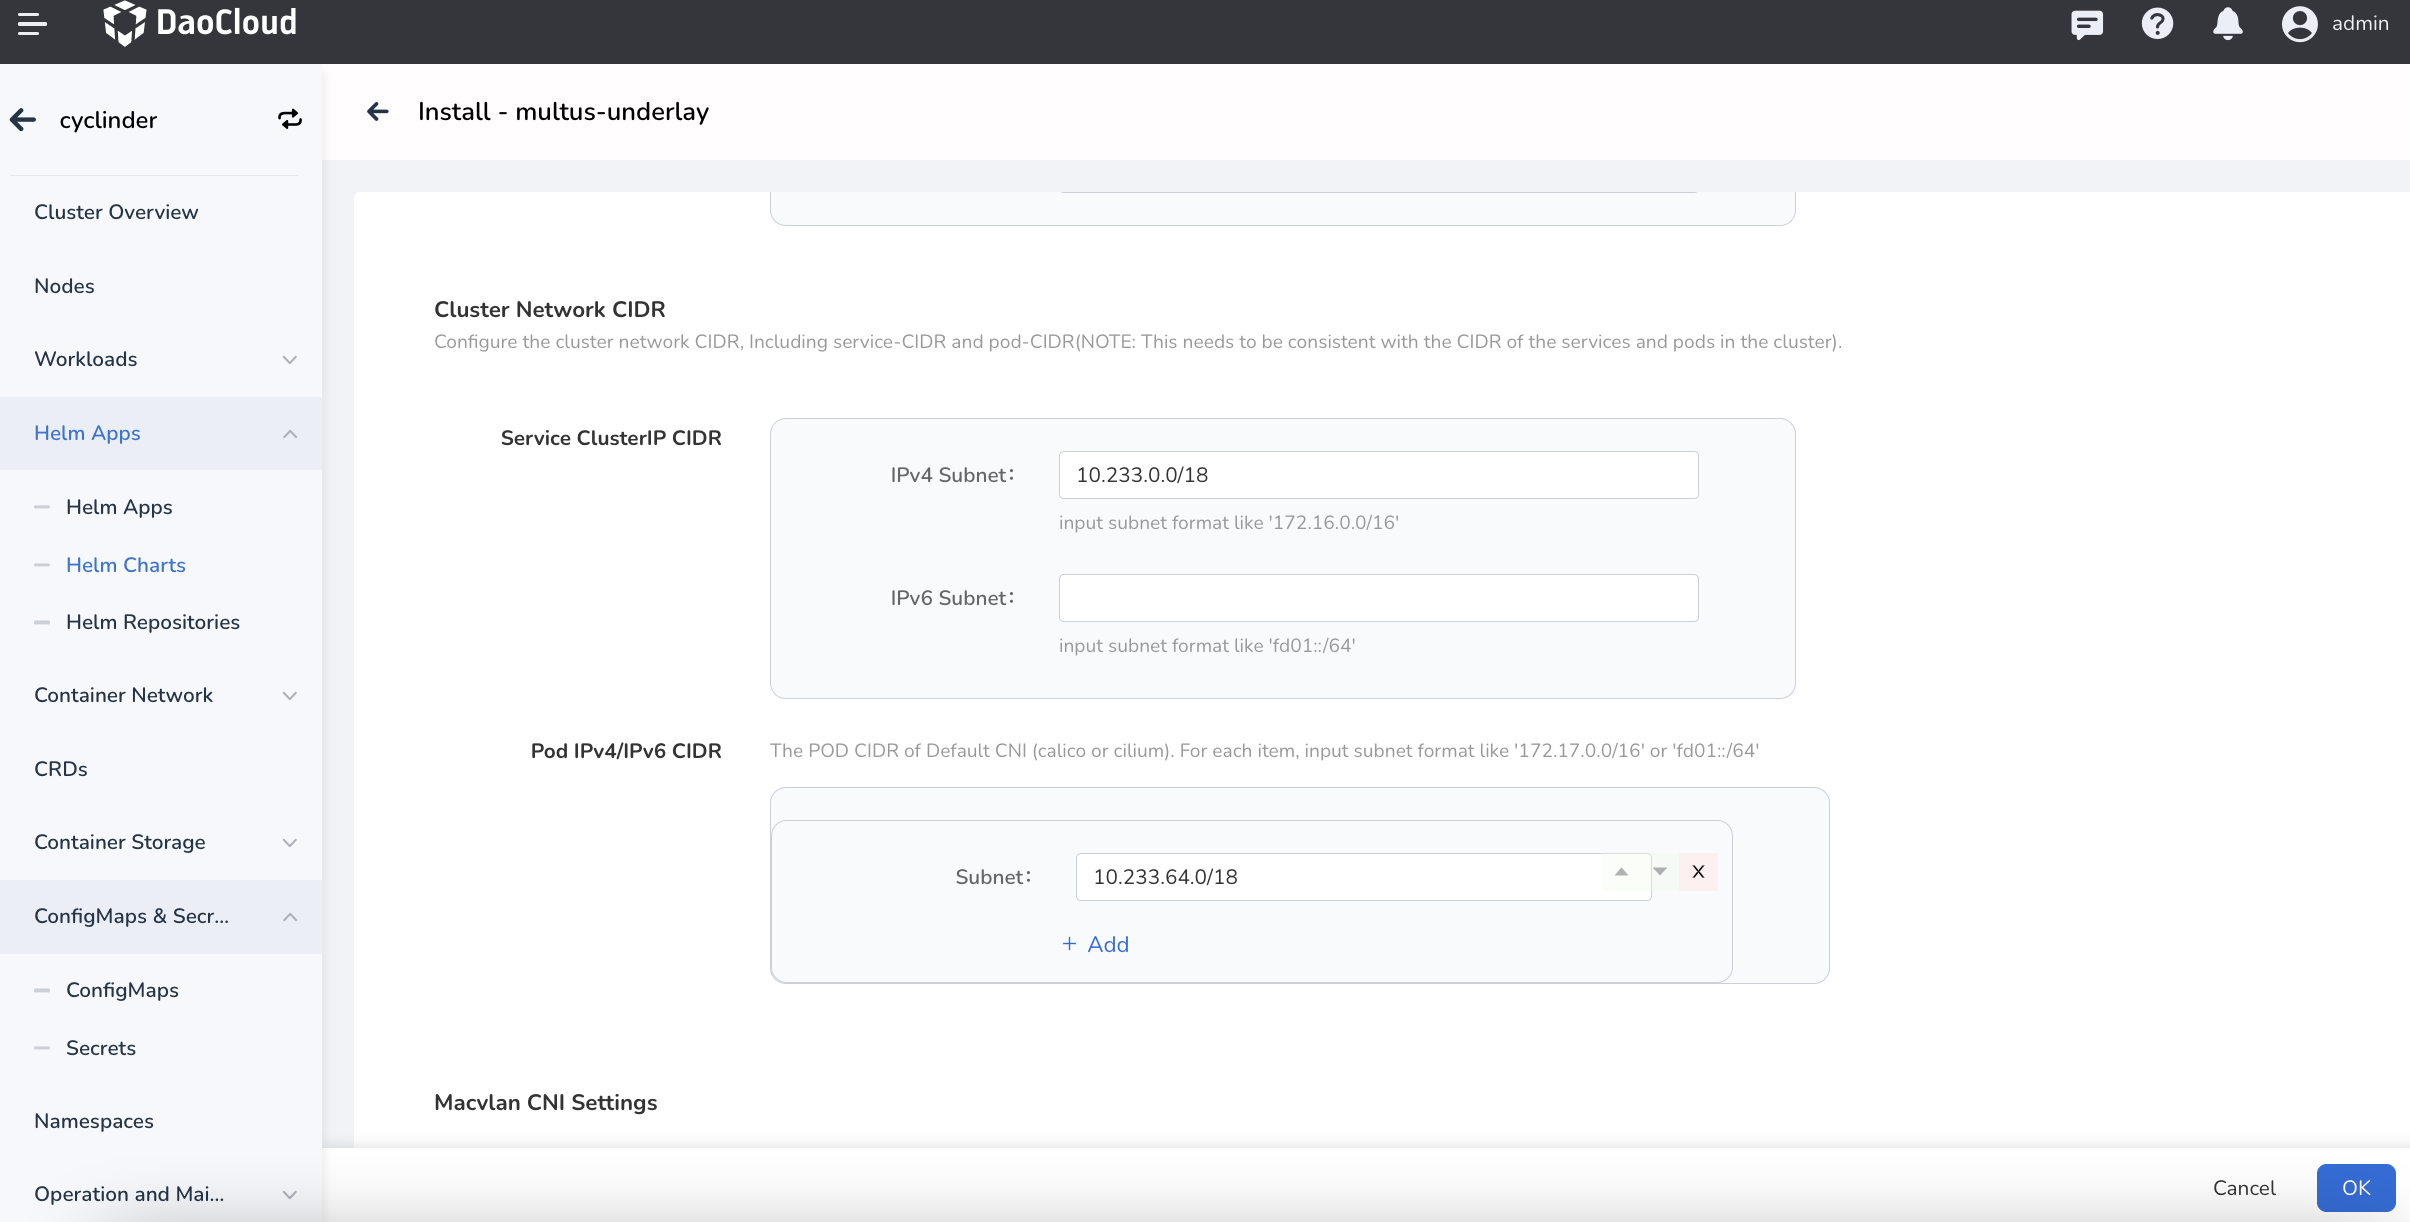
The CIDRs of the Services and Pods in the current cluster can be obtained by looking at
configMap:kube-system/kubeadm-config: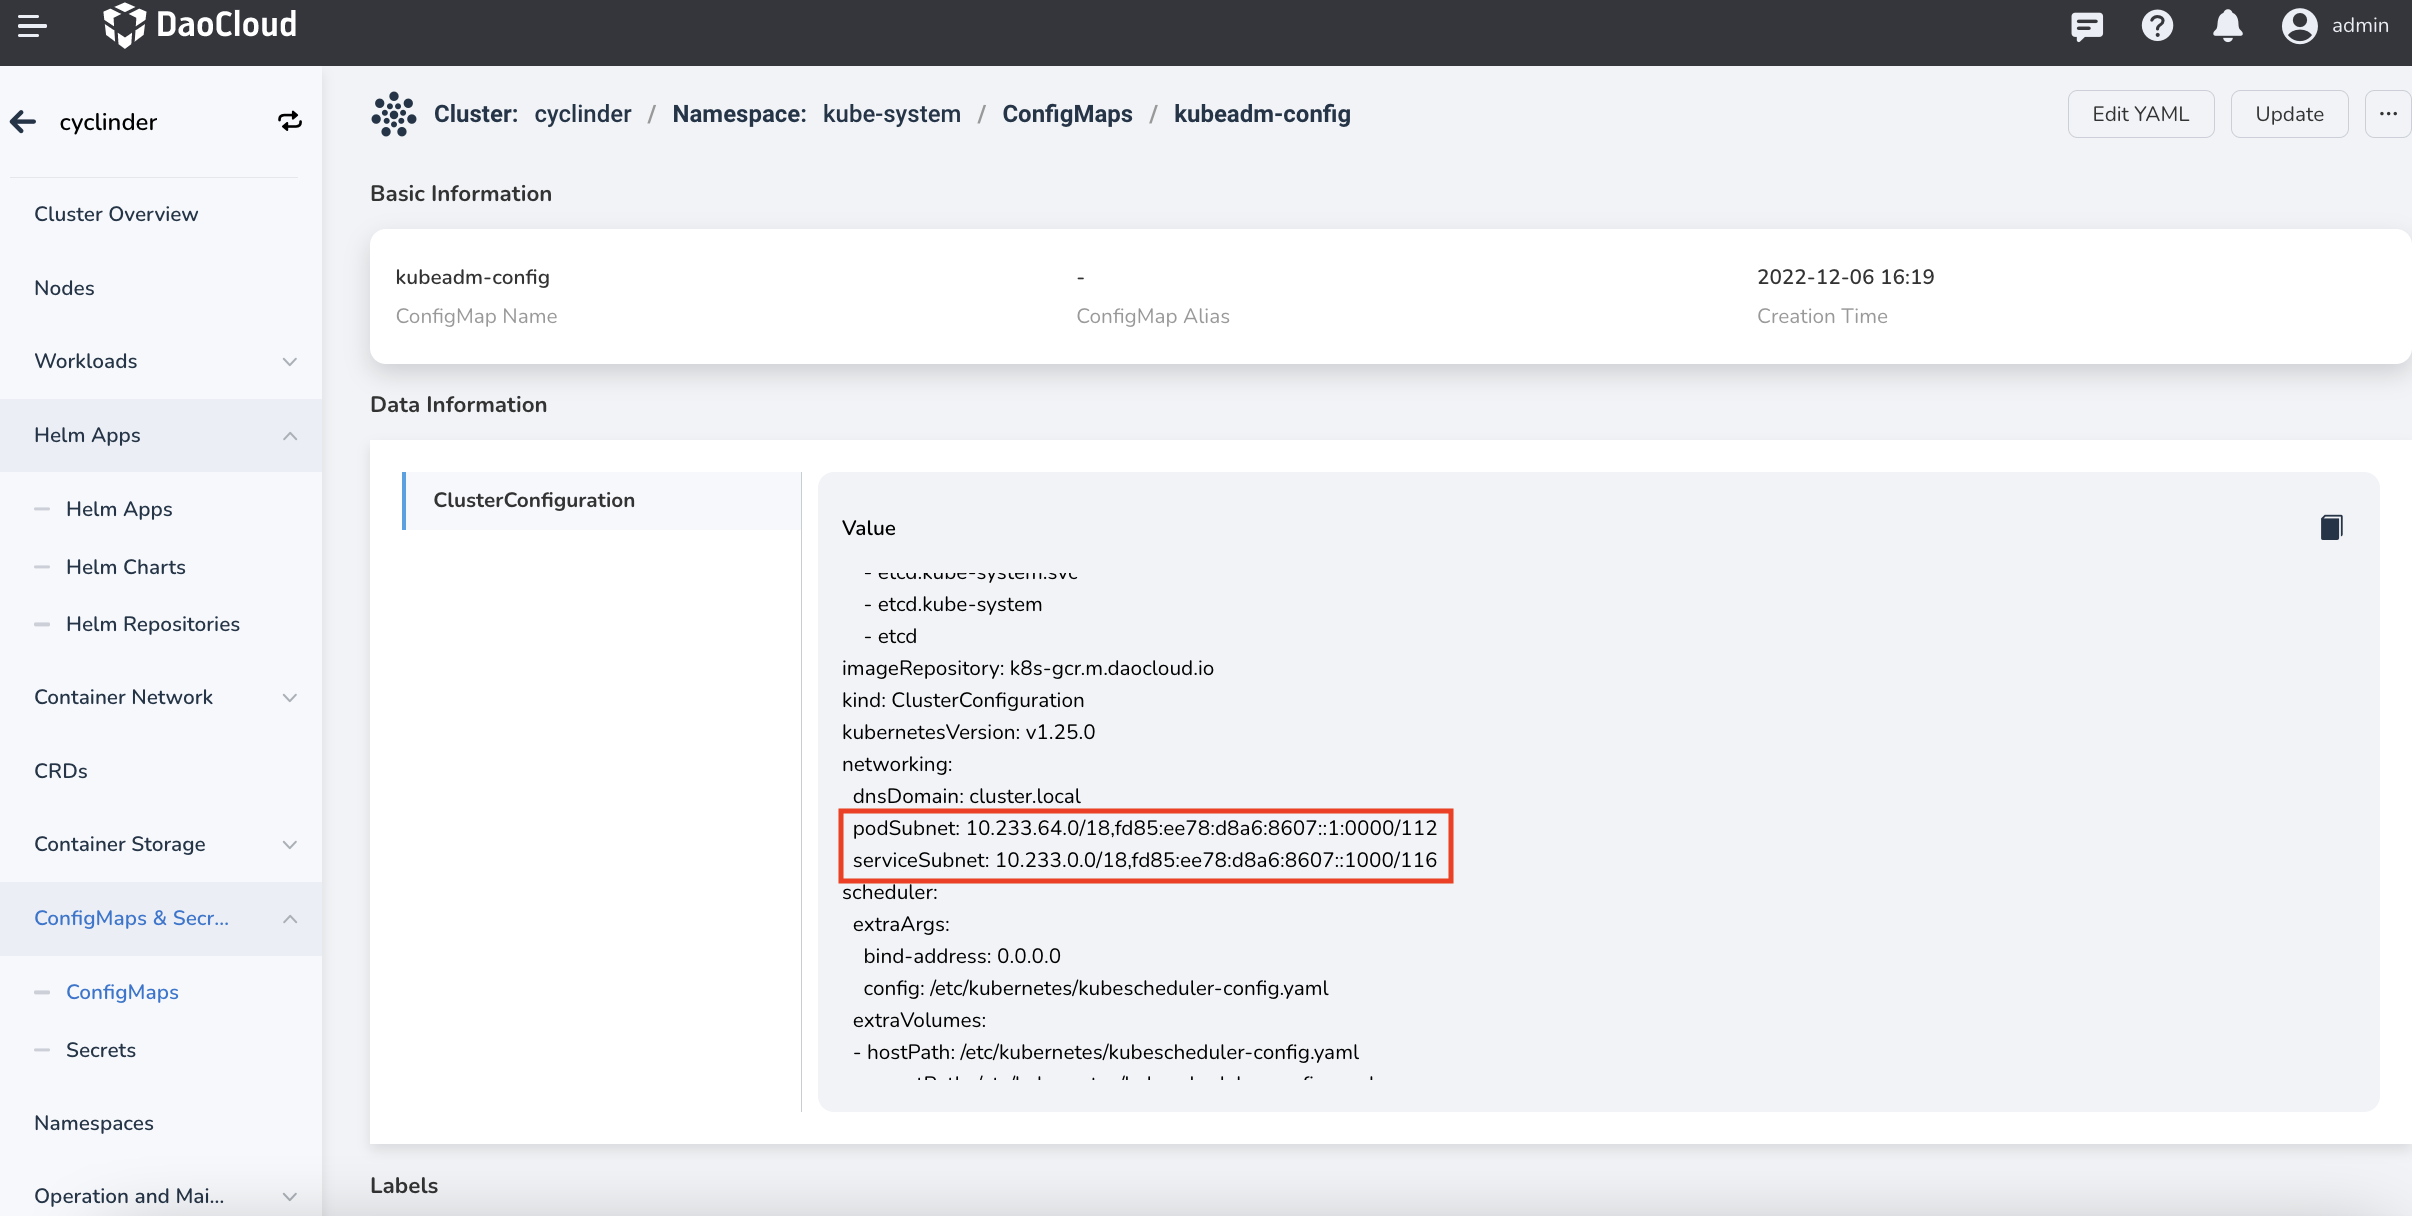
Note
If it is a dual-stack cluster, you also need to fill in the IPv6 address. If the CNI is Calico and there are multiple IP pools, the Pod CIDR can be configured multiple times.
-
Install MacVLAN (optional, installed by dafault):
This step creates the Multus CRD instance corresponding to the MacVLAN according to the configuration.
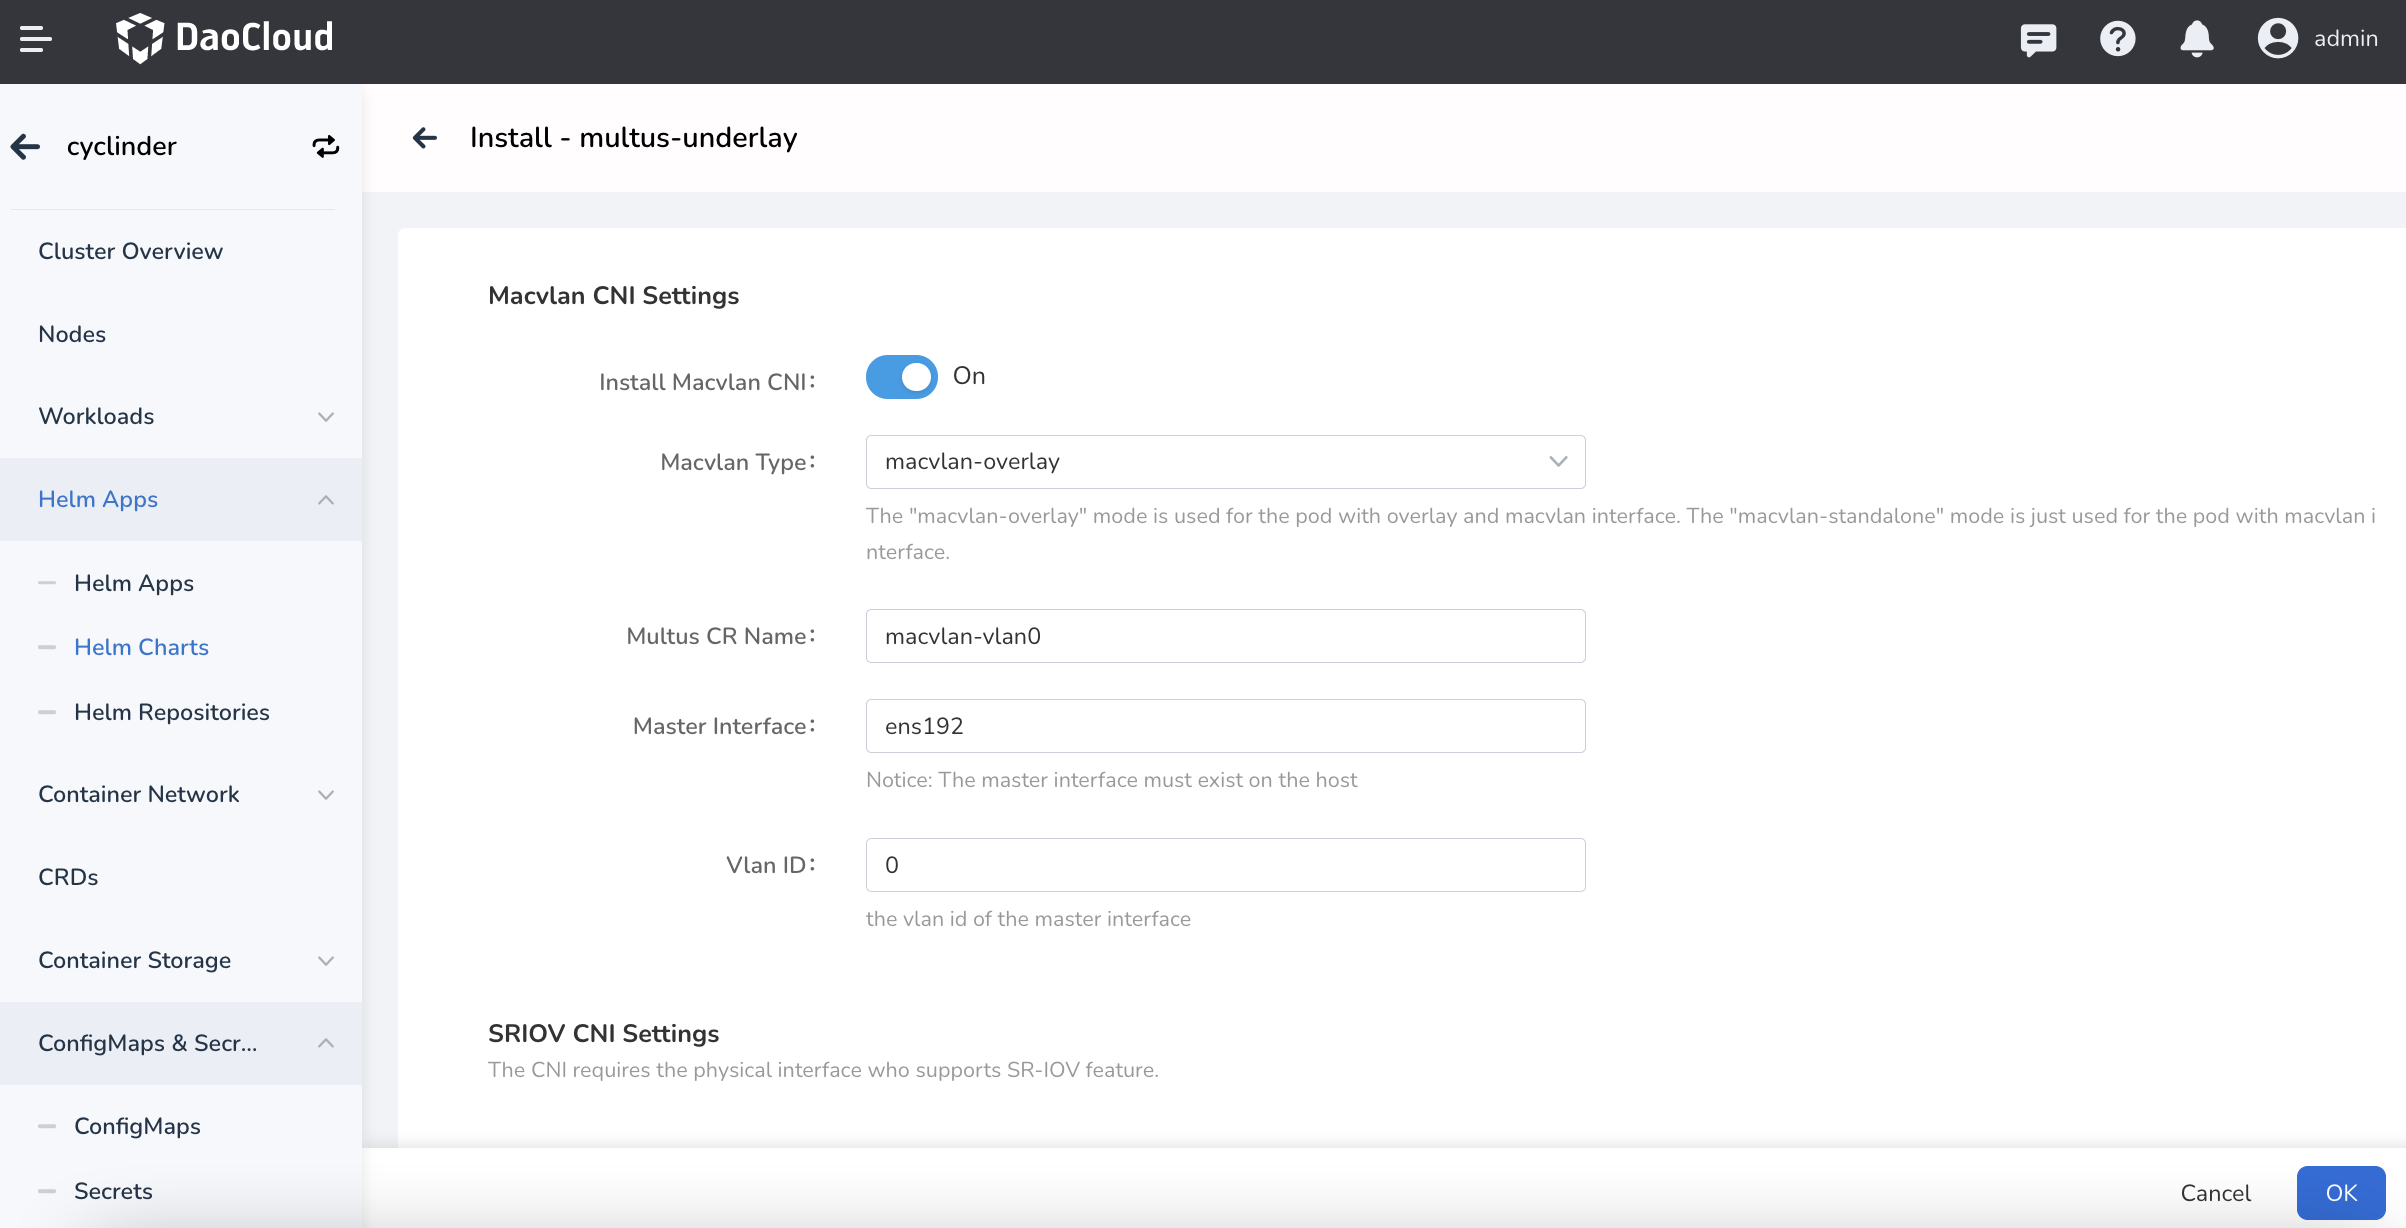
Install Macvlan CNI: true/false, whether to create a Multus CRD instance of the MacVLAN.-
Macvlan Type: macvlan-overlay/macvlan-standalone, the type of MacVLAN CRD instance to install.macvlan-overlay: for this type, MacVLAN is used with the default CNI (e.g. Calico), which will insert two NICs in the Pod: the default NIC and the MacVLAN NIC The former is used to solve the problem of east-west communication between the Pod and the cluster; the latter is used for north-south communication between the Pod clusters.macvlan-standalone: for this type, only one MacVLAN NIC will be inserted in the Pod, and it will only be used for east-west and north-south communication with the cluster.
-
Multus CR Name: name of the Multus CRD instance. Master Interface: name of the MacVLAN master interface. Note: The configured master interface must exist on the host, otherwise MacVLAN will not work.Vlan ID: optional item, and the Vlan tag of the MacVLAN master interface.
-
Install SR-IOV (optional, not installed by default):
Configure SR-IOV Multus CRD:
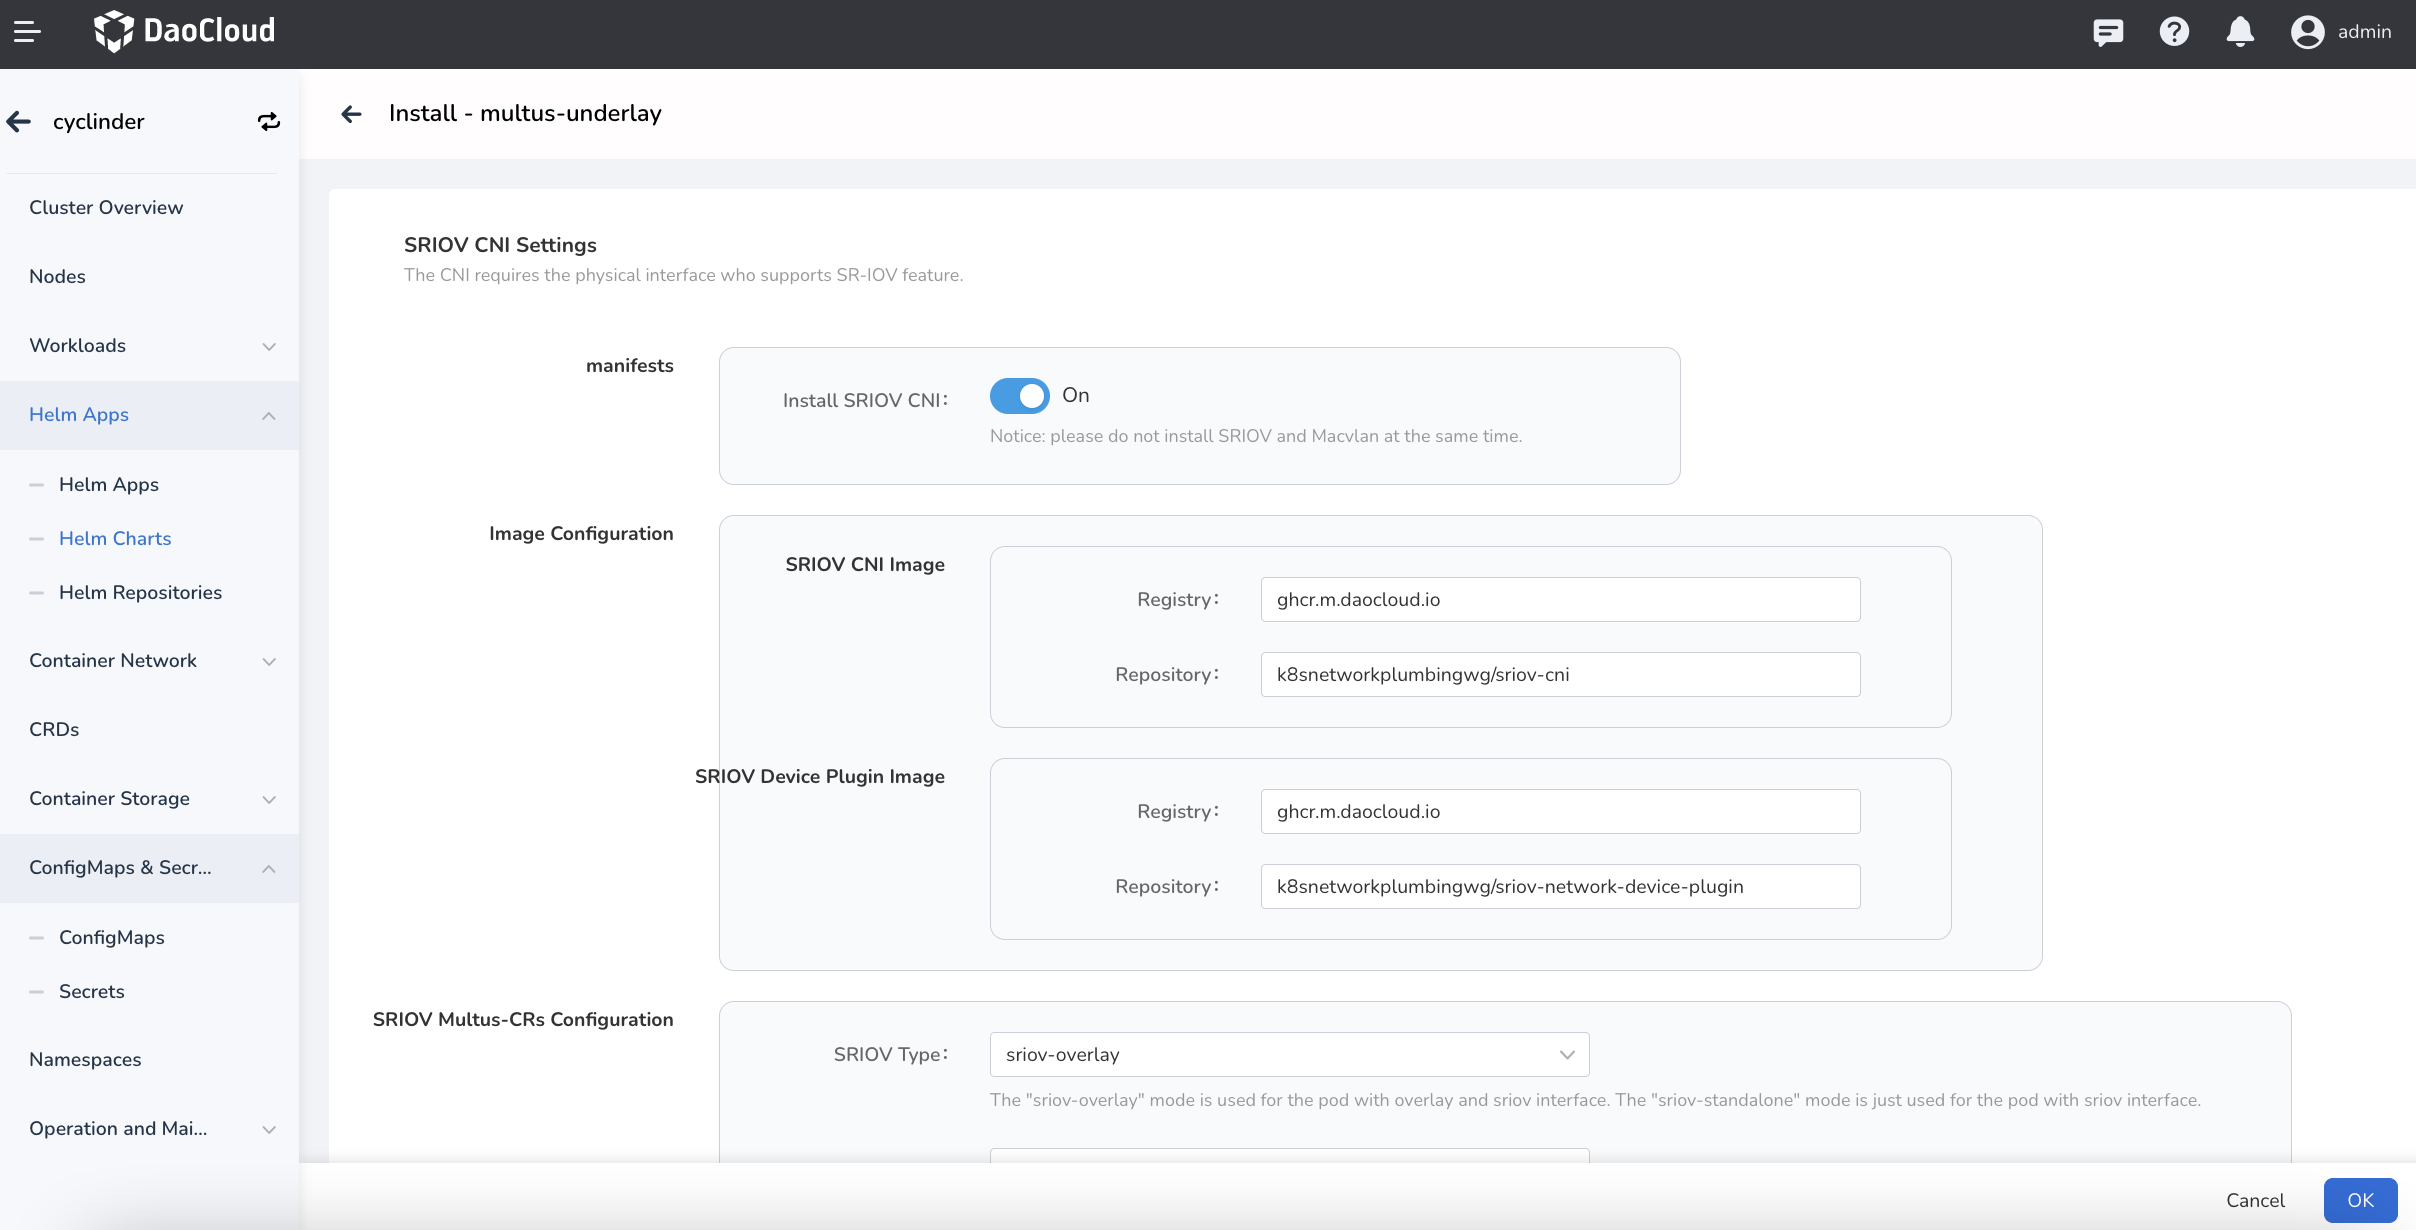
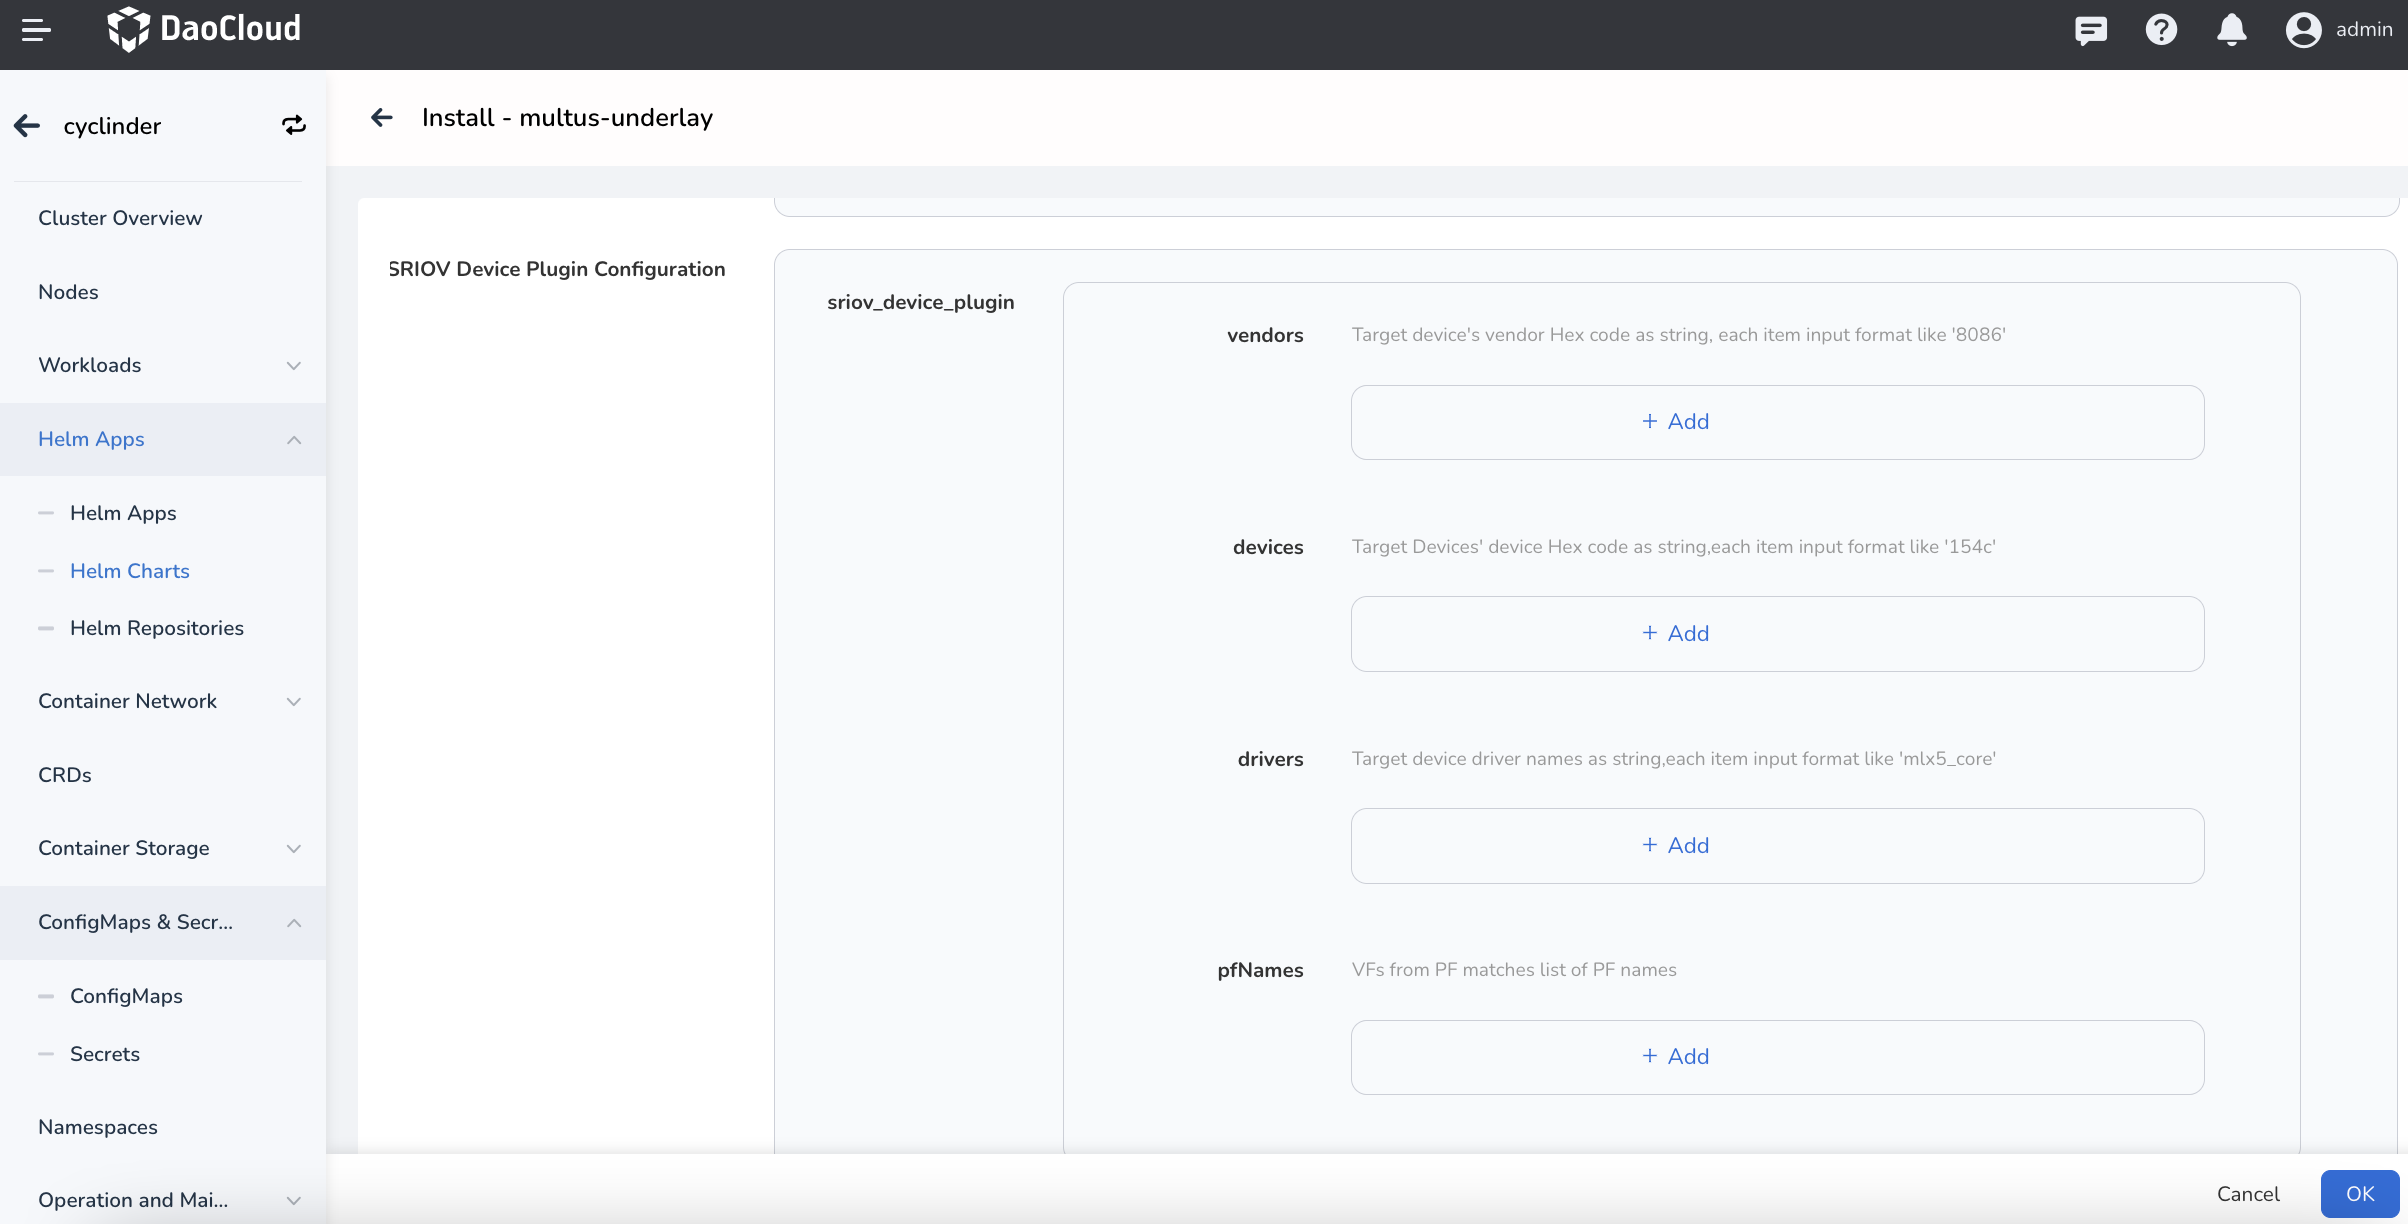
Install SRIOV CNI: install SR-IOV, which is not installed by default.SRIOV Type: the type of Multus CRD instance for which SR-IOV is installed, including:sriov-overlay: SR-IOV is used with the default CNI (e.g. Calico), which will insert two NICs in the Pod: the default NIC and the SR-IOV NIC. The former is used to solve the problem of east-west communication between the Pod and the cluster; the latter is used for north-south communication between the Pod and the cluster.sriov-standalone: only one SR-IOV NIC will be inserted in the Pod, and serves for the east-west and north-south communication.SRIOV CR Name: the name of the Multus CRD instance.Vlan ID: optional, the Vlan tag of the SRIOV PF.SRIOV Device Plugin Configuration: used to discover SR-IOV PF and VF devices on the host by means of filtering:vendors,devices,drivers,pfNames. Refer to sriov-device-plugin-readme.md for details.
Configure the SR-IOV Net-Device Plugin with:
vendors: PCI device vendor number, e.g. '8086' for Inteldevices: PCI device model, e.g. '154c'drivers: PCI device drivers, e.g. 'mlx5_core'pfNames: list of PF device names
Note
It is not recommended to enable MacVLAN and SR-IOV at the same time. In addition, SR-IOV requires hardware support, so make sure that the physical host's NIC supports SR-IOV before installation.
-
When the configuration is complete, click
Install.
Verify
-
Check that the components are running properly:
This includes Multus, Meta-plugins, SR-IOV CNI (if enabled), SRIOV-Device-Plugins (if enabled).

-
Create a workload, using MacVLAN as an example:
-
If the workload type is macvlan-overlay, then the following annotation needs to be entered in the Annotations of the Pod:
k8s.v1.cni.cncf.io/networks: indicates that a MacVLAN NIC will be inserted in the Pod in addition to the default CNI. -
If the workload type is macvlan-standalone, then the following annotation needs to be entered in the Annotations of the Pod:
v1.multus-cni.io/default-network: specifies the Pod's default NIC. If not specified, the first NIC will be assigned to the Pod via the cluster default CNI.Using macvlan-overlay as an example:
apiVersion: apps/v1 kind: Deployment metadata: name: macvlan-overlay namespace: default spec: replicas: 2 selector: matchLabels: app.kubernetes.io/instance: dao2048-macvlan-overlay app.kubernetes.io/name: dao2048-macvlan-overlay template: metadata: annotations: ipam.spidernet.io/ippool: |- { "interface": "net1", # 1. Specify from which IPPool pool the Pod's second NIC (net1) is assigned an IP. "ipv4": [ "172-81-0-1" ], "ipv6": [ "172-81-0-1-v6" ] } k8s.v1.cni.cncf.io/networks: kube-system/macvlan-vlan0 # 2. Set the Pod's second NIC. ...ipam.spidernet.io/ippool: specifies from which IP pool the IP address is assigned to the MacVLAN NIC. If not specified, it will be assigned from the default pool. For more Spiderpool instructions, please refer to Spiderpool.k8s.v1.cni.cncf.io/networks: assigns another MacVLAN network card (net1) to the Pod by specifying the MacVLAN Multus CRD.Created successfully:
-
-
Test connectivity.
The first NIC of the Pod is still assigned by Calico and the second NIC is assigned by MacVLAN:
root@master:~# kubectl exec -it macvlan-overlay-589d6ddc68-kk798 sh
kubectl exec [POD] [COMMAND] is DEPRECATED and will be removed in a future version. Use kubectl exec [POD] -- [COMMAND] instead.
/ # ip a
1: lo: <LOOPBACK,UP,LOWER_UP> mtu 65536 qdisc noqueue state UNKNOWN qlen 1000
    link/loopback 00:00:00:00:00:00 brd 00:00:00:00:00:00
    inet 127.0.0.1/8 scope host lo
      valid_lft forever preferred_lft forever
    inet6 ::1/128 scope host
      valid_lft forever preferred_lft forever
2: tunl0@NONE: <NOARP> mtu 1480 qdisc noop state DOWN qlen 1000
    link/ipip 0.0.0.0 brd 0.0.0.0
4: eth0@if503978: <BROADCAST,MULTICAST,UP,LOWER_UP,M-DOWN> mtu 1430 qdisc noqueue state UP
    link/ether ba:b0:dc:d9:91:1c brd ff:ff:ff:ff:ff:ff
    inet 10.253.255.73/32 scope global eth0
      valid_lft forever preferred_lft forever
    inet6 fd00:10:244::eaa:bafd/128 scope global
      valid_lft forever preferred_lft forever
    inet6 fe80::b8b0:dcff:fed9:911c/64 scope link
      valid_lft forever preferred_lft forever
5: net1@if7: <BROADCAST,MULTICAST,UP,LOWER_UP,M-DOWN> mtu 1500 qdisc noqueue state UP
    link/ether 4e:31:cb:b5:68:13 brd ff:ff:ff:ff:ff:ff
    inet 172.17.8.193/21 brd 172.17.15.255 scope global net1
      valid_lft forever preferred_lft forever
    inet6 fd00:1033::172:17:8:14b/64 scope global
      valid_lft forever preferred_lft forever
    inet6 fe80::4c31:cbff:feb5:6813/64 scope link
      valid_lft forever preferred_lft forever
Test
The IP address segment of the MacVLAN NIC is assigned from the host, so the Pod's MacVLAN NIC can be accessed directly if the host network route is reachable, as tested below:
-
Access
10.253.255.73and172.17.8.193in the cluster node.# ping pod eth0 root@master:~# ping 10.253.255.73 PING 10.253.255.73 (10.253.255.73) 56(84) bytes of data. 64 bytes from 10.253.255.73: icmp_seq=1 ttl=64 time=0.170 ms 64 bytes from 10.253.255.73: icmp_seq=2 ttl=64 time=0.088 ms 64 bytes from 10.253.255.73: icmp_seq=3 ttl=64 time=0.077 ms 64 bytes from 10.253.255.73: icmp_seq=4 ttl=64 time=0.117 ms 64 bytes from 10.253.255.73: icmp_seq=5 ttl=64 time=0.073 ms ^C --- 10.253.255.73 ping statistics --- 5 packets transmitted, 5 received, 0% packet loss, time 4076ms rtt min/avg/max/mdev = 0.073/0.105/0.170/0.035 ms # ping pod net1 root@master:~# ping 172.17.8.193 PING 172.17.8.193 (172.17.8.193) 56(84) bytes of data. 64 bytes from 172.17.8.193: icmp_seq=1 ttl=64 time=0.115 ms 64 bytes from 172.17.8.193: icmp_seq=2 ttl=64 time=0.068 ms 64 bytes from 172.17.8.193: icmp_seq=3 ttl=64 time=0.091 ms 64 bytes from 172.17.8.193: icmp_seq=4 ttl=64 time=0.103 ms ^C --- 172.17.8.193 ping statistics --- 4 packets transmitted, 4 received, 0% packet loss, time 3072ms rtt min/avg/max/mdev = 0.068/0.094/0.115/0.017 ms -
Access
172.17.8.193outside the cluster.$ ping 172.17.8.193 PING 172.17.8.193 (172.17.8.193): 56 data bytes 64 bytes from 172.17.8.193: icmp_seq=0 ttl=62 time=37.668 ms 64 bytes from 172.17.8.193: icmp_seq=1 ttl=62 time=44.025 ms 64 bytes from 172.17.8.193: icmp_seq=2 ttl=62 time=39.606 ms ^C64 bytes from 172.17.8.193: icmp_seq=3 ttl=62 time=40.599 ms --- 172.17.8.193 ping statistics --- 4 packets transmitted, 4 packets received, 0.0% packet loss round-trip min/avg/max/stddev = 37.668/40.474/44.025/2.305 ms -
Access the Calico Pod in the cluster.
root@master:~# kubectl get po -o wide | grep nginx nginx-8f458dc5b-kshpw 1/1 Running 0 2d3h 10.250.186.210 172-17-8-110 <none> <none> nginx-8f458dc5b-wgkpg 1/1 Running 0 46h 10.253.255.72 172-17-8-120 <none> <none> root@master:~# kubectl exec -it macvlan-overlay-b968998d8-mbtbp sh kubectl exec [POD] [COMMAND] is DEPRECATED and will be removed in a future version. Use kubectl exec [POD] -- [COMMAND] instead. / # ping 10.250.186.210 PING 10.250.186.210 (10.250.186.210): 56 data bytes 64 bytes from 10.250.186.210: seq=0 ttl=63 time=0.247 ms 64 bytes from 10.250.186.210: seq=1 ttl=63 time=0.151 ms ^C --- 10.250.186.210 ping statistics --- 2 packets transmitted, 2 packets received, 0% packet loss round-trip min/avg/max = 0.151/0.199/0.247 ms / # ping 10.253.255.72 PING 10.253.255.72 (10.253.255.72): 56 data bytes 64 bytes from 10.253.255.72: seq=0 ttl=62 time=0.596 ms 64 bytes from 10.253.255.72: seq=1 ttl=62 time=0.428 ms 64 bytes from 10.253.255.72: seq=2 ttl=62 time=0.387 ms ^C --- 10.253.255.72 ping statistics --- 3 packets transmitted, 3 packets received, 0% packet loss round-trip min/avg/max = 0.387/0.470/0.596 ms -
Access ClusterIP.
root@master:~# kubectl get svc | grep kubernetes
Kubernetes               ClusterIP   172.96.0.1             <none>        443/TCP                                       78d
root@172-17-8-110:~# kubectl get svc | grep nginx
nginx-172-17-8-110-v4    NodePort    172.96.53.151          <none>        80:31696/TCP,5201:32137/TCP,12865:31253/TCP   78d
nginx-172-17-8-110-v6    NodePort    2001:4860:fd00::85db   <none>        80:32452/TCP,5201:32658/TCP,12865:32231/TCP   78d
root@master:~# kubectl exec -it macvlan-overlay-5c87d74c46-fzkln sh
kubectl exec [POD] [COMMAND] is DEPRECATED and will be removed in a future version. Use kubectl exec [POD] -- [COMMAND] instead.
/ # curl 172.96.53.151
<!DOCTYPE html>
<html>
<head>
<title>Welcome to nginx!</title>
<style>
html { color-scheme: light dark; }
body { width: 35em; margin: 0 auto;
font-family: Tahoma, Verdana, Arial, sans-serif; }
</style>
</head>
<body>
<h1>Welcome to nginx!</h1>
<p>If you see this page, the nginx web server is successfully installed and
working. Further configuration is required.</p>

<p>For online documentation and support please refer to
<a href="http://nginx.org/">nginx.org</a>.<br/>
Commercial support is available at
<a href="http://nginx.com/">nginx.com</a>.</p>

<p><em>Thank you for using nginx.</em></p>
</body>
</html>
Uninstall
Uninstall Multus-underlay requires removing the Multus configuration files on each node: