Upgrade Spiderpool
This page explains how to upgrade an old version of Spiderpool in DCE 5.0 to a newer version. This document uses the upgrade to Spiderpool v0.9.6 as an example.
Prerequisites
- A Kubernetes cluster
- Helm installed
Obtain Chart Package and Image
You can sync the image package and Chart package to the offline repository in one of the following two ways.
Method 1: Upgrade the Addon offline package and sync Spiderpool Chart and image
The Spiderpool offline package is stored in Addon. You can refer to download Addon offline package to download the latest Addon offline package. After downloading, open the clusterConfig.yaml, modify the addonOfflinePackagePath field to specify the path where Addon is located, and complete the upgrade of the Addon offline package.
-
After upgrading Addon, you can obtain the Chart package as follows:
Download the v0.9.6 Chart package through the DCE 5.0 UI as follows:

-
Upload and unzip the Chart package to the environment
Method 2: Manually upgrade Spiderpool
-
Get the Chart package
Obtain the Chart package in the environment using the following Helm commands.
$ helm repo add spiderpool https://spidernet-io.github.io/spiderpool
$ helm repo update spiderpool

$ helm search repo spiderpool/spiderpool --versions
NAME                   CHART VERSION   APP VERSION  DESCRIPTION
spiderpool/spiderpool  0.9.6           0.9.6        ipam for kubernetes cni
...

$ helm fetch spiderpool/spiderpool --version 0.9.6

$ ls spiderpool-0.9.6.tgz
spiderpool-0.9.6.tgz
Upload the Chart package to the offline repository.
-
Get the offline image package
On any internet-connected environment with Docker installed, run the following commands to get the Spiderpool images.
docker pull ghcr.m.daocloud.io/spidernet-io/spiderpool/spiderpool-controller:v0.9.6
docker pull ghcr.m.daocloud.io/spidernet-io/spiderpool/spiderpool-agent:v0.9.6
Save as offline image tar packages using
docker saveand upload to the offline environment. -
Load images into Docker or containerd in the upgrade environment.
Note
Every node needs to load images into Docker or containerd. After loading, tag the images to keep the Registry and Repository consistent with the installation time.
Delete spiderpool-init
-
Starting from v0.9.5, Spiderpool has changed the spiderpool-init component from a Pod to a Job, making upgrades more flexible. When upgrading from v0.9.5 to a higher version, there is no need to delete the spiderpool-init Job.
-
When upgrading from any version below v0.9.5 to a version higher than v0.9.5, please delete the spiderpool-init Pod before upgrading Spiderpool. If it is not deleted, it may lead to some update conflicts. Additionally, after performing
helm upgrade, the spiderpool-init Job will be automatically created, but at that point, the spiderpool-init Pod may still remain.
Update CRD
Since updating CRDs through Helm is not possible via UI, update the Spiderpool CRDs on the Master node using kubectl apply.
[root@controller-node-1 crds]# ls
spiderpool.spidernet.io_spidercoordinators.yaml  spiderpool.spidernet.io_spiderippools.yaml        spiderpool.spidernet.io_spiderreservedips.yaml
spiderpool.spidernet.io_spiderendpoints.yaml     spiderpool.spidernet.io_spidermultusconfigs.yaml  spiderpool.spidernet.io_spidersubnets.yaml

[root@controller-node-1 crds]# ls | grep '\.yaml$' | xargs -I {} kubectl apply -f {}
customresourcedefinition.apiextensions.k8s.io/spidercoordinators.spiderpool.spidernet.io created
customresourcedefinition.apiextensions.k8s.io/spiderendpoints.spiderpool.spidernet.io configured
customresourcedefinition.apiextensions.k8s.io/spiderippools.spiderpool.spidernet.io configured
customresourcedefinition.apiextensions.k8s.io/spidermultusconfigs.spiderpool.spidernet.io created
customresourcedefinition.apiextensions.k8s.io/spiderreservedips.spiderpool.spidernet.io configured
customresourcedefinition.apiextensions.k8s.io/spidersubnets.spiderpool.spidernet.io configured
Upgrade via DCE 5.0 UI
After correctly uploading the offline Chart and image packages to the offline environment in the previous steps, you can now perform the upgrade via the 5.0 UI. In versions below v0.7.0, Spiderpool was used in conjunction with the Multus-underlay plugin, while the new version of Spiderpool has integrated the Multus plugin. When updating via UI, turn off the Install Multus CNI button to avoid redundant installation. As shown in the image below, click Update and wait for the update to complete.
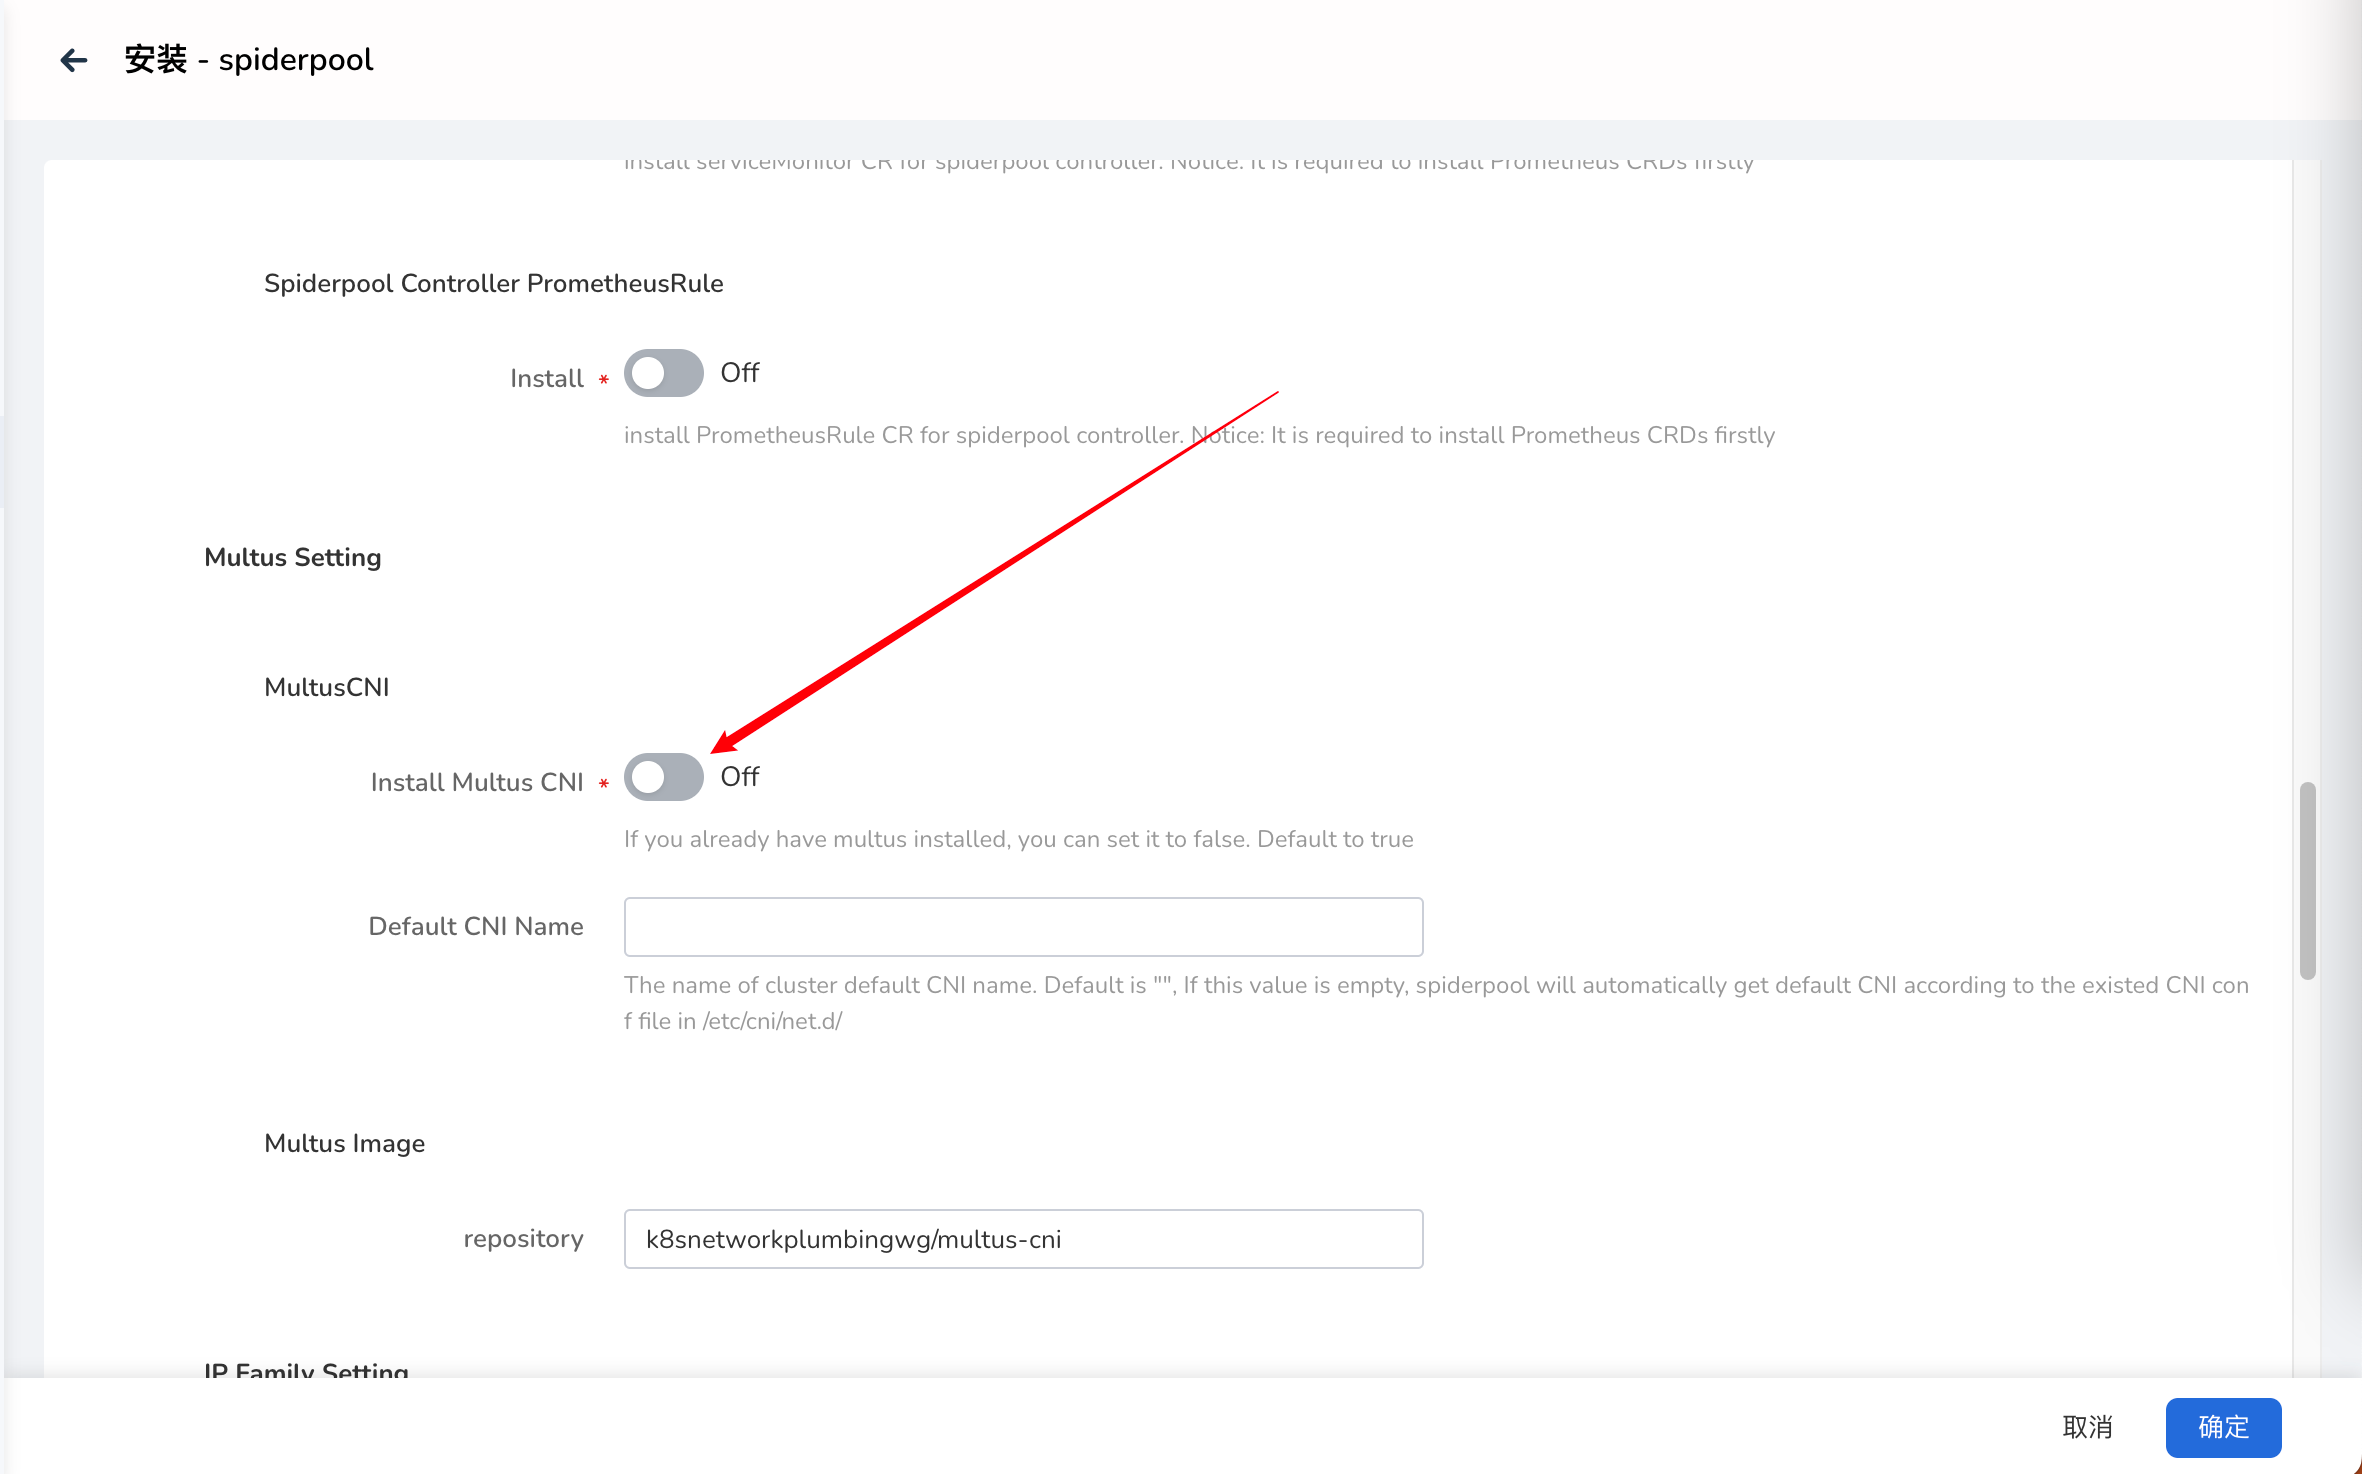
- Multus Setting -> MultusCNI -> Default CNI Name : Cluster default CNI name. When updating, this value should be consistent with the one filled in during installation. If the value is empty during installation, Spiderpool will automatically obtain the default CNI based on the existing CNI conf file in /etc/cni/net.d/. At this time Update Spiderpool. Fill in the value corresponding to the field in the /etc/cni/net.d/00-multus.config file:
clusterNetwork, such as calico.
Verification
After the upgrade, check that the version is correct.

In Spiderpool versions 0.7.0 and above, the SpiderMultusConfig CR is provided to automatically manage the Multus NetworkAttachmentDefinition CR. If your cluster has old Multus CRs, the new version, due to different creation mechanisms, will not display your old Multus CRs in the UI. You can create a Multus CR with the same name through UI to manage it, and it will not affect the use of your original features. Note that the values filled in UI, such as Vlan ID and network interface, you need to be completely consistent with those in your original Multus CR.
