Deploy Pluggable Components for the Workbench
Some features in the Workbench leverage the capabilities of open-source components. Starting from v0.21.0 of the Workbench, a pluggable design pattern is adopted to decouple these functional components. Therefore, when deploying the Workbench, you can choose whether to enable them in the manifest.yaml file of the installer. If they are not enabled during installation, you can follow the instructions below to enable them.
The corresponding functionalities for each component are as follows:
| Component | Features | Remarks |
|---|---|---|
| argo-cd | Continuous Deployment | Installed by default |
| argo-rollouts | Canary Release | Not installed by default |
| vela-core | OAM Applications | Not installed by default |
Note
If you want to enable or disable the related components of the Workbench during the deployment of DCE 5.0, you can set the enable keyword in the manifest.yaml file to true or false to choose whether to enable them.
Deploying the argo-cd component
If you chose not to enable it during the deployment of DCE 5.0, follow the instructions below to deploy it and use the continuous deployment capability provided by the Workbench.
-
In the DCE 5.0 product module, go to Container Management -> Clusters and enter the details page of the kpanda-global-cluster .
-
In the cluster details page, navigate to the menu on the left side and go to Helm Apps -> Helm Charts -> select the All repository. Search for argo-cd , click it to enter the details page, and install it.
-
On the installation interface, fill in the required installation parameters.
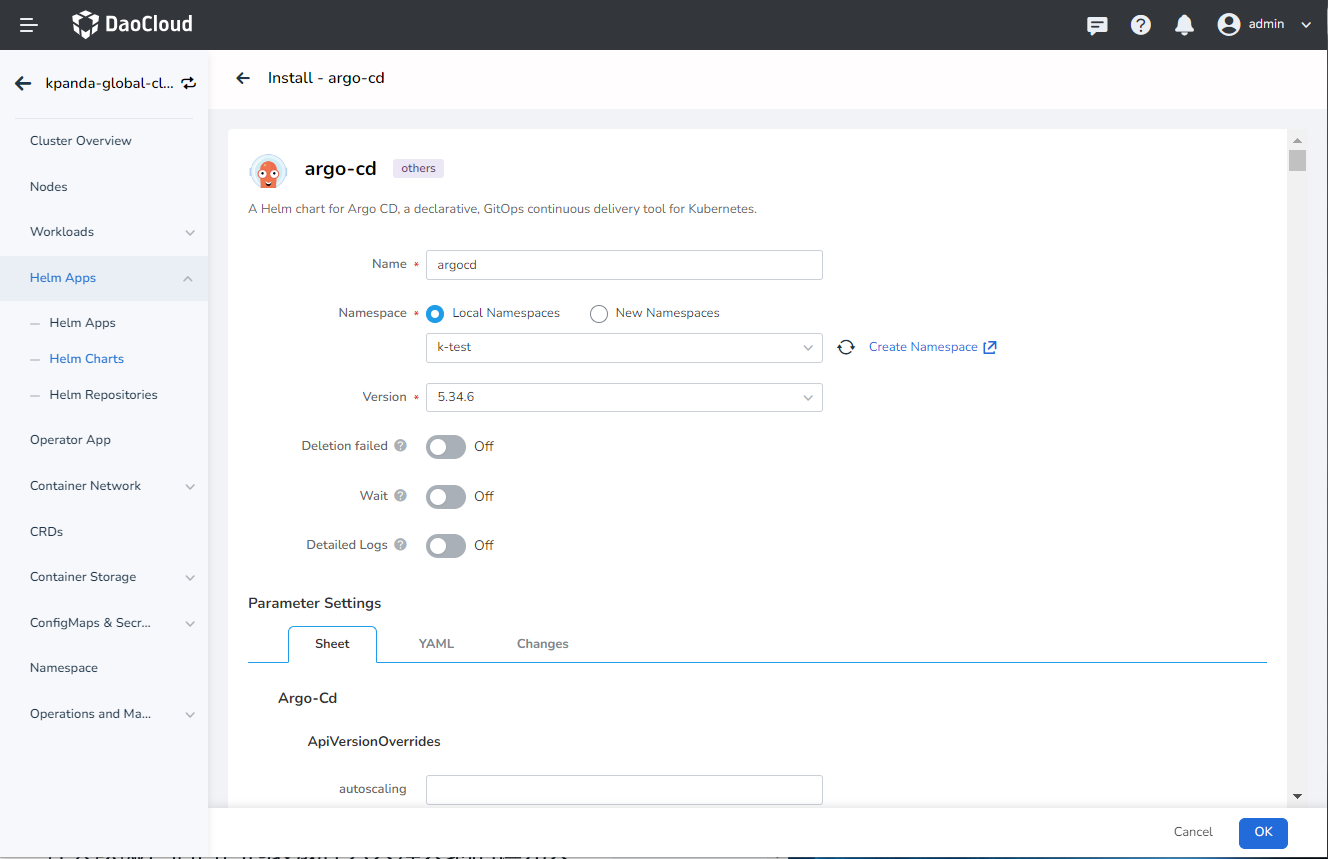
Parameter descriptions:
- Name: Enter argocd
- Version: The default version is 5.34.6 , which is the only version available in the addon repository
- Namespace: Select argocd
Note
You can use the default values for the rest of the parameters.
-
Click the OK button at the bottom right to complete the installation. Confirm that the related argo-cd resources in the argocd namespace are all in the Running state.
-
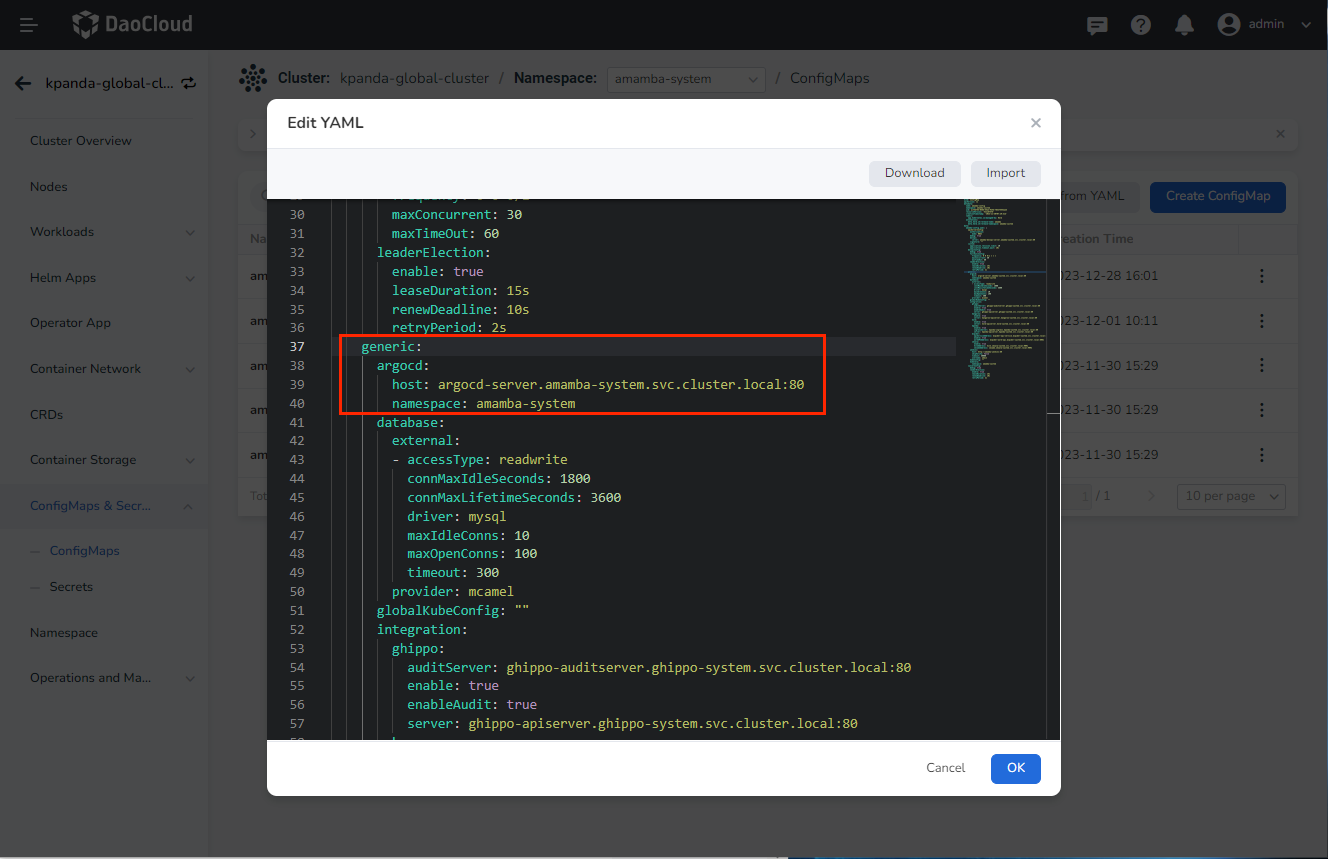
After successfully deploying the resources mentioned above, go to the ConfigMaps & Secrets -> ConfigMaps menu on the left side of the current cluster details page. Choose namespace amamba-system , then search for amamba-config and click Edit YAML .
-
Add the following parameters in the data->amamba-config.yaml section:
- argocd server address, format: argocd-server service name.namespace.svc.cluster.local:80
- argocd deployment namespace
-
After making the changes, go to the Workloads -> Pods menu on the left side of the current cluster details page and search for amamba-apiserver and amamba-syncer . Restart them one by one.
-
Once the restart is successful, you can go to the Workbench module to use the continuous deployment capability.
Notes
For the argo-cd component in the addon, we made some configuration changes based on the open-source version. The main changes are as follows:
- Modified the helm template to use the three-part structure of registry:repository:tag for the image, which can be set using global.imageRegistry for the global registry address.
- Modified two configmaps of argo-cd for authentication. These can be installed directly through the argo-cd component in the addon, and no manual operation is required.
apiVersion: v1
data:
  accounts.amamba: apiKey
  admin.enabled: "true"
kind: ConfigMap
metadata:
  name: argocd-cm

[root@demo-dev-master1 ~]# kubectl get cm -n argocd argocd-rbac-cm -o yaml
apiVersion: v1
data:
  policy.csv: |
    g, amamba, role:admin
  policy.default: ""
  scopes: '[groups]'
kind: ConfigMap
metadata:
  name: argocd-rbac-cm
Deploying the vela-core component
If you chose not to enable it during the deployment of DCE 5.0, follow the instructions below to deploy and utilize the OAM application capabilities provided by the Workbench.
-
In the DCE 5.0 product module, go to Container Management -> Clusters and enter the details page of the kpanda-global-cluster cluster.
-
In the cluster details page, navigate to the left sidebar menu and select Helm Apps -> Helm Charts -> choose the addon repository. Search for vela-core , click it to enter the details page, and proceed with the installation.
-
On the installation page, fill in the required installation parameters:

Parameter explanation:
- Name: Enter kubevela (recommended)
- Version: By default, select 1.7.7 as the addon repository only has this version available
- Namespace: Select vela-system (recommended)
Note
- Use the default values for the rest of the parameters.
- Note that the parameter applicationRevisionLimit indicates the limit on the number of OAM application versions, which is set to 10 by default but can be changed based on your preference.
-
Click the OK button on the bottom right corner to complete the installation. You can check if the relevant workloads under the vela-system namespace are all in the Running state.
-
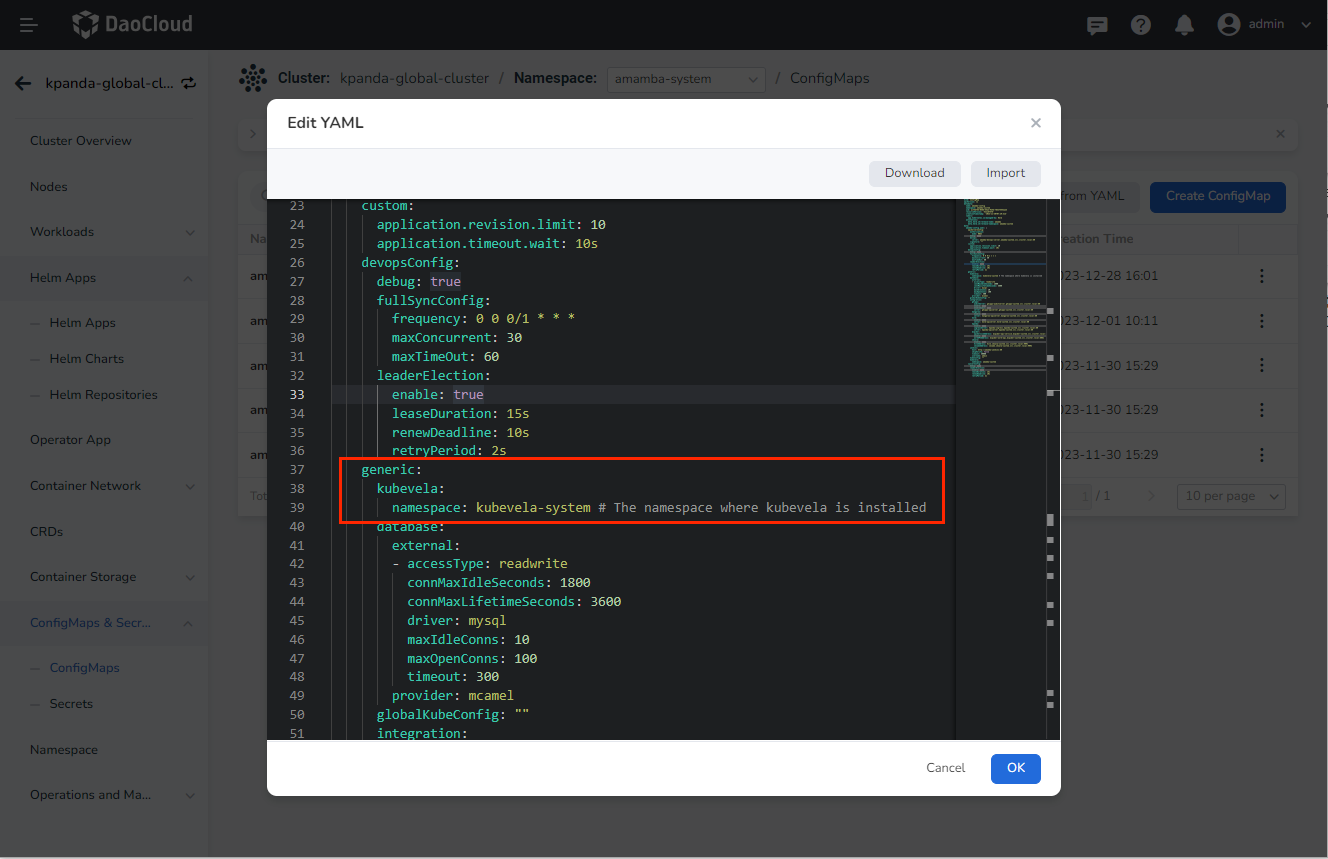
Once you have confirmed the successful deployment of the above workloads, go to the current cluster's details page and navigate to the left sidebar menu and select ConfigMaps & Secrets -> ConfigMaps . Search for amamba-config in namespace amamba-system and click Edit YAML .
-
In the data->amamba-config.yaml section, add the following parameters:
- The namespace where kubevela is installed
-
After making the changes, go to the left sidebar menu of the current cluster's details page and select Workloads -> Containers . Search for amamba-apiserver and amamba-syncer respectively, and restart them one by one.
-
Once the restart is successful, you can access the Workbench module to utilize the OAM application capabilities.
Deploying the argo-rollouts component
If you chose not to enable it during the deployment of DCE 5.0, follow the instructions below to deploy and utilize the gray release capabilities provided by the Workbench.
-
In the DCE 5.0 product module, go to Container Management -> Clusters and enter the details page of the kpanda-global-cluster cluster (the cluster where you want to perform gray releases on applications).
-
In the cluster details page, navigate to the left sidebar menu and select Helm Apps -> Helm Charts -> choose the addon repository. Search for argo-rollouts , click it to enter the details page, and proceed with the installation.
-
Fill in the required installation parameters on the installation interface.
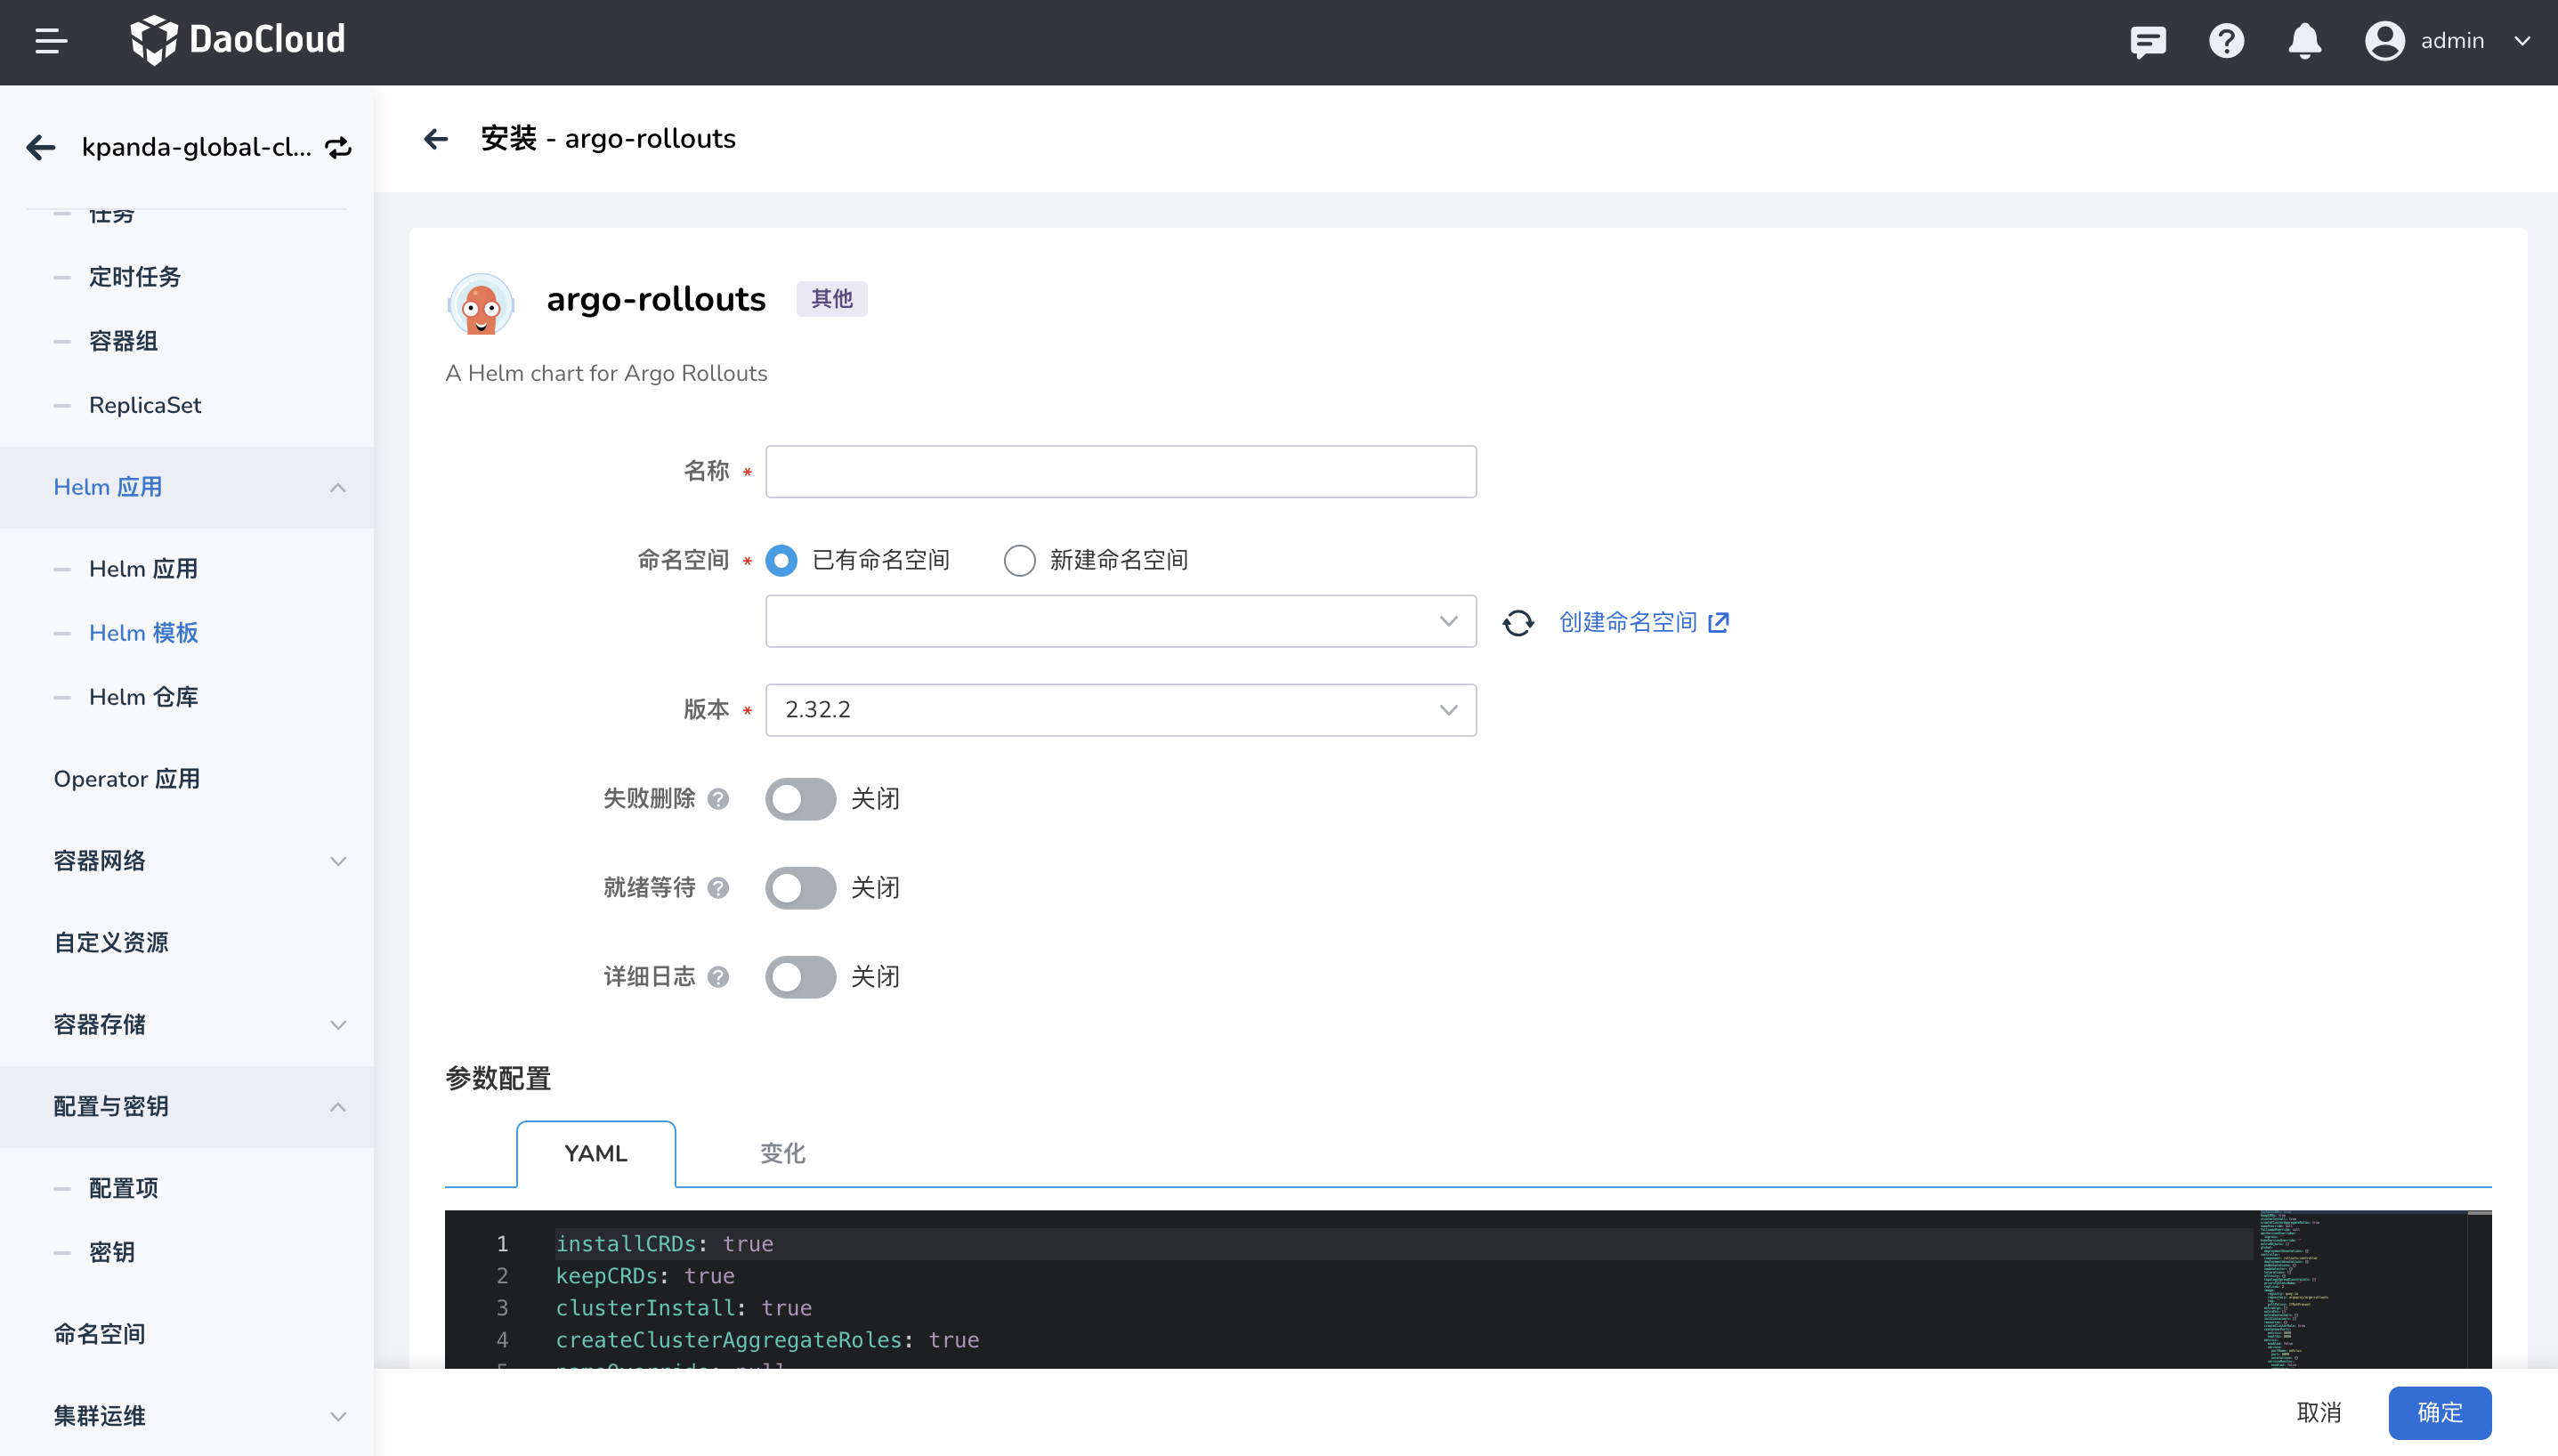
Parameter Description:
- Name: Please fill in argo-rollouts, recommended.
- Version: Default selection is 2.32.0, the addon repository currently only has this version.
- Namespace: Please select argo-rollouts, recommended.
Enable contour
Workbench supports traffic control based on contour for gray release policy in the new v0.24.0. If you need to use this capability, you need to do the following:
-
Define the parameters under the
initContainersfield invalue.yaml:argo-rollouts: controller: initContainers: - name: copy-contour-plugin image: release.daocloud.io/skoala/rollouts-plugin-trafficrouter-contour:v0.3.0 # (1)! command: ["/bin/sh", "-c"] args: - cp /bin/rollouts-plugin-trafficrouter-contour /plugins volumeMounts: - name: contour-plugin mountPath: /plugins trafficRouterPlugins: trafficRouterPlugins: |- - name: argoproj-labs/contour location: "file:///plugins/rollouts-plugin-trafficrouter-contour" volumes: - name: contour-plugin emptyDir: {} volumeMounts: - name: contour-plugin mountPath: /plugins- When offline, the offline container registry address needs to be added before the image address.
-
After the argo-rollouts installation is completed, you also need to execute the following command to modify the clusterRole:
# The name of the clusterRole needs to be modified according to the actual installation situation
kubectl patch clusterrole argo-rollouts -n argo-rollouts --type='json' -p='[{"op": "add", "path": "/rules/-", "value": {"apiGroups":["projectcontour.io"],"resources":["httpproxies"],"verbs":["get","list","watch","update","patch","delete"]}}]'
After the Rollout deployment is successful, you can create a canary release interface to select contour as the traffic control.
-
Click the confirm button in the lower right corner to complete the installation. You can check if the related loads under the argo-rollouts namespace are all in the running state.
-
After successful deployment, you can go to the Workbench module to use the gray release capability based on
cloud-native gatewayin the current cluster.
Note
- Argo-rollouts is a tool for gray release and traffic management for Kubernetes applications, focusing on the deployment and update process of applications.
- During use, it needs to be deployed in the cluster where the application is located. If you need to use gray release capability in multiple clusters, you need to deploy the argo-rollouts component in each corresponding cluster.