Deploy Label Studio
Note
Refer to the video tutorial: Data Labeling and Dataset Usage Instructions
Label Studio is an open-source data labeling tool used for various machine learning and artificial intelligence jobs. Here is a brief introduction to Label Studio:
- Supports labeling of various data types including images, audio, video, and text
- Can be used for jobs such as object detection, image classification, speech transcription, and named entity recognition
- Provides a customizable labeling interface
- Supports various labeling formats and export options
Label Studio offers a powerful data labeling solution for data scientists and machine learning engineers due to its flexibility and rich features.
Deploy to DCE 5.0
To use Label Studio in AI Lab, it needs to be deployed to the Global Service Cluster. You can quickly deploy it using Helm.
Note
For more deployment details, refer to Deploy Label Studio on Kubernetes.
-
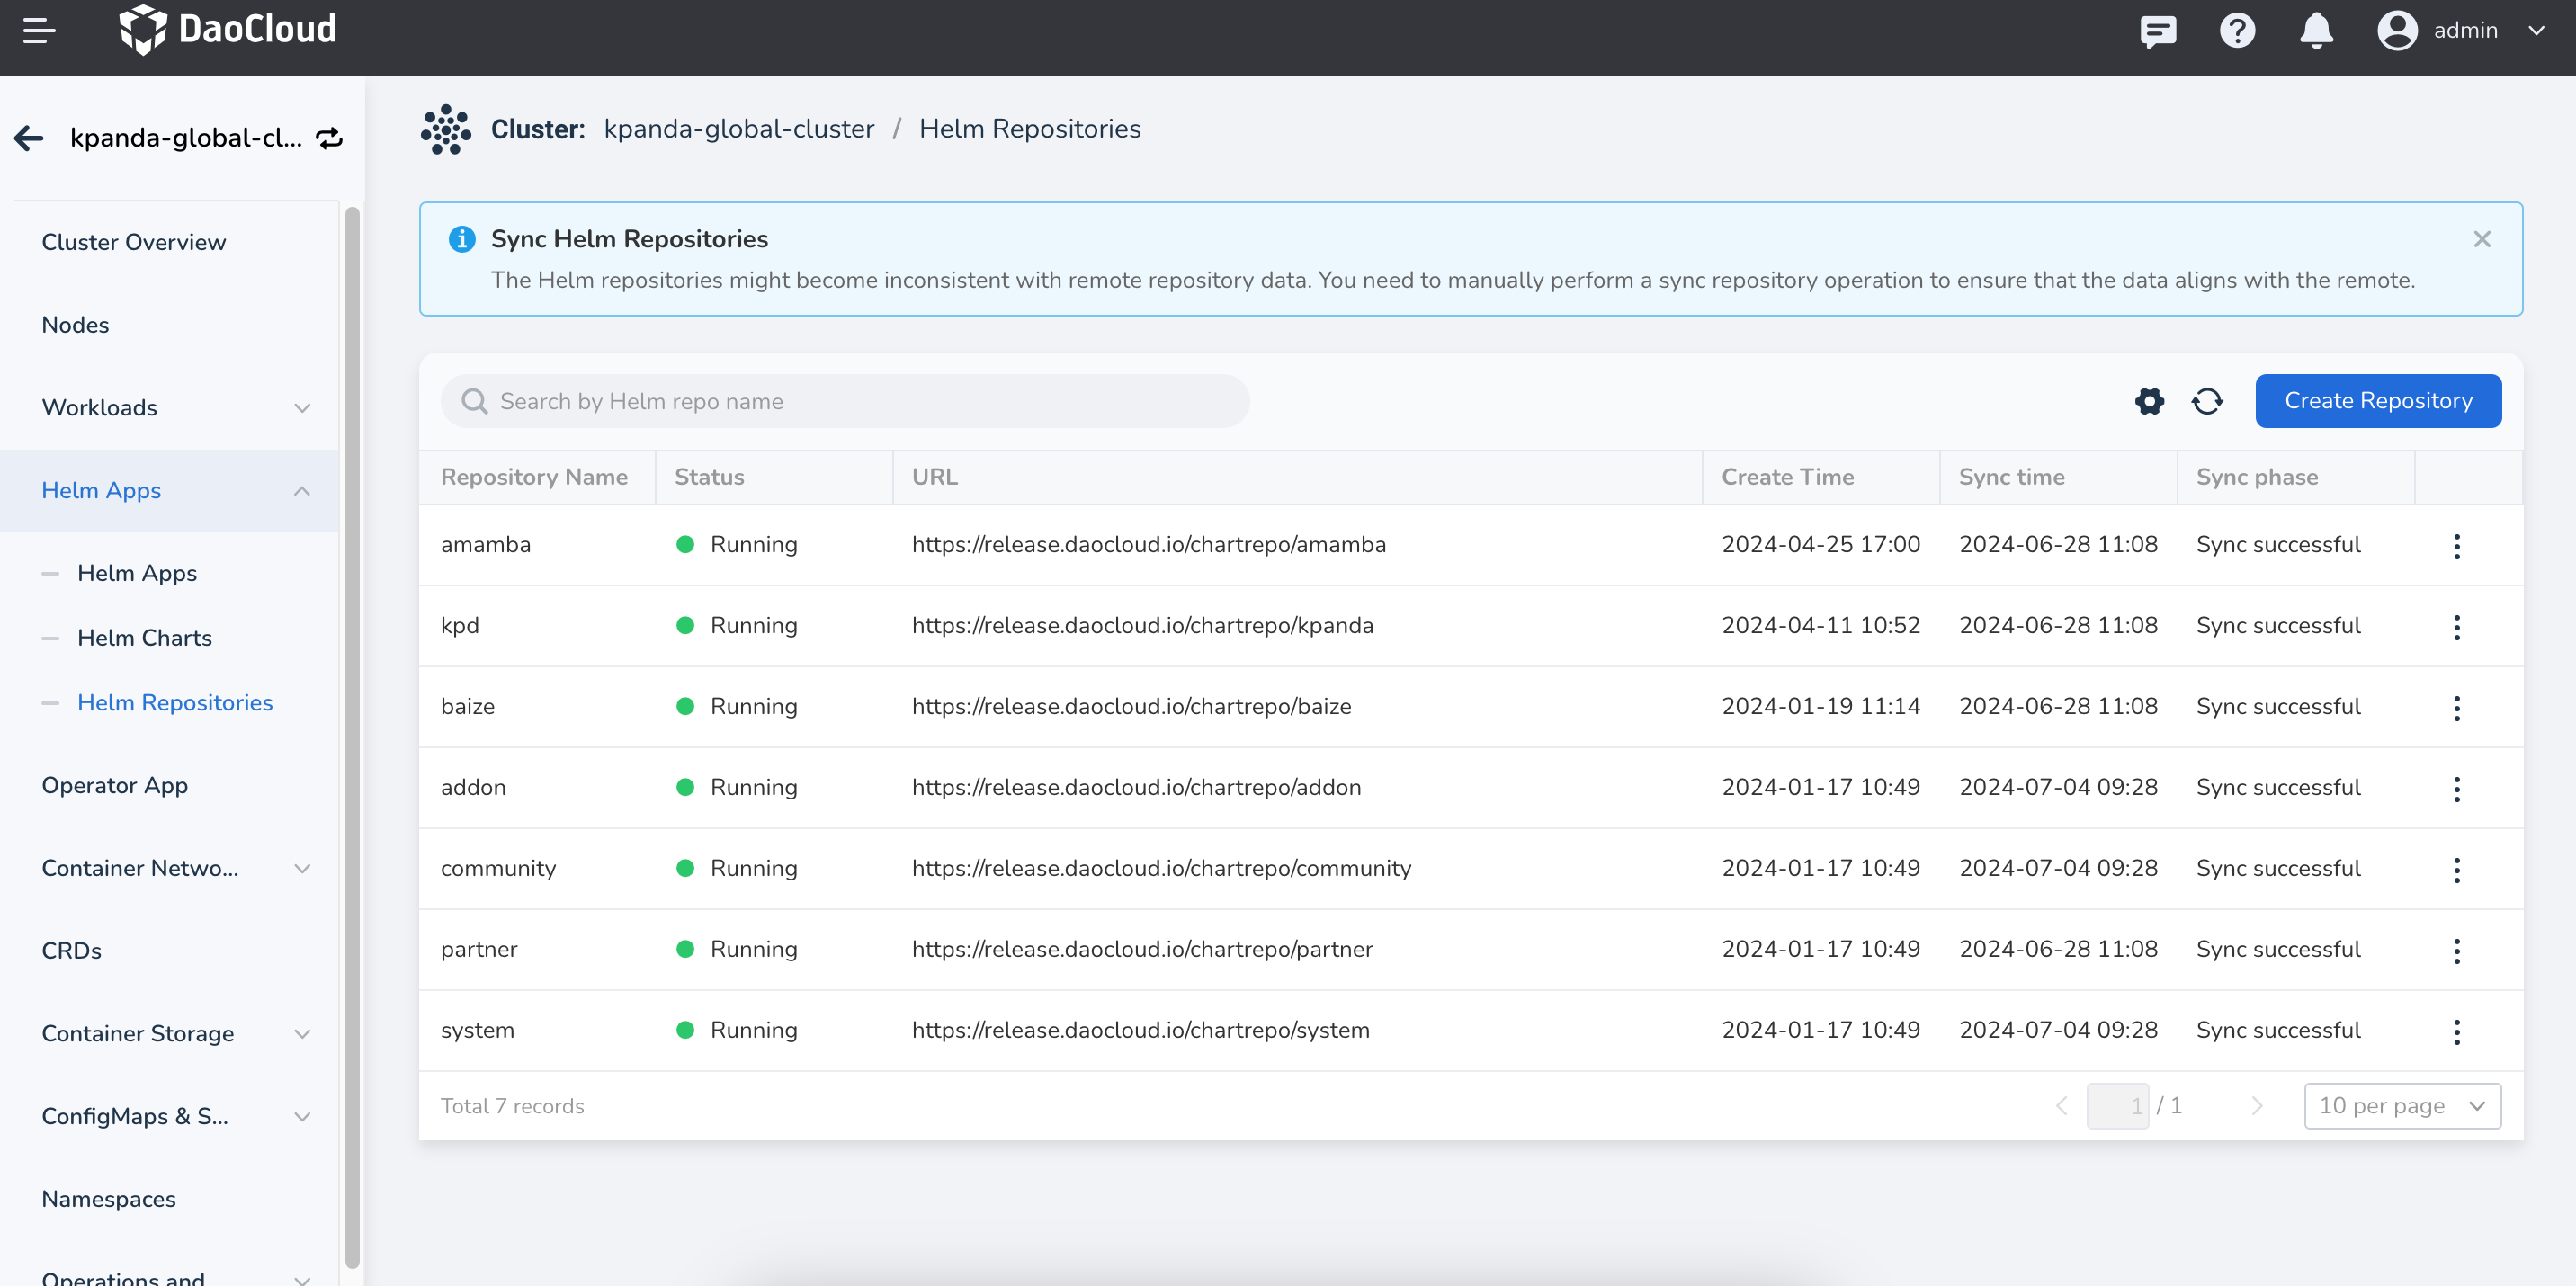
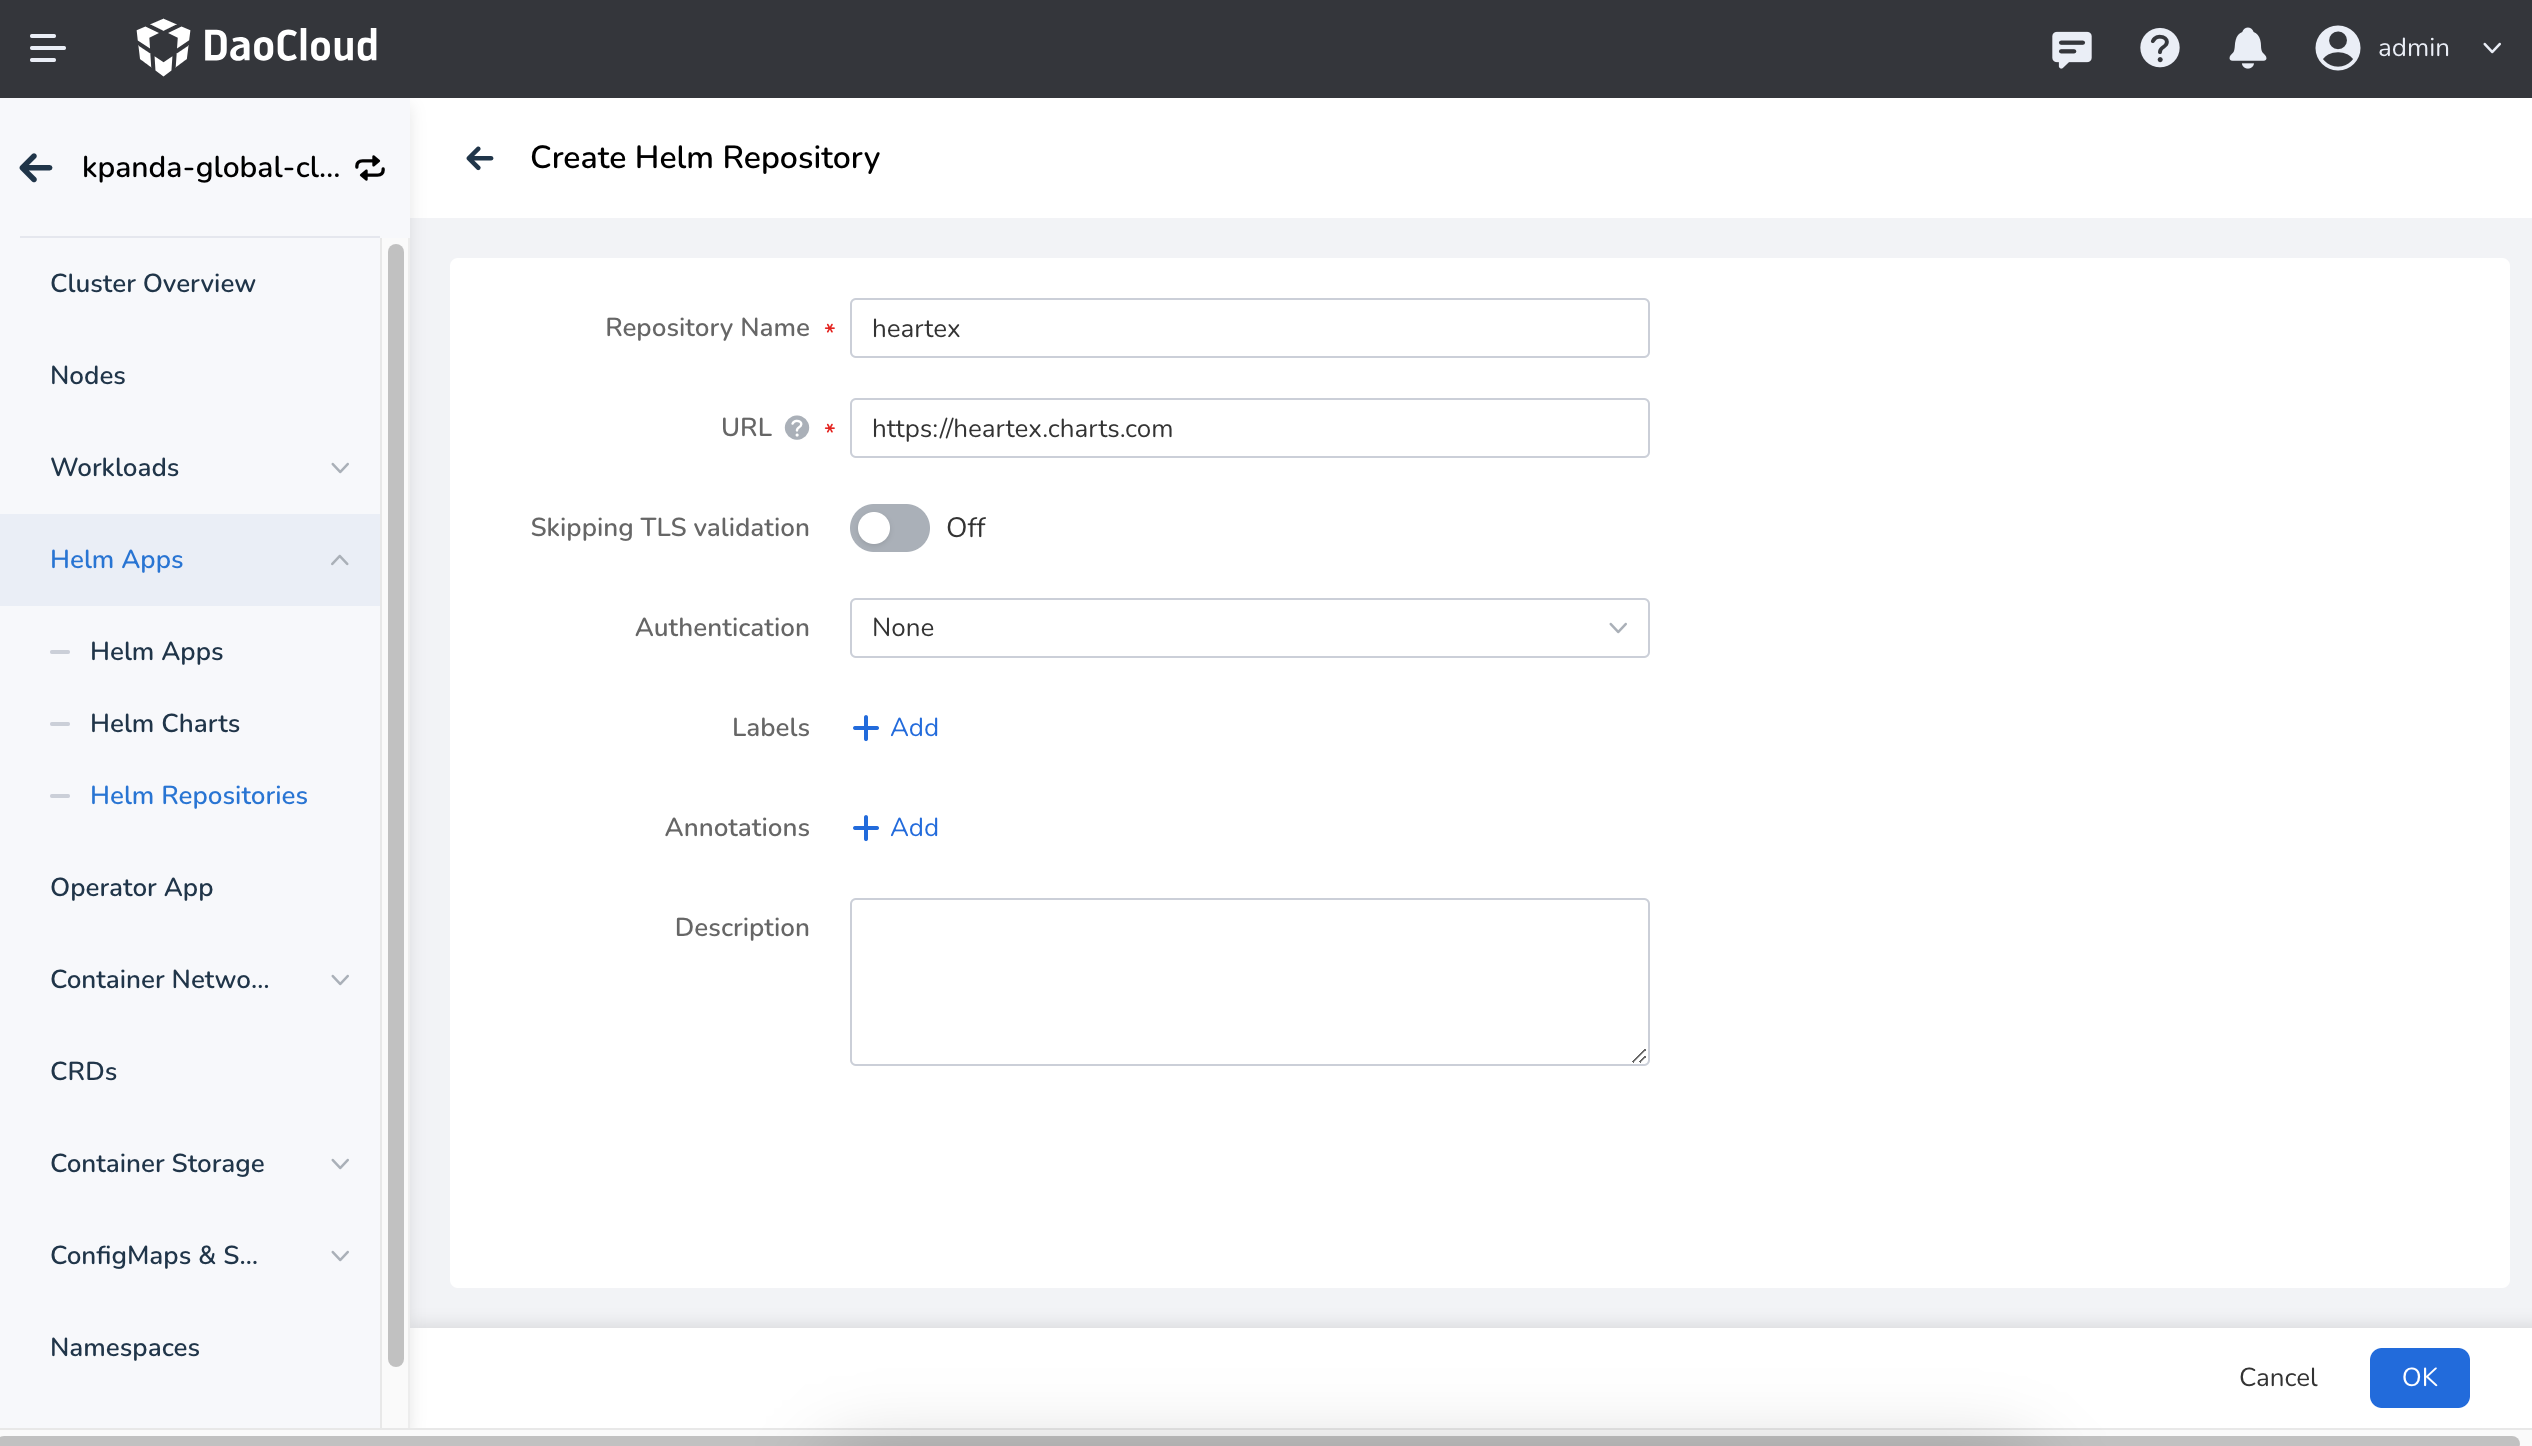
Enter the Global Service Cluster, find Helm Apps -> Helm Repositories from the left navigation bar, click the Create Repository button, and fill in the following parameters:
-
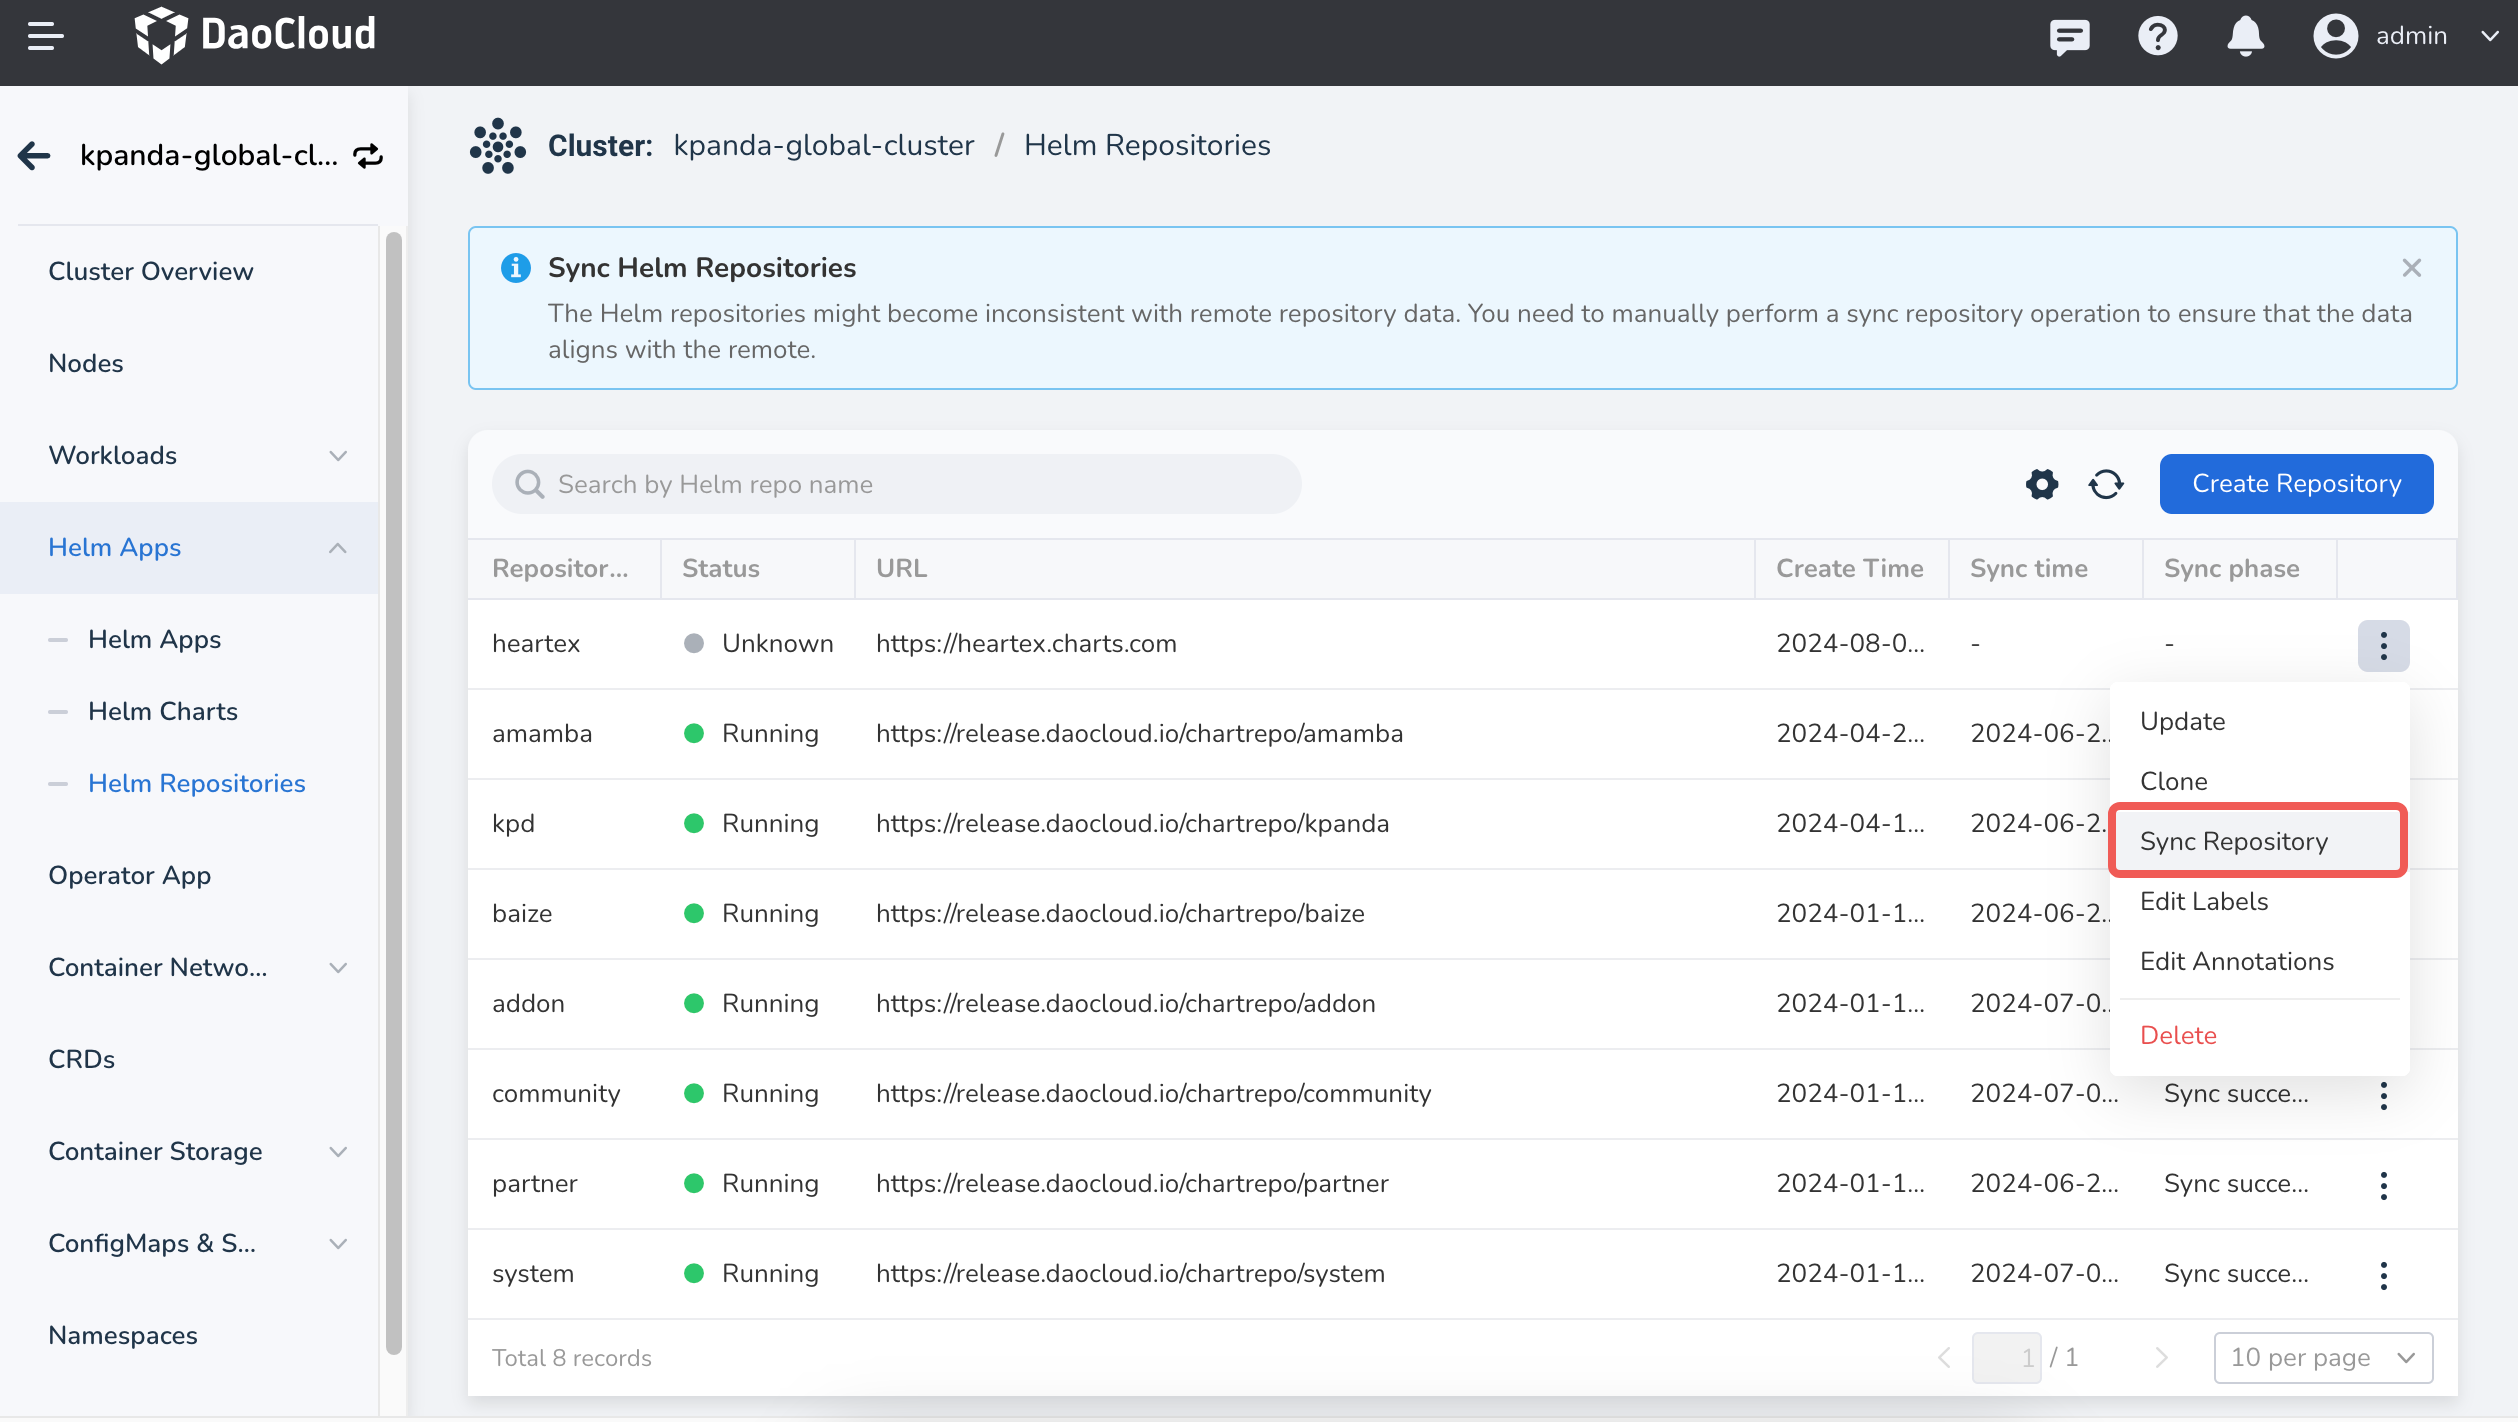
After successfully adding the repository, click the ┇ on the right side of the list and select Sync Repository. Wait a moment to complete the synchronization. (This sync operation will also be used for future updates of Label Studio).
-
Then navigate to the Helm Charts page, search for
label-studio, and click the card. -
Choose the latest version and configure the installation parameters as shown below, naming it
label-studio. It is recommended to create a new namespace. Switch the parameters toYAMLand modify the configuration according to the instructions.global: image: repository: heartexlabs/label-studio # Configure proxy address here if docker.io is inaccessible extraEnvironmentVars: LABEL_STUDIO_HOST: https://{DCE_Access_Address}/label-studio # Use the DCE 5.0 login address, refer to the current webpage URL LABEL_STUDIO_USERNAME: {User_Email} # Must be an email, replace with your own LABEL_STUDIO_PASSWORD: {User_Password} app: nginx: livenessProbe: path: /label-studio/nginx_health readinessProbe: path: /label-studio/version
At this point, the installation of Label Studio is complete.
Warning
By default, PostgreSQL will be installed as the data service middleware. If the image pull fails, it may be because docker.io is inaccessible. Ensure to switch to an available proxy.
If you have your own PostgreSQL data service middleware, you can use the following parameters:
global:
  image:
    repository: heartexlabs/label-studio   # Configure proxy address here if docker.io is inaccessible
  extraEnvironmentVars:
    LABEL_STUDIO_HOST: https://{DCE_Access_Address}/label-studio    # Use the DCE 5.0 login address, refer to the current webpage URL
    LABEL_STUDIO_USERNAME: {User_Email}    # Must be an email, replace with your own
    LABEL_STUDIO_PASSWORD: {User_Password}
app:
  nginx:
    livenessProbe:
      path: /label-studio/nginx_health
    readinessProbe:
      path: /label-studio/version
postgresql:
enabled: false # Disable the built-in PostgreSQL
externalPostgresql:
host: "postgres-postgresql" # PostgreSQL address
port: 5432
username: "label_studio" # PostgreSQL username
password: "your_label_studio_password" # PostgreSQL password
database: "label_studio" # PostgreSQL database name
Add GProduct to Navigation Bar
To add Label Studio to the DCE 5.0 navigation bar, you can refer to the method in Global Management OEM IN. The following example shows how to add it to the secondary navigation of AI Lab.
Add Proxy Access
apiVersion: ghippo.io/v1alpha1
kind: GProductProxy
metadata:
  name: label-studio
spec:
  gproduct: label-studio
  proxies:
  - authnCheck: false
    destination:
      host: label-studio-ls-app.label-studio.svc.cluster.local
      port: 80
    match:
      uri:
        prefix: /label-studio
Add to AI Lab
Modify the CRD for GProductNavigator CR baize, then make the following changes:
apiVersion: ghippo.io/v1alpha1
kind: GProductNavigator
metadata:
labelings:
meta.helm.sh/release-name: baize
meta.helm.sh/release-namespace: baize-system
labels:
app.kubernetes.io/managed-by: Helm
gProductName: baize
name: baize
spec:
category: cloudnativeai
gproduct: baize
iconUrl: ./ui/baize/logo.svg
isCustom: false
localizedName:
en-US: AI Lab
zh-CN: AI Lab
menus:
- iconUrl: ''
isCustom: false
localizedName:
en-US: AI Lab
zh-CN: AI Lab
name: workspace-view
order: 1
url: ./baize
visible: true
- iconUrl: ''
isCustom: false
localizedName:
en-US: Operator
zh-CN: 运维管理
name: admin-view
order: 1
url: ./baize/admin
visible: true
# Start adding
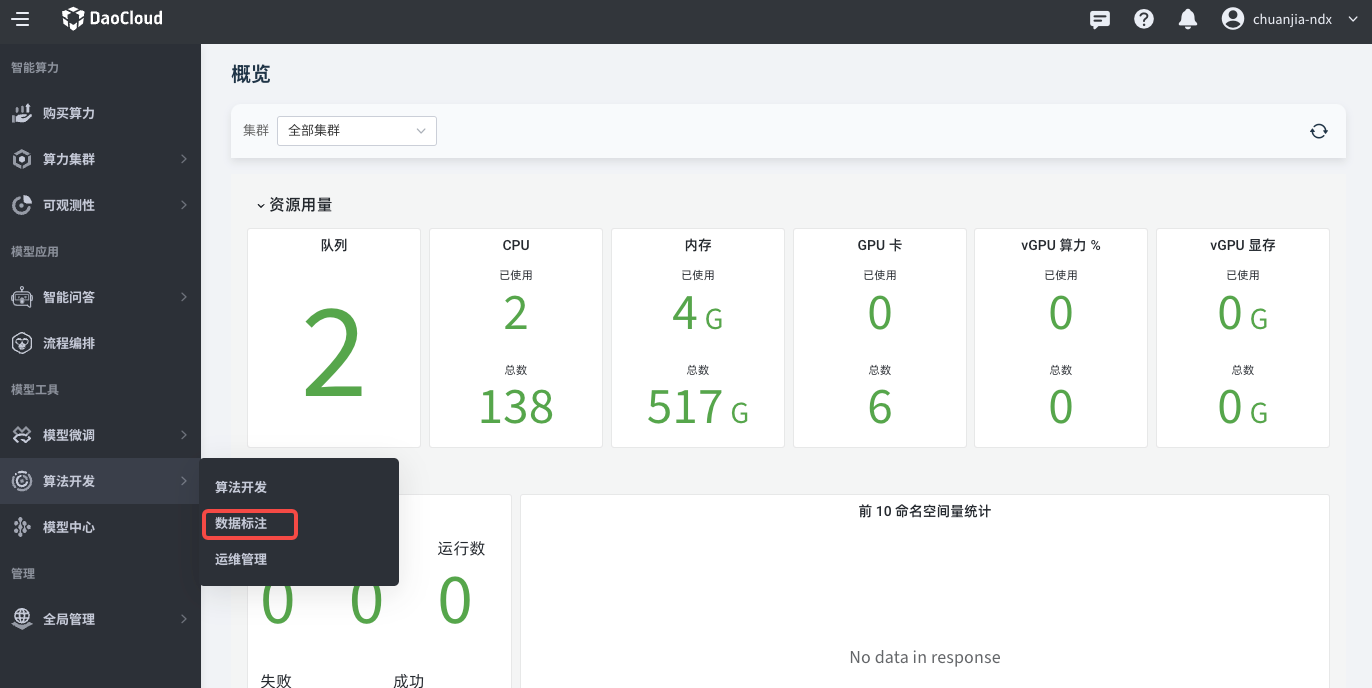
- iconUrl: ''
localizedName:
en-US: Data Labeling
zh-CN: 数据标注
name: label-studio
order: 1
target: blank # Control new blank page
url: https://{DCE_Access_Address}/label-studio # url to access
visible: true
# End adding
name: AI Lab
order: 10
url: ./baize
visible: true
Adding Effect
Conclusion
The above describes how to add Label Studio and integrate it as an labeling component in AI Lab. By adding labels to the datasets in AI Lab, you can associate it with algorithm development and improve the algorithm development process. For further usage, refer to relevant documentation.