Quick Start Guide
This article serves as a straightforward manual for users to leverage AI Lab throughout the development and training process involving datasets, Notebooks, and job training.
Preparing Your Dataset
Start by clicking on Data Management -> Datasets, and then select the Create button to set up the three datasets outlined below.
Dataset: Training Code
- Code Source: https://github.com/samzong/training-sample-code.git. This repository contains a simple TensorFlow code sample.
- If you're located in China, you can access it more quickly via Gitee: https://gitee.com/samzong_lu/training-sample-code.git
- The code can be found at:
tensorflow/tf-fashion-mnist-sample
Note
Currently, only the StorageClass with read-write mode ReadWriteMany is supported. Please use NFS or the recommended JuiceFS.
Dataset: Training Data
For this training session, we will use the Fashion-MNIST dataset, which can be found at https://github.com/zalandoresearch/fashion-mnist.git.
If you're in China, you can use Gitee for a quicker download: https://gitee.com/samzong_lu/fashion-mnist.git
Note
If the training data dataset isn't created beforehand, it will be automatically downloaded during the training script execution. Preparing the dataset in advance can help speed up the training process.
Dataset: Empty Dataset
AI Lab allows you to use PVC as the data source type for datasets. After creating an empty PVC bound to the dataset, you can utilize this empty dataset to store the output datasets from future training jobs, including models and logs.
Environment Dependency: TensorFlow
When running the script, you'll need the TensorFlow Python library. You can use AI Lab's environment dependency management feature to download and prepare the necessary Python libraries in advance, eliminating the need for image builds.
Check out the Environment Dependency guide to add a
CONDAenvironment.
name: tensorflow
channels:
  - defaults
  - conda-forge
dependencies:
  - python=3.12
  - tensorflow
prefix: /opt/conda/envs/tensorflow
Note
After the environment is successfully set up, you only need to mount this environment to the Notebook or training jobs, using the base image provided by AI Lab.
Using a Notebook to Debug Your Script
Prepare your development environment by clicking on Notebooks in the navigation bar, then hit Create.
-
Associate the three datasets you prepared earlier, filling in the mount paths as shown in the image below. Make sure to configure the empty dataset in the output dataset location.
-
Select and bind the environment dependency package.
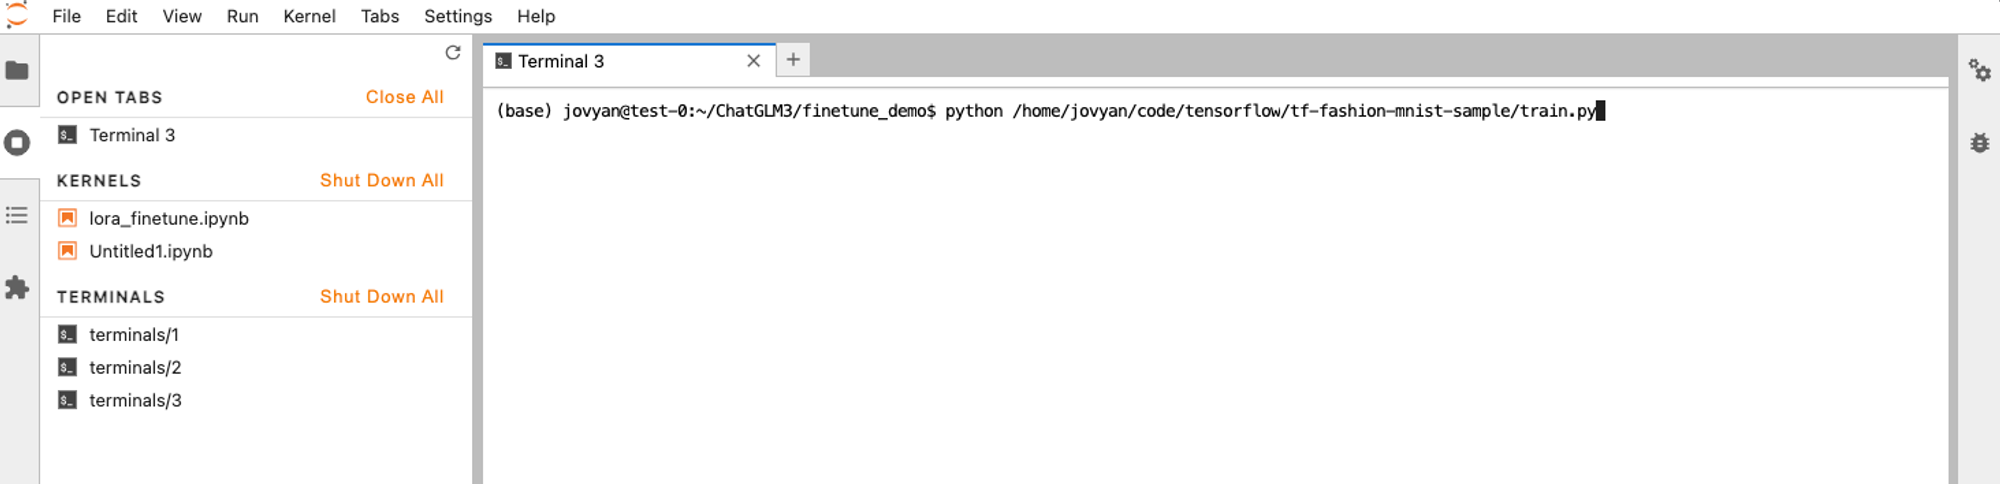
Wait for the Notebook to be successfully created, then click the access link in the list to enter the Notebook. In the Notebook terminal, run the following command to start the training job:
Creating a Training Job
- Click on Job Center -> Training Jobs in the navigation bar to create a standalone
TensorFlowjob. - Fill in the basic parameters and click Next.
-
In the job resource configuration, correctly set up the job resources and click Next.
- Image: If you prepared the environment dependency package earlier, you can use the default image. Otherwise, make sure the image includes the
TensorFlowPython library. - Shell: Use
bash. -
Enable Command:
- Image: If you prepared the environment dependency package earlier, you can use the default image. Otherwise, make sure the image includes the
-
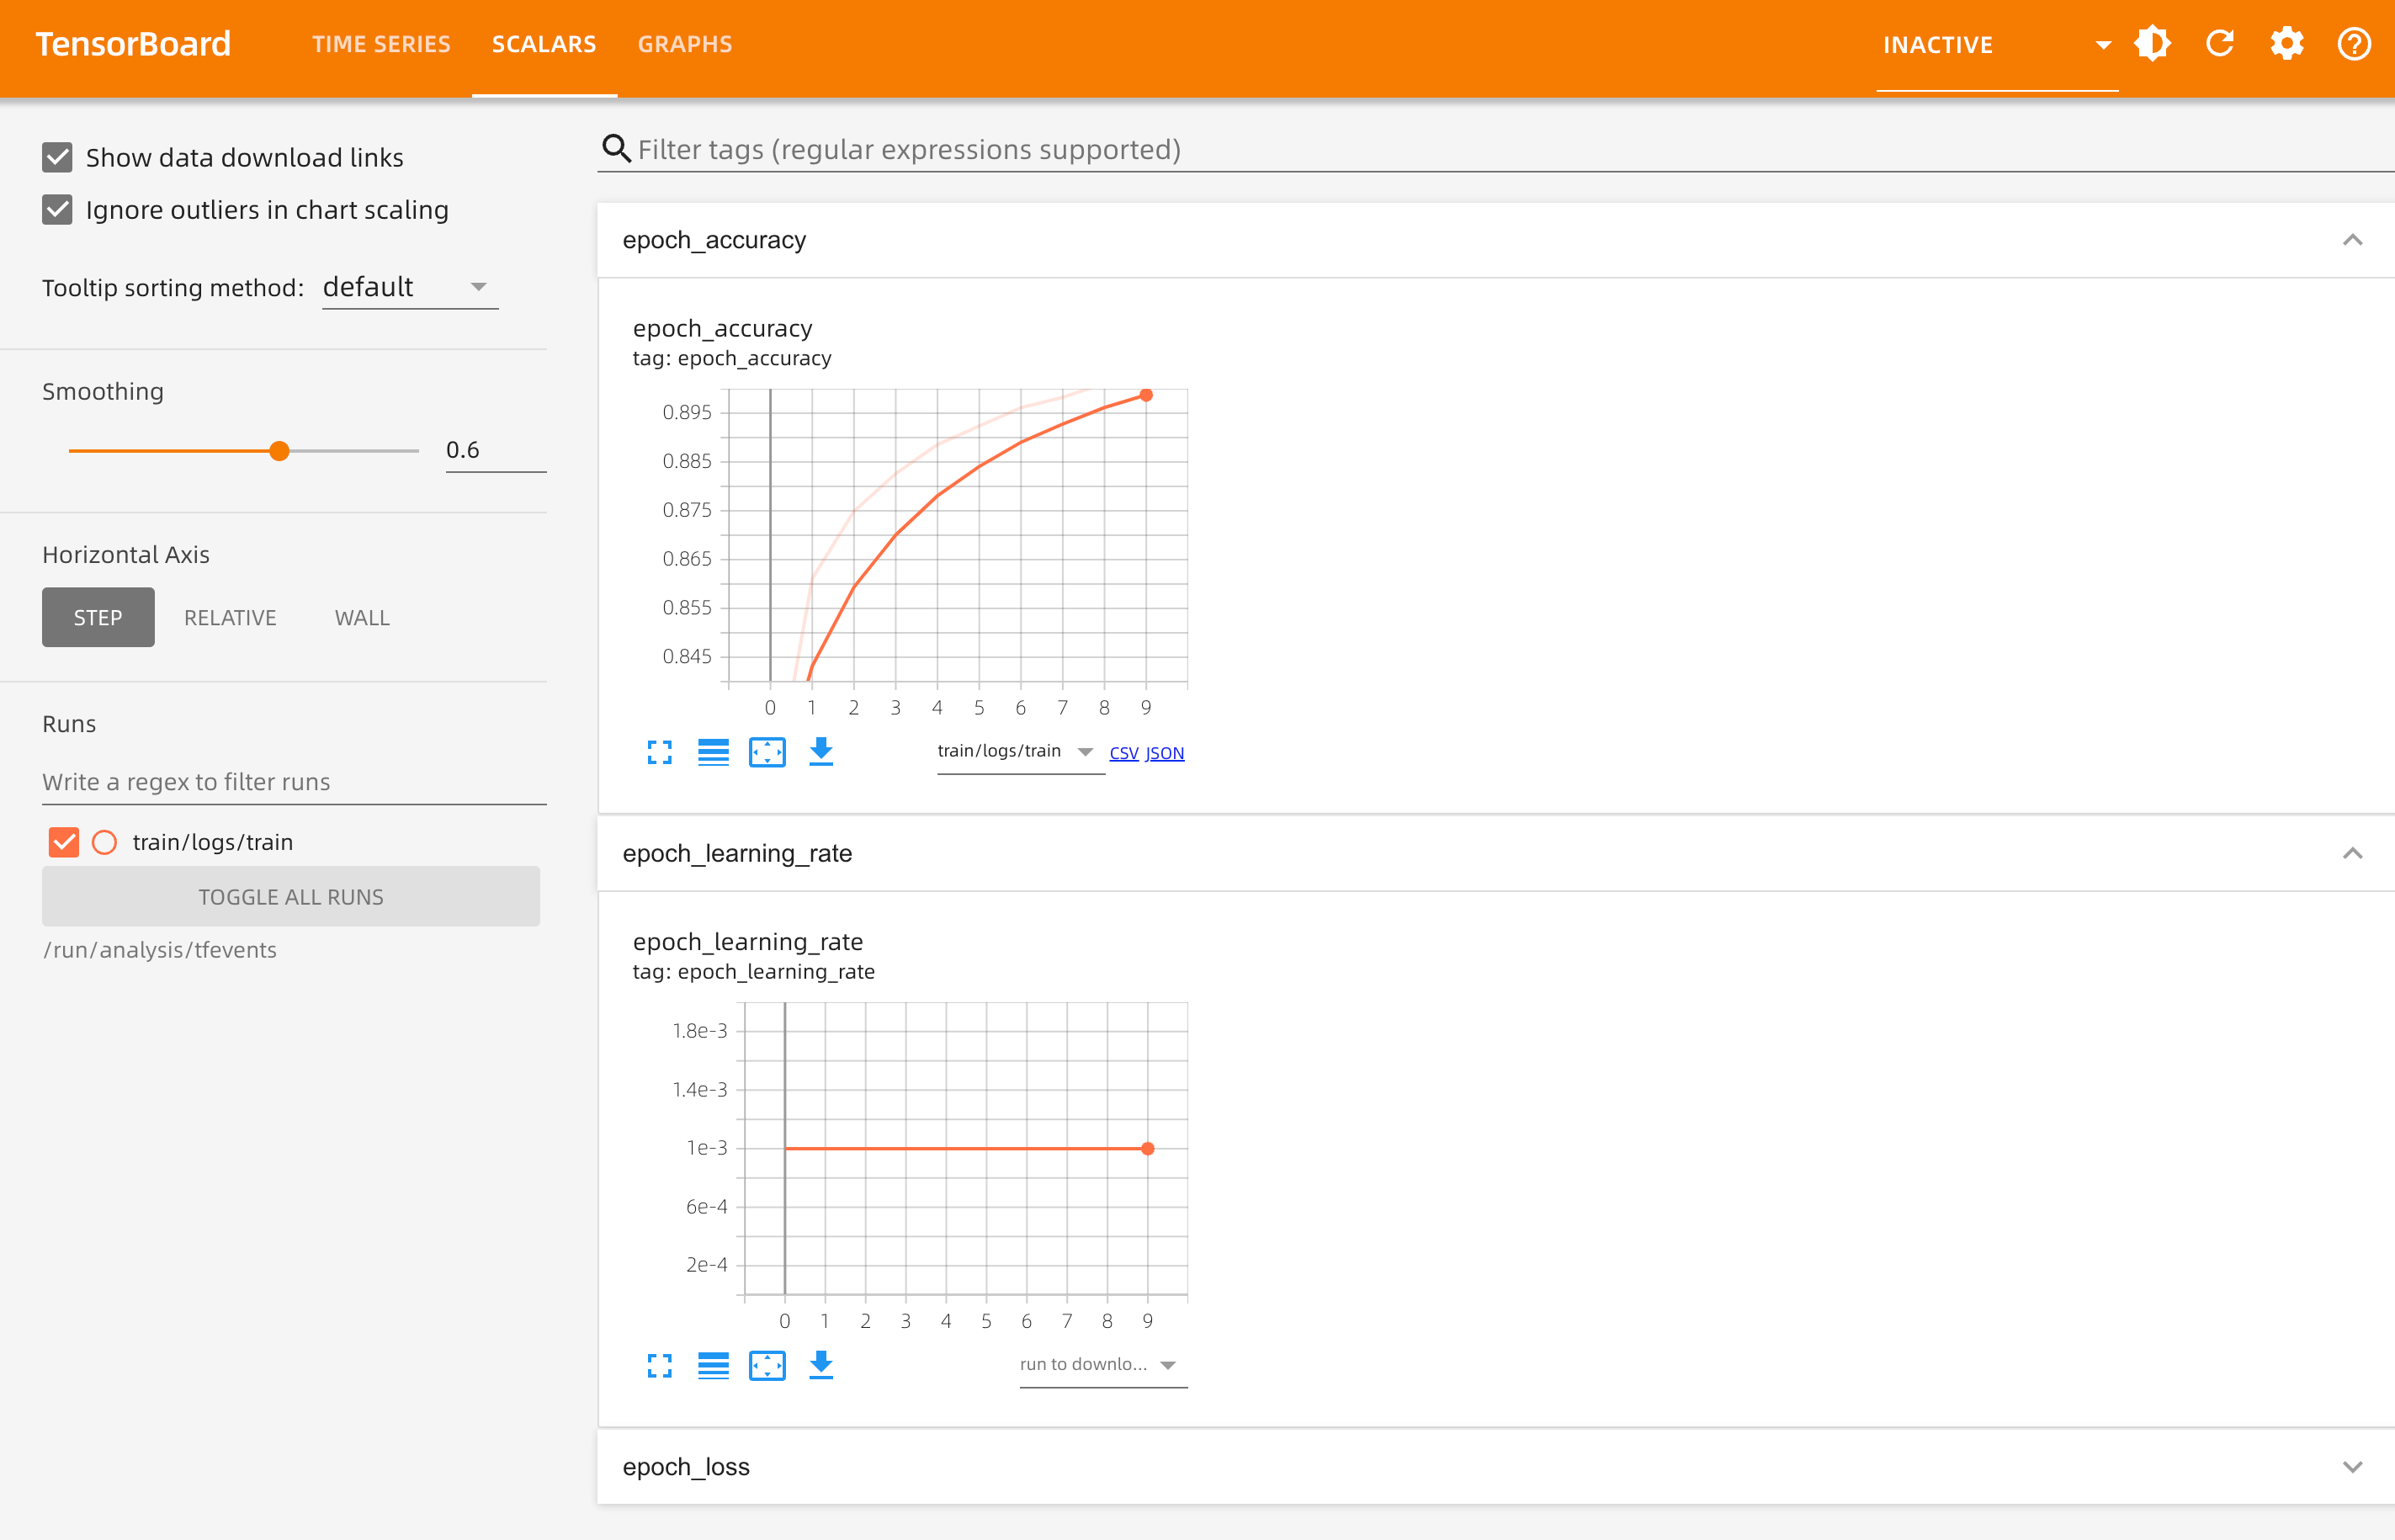
In the advanced configuration, enable Job Analysis (TensorBoard), and click OK.
Note
Logs will be saved in the output dataset at
/home/jovyan/model/train/logs/. -
Return to the training job list and wait for the status to change to Success. Click on the ┇ icon on the right side of the list to view details, clone jobs, update priority, view logs, and delete jobs, among other options.
-
Once the job is successfully created, click on Job Analysis in the left navigation bar to check the job status and fine-tune your training.