How to Integrate Customer System into DCE 5.0 (OEM IN)
OEM IN refers to embedding a partner's platform as a sub-module in DCE 5.0, appearing in the top-level navigation bar of DCE 5.0. Users can log in and manage the platform through DCE 5.0. The implementation of OEM IN involves 5 steps:
- Unified domain name
- Integration of user systems
- Integration of navigation bar
- Customizing appearance
- Integration of permission systems (optional)
For detailed instructions, please refer to the OEM IN best practices video tutorial.
Note
The following demonstration uses two instances of DCE 5.0 for nesting purposes.
Environment Setup
-
Deploy two instances of DCE 5.0:
-
http://192.168.1.6:30444as DCE 5.0 http://192.168.1.6:30080as the customer system
Adjust the operations on the customer system according to your actual situation.
- Plan the subpath path for the customer system:
http://192.168.1.6:30080/external-anyproduct/(It is highly recommended to use a distinctive name as the subpath, and it should not conflict with the main DCE 5.0 HTTP router!!)
Note
- This article uses HTTP for deploying DCE 5.0. In practical applications, you can use either HTTP or TLS certificates from public sources. Please do not use self-signed TLS certificates.
- In this article, /external-anyproduct represents the subpath of the customer system. Replace it with your subpath.
- In this article,
http://192.168.1.6:30444is the access address for DCE 5.0, andhttp://192.168.1.6:30080is the access address for the customer system. Replace them with your DCE 5.0 access address and customer system access address.
Unified Domain Name
1. Configure subpath for the customer system
- SSH into the customer system server.
-
Use the vim command to create the subpath-envoyfilter.yaml file.
apiVersion: networking.istio.io/v1alpha3 kind: EnvoyFilter metadata: name: subpath-envoyfilter namespace: istio-system spec: workloadSelector: labels: istio: ingressgateway configPatches: - applyTo: HTTP_FILTER match: context: GATEWAY listener: filterChain: filter: name: envoy.filters.network.http_connection_manager subFilter: name: envoy.filters.http.router patch: operation: INSERT_BEFORE value: name: envoy.lua typed_config: "@type": type.googleapis.com/envoy.extensions.filters.http.lua.v3.Lua inlineCode: |- function envoy_on_request(request_handle) local path = request_handle:headers():get(":path") # change it to your desired subpath local mysubpath = "/external-anyproduct" if string.sub(path,1,string.len(mysubpath)) ~= mysubpath then return end local _, _, rest = string.find(path, "/[^/]+/(.*)") if rest then request_handle:headers():replace(":path", "/" .. rest) end end --- apiVersion: security.istio.io/v1 kind: AuthorizationPolicy metadata: # Please edit the object below. Lines beginning with a '#' will be ignored, name: mysubpath namespace: istio-system spec: rules: - to: - operation: paths: # change it to your desired subpath # This config is only for dev environment rather than a production environment because it may cause AuthN failure!!! - /external-anyproduct* - from: - source: requestPrincipals: - "*" selector: matchLabels: app: istio-ingressgateway -
Apply the subpath-envoyfilter.yaml using the kubectl command:
-
Use the helm command to retrieve the version of ghippo:
-
Use the helm command to retrieve the helm values:
-
Use the vim command to edit the dce5-slave-values.yaml file.
USER-SUPPLIED VALUES: USER-SUPPLIED VALUES: null anakin: replicaCount: 1 apiserver: replicaCount: 1 auditserver: replicaCount: 1 controllermanager: replicaCount: 1 global: # Change it to the domain (IP) + subpath</font> of primary DCE 5.0 reverseProxy: http://192.168.1.6:30444/external-anyproduct storage: audit: - driver: mysql dsn: audit:changeme@tcp(ghippo-mysql.ghippo-system.svc.cluster.local:3306)/audit?charset=utf8mb4&multiStatements=true&parseTime=true builtIn: true ghippo: - driver: mysql dsn: ghippo:changeme@tcp(ghippo-mysql.ghippo-system.svc.cluster.local:3306)/ghippo?charset=utf8mb4&multiStatements=true&parseTime=true keycloak: - driver: mysql dsn: keycloak:changeme@tcp(ghippo-mysql.ghippo-system.svc.cluster.local:3306)/keycloak?charset=utf8mb4 keycloakx: replicas: 1 ui: replicaCount: 1 -
Apply the dce5-slave-values.yaml configuration using the helm command (Note: Replace the version number):
-
Restart the ghippo pod using the kubectl command to apply the configuration:
2. Configure the jwksUri discovery address for the customer system in DCE 5.0
- Log in to the DCE 5.0 server via SSH.
-
Use the vim command to create the external-svc-anyproduct.yaml file.
apiVersion: networking.istio.io/v1beta1 kind: ServiceEntry metadata: name: external-svc-anyproduct namespace: istio-system spec: exportTo: - "*" addresses: - 172.168.1.6 hosts: - external.svc.anyproduct ports: # Change it to client port - number: 30080 name: http protocol: HTTP location: MESH_EXTERNAL resolution: STATIC endpoints: # Change it to client domain (or IP) - address: 192.168.1.6 ports: # Change it to client port http: 30080 -
Apply the external-svc-anyproduct.yaml using the kubectl command:
-
Use the kubectl command to modify the DCE 5.0 RequestAuthentication CR resource:
apiVersion: security.istio.io/v1
kind: RequestAuthentication
metadata:
  name: ghippo
  namespace: istio-system
spec:
  jwtRules:
  # New rule 1
  - forwardOriginalToken: true
    # Primary DCE 5.0 domain (or IP) + subpath + /auth/realms/ghippo
    issuer: http://192.168.1.6:30444/external-anyproduct/auth/realms/ghippo
    # Primary DCE 5.0 domain (or IP) + subpath + /auth/realms/ghippo/protocol/openid-connect/certs
    jwksUri: http://192.168.1.6:30444/external-anyproduct/auth/realms/ghippo/protocol/openid-connect/certs?1692515854
  # New rule 2
  - forwardOriginalToken: true
    issuer: ghippo.io
    # Primary DCE 5.0 domain (or IP) + subpath + /apis/ghippo.io/v1alpha1/certs
    jwksUri: http://192.168.1.6:30444/external-anyproduct/apis/ghippo.io/v1alpha1/certs?1692515854

  - forwardOriginalToken: true
    issuer: http://192.168.1.6:30444/auth/realms/ghippo
    jwksUri: http://ghippo-keycloakx-http.ghippo-system.svc.cluster.local/auth/realms/ghippo/protocol/openid-connect/certs?1692515854
  - forwardOriginalToken: true
    issuer: http://ghippo-keycloakx-http.ghippo-system.svc.cluster.local/auth/realms/ghippo
    jwksUri: http://ghippo-keycloakx-http.ghippo-system.svc.cluster.local/auth/realms/ghippo/protocol/openid-connect/certs?1692515854
  - forwardOriginalToken: true
    issuer: ghippo.io
    jwksUri: http://ghippo-apiserver.ghippo-system.svc.cluster.local:80/apis/ghippo.io/v1alpha1/certs?1692515854
  selector:
    matchLabels:
      app: istio-ingressgateway
Docking User Systems
Integrate the customer system with the DCE 5.0 platform using protocols such as OIDC/OAUTH, allowing users to access the customer system without having to log in again after logging into the DCE 5.0 platform.
-
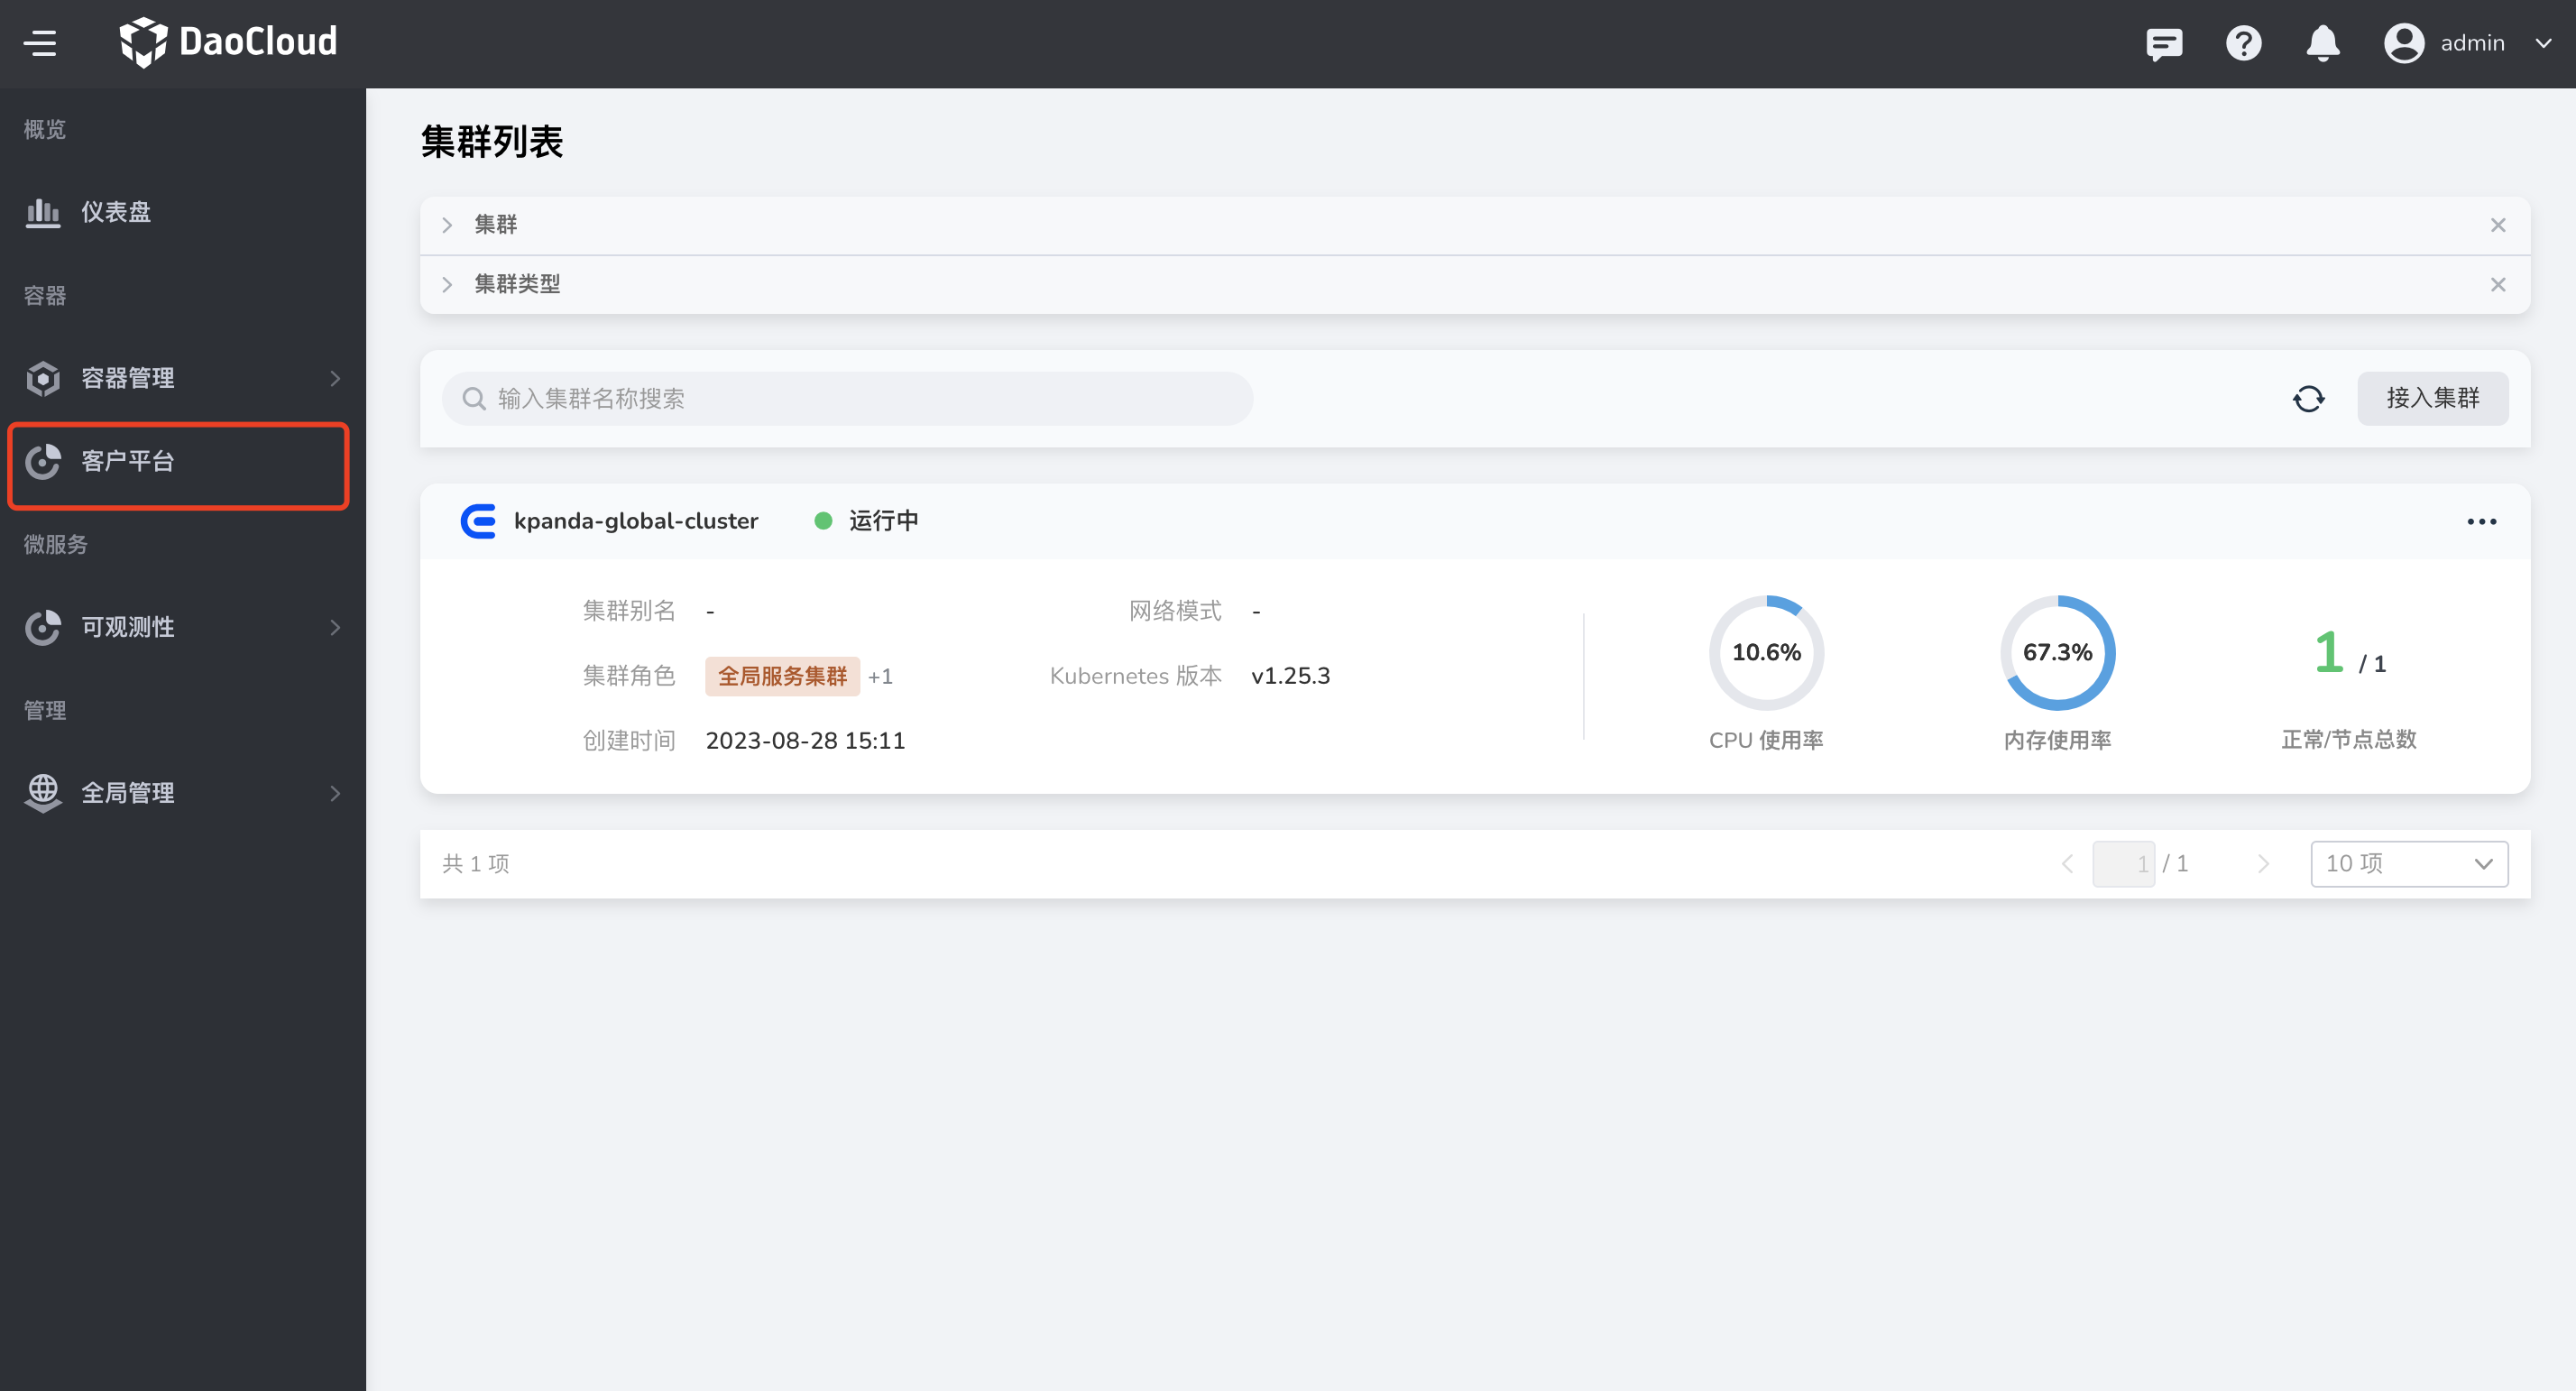
In the scenario of two instances of DCE 5.0, you can create an SSO integration under DCE 5.0 Global Management -> Users and Access Control -> Access Management .
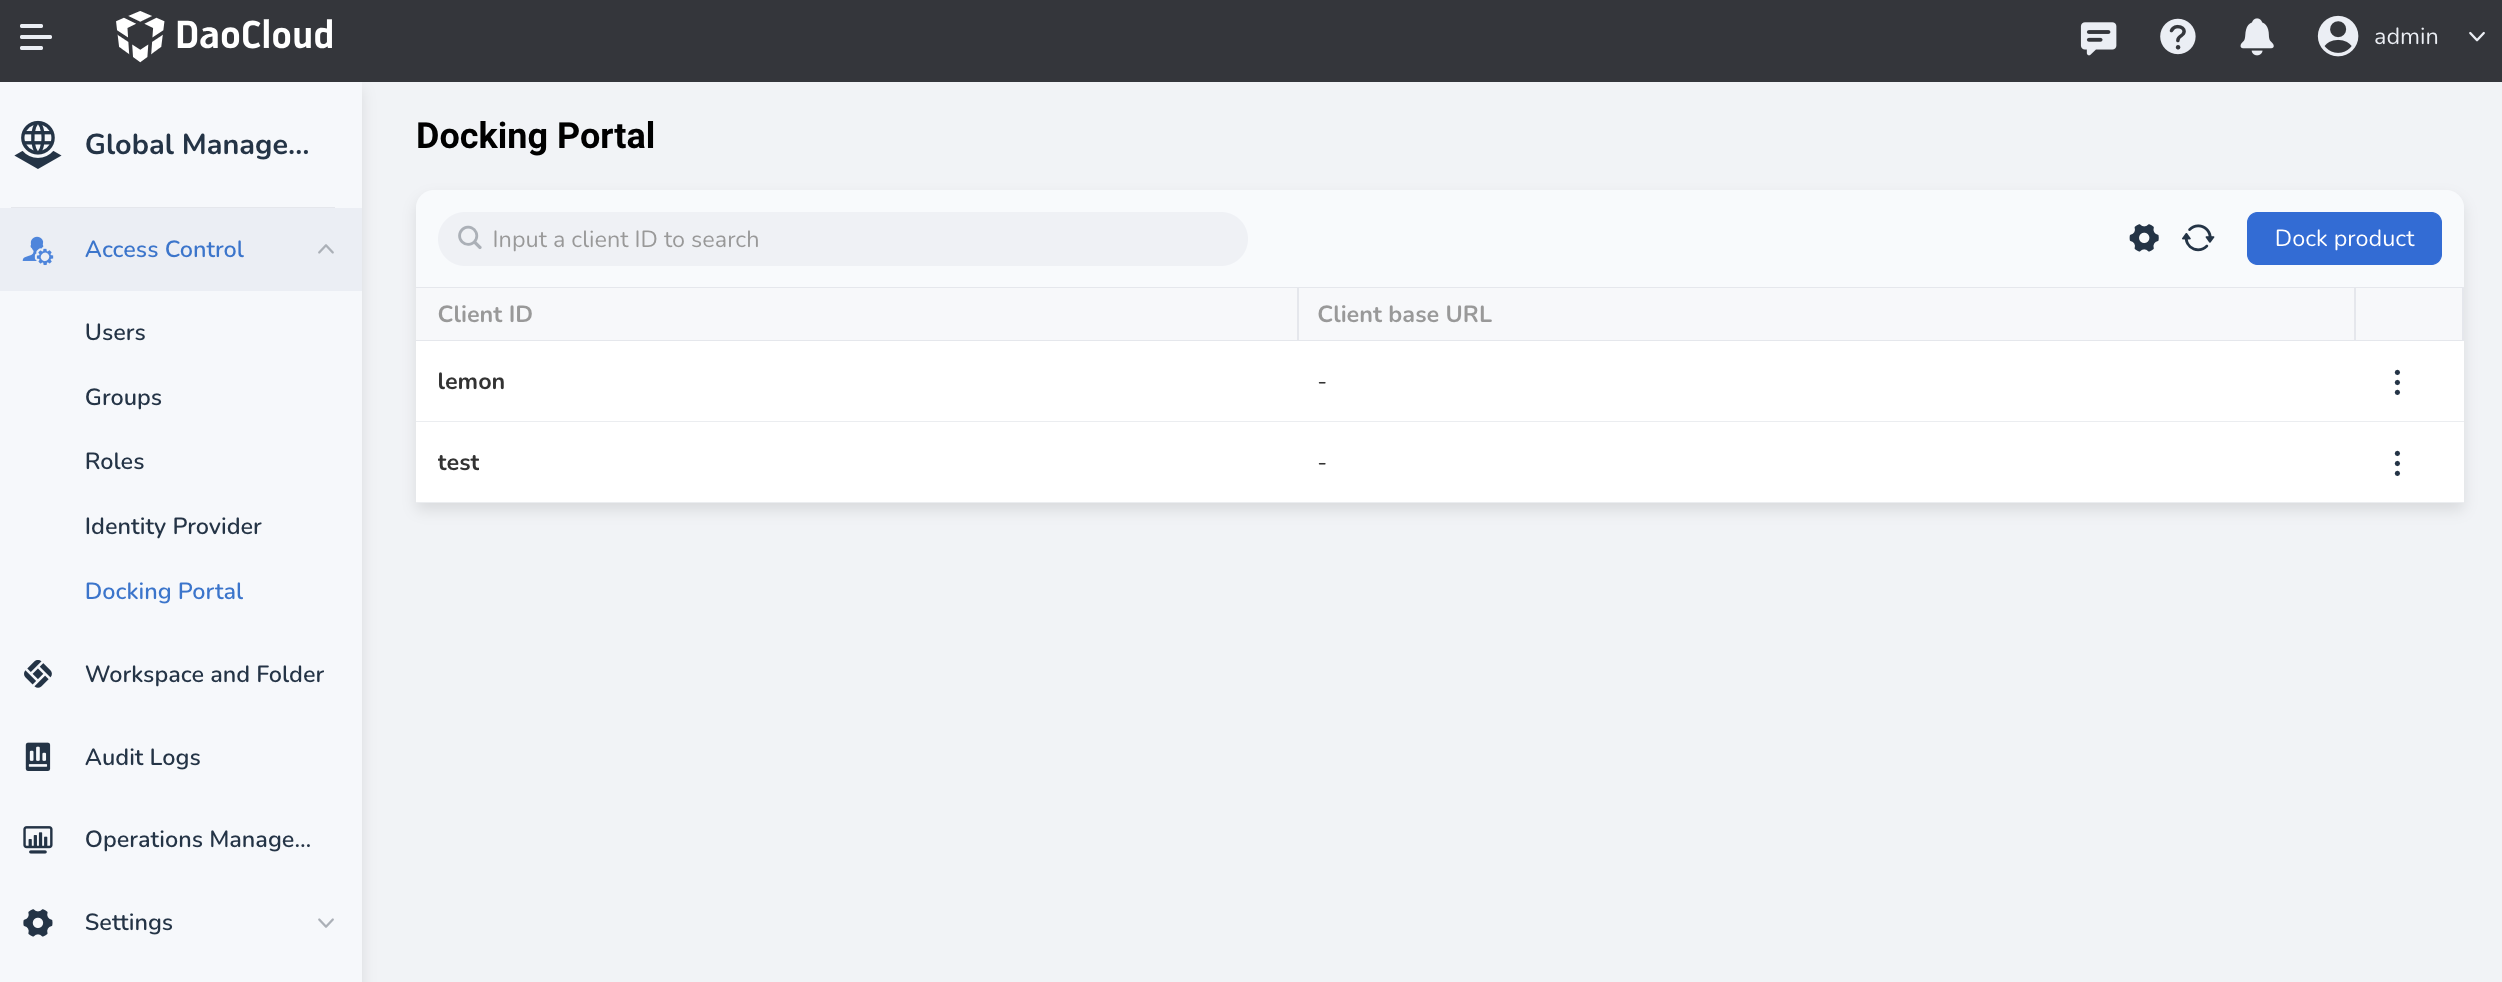

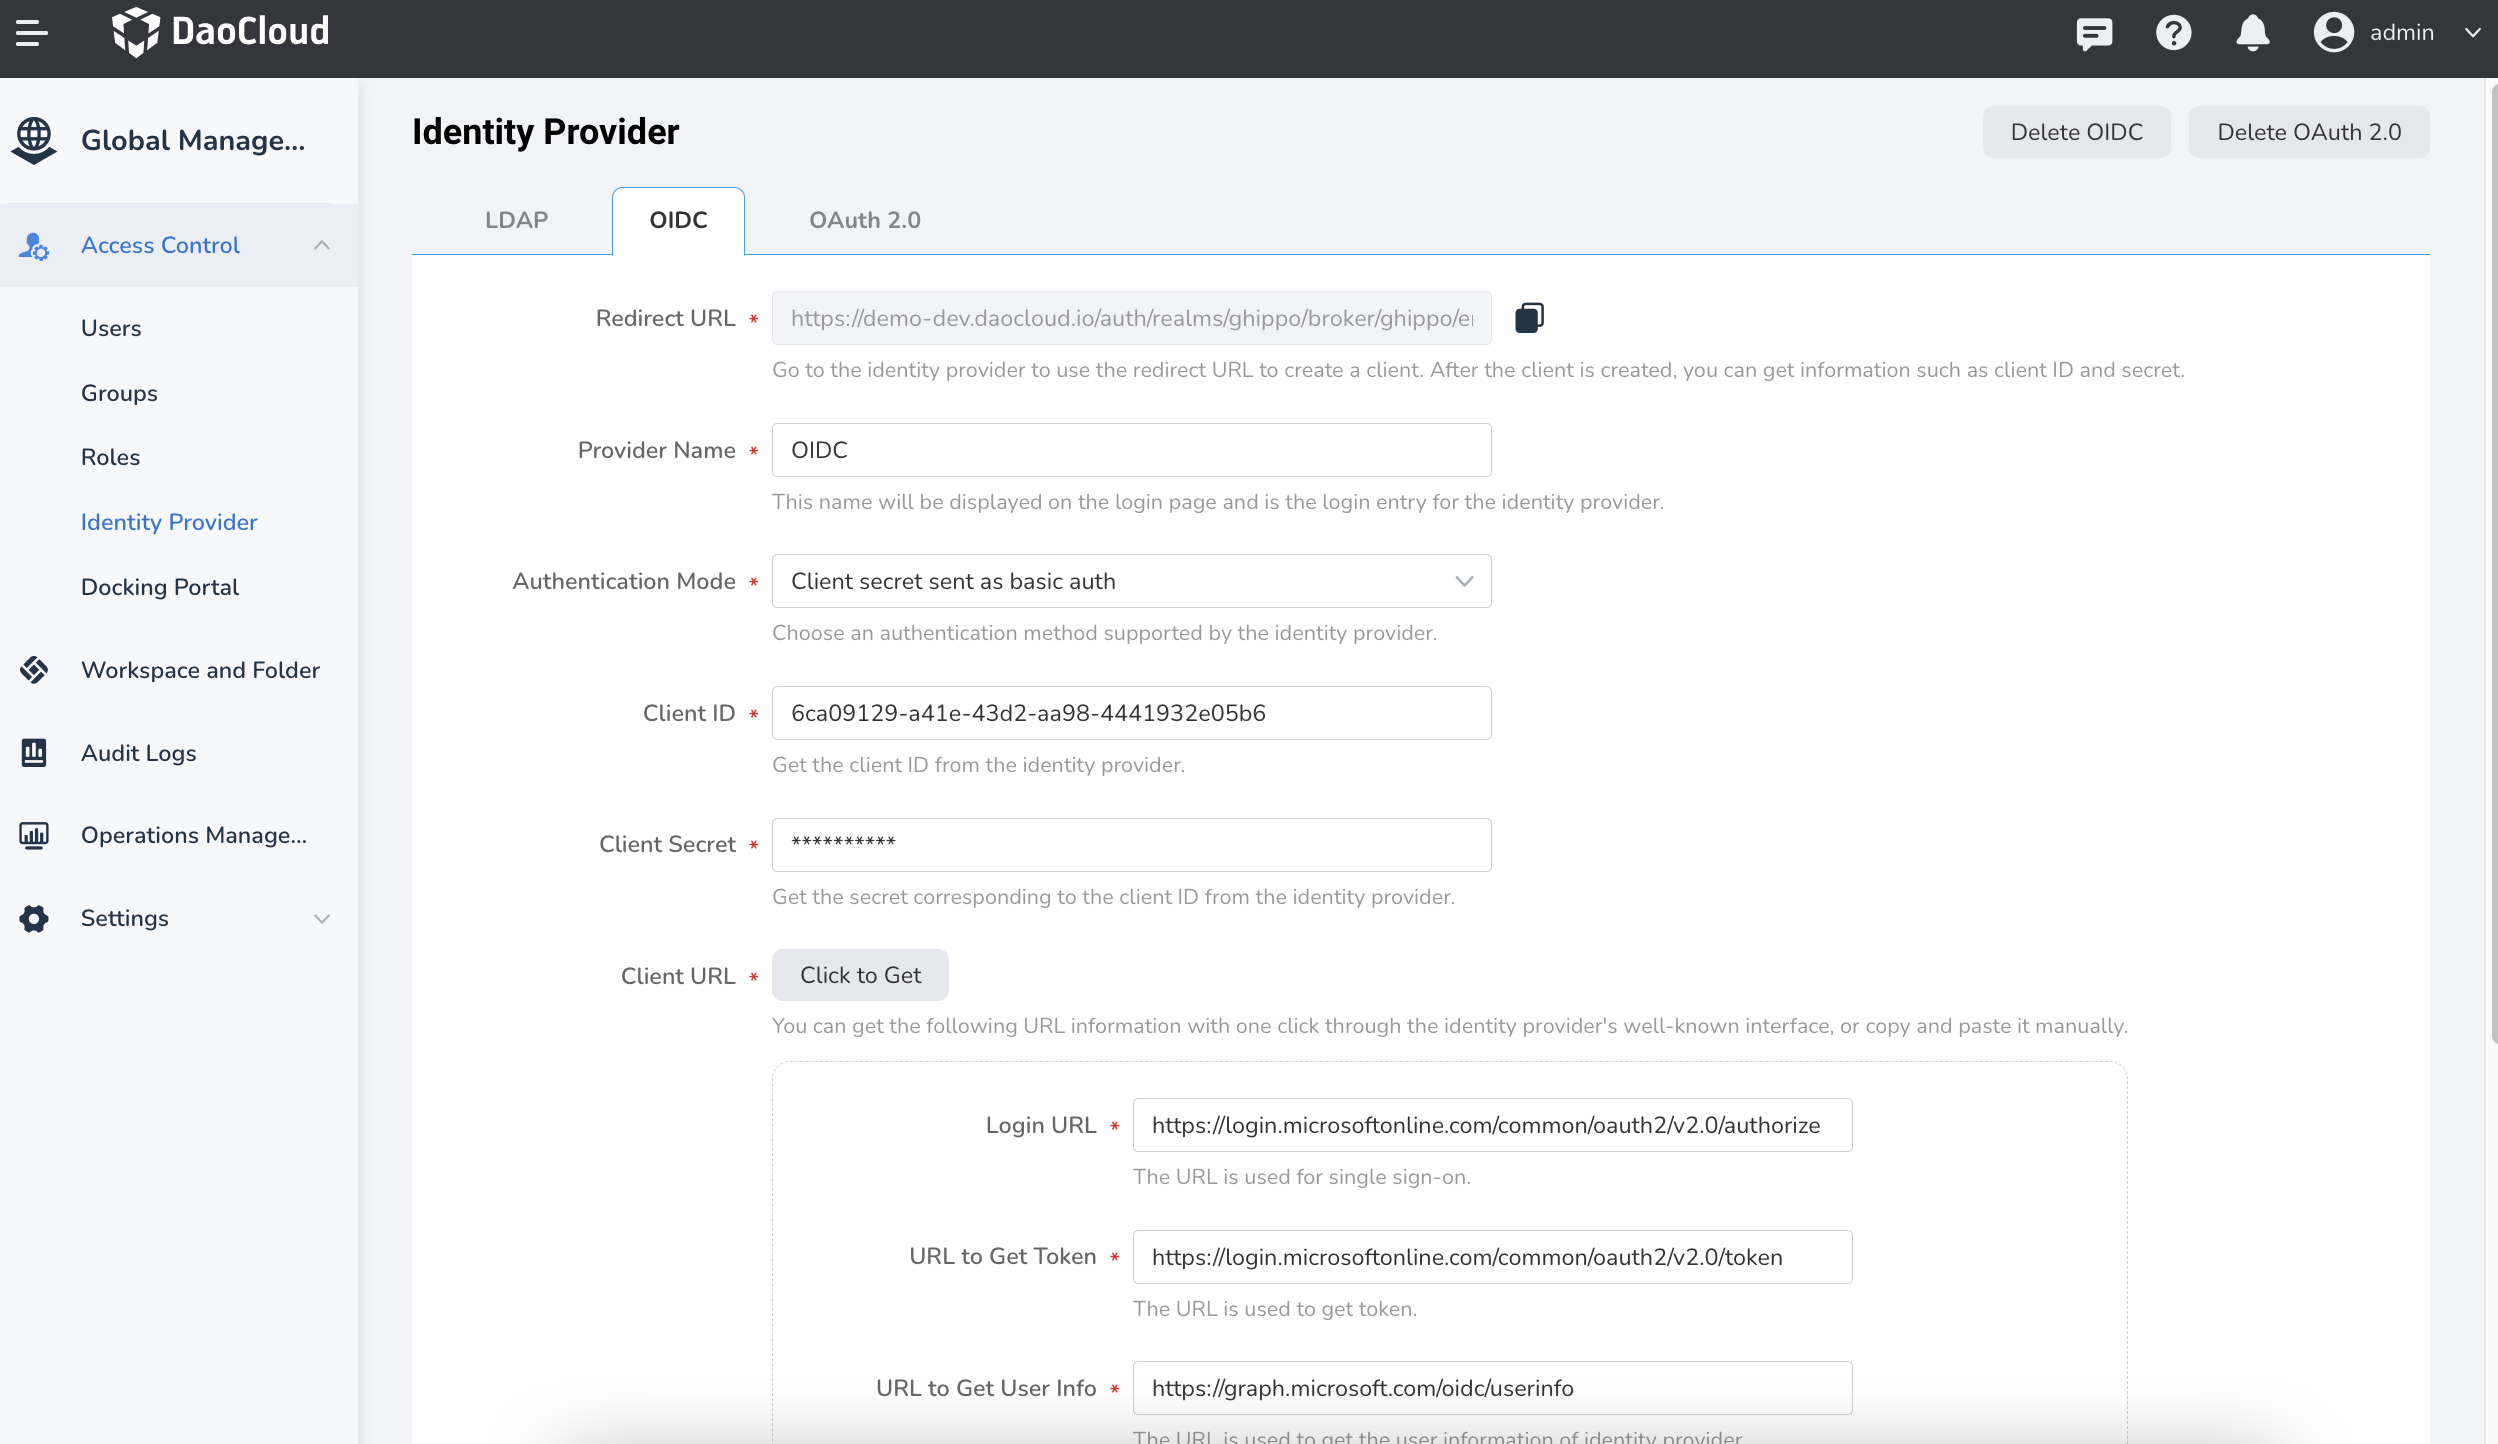
-
After creation, fill in the client ID, secret key, single sign-on URL, and other details from the Access Management page into the customer system's Global Management -> Users and Access Control -> Identity Providers -> OIDC , completing the user integration.
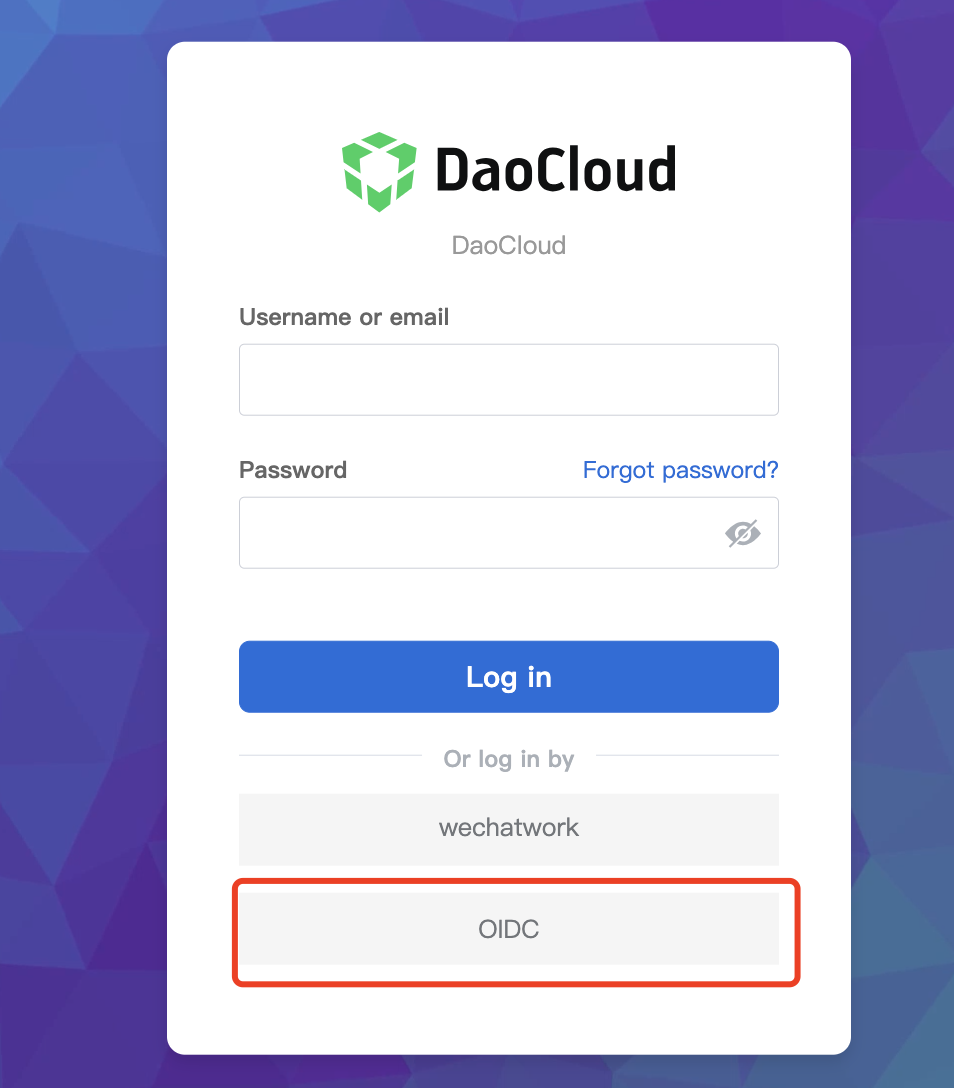
-
After integration, the customer system login page will display the OIDC (Custom) option. When accessing the customer system from the DCE 5.0 platform for the first time, select OIDC as the login method. Subsequently, users will be directly redirected to the customer system without needing to choose again.
Docking Navigation Bar
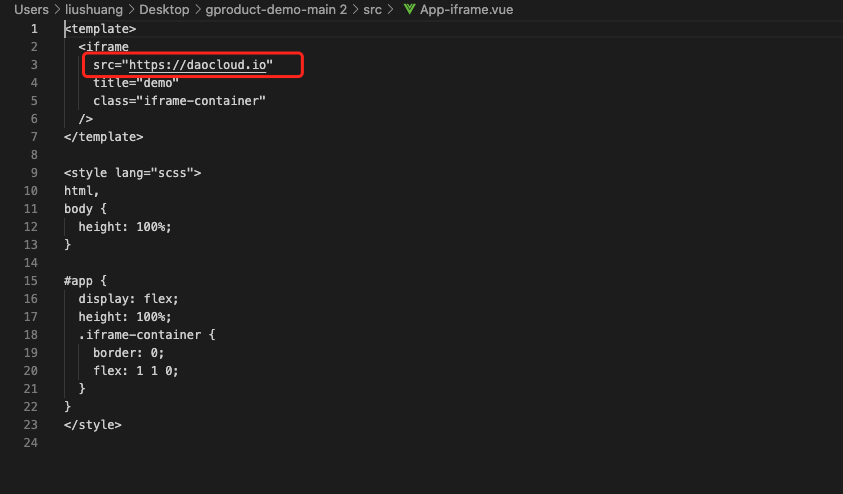
Refer to the tar package provided in the documentation below to create a blank frontend sub-application. Embed the customer system within this blank application using an iframe.
- Download the gproduct-demo-main.tar.gz file. Open the App-iframe.vue file located in the src folder and modify the value of the src attribute to the absolute address that users will use to access the customer system, such as: src="http://192.168.1.6/external-anyproduct" (DCE 5.0 address + subpath) or a relative address, such as: src="./external-anyproduct/insight"
- Delete the App.vue and main.ts files from the src folder. Rename the App-iframe.vue file to App.vue and the main-iframe.ts file to main.ts.
-
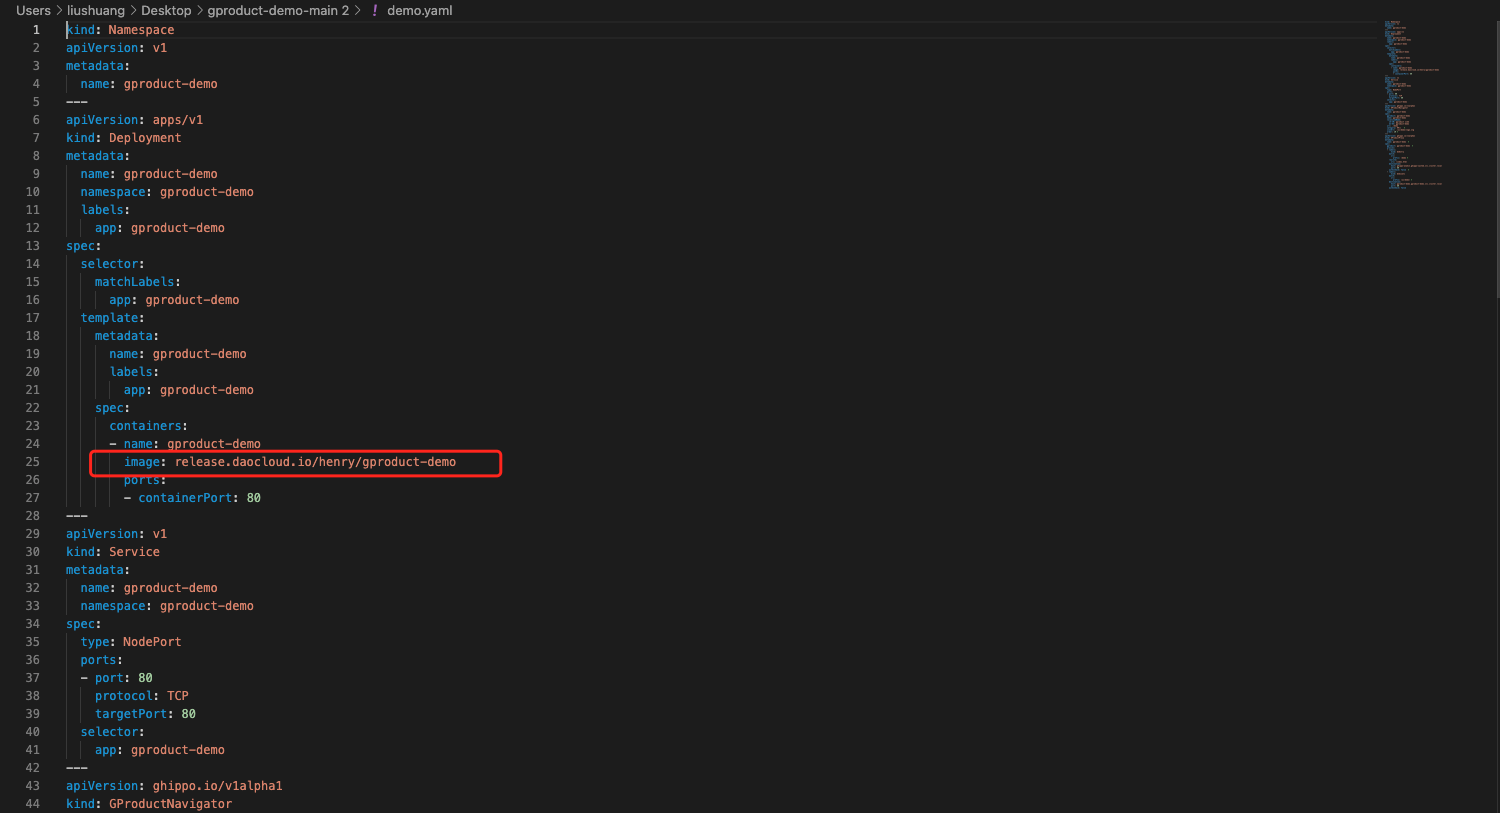
Edit the demo.yaml file.
kind: Namespace apiVersion: v1 metadata: name: gproduct-demo --- apiVersion: apps/v1 kind: Deployment metadata: name: gproduct-demo namespace: gproduct-demo labels: app: gproduct-demo spec: ... --- apiVersion: v1 kind: Service metadata: name: gproduct-demo namespace: gproduct-demo spec: ... --- apiVersion: ghippo.io/v1alpha1 kind: GProductNavigator metadata: name: gproduct-demo spec: ... --- apiVersion: ghippo.io/v1alpha1 kind: GProductProxy metadata: name: gproduct-demo spec: gproduct: gproduct-demo proxies: ... # Add a rule to replace '/external-anyproduct' with your subpath - match: uri: prefix: /external-anyproduct destination: host: external.svc.anyproduct # Replace the port number with the port number of the customer system (defined in the ServiceEntry). port: 30080 authnCheck: false -
Follow the steps in the readme file to build the image (Note: Before executing the last step, replace the image address in demo.yaml with the built image address).
Once the integration is complete, the "Customer System" will appear in the top-level navigation bar of DCE 5.0. Clicking on it will take you to the customer system.
Customizing Appearance
Note
DCE 5.0 supports customizing the appearance using CSS. The actual implementation of appearance customization for the customer system may vary depending on the specific requirements.
Login to the customer system and navigate to Global Management -> Settings -> Appearance to customize the platform's background color, logo, name, and more. For detailed instructions, please refer to Appearance Customization.
Integration of Authorization System (Optional)
Solution Approach 1:
Custom teams can implement a custom module where DCE 5 will notify every user login event through a Webhook. The custom module can then use the OpenAPI of AnyProduct and DCE 5.0 to synchronize the user's permission information.
Solution Approach 2:
If required, every authorization change can be notified to AnyProduct using the Webhook method (implementation can be done later).
Leveraging Other Capabilities of DCE 5.0 in AnyProduct (Optional)
The method involves using DCE 5.0's OpenAPI.