High Availability Solution for Bootstrap Nodes
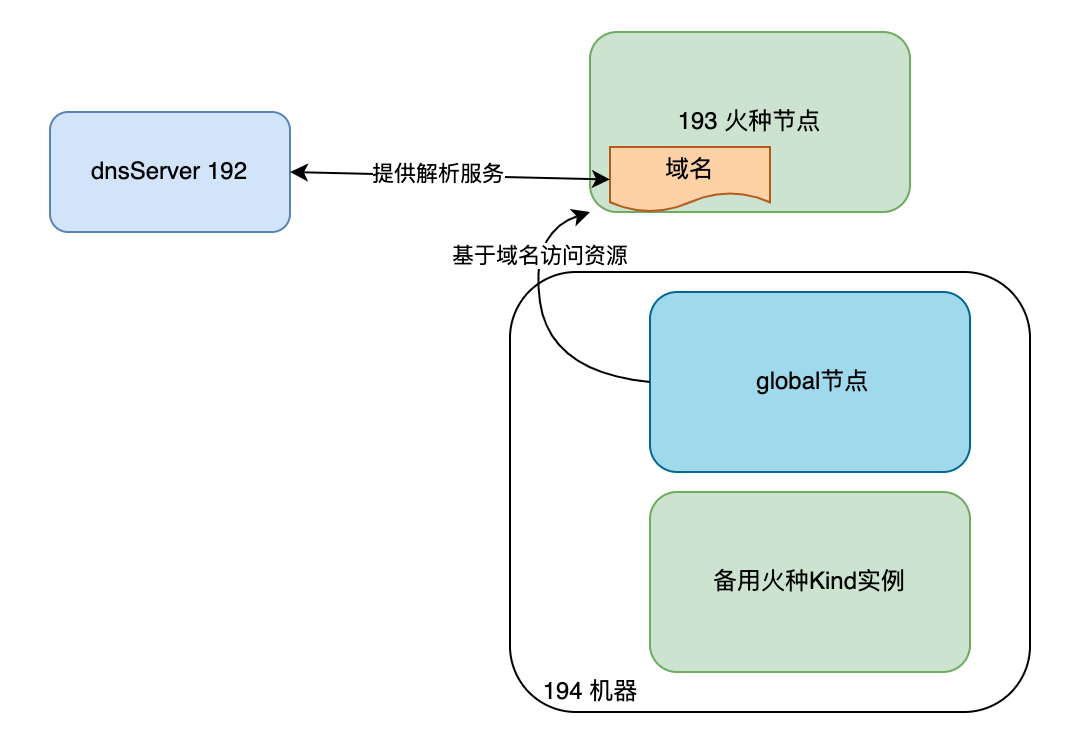
This page explains the concept of a "backup bootstrap node." Essentially, this node is a virtual machine designed to perform all the duties of the primary bootstrap node but is activated only when the original node experiences issues. Once the primary node is restored, operations should promptly revert to it. To ensure the high availability of the bootstrap service, policies such as pre-configured DNS, HAProxy + KeepAlived, or an nginx reverse proxy can be employed. This article will specifically focus on the pre-configured DNS approach.
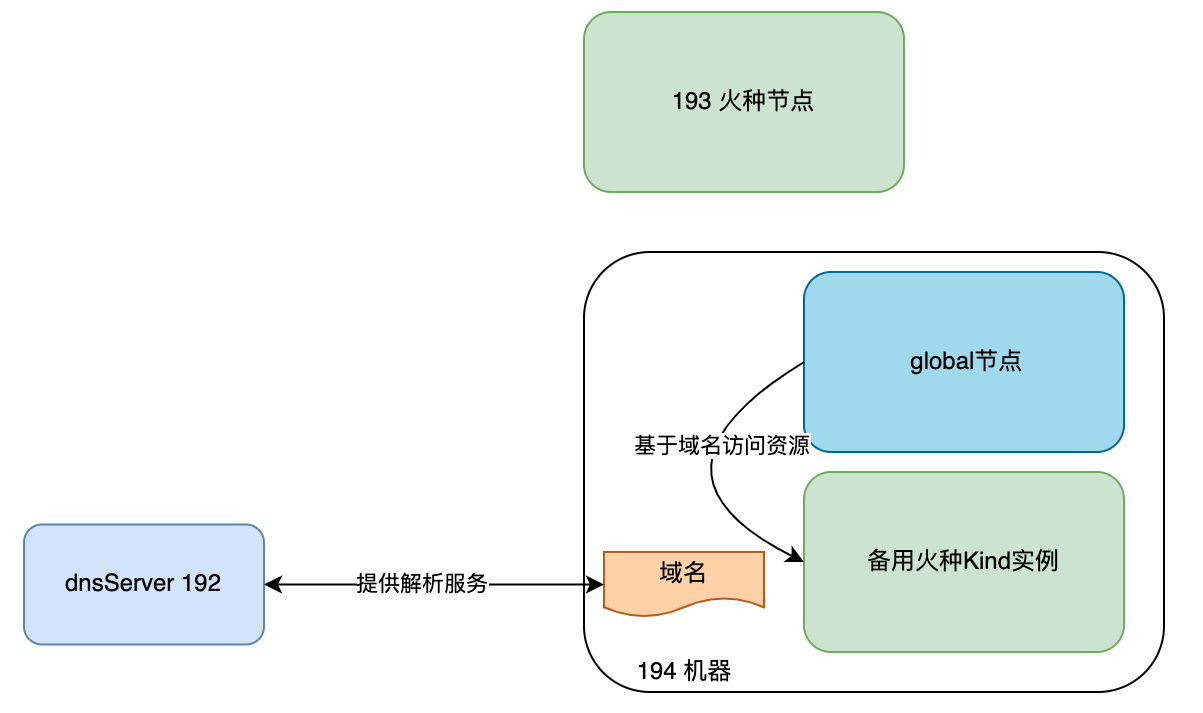
Overall solution architecture is as folllows:
Prepare Environment
- Bootstrap node: Operating system centos7.9, IP
xxx.xx.xx.193 - Global single cluster: Operating system centos7.9, IP
xxx.xx.xx.194, CRI containerd - Backup bootstrap node: Operating system centos7.9, IP
xxx.xx.xx.194, the backup bootstrap node can be colocated with the master node of the global cluster. - dnsServer: IP
xxx.xx.xx.192 - Domain name:
(Initially resolved to the bootstrap node xxx.xx.xx.193)
Steps
Simulate dnsServer and Configure According to Your Actual Situation
Set up dnsServer information on the machine xxx.xx.xx.192. The following configuration information is for demonstration purposes only:
-
Configure
/etc/named.conf -
Configure
/var/named/tinder-node-server.com.zone -
Configure
/var/named/tinder-node-server.com.local -
Configure DNS machine
/etc/resolv.conf -
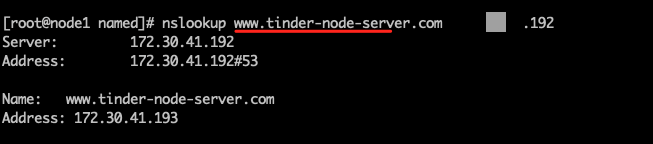
Verify if dnsServer resolution is correct
Note
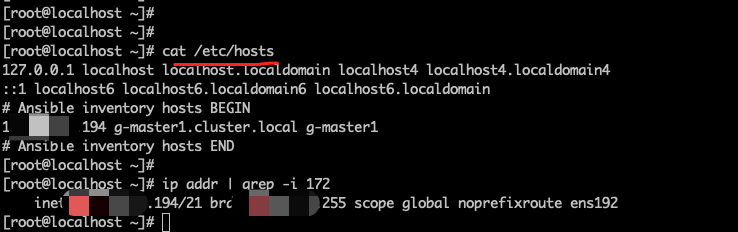
- If an external DNS service is used to resolve the domain name, make sure that the /etc/hosts file of each node, including the bootstrap node, does not contain the domain name configuration.
- You can use the nslookup command to check the domain name resolution status. Make sure that each node, including the bootstrap node, can use nslookup to check the resolution status.
Install DCE 5.0 Based on External Domain Name Mode
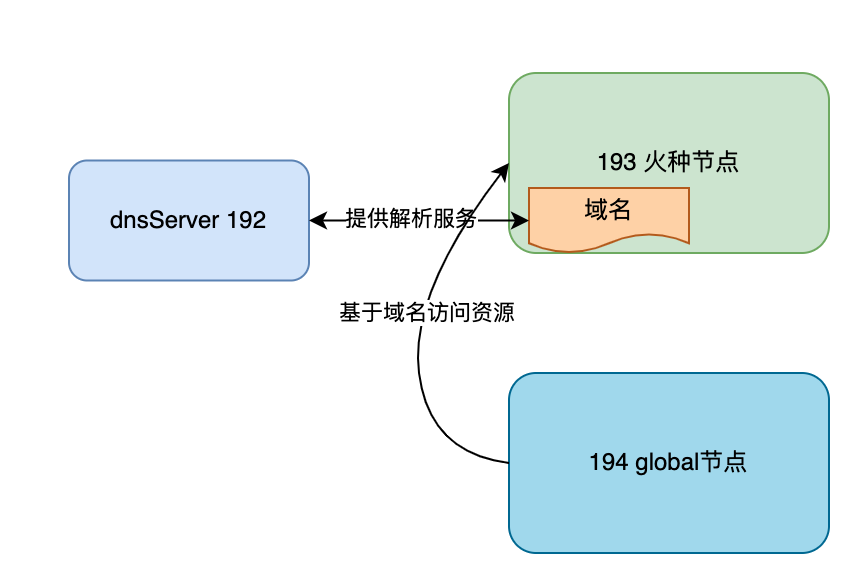
Overall architecture:
-
Refer to the installation process in Offline Installation of DCE 5.0 Enterprise
-
Example of a well-defined clusterConfig file:
clusterConfig.yamlapiVersion: provision.daocloud.io/v1alpha3 kind: ClusterConfig metadata: creationTimestamp: null spec: clusterName: my-cluster bootstrapNode: www.tinder-node-server.com # Based on external domain name mode masterNodes: - nodeName: "g-master1" ip: xxx.xx.xx.194 ansibleUser: "root" ansiblePass: "admin" fullPackagePath: "/home/offline-fix-dns" osRepos: type: builtin isoPath: "/home/CentOS-79-x86_64-DVD-2009.iso" osPackagePath: "/home/os-pkgs-centos7-v0.4.8.tar.gz" imagesAndCharts: type: builtin additionalSSLSubjectAltName: "xxx.xx.xx.193" # Domain name resolved by the dns service addonPackage: binaries: type: builtin -
Start the installation
-
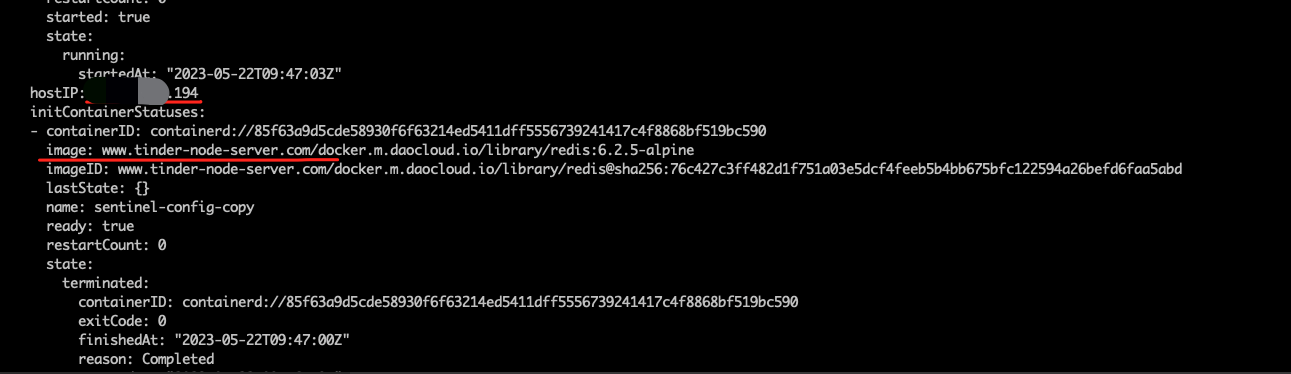
After the cluster is successfully installed, check the pod image addresses
-
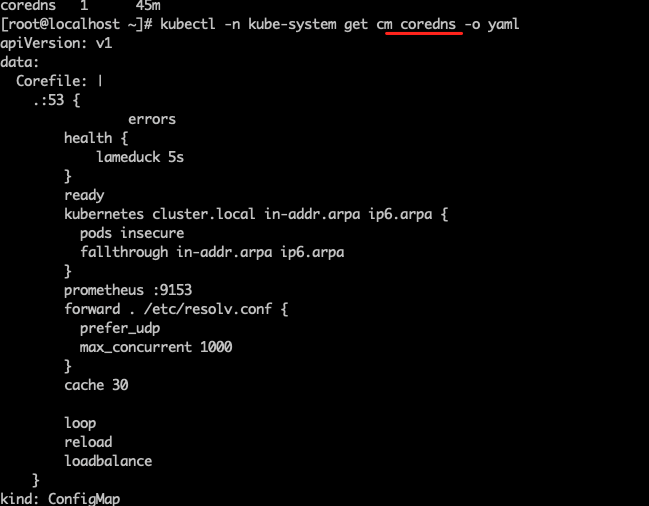
Check the hosts file of the global node and the configuration of the coredns pod. There should be no additional domain name configurations
Simulate the Activation of the Backup Bootstrap Node
-
Ensure that the backup bootstrap node has installed the necessary dependencies, refer to Install Tools,
-
SCP the offline package of the bootstrap node to the backup bootstrap node
-
Example of a well-defined clusterConfig file: Start the installation of the bootstrap node using IP mode (bootstrapNode is set to auto or the specific IP address of the bootstrap node)
clusterConfig.yamlapiVersion: provision.daocloud.io/v1alpha3 kind: ClusterConfig metadata: creationTimestamp: null spec: clusterName: my-cluster bootstrapNode: 172.30.41.194 # IP-based mode masterNodes: - nodeName: "g-master1" ip: xxx.xx.xx.194 ansibleUser: "root" ansiblePass: "admin" fullPackagePath: "/home/offline-fix-dns" osRepos: type: builtin isoPath: "/home/CentOS-79-x86_64-DVD-2009.iso" osPackagePath: "/home/os-pkgs-centos7-v0.4.8.tar.gz" imagesAndCharts: type: builtin additionalSSLSubjectAltName: "www.tinder-node-server.com" # Domain name resolved by the dns service addonPackage: binaries: type: builtin -
Run specific steps
1,2,3,4,5on the backup bootstrap nodeNote
The -j parameter is necessary here, it only installs on the bootstrap node itself.
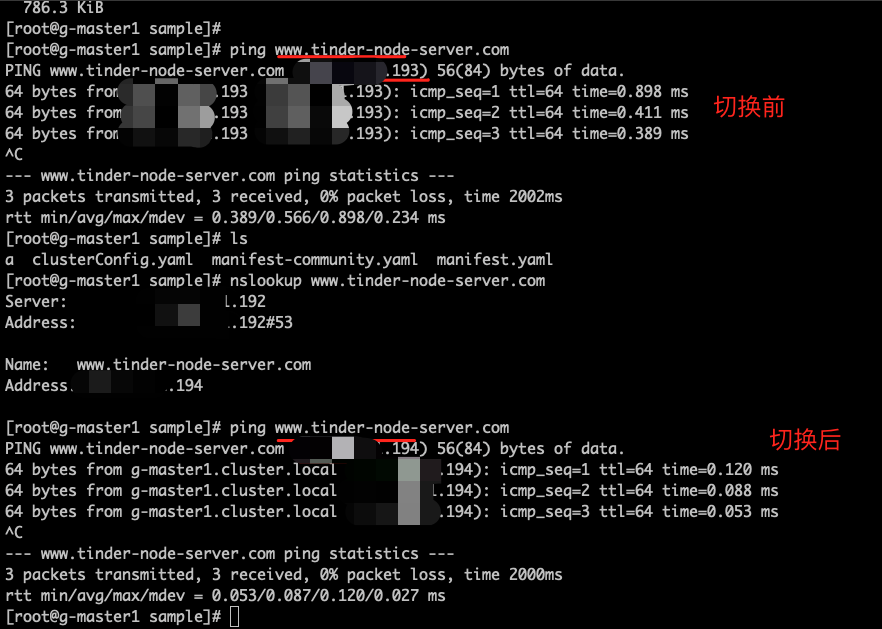
Test the High Availability of the Bootstrap Node Based on DNS Resolution
Prerequisite: Update dnsServer to switch DNS resolution to the backup bootstrap node and perform verification after the switch.
-
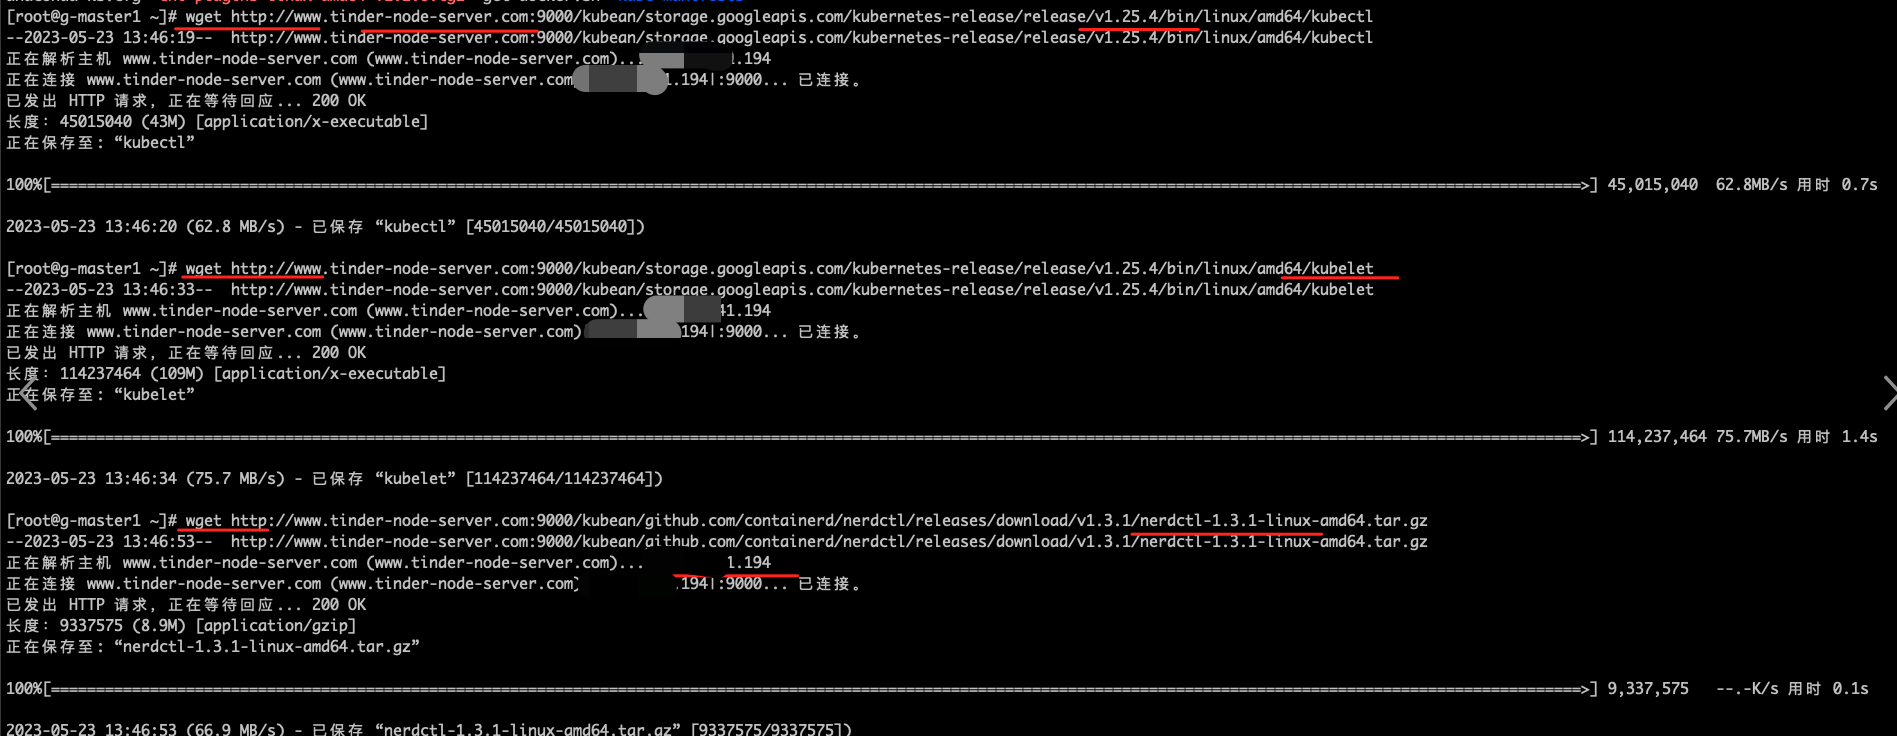
Verify that file downloads are normal
-
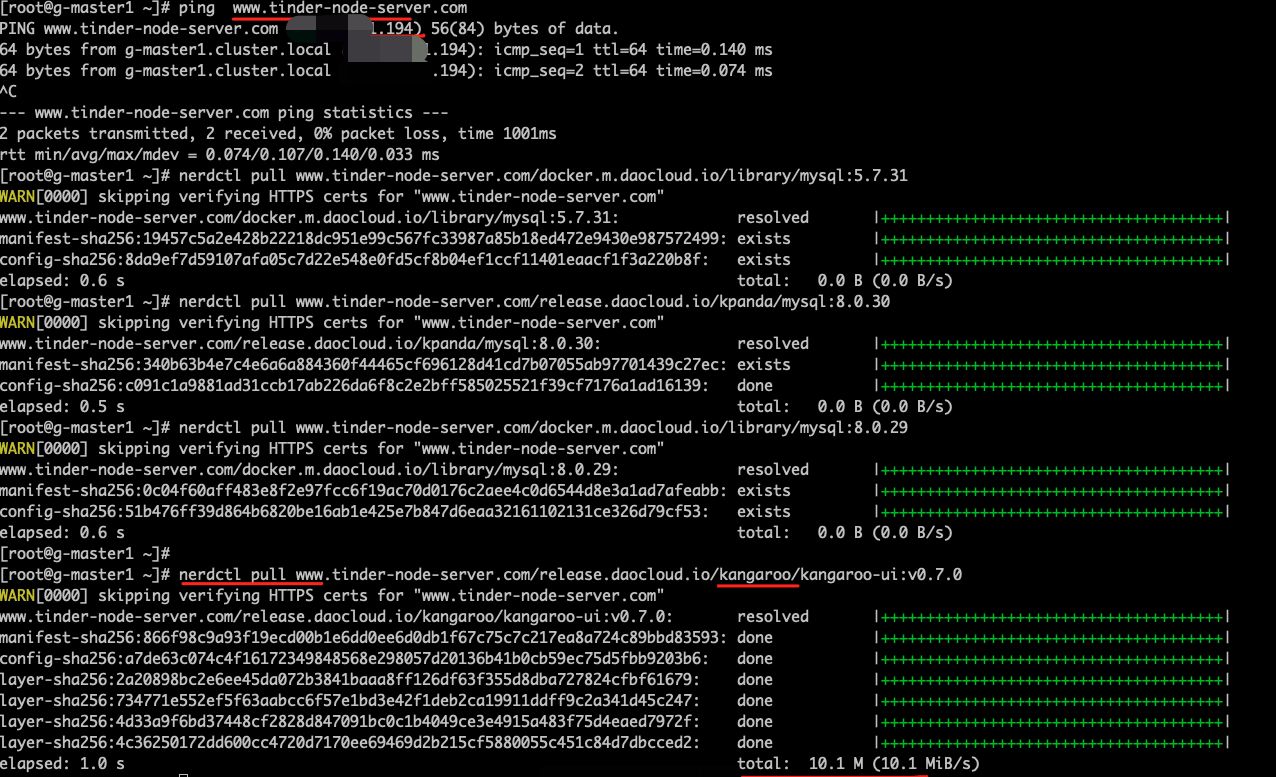
Verify that image pulls are normal
-
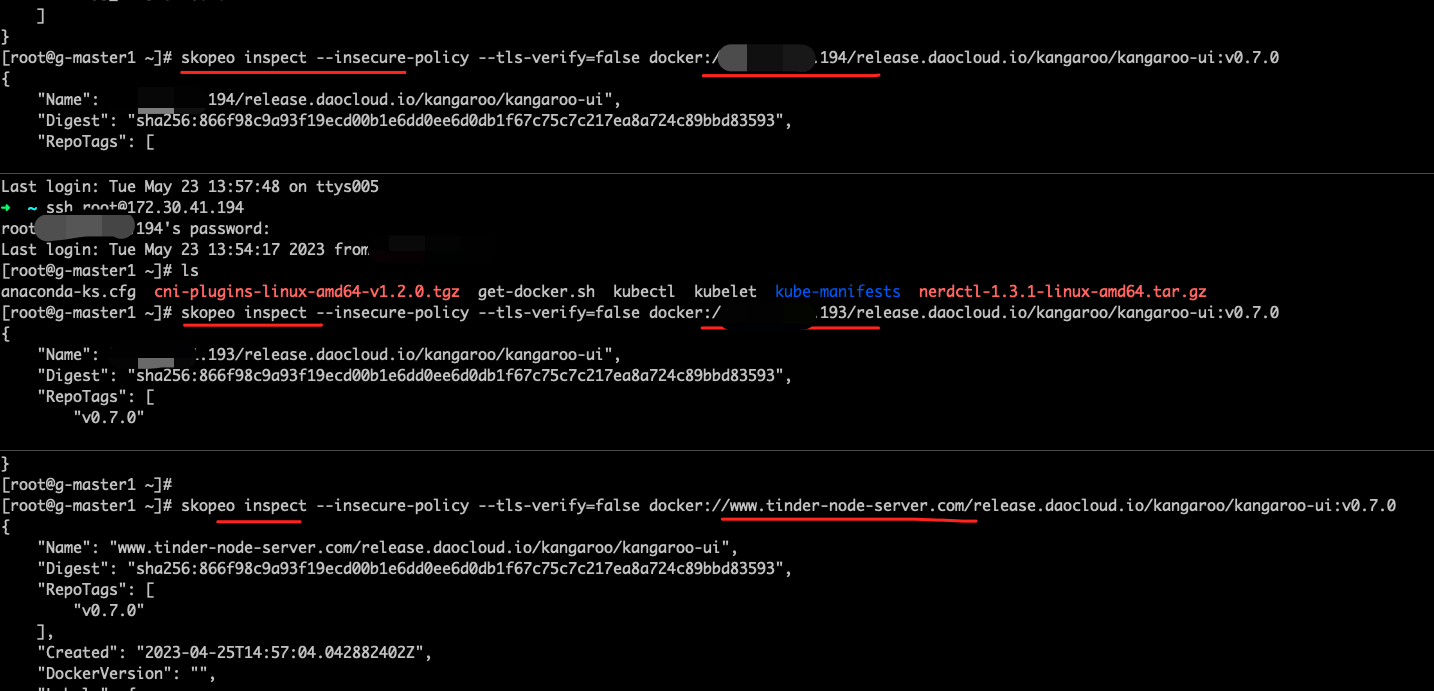
Verify that the source bootstrap node and the backup node have normal images
-
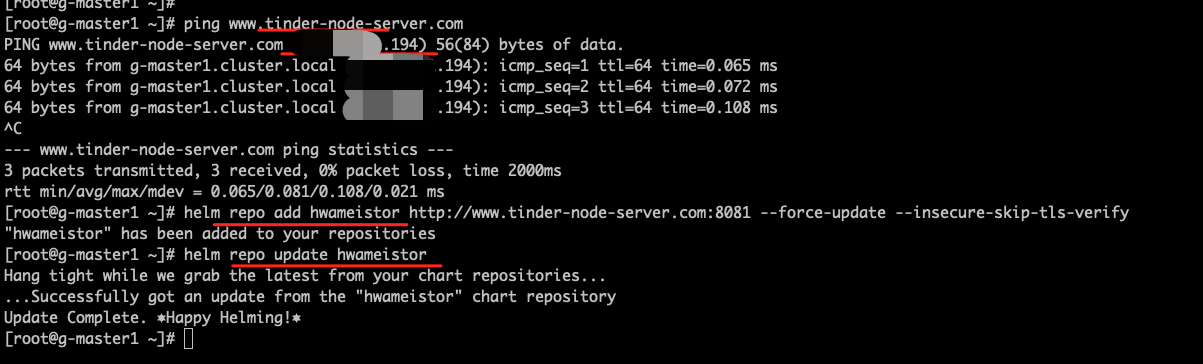
Verify that the charts repository is normal
FAQs
Configure bootstrapNode and AdditionalSubjectAltName Fields
Explanation of the configuration of bootstrapNode and imagesAndCharts.additionalSSLSubjectAltName in clusterConfig.yaml for the bootstrap node and the backup bootstrap node:
| Node | SubjectAltName(bootstrapNode) | AdditionalSubjectAltName |
|---|---|---|
| Original bootstrap node 193 | www.tinder-node-server.com | 172.30.41.193 |
| Backup bootstrap node 194 | 172.30.41.194 | www.tinder-node-server.com |
Synchronize the Upgrade of the Backup Bootstrap Node in an Upgrade Scenario
Prerequisites:
-
Restore the dns resolution to its original state, i.e., the domain name points to the original bootstrap node
xxx.xx.xx.193Note
Why restore the resolution to its original state? Because without modifying the clusterConfig, when starting or updating the bootstrap node in domain name mode, there is a code check logic: Check if the given domain name is resolved to the IP address of the current node. If it is, do nothing; if not, update the hosts file of the bootstrap node to support the domain name mode. So if the resolution is not restored to its original state, the hosts file of the bootstrap node will be modified unnecessarily.
-
The bootstrap node and the backup bootstrap node have downloaded the offline upgrade package
-
Run the following command to upgrade the bootstrap node on both the bootstrap node and the backup bootstrap node, to upgrade the image, minio files, and charts versions.
Modify the fullPackagePath to point to the offline upgrade package address.
-
After the upgrade, check if the images, files, and charts repositories of the bootstrap node and the backup node can be downloaded normally.
-