Manage Worker Clusters
After creating multicloud instances, you need to connect them to worker clusters.
Integrate a Cluster
-
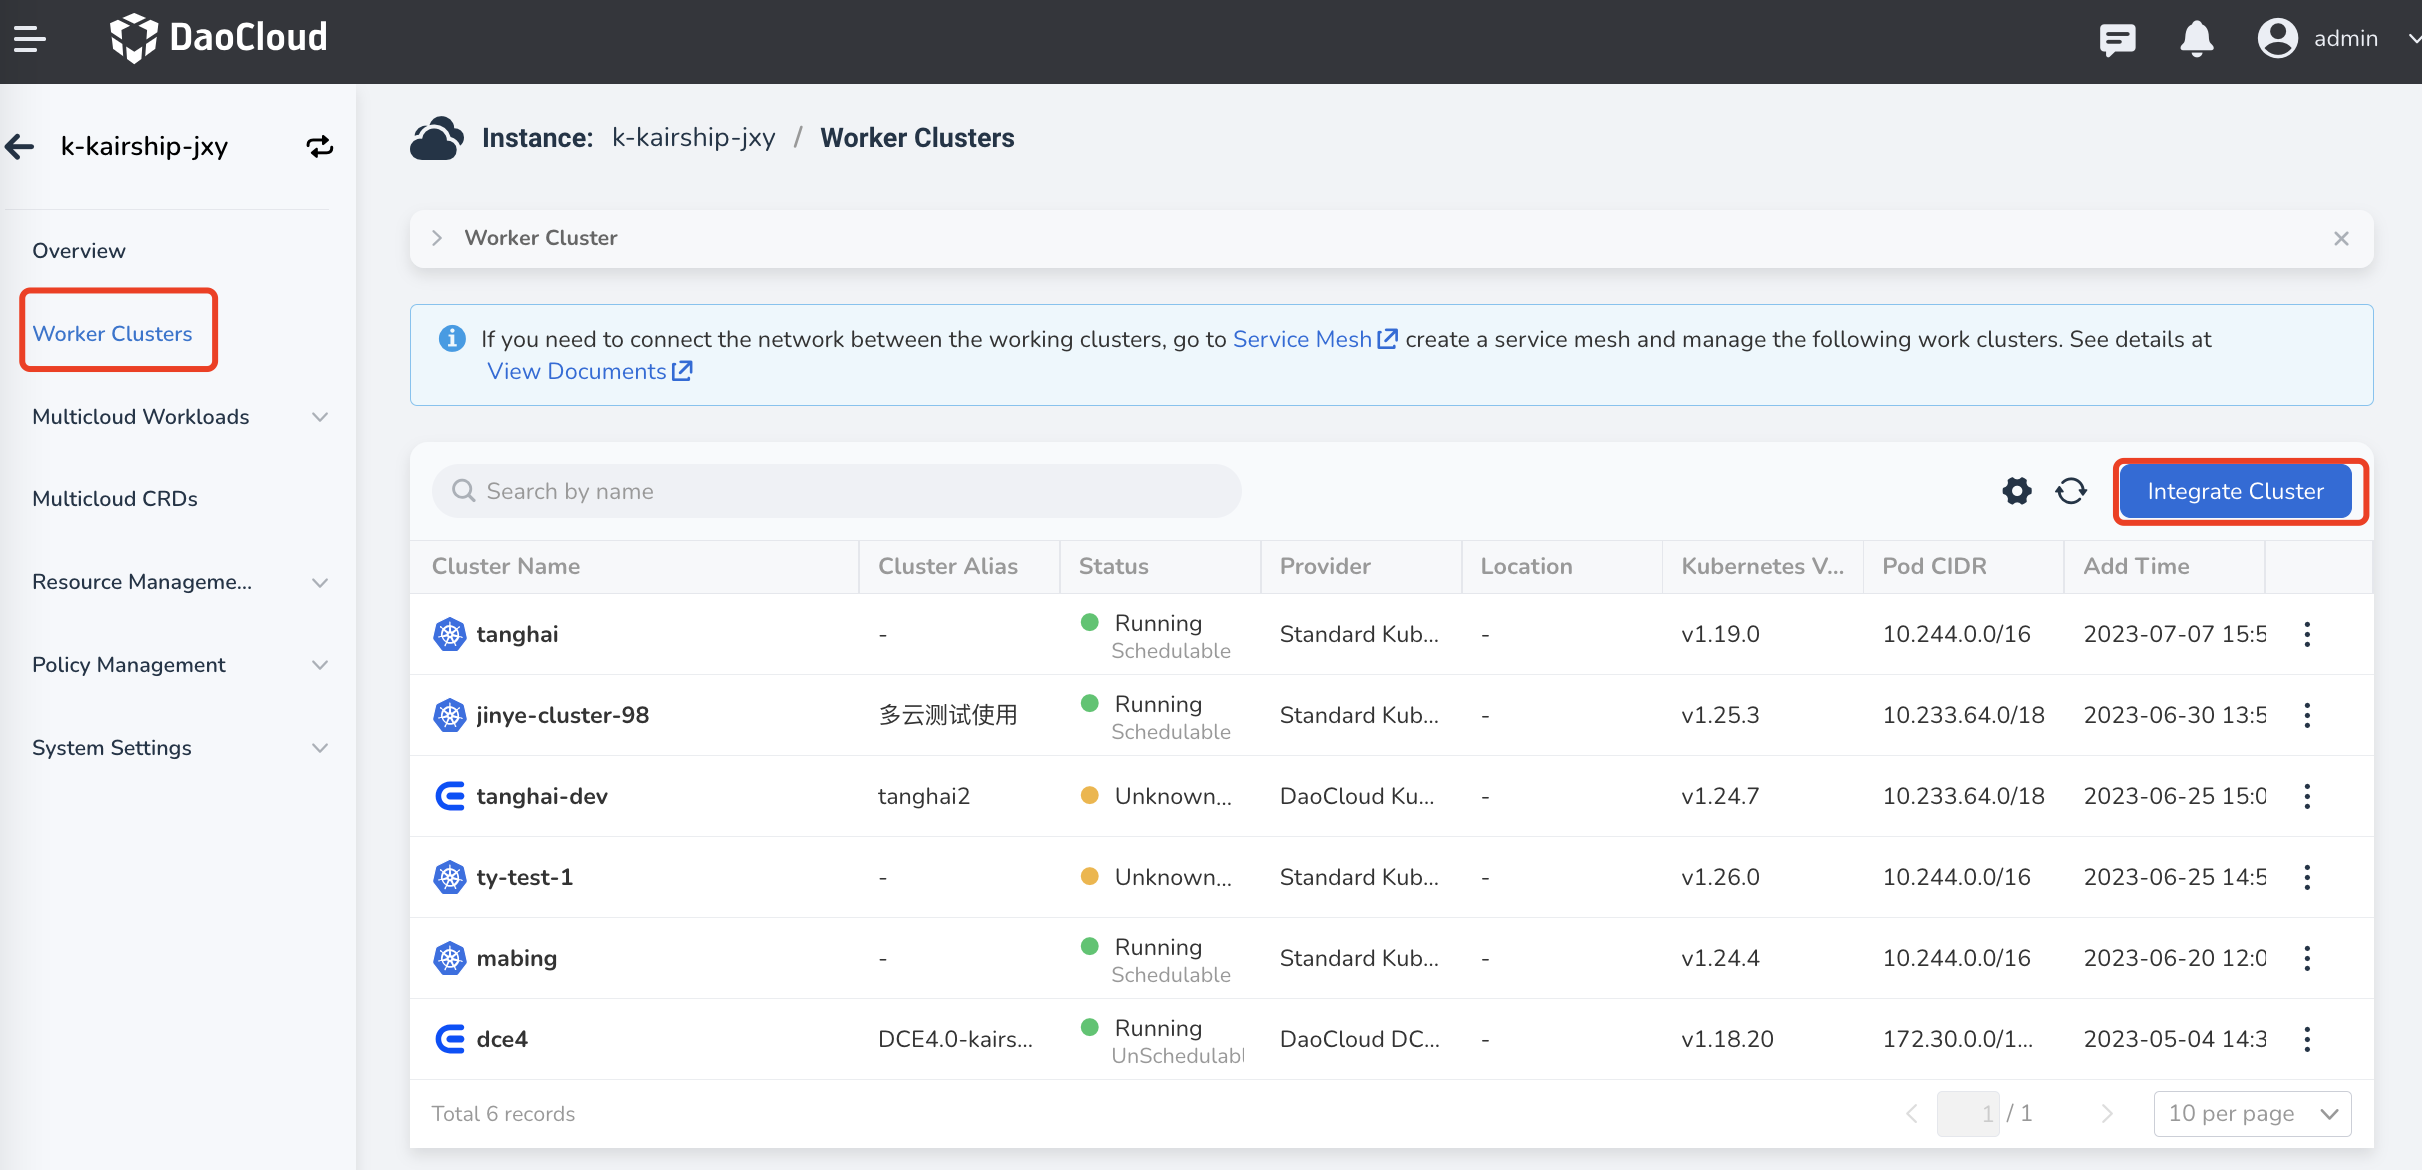
Click Worker Clusters in the left navigation bar, then click Integrate Cluster in the top-right corner.
If you want to connect network between worker clusters, you need to create a mesh instance and manage worker clusters on the Service Mesh page. For detailed steps, refer to MultiCloud Network Interconnect.
-
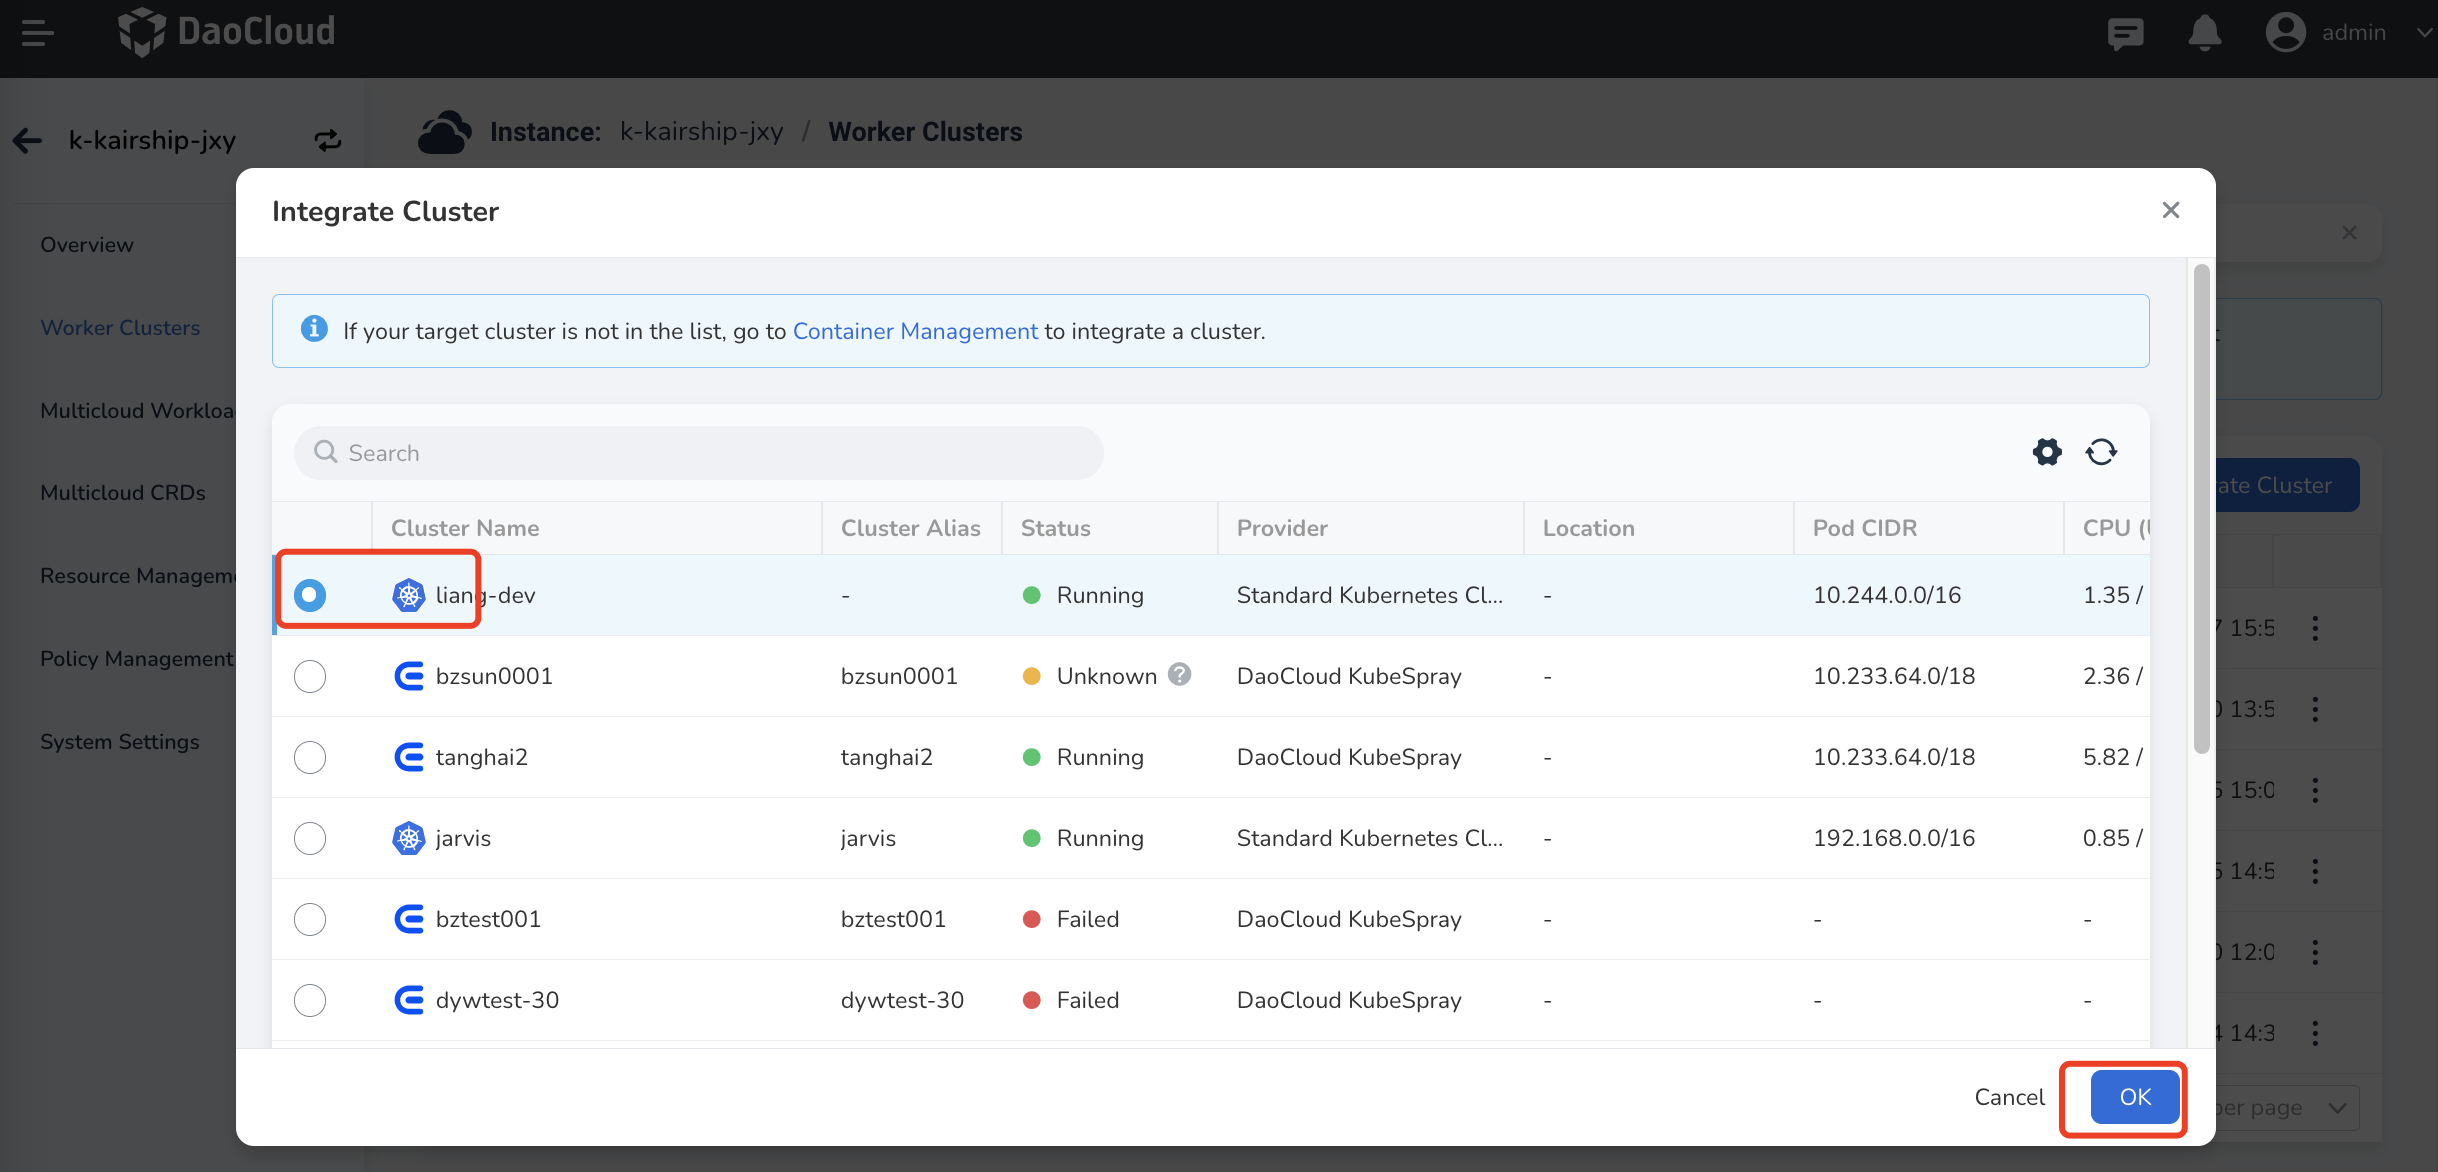
Select the worker cluster you want to integrate and click OK .
If the target cluster you want to integrate is not listed, you can either integrate or create a cluster in the Container Management module. For more details, refer to Cluster Integration or Cluster Creation.
Remove a Cluster
-
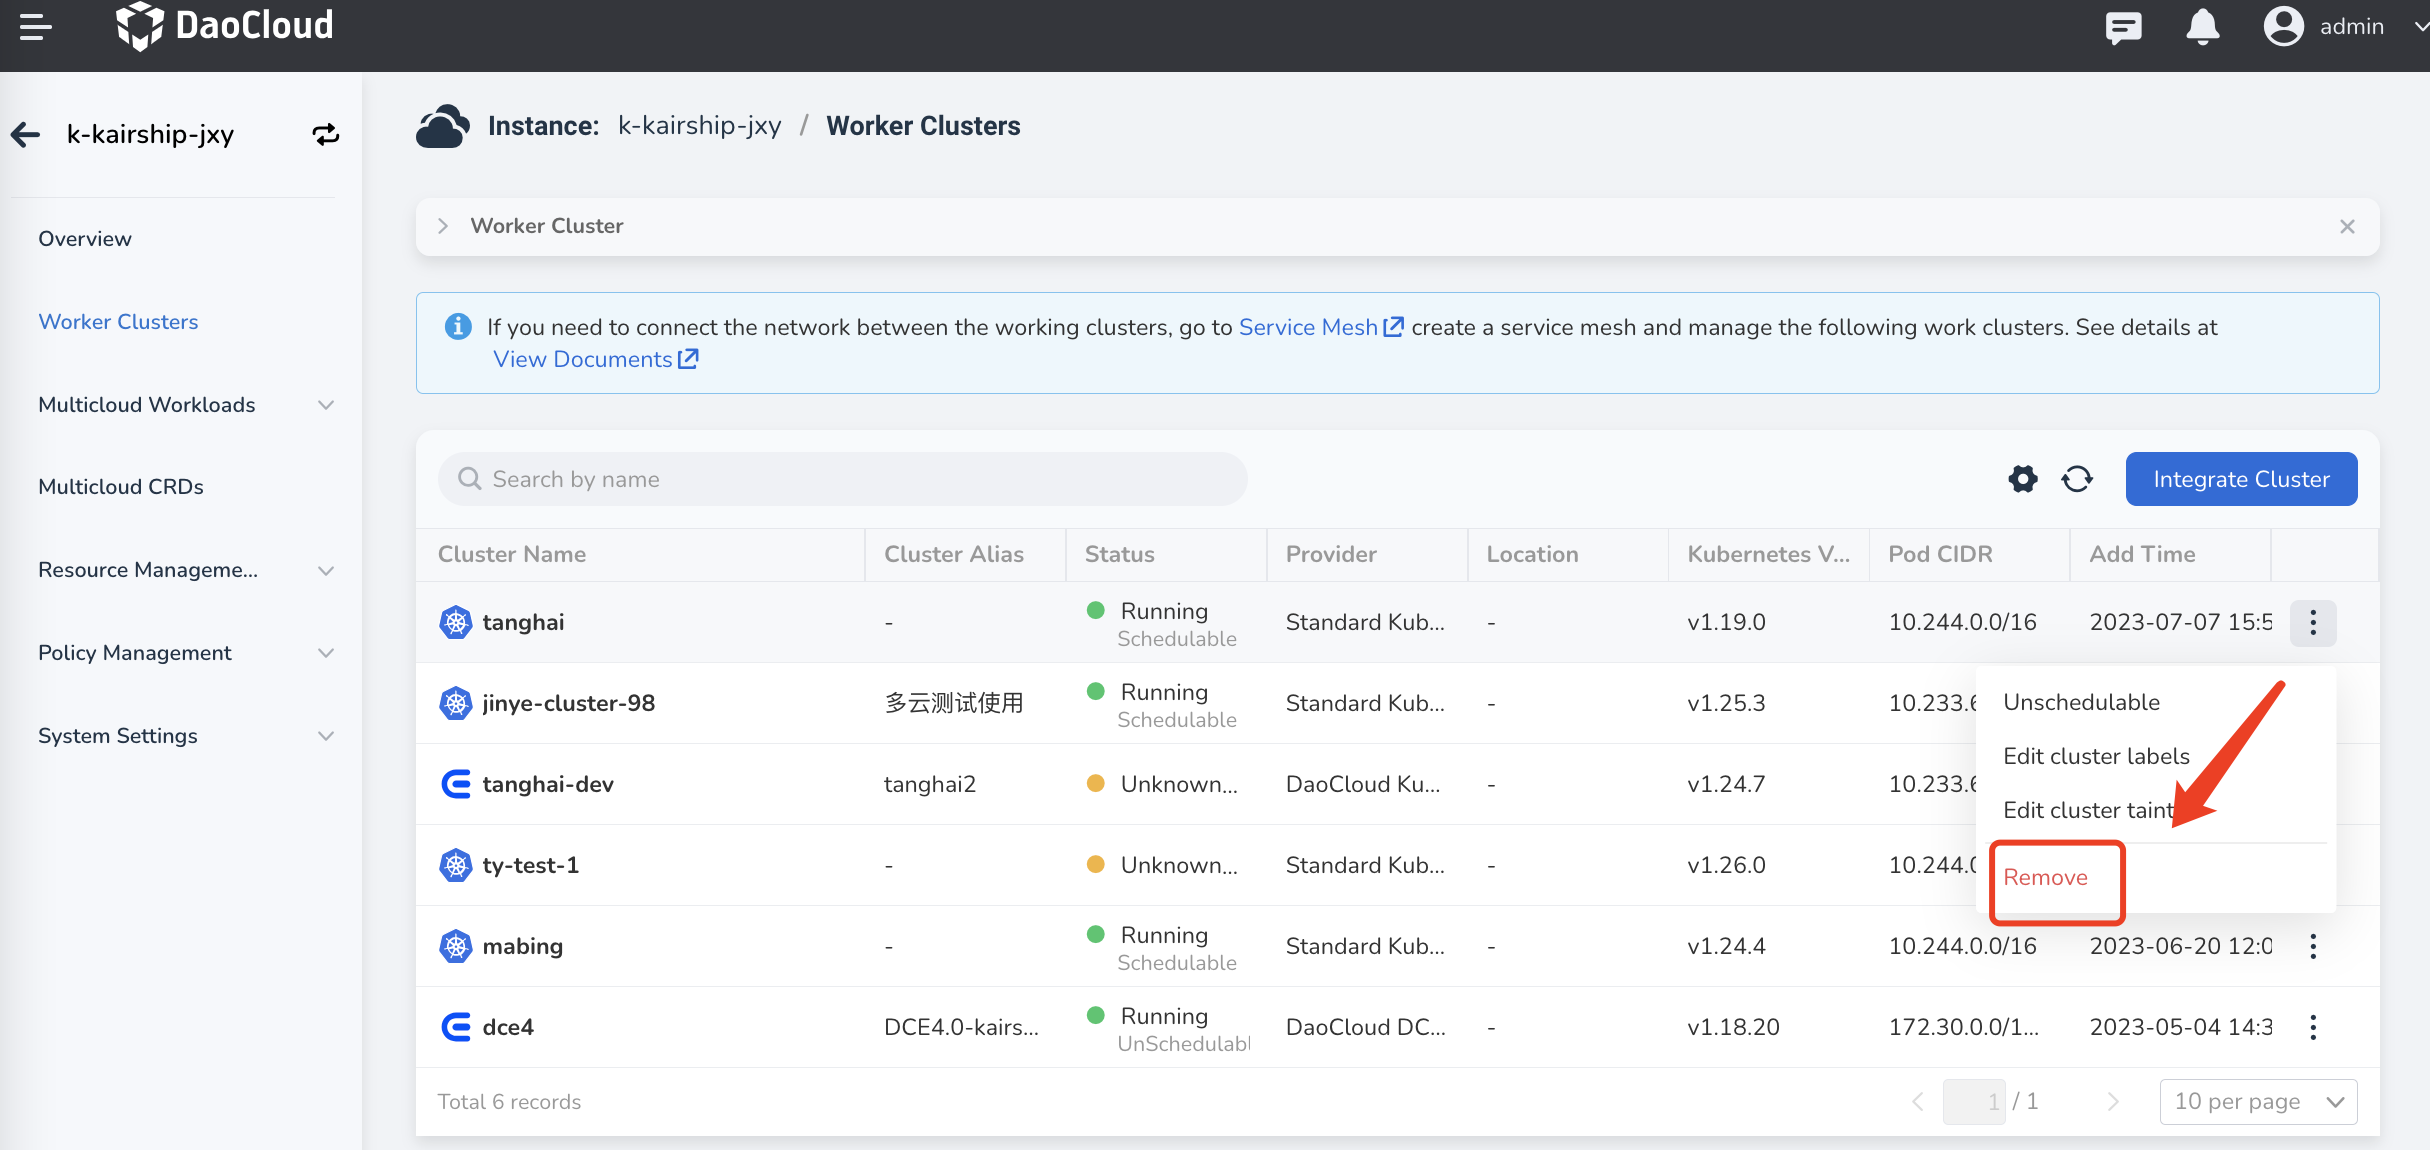
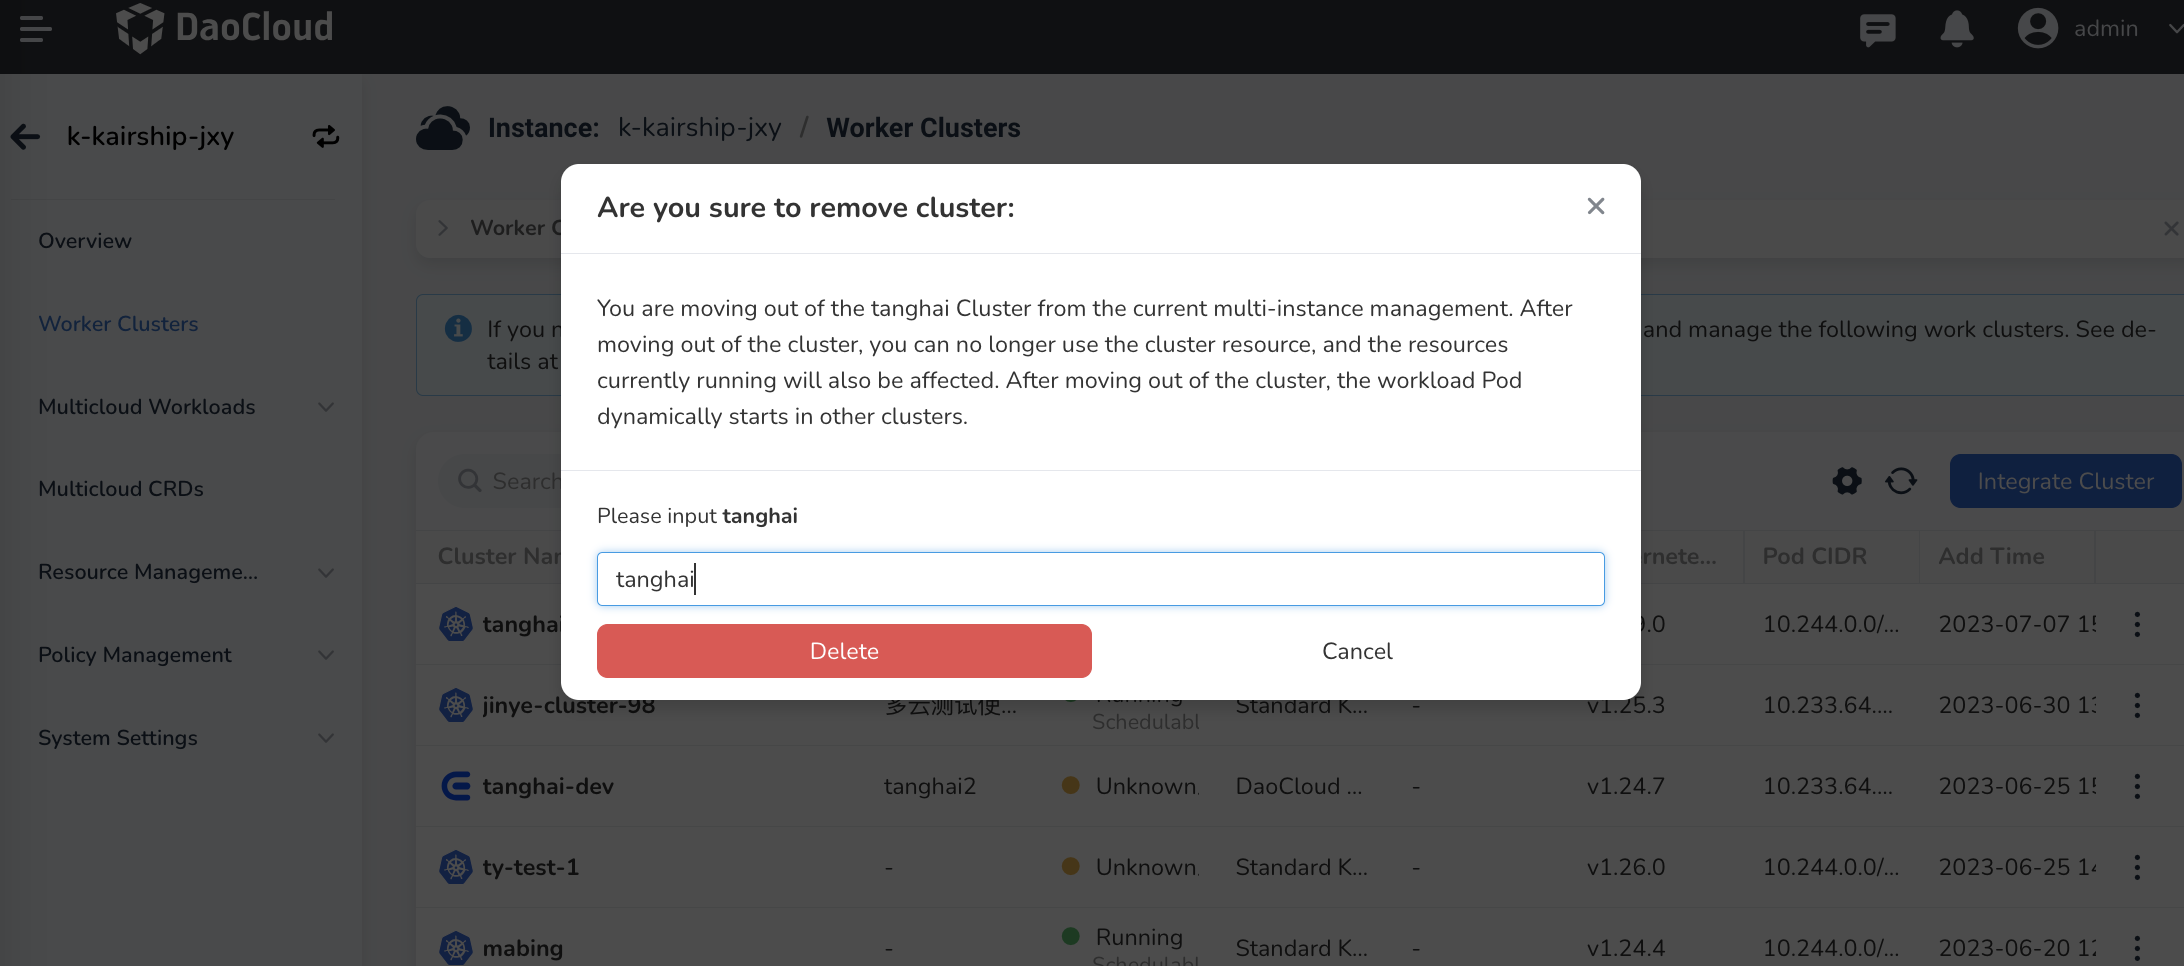
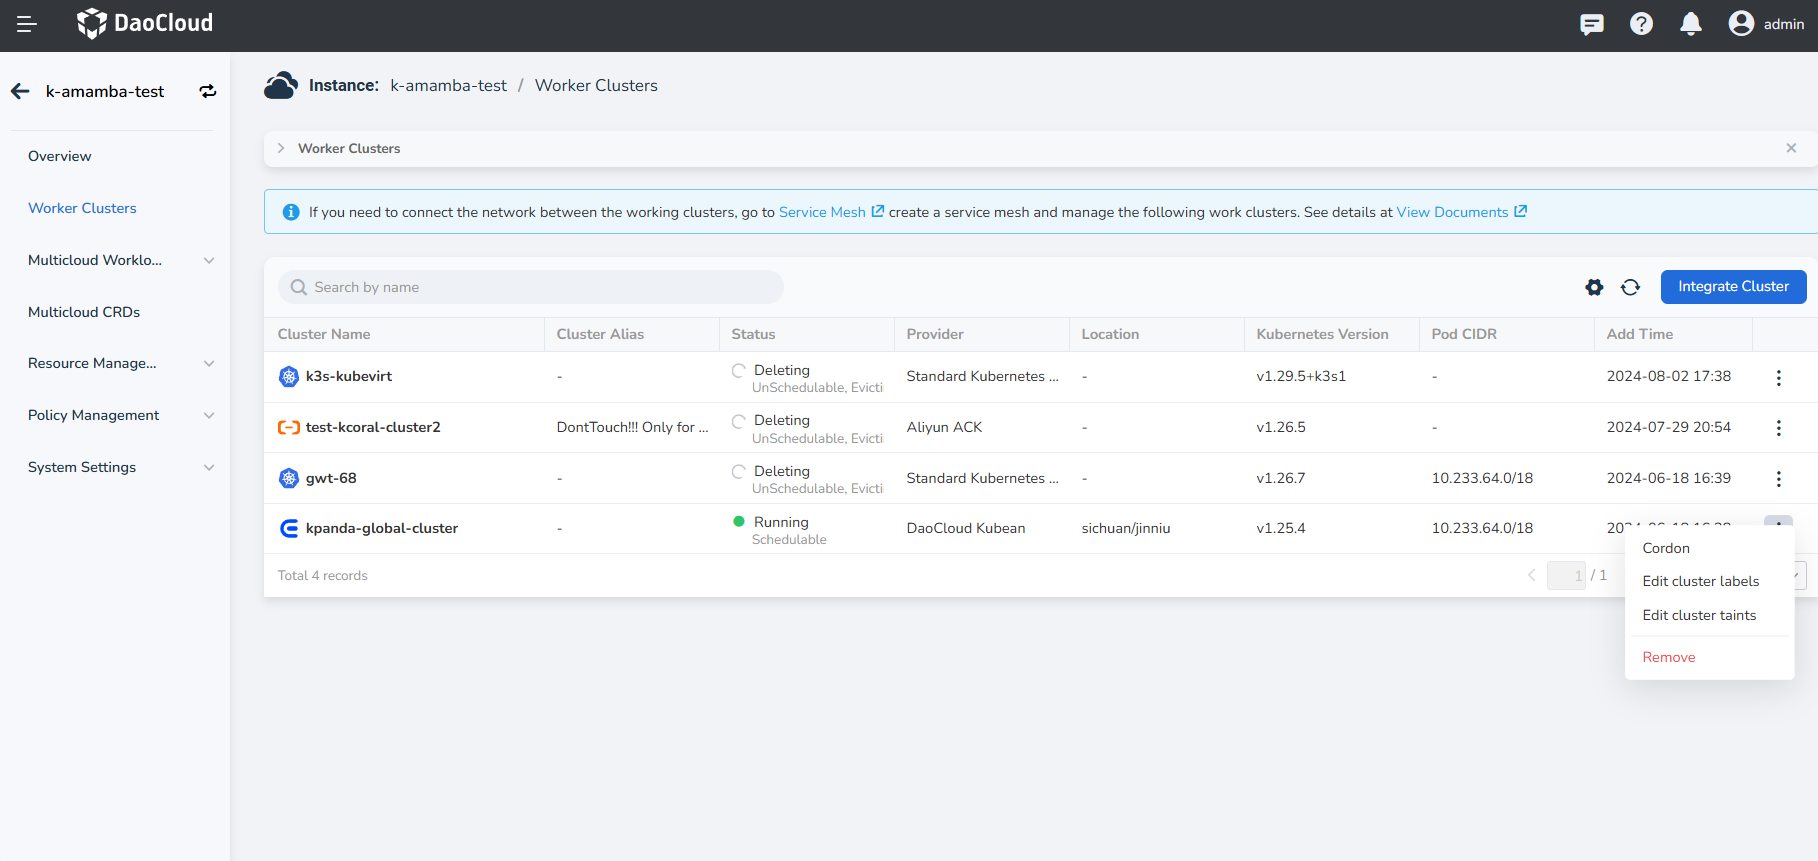
Click the ┇ button on the right side of the cluster, and select Remove from the pop-up menu.
-
In the dialog box, enter the name of the cluster, and click Delete after confirming that it is correct.
Note
- After removing a worker cluster, the workloads of the cluster will no longer be managed by this multicloud instance.
- All multicloud workloads that have been distributed to this cluster will be automatically migrated to other worker clusters managed by this multicloud instance.
More Operations
The system will automatically return to the worker cluster list. Click the ┇ button on the right side of the cluster to perform operations such as Cordon/Uncordon , Edit cluster labels , and Edit cluster taints .
Cordon/Uncordon
-
Click Cordon to pause the scheduling of the cluster. This means that new multicloud resources will not be distributed to this cluster, but the previously distributed resources to this cluster will not be affected.
-
At this point, click Edit cluster taints and you will find that the cluster has been automatically tainted.
If you want to resume scheduling, you can also click Uncordon or manually remove the corresponding cluster taint.
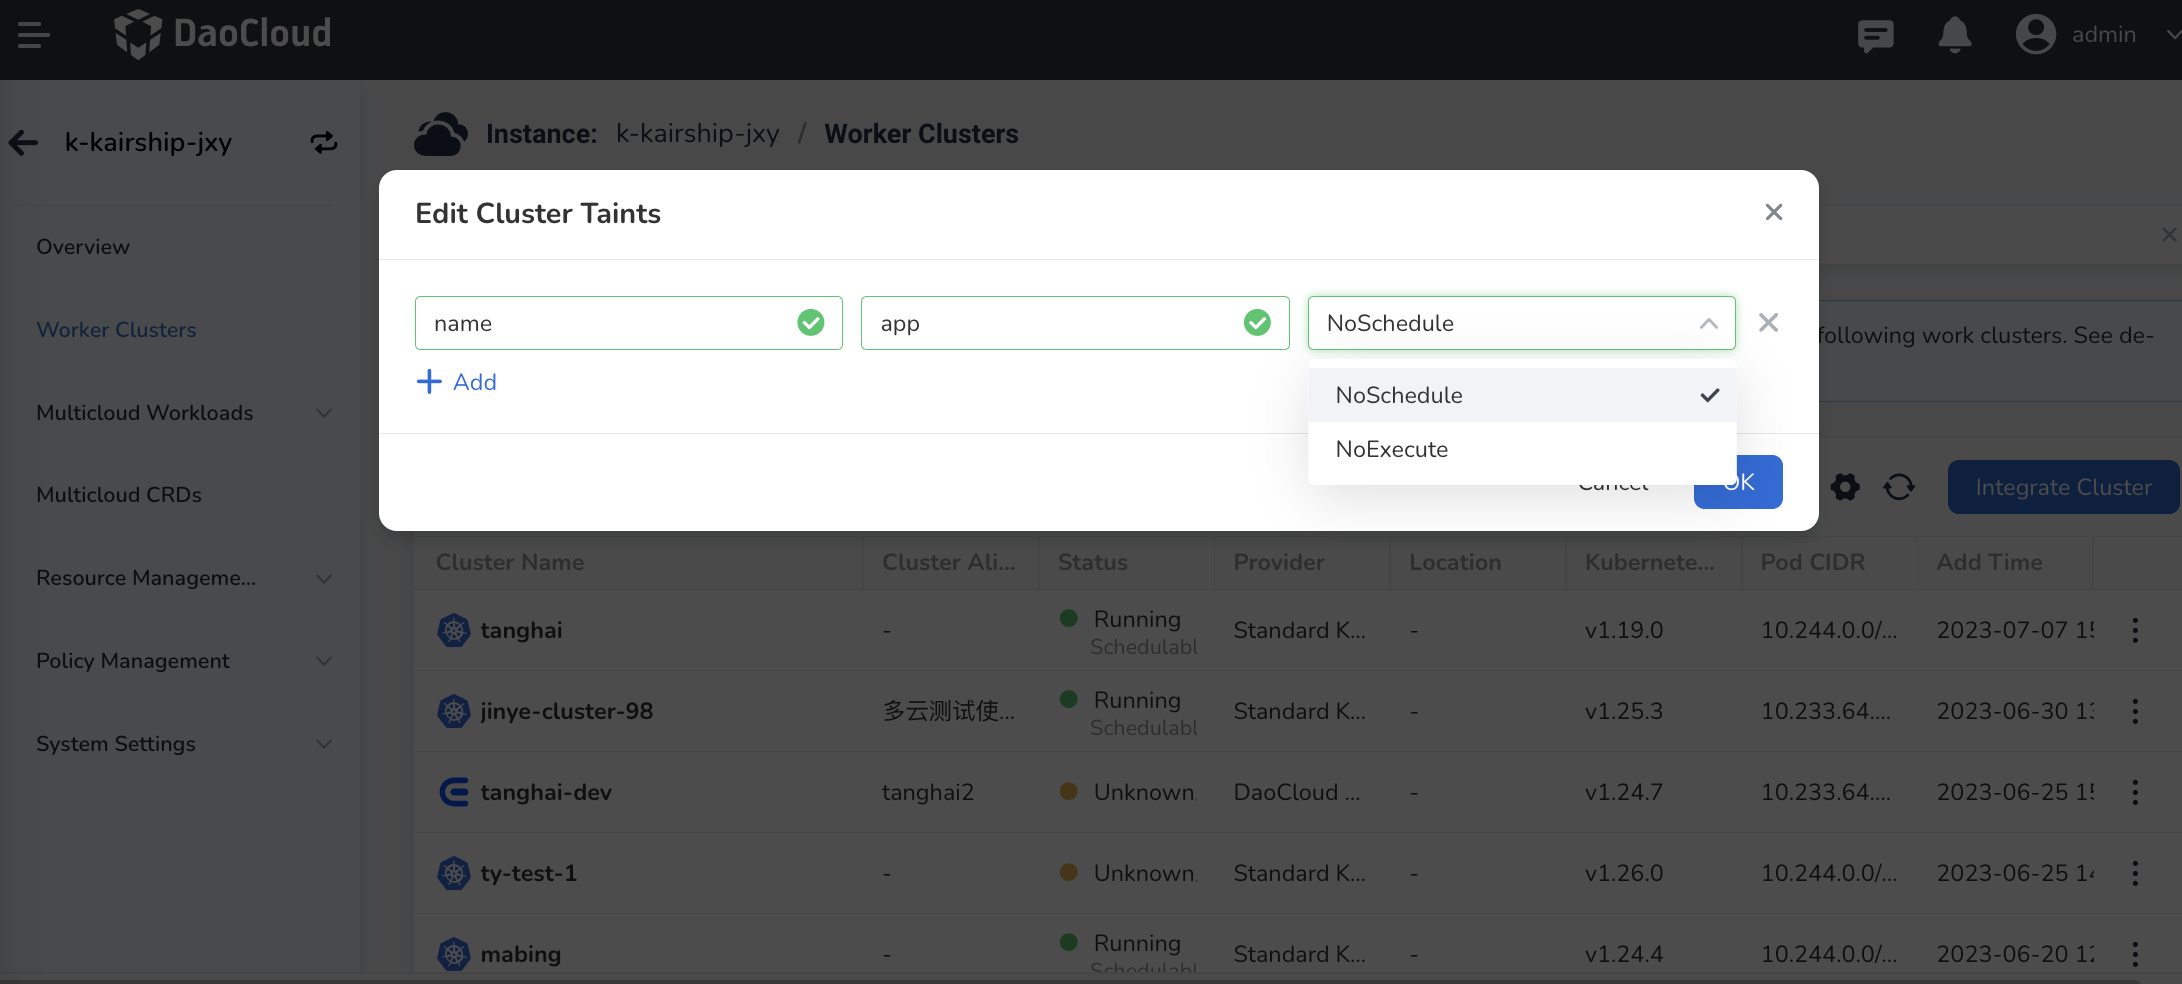
Edit Cluster Taints
-
Click Edit cluster taints to control the deployment of workloads, containers, and other resources in the cluster.
-
Enter the key-value information of the taint in the pop-up box. The value can be left empty.
-
Select the taint effect from the drop-down menu and click OK .
Multiple taints can be added. Currently, two taint effects are supported:
Effect Description NoSchedule Only nodes with tolerations matching this taint can be assigned to this cluster. NoExecute Define eviction behavior to deal with cluster failures. If the taint effect is defined as NoExecute, when the workload or pod is already running on this cluster, it will be evicted. If it is not running on this cluster, it will not be scheduled to this cluster either.