Create Kafka Instance
In the Kafka message queue, follow these steps to create a Kafka instance.
-
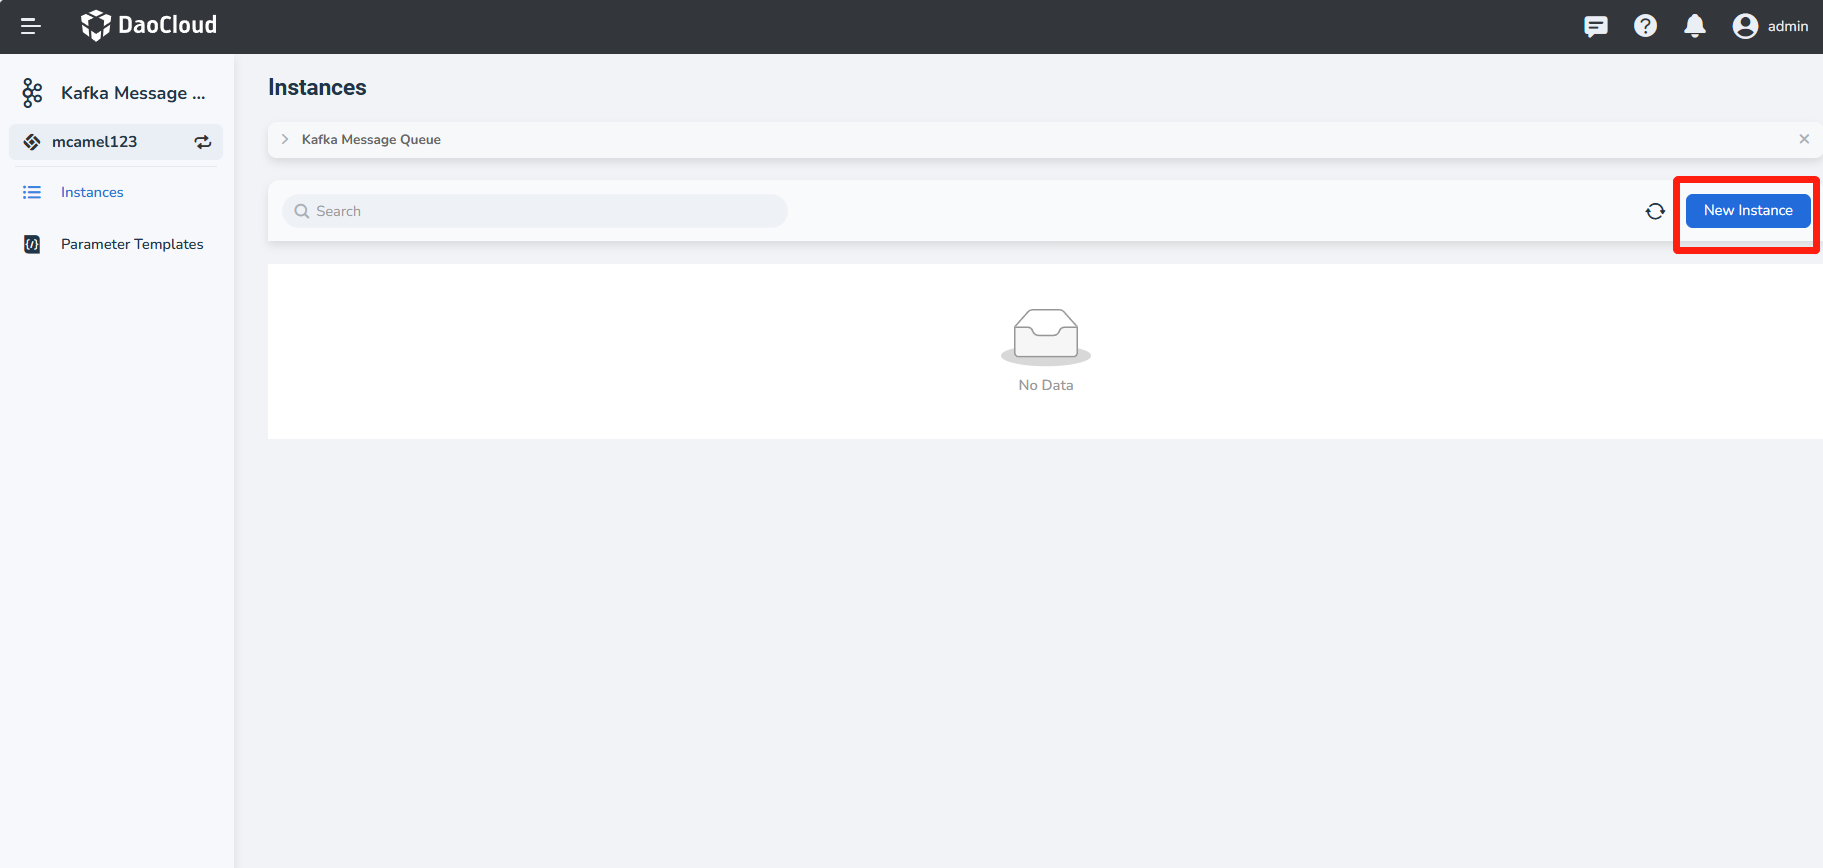
On the Kafka message queue page, click the Create Kafka Instance button in the top right corner.
Tip
When deploying for the first time, you can click Deploy Now.
-
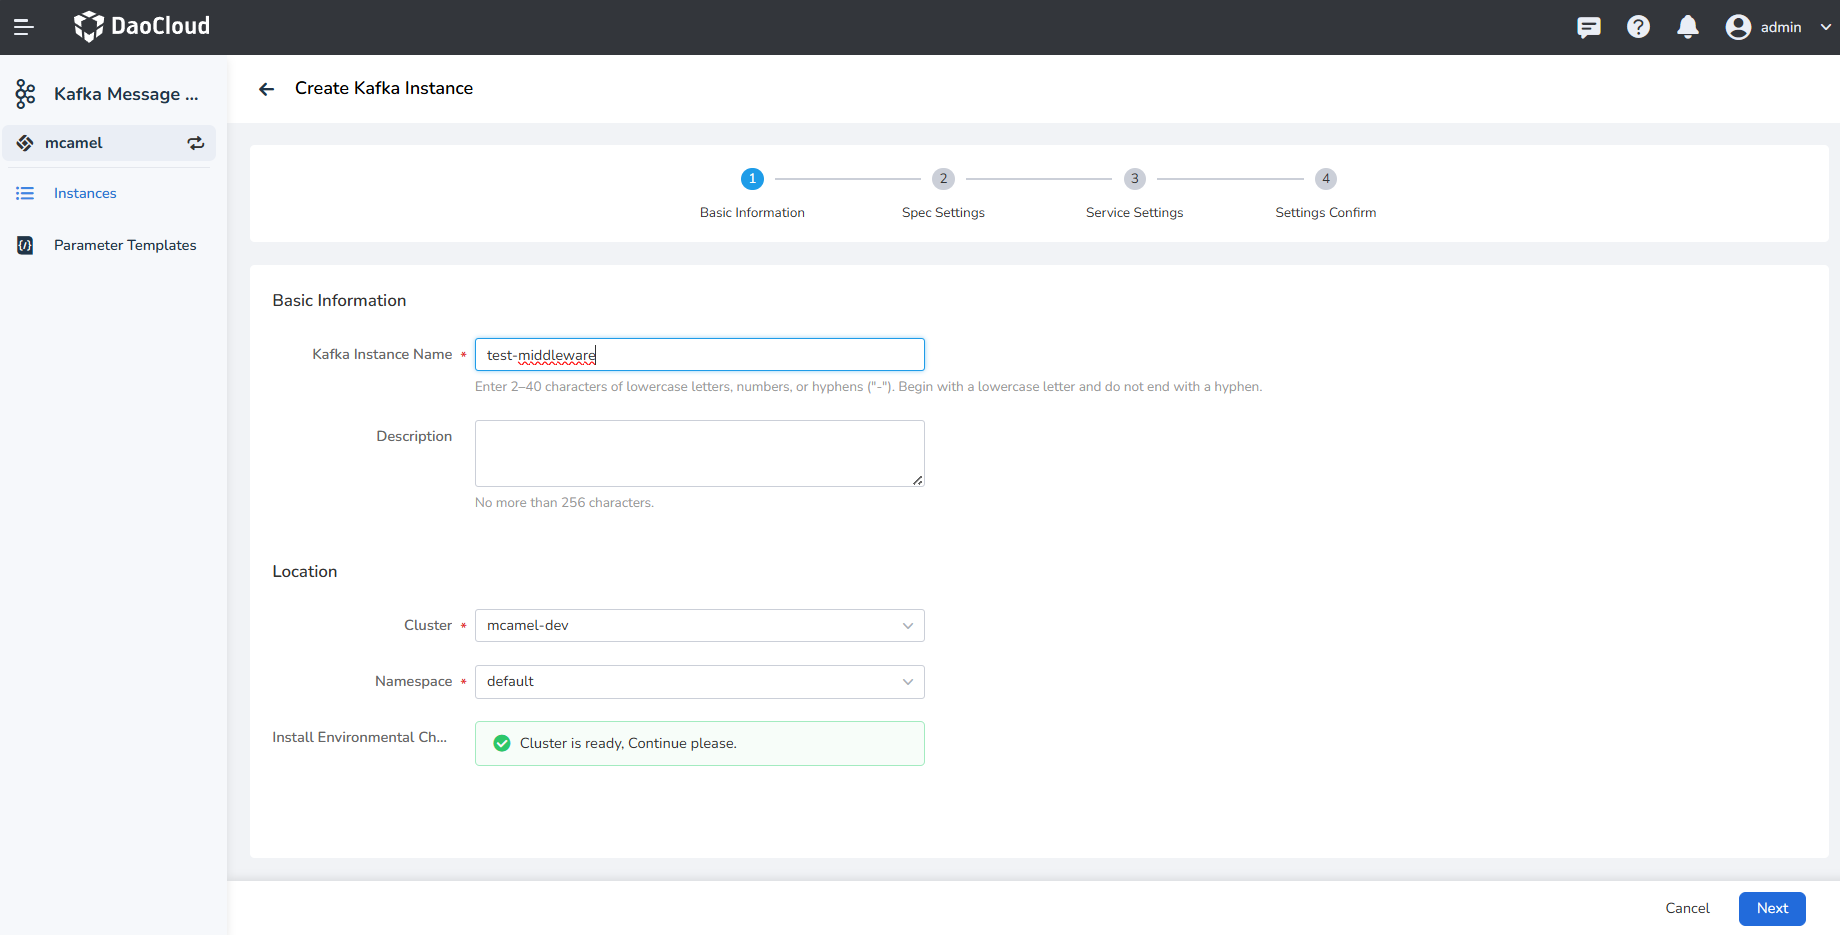
On the Create Kafka Instance page, after setting the basic information, click Next.
-
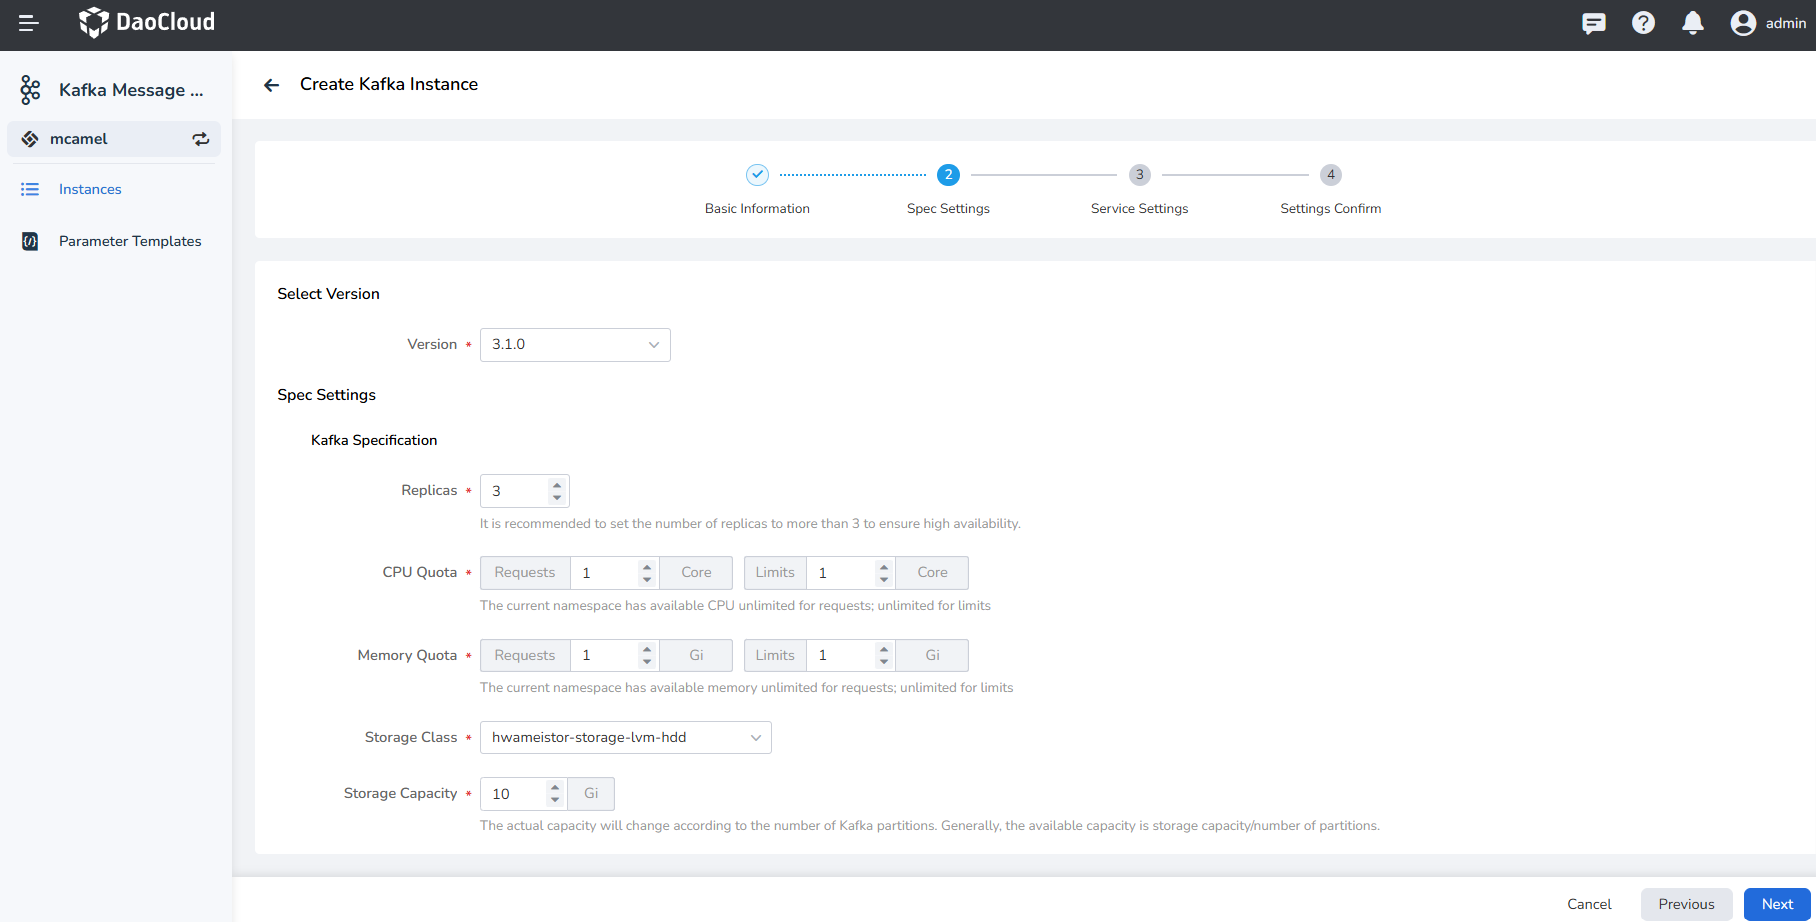
After configuring the specifications, click Next.
- Version: The version of Kafka, currently only supports Kafka 3.1.0.
- Replicas: Supports 1, 3, 5, 7 replicas.
- Resource Quota: Choose rules according to the actual situation.
- Storage Capacity: Select the storage volume and total storage space for the Kafka instance.
-
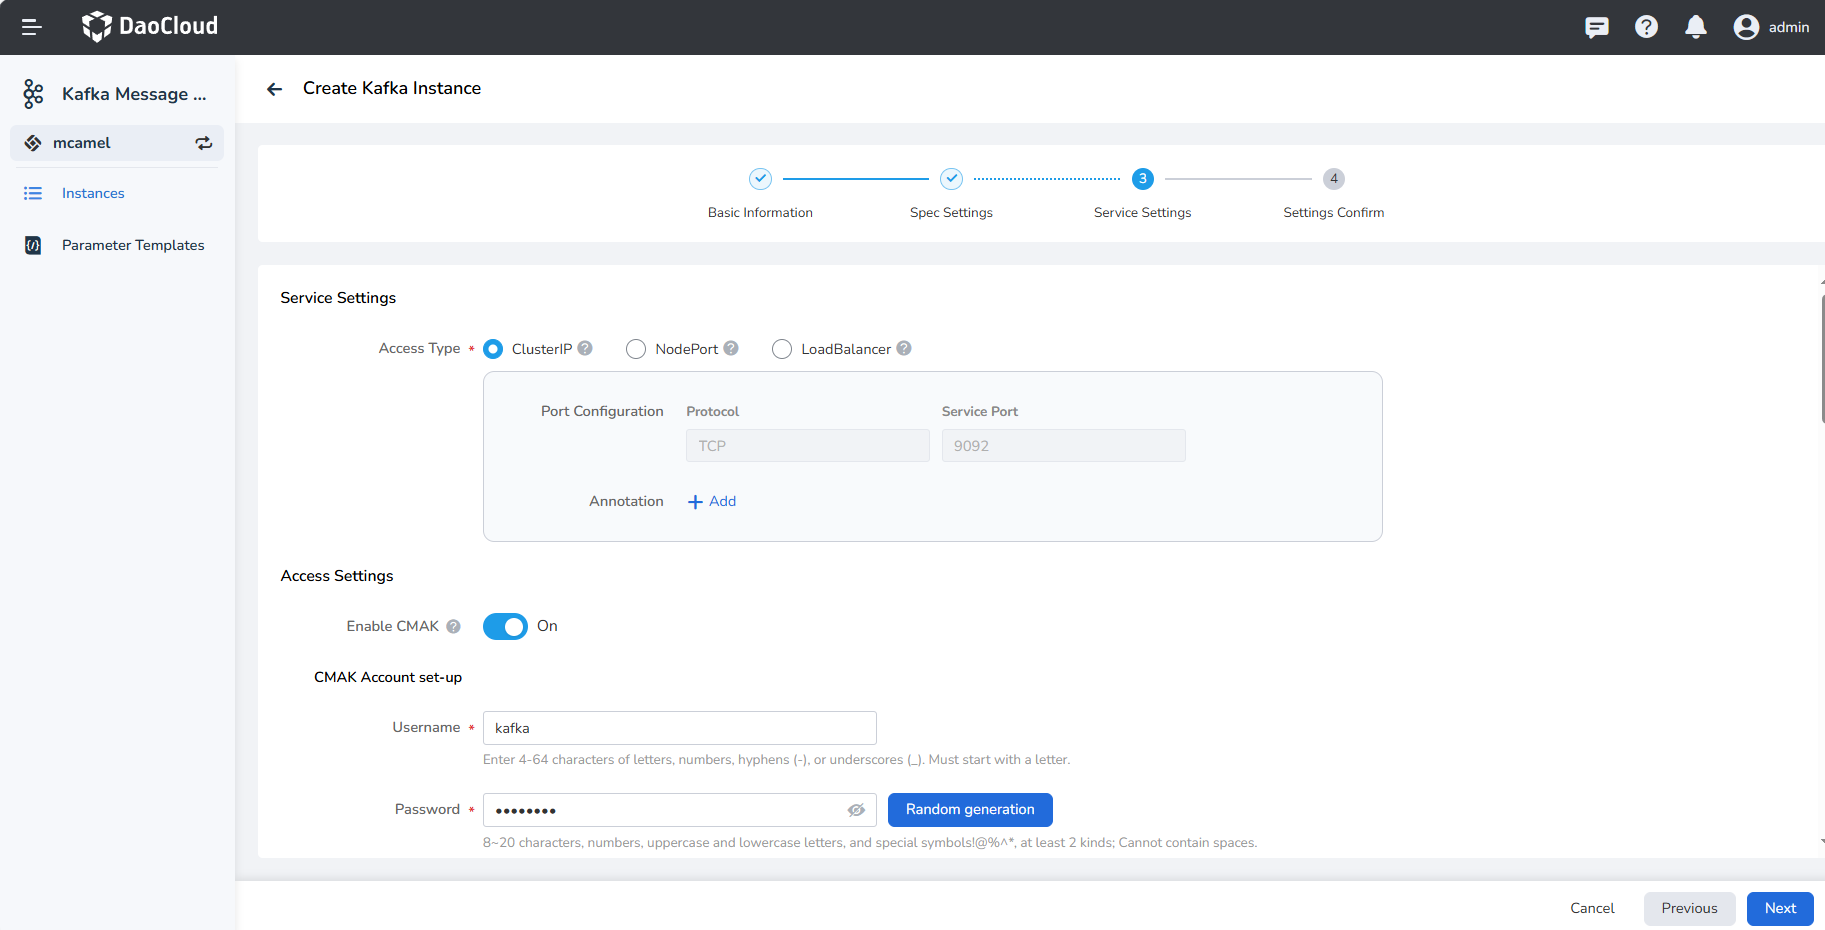
After service settings, click Next.
- Service Settings:
- ClusterIP
- Nodeport
- LoadBalancer
- Access Settings:
- CMAK Account set-up: Username and password to connect to the Kafka instance.
- CMAK Resources: Replicas, CPU quota, and memory quotas.
- CMAK Service Configuration: Nodeport, LoadBalancer
- Advanced Settings: Configure as needed.
- Service Settings:
-
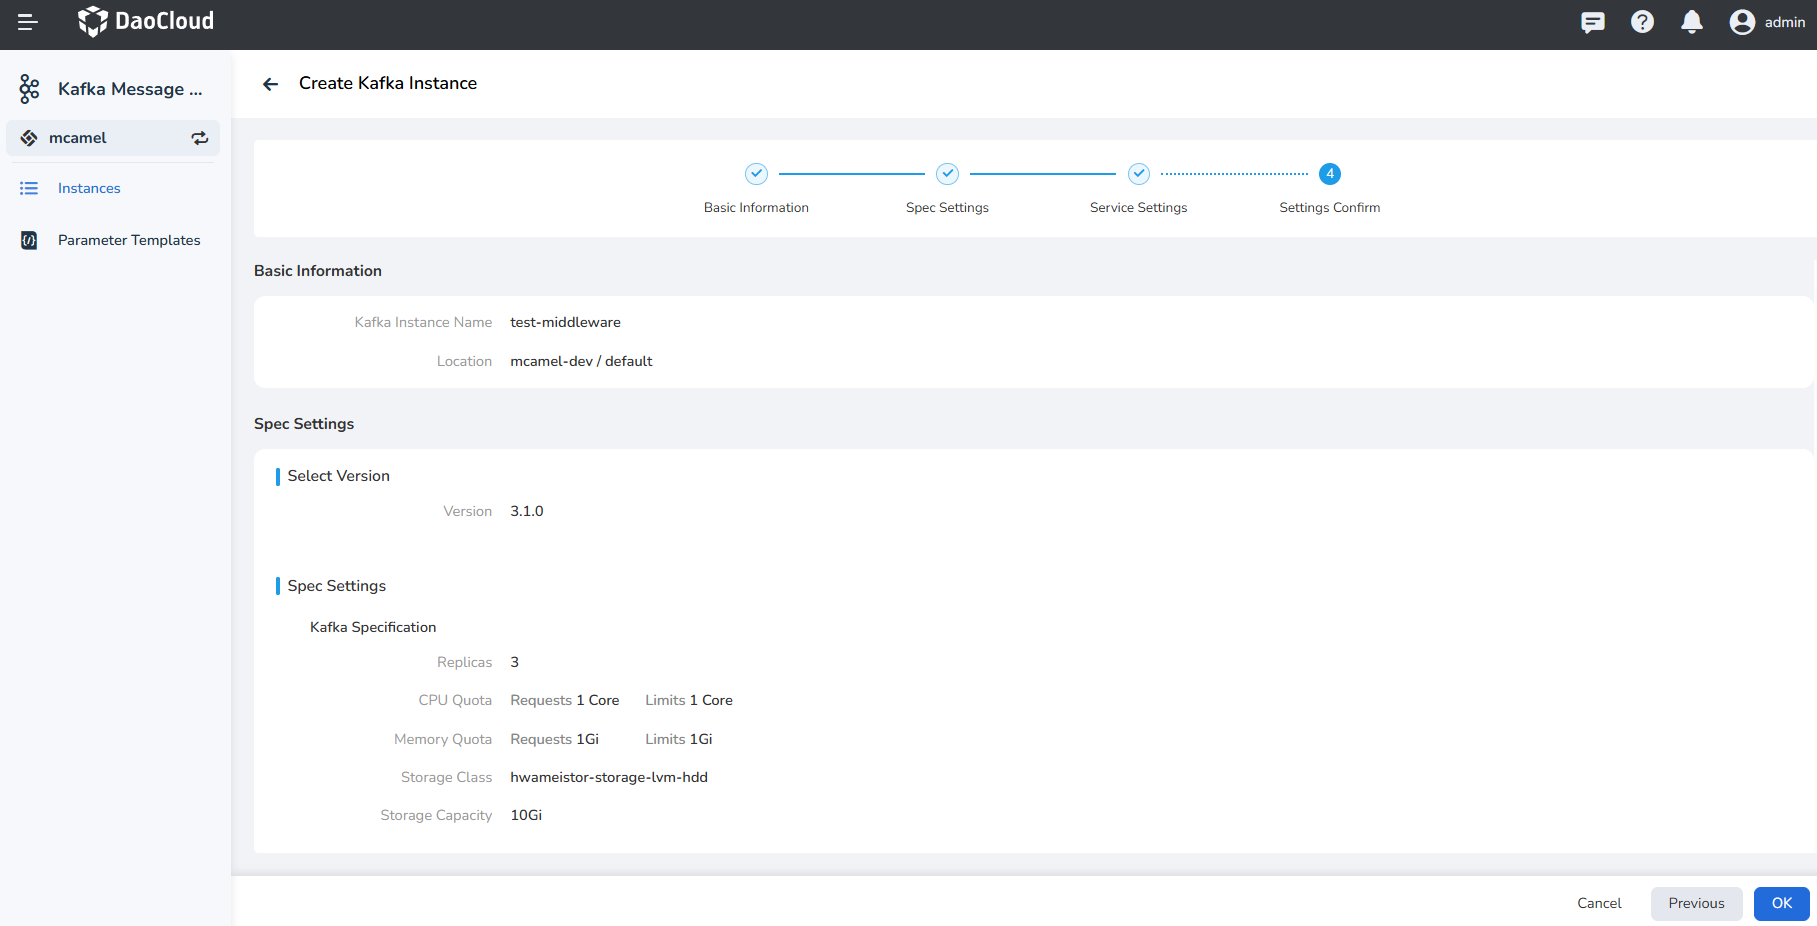
Confirm that the instance configuration information is correct, click OK to complete the creation.
-
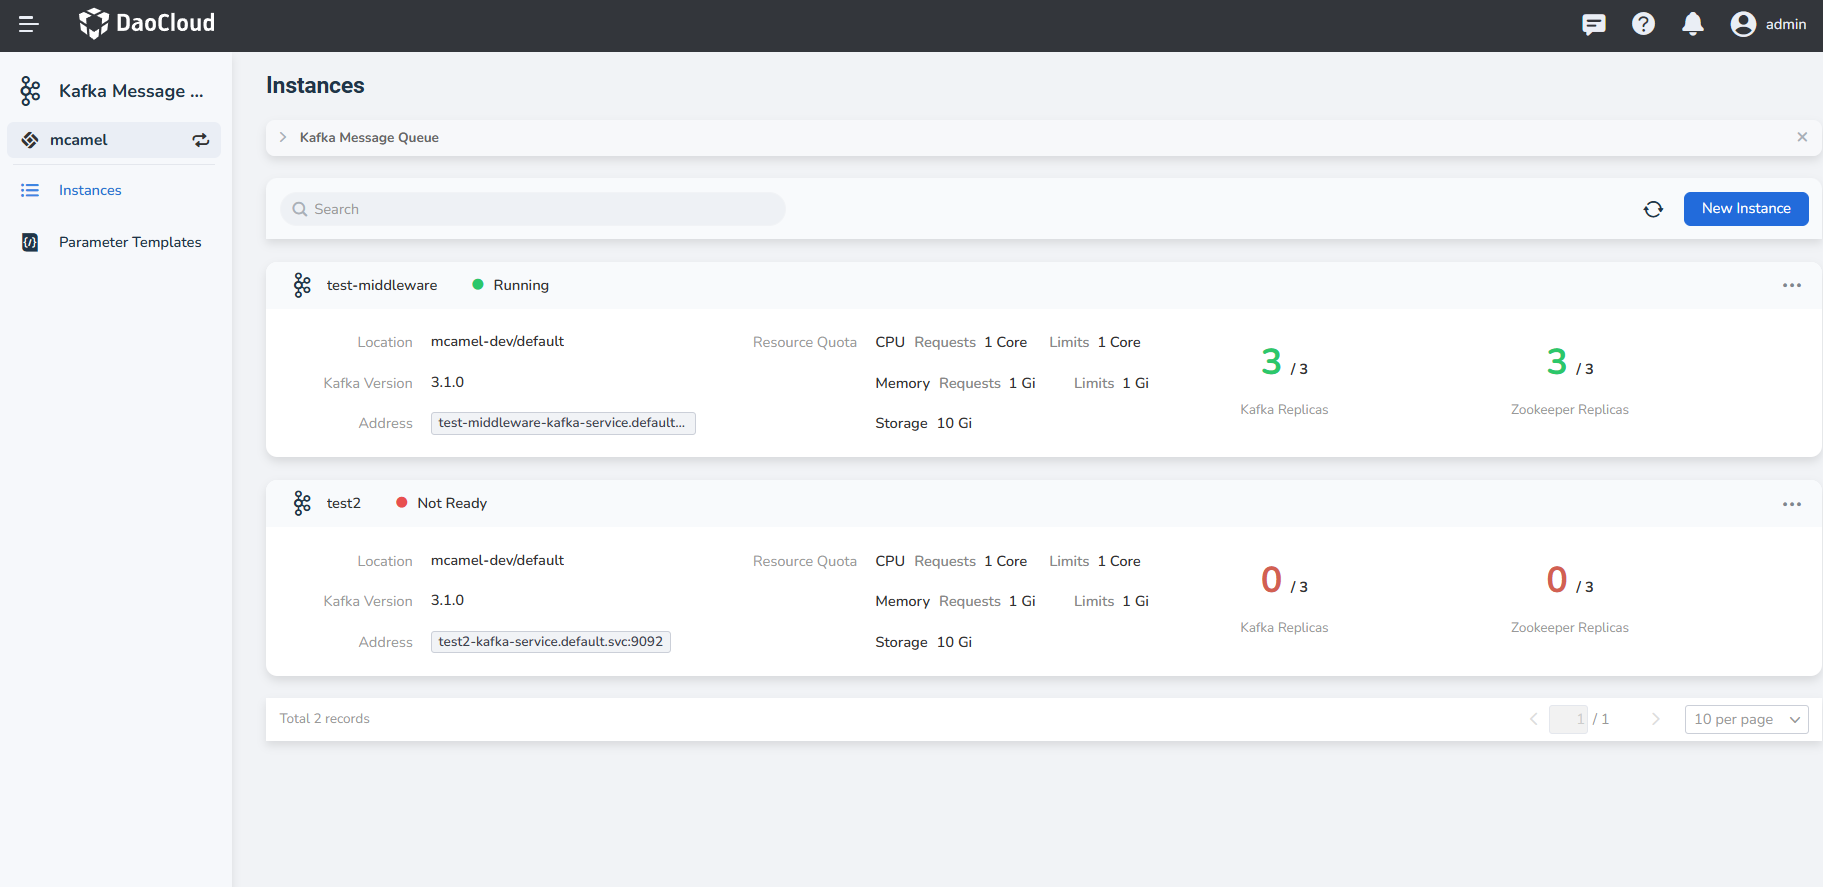
Check the instance list page to see if the instance has been created successfully. The status of the newly created instance will be Not Ready, and after a few minutes, this status will change to Running.
Note
In addition, DCE's Kafka provides parameter templates to simplify instance creation. You can use these predefined parameter templates to create instances.