Install Contour
This page describes how to install Contour.
Please confirm that your cluster has successfully connected to the Container Management platform, and then perform the following steps to install Contour.
-
Click
Container Management->Clustersin the left navigation bar, and then find the cluster name where you want to install Contour.
-
In the left navigation bar, select
Helm Applications->Helm charts, find and clickcontour.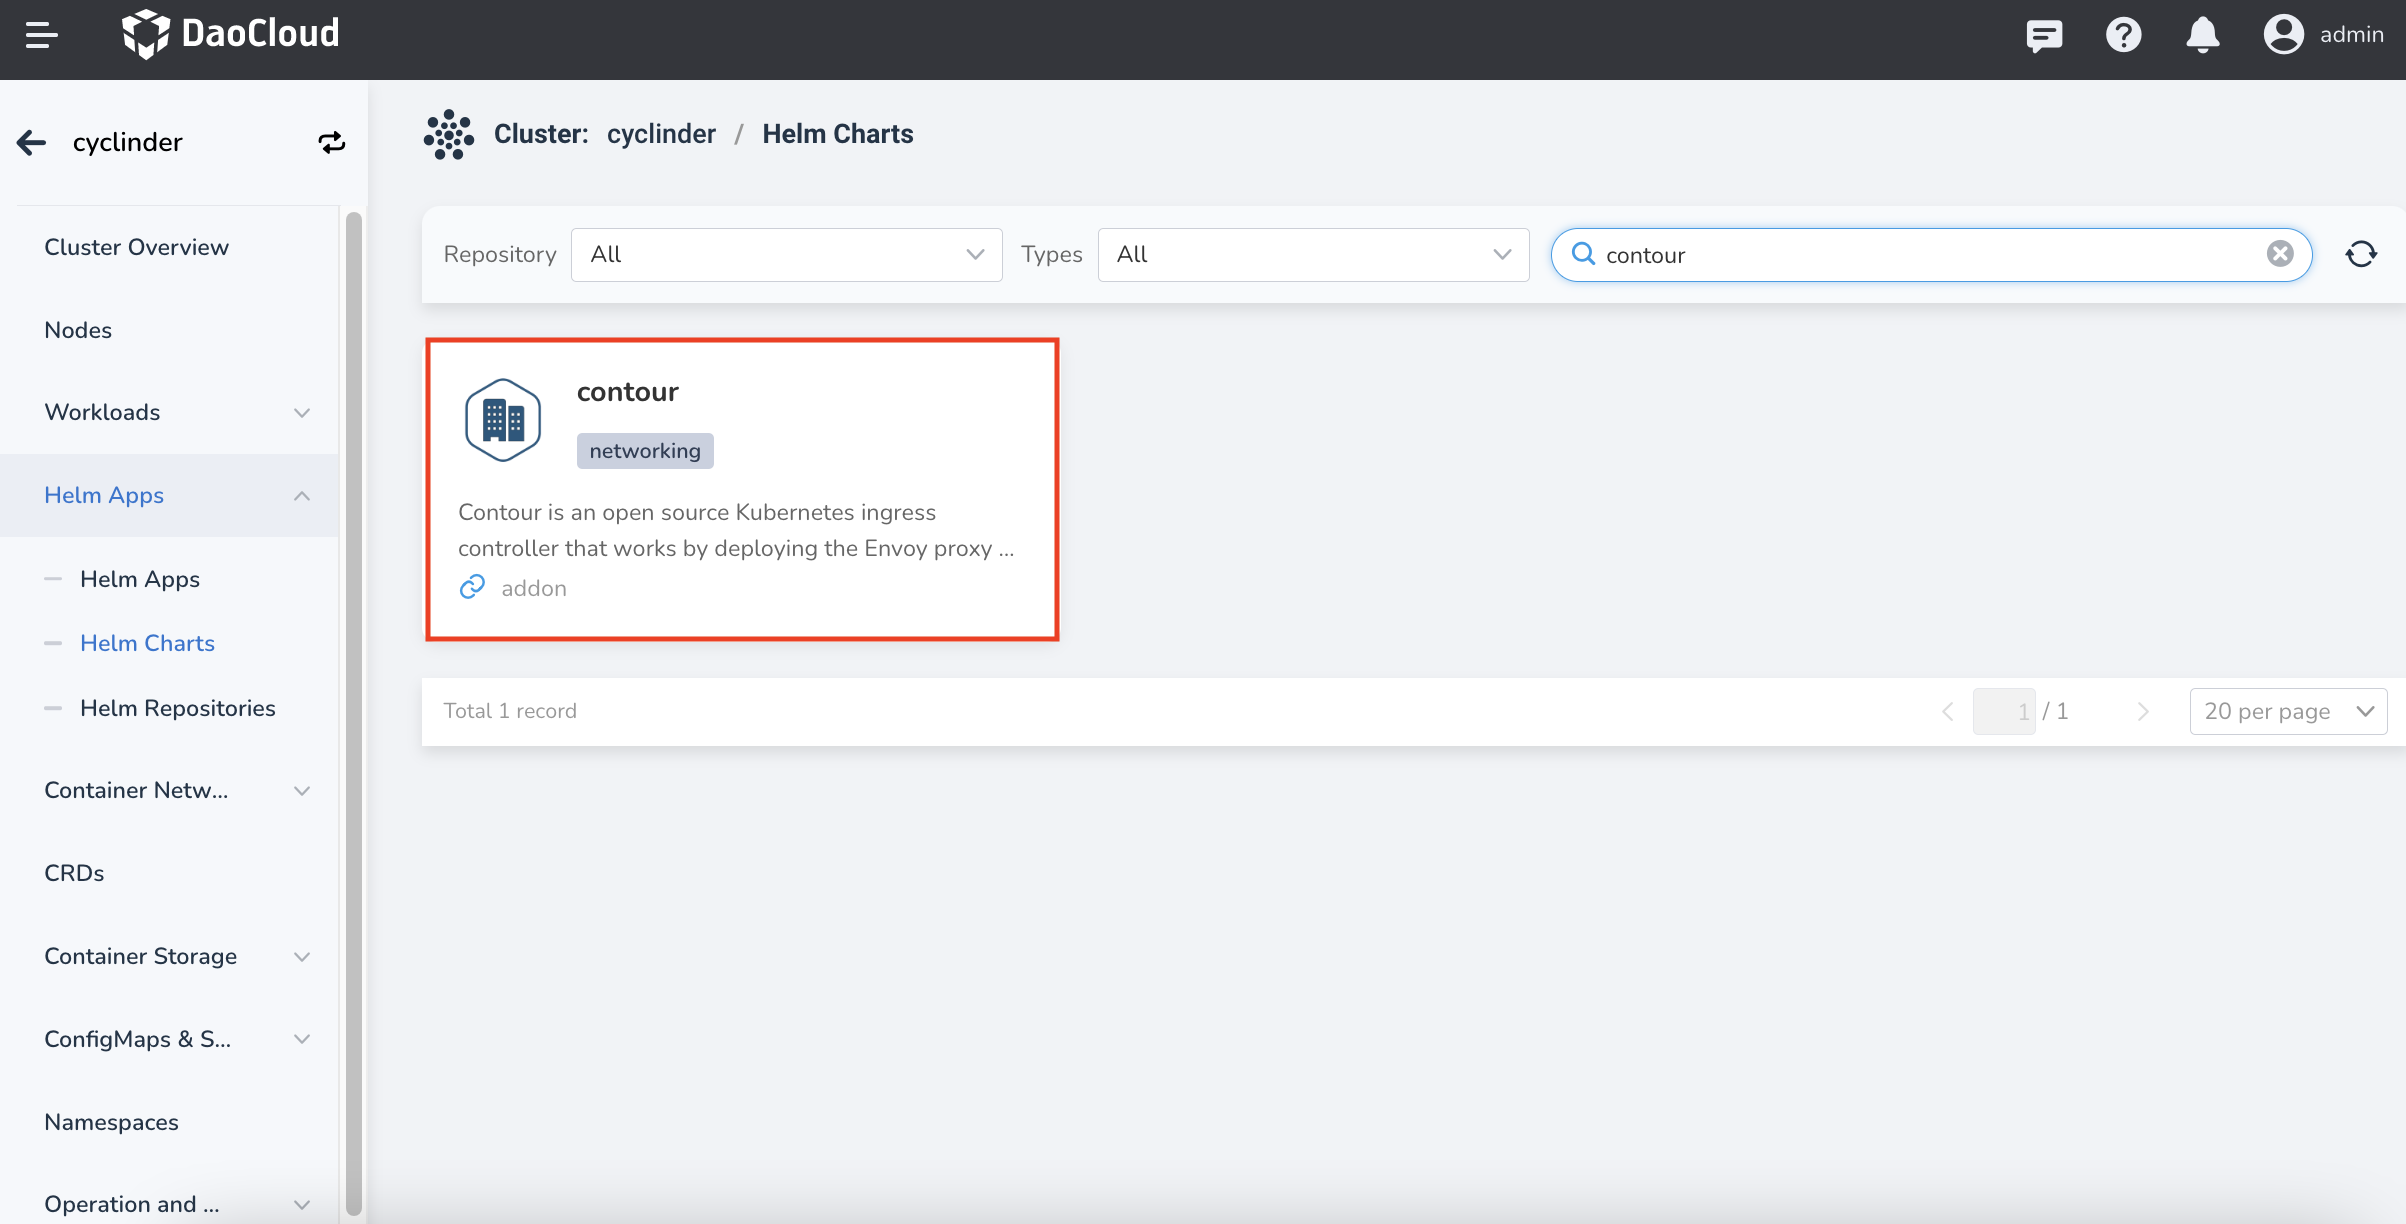
-
Select the version you want to install in the
Version selectionand clickInstall.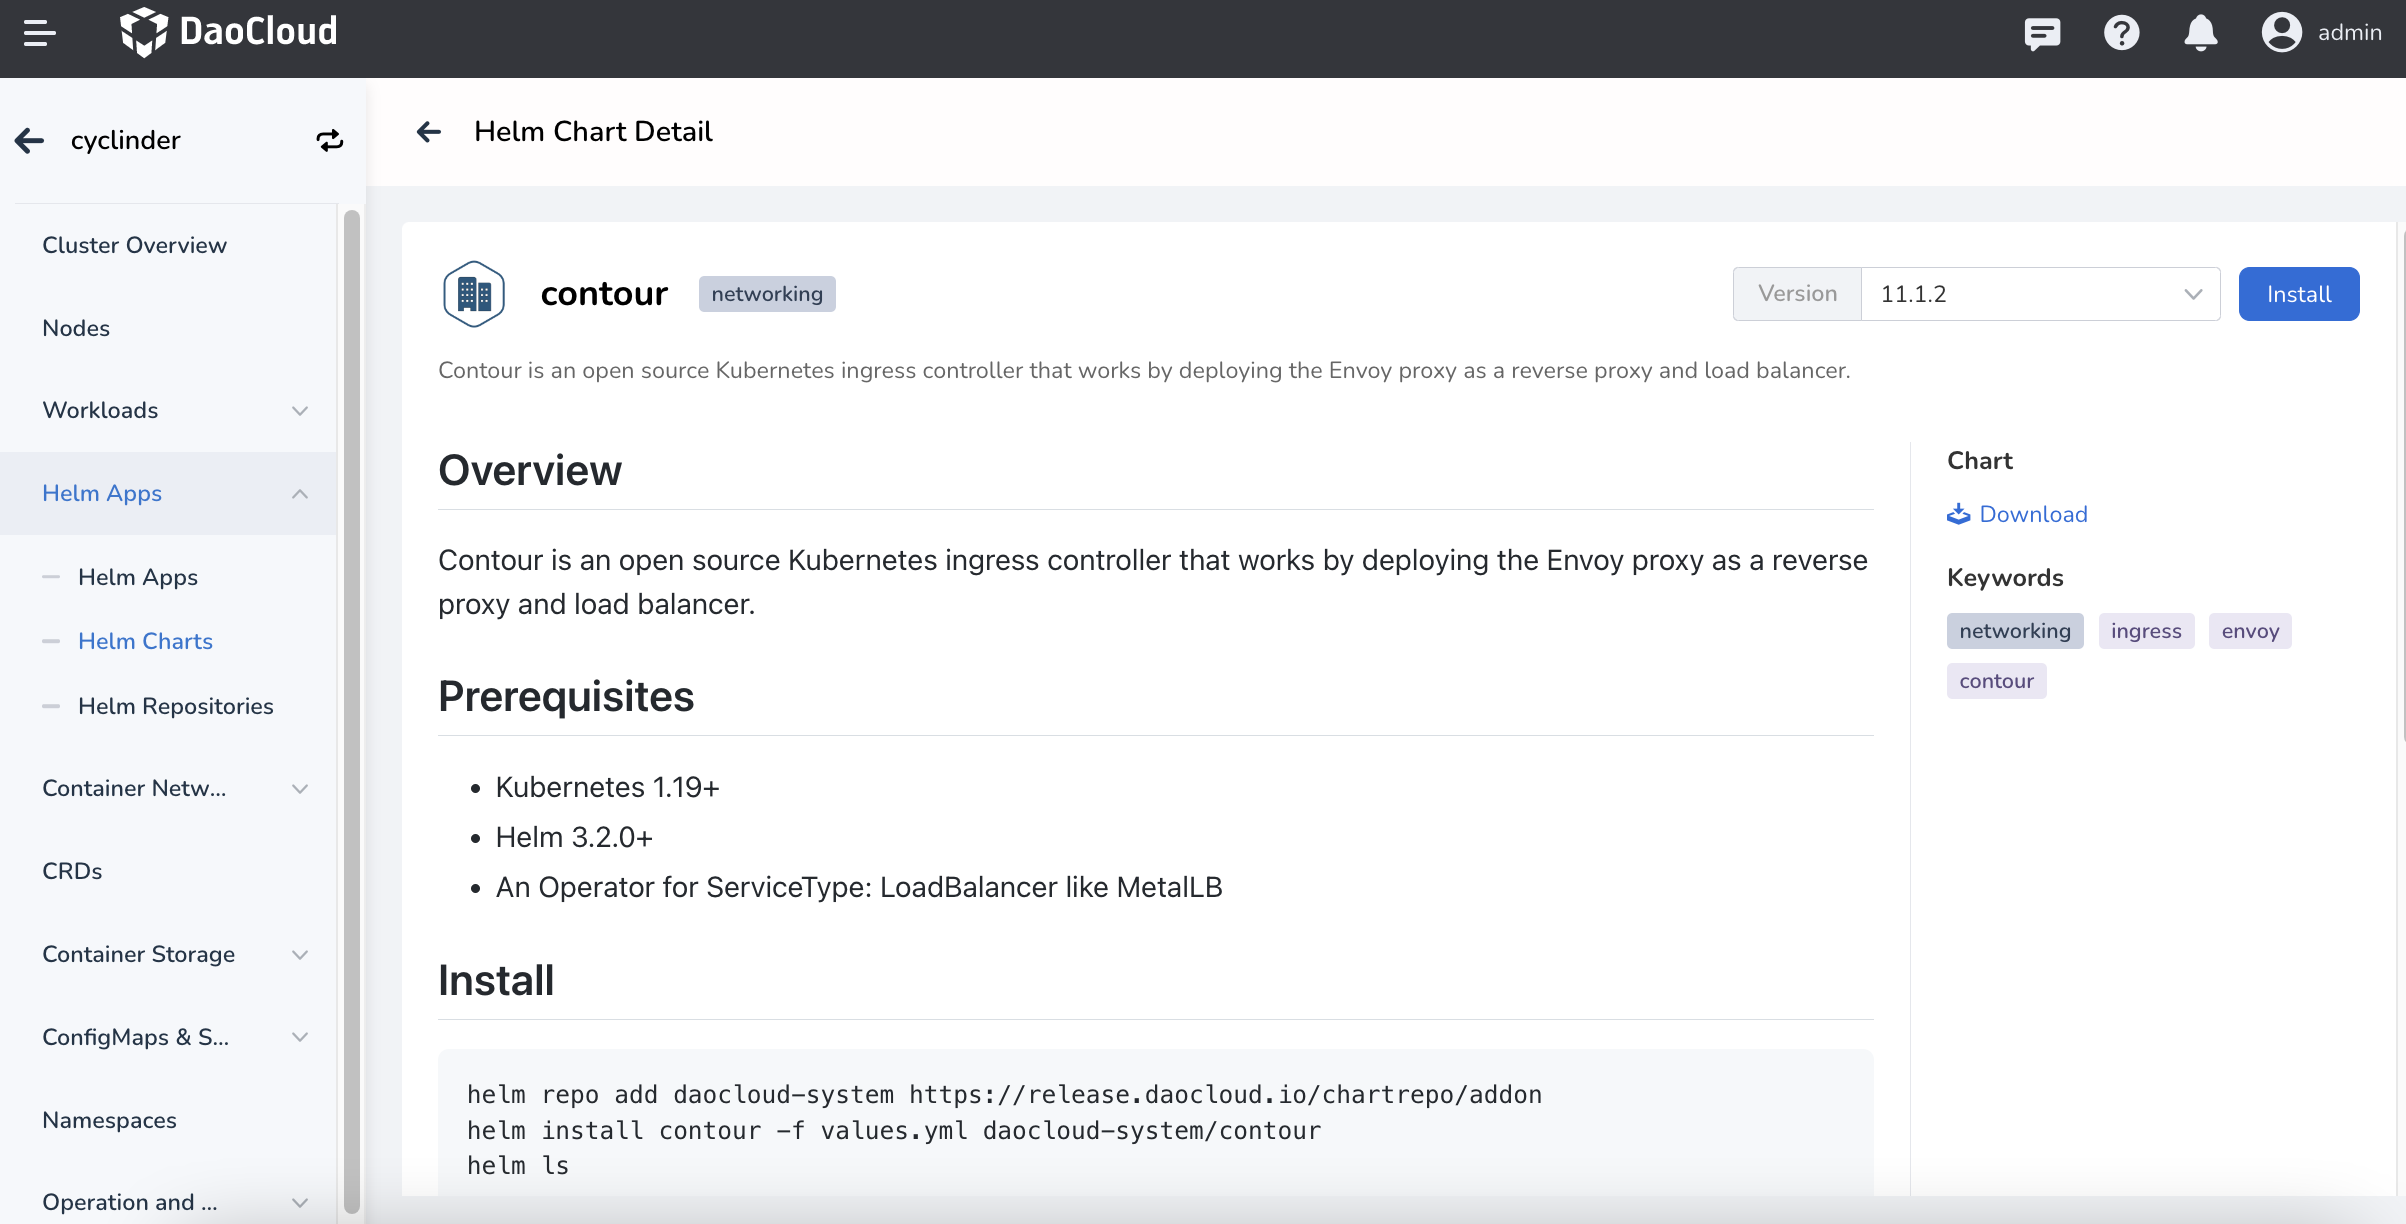
-
In the installation page, fill in the required installation parameters.
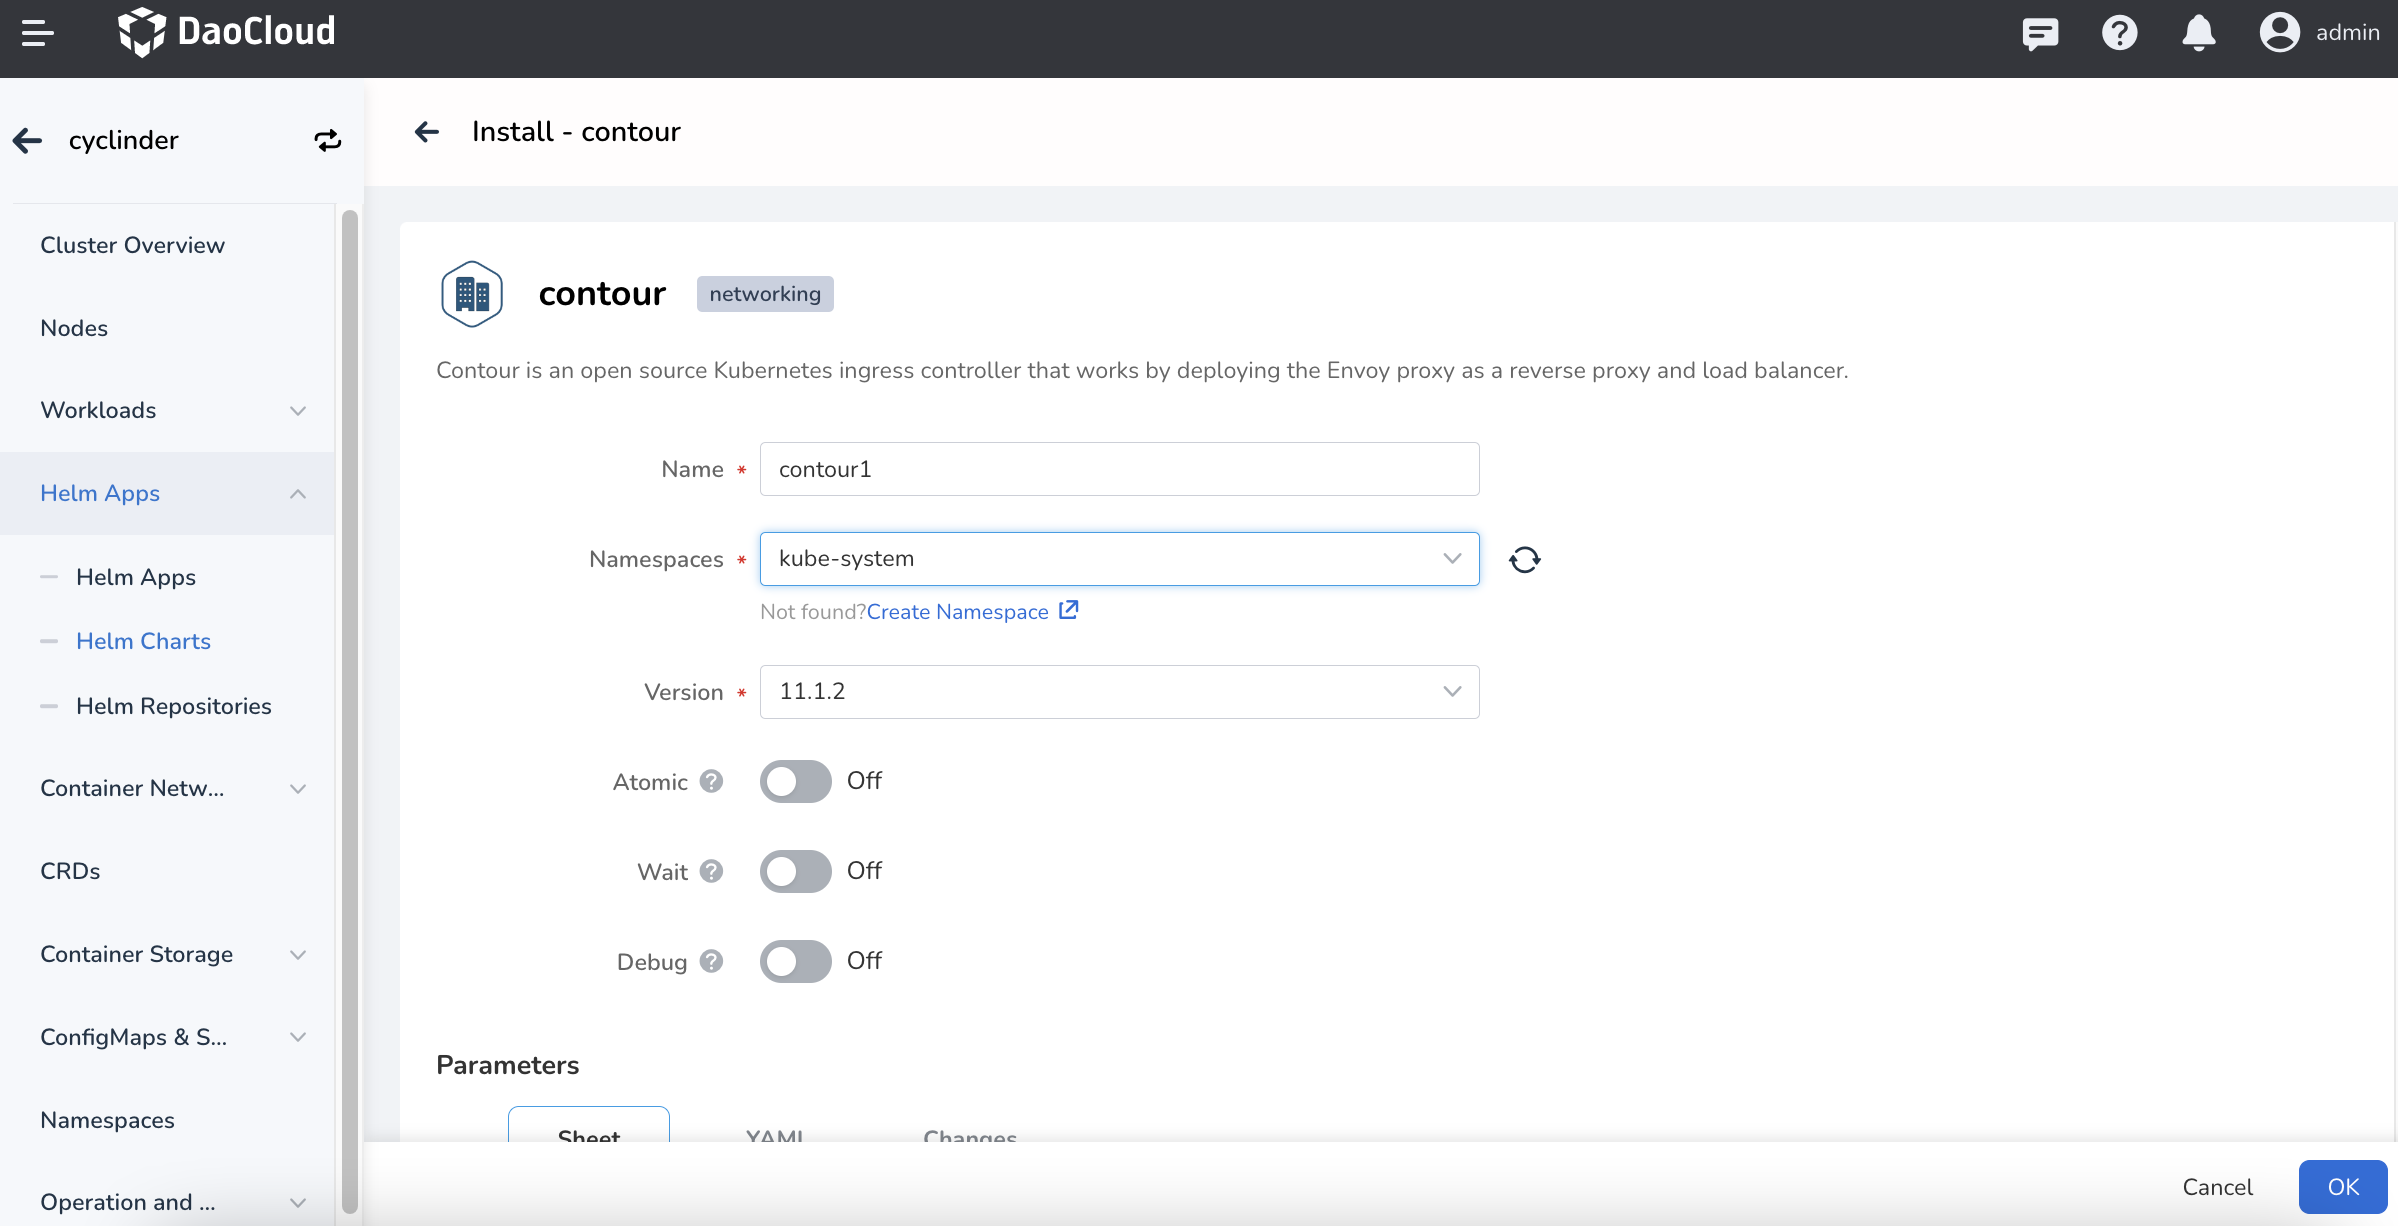
In the screen as above, fill in the
Name,Namespace,Version, etc.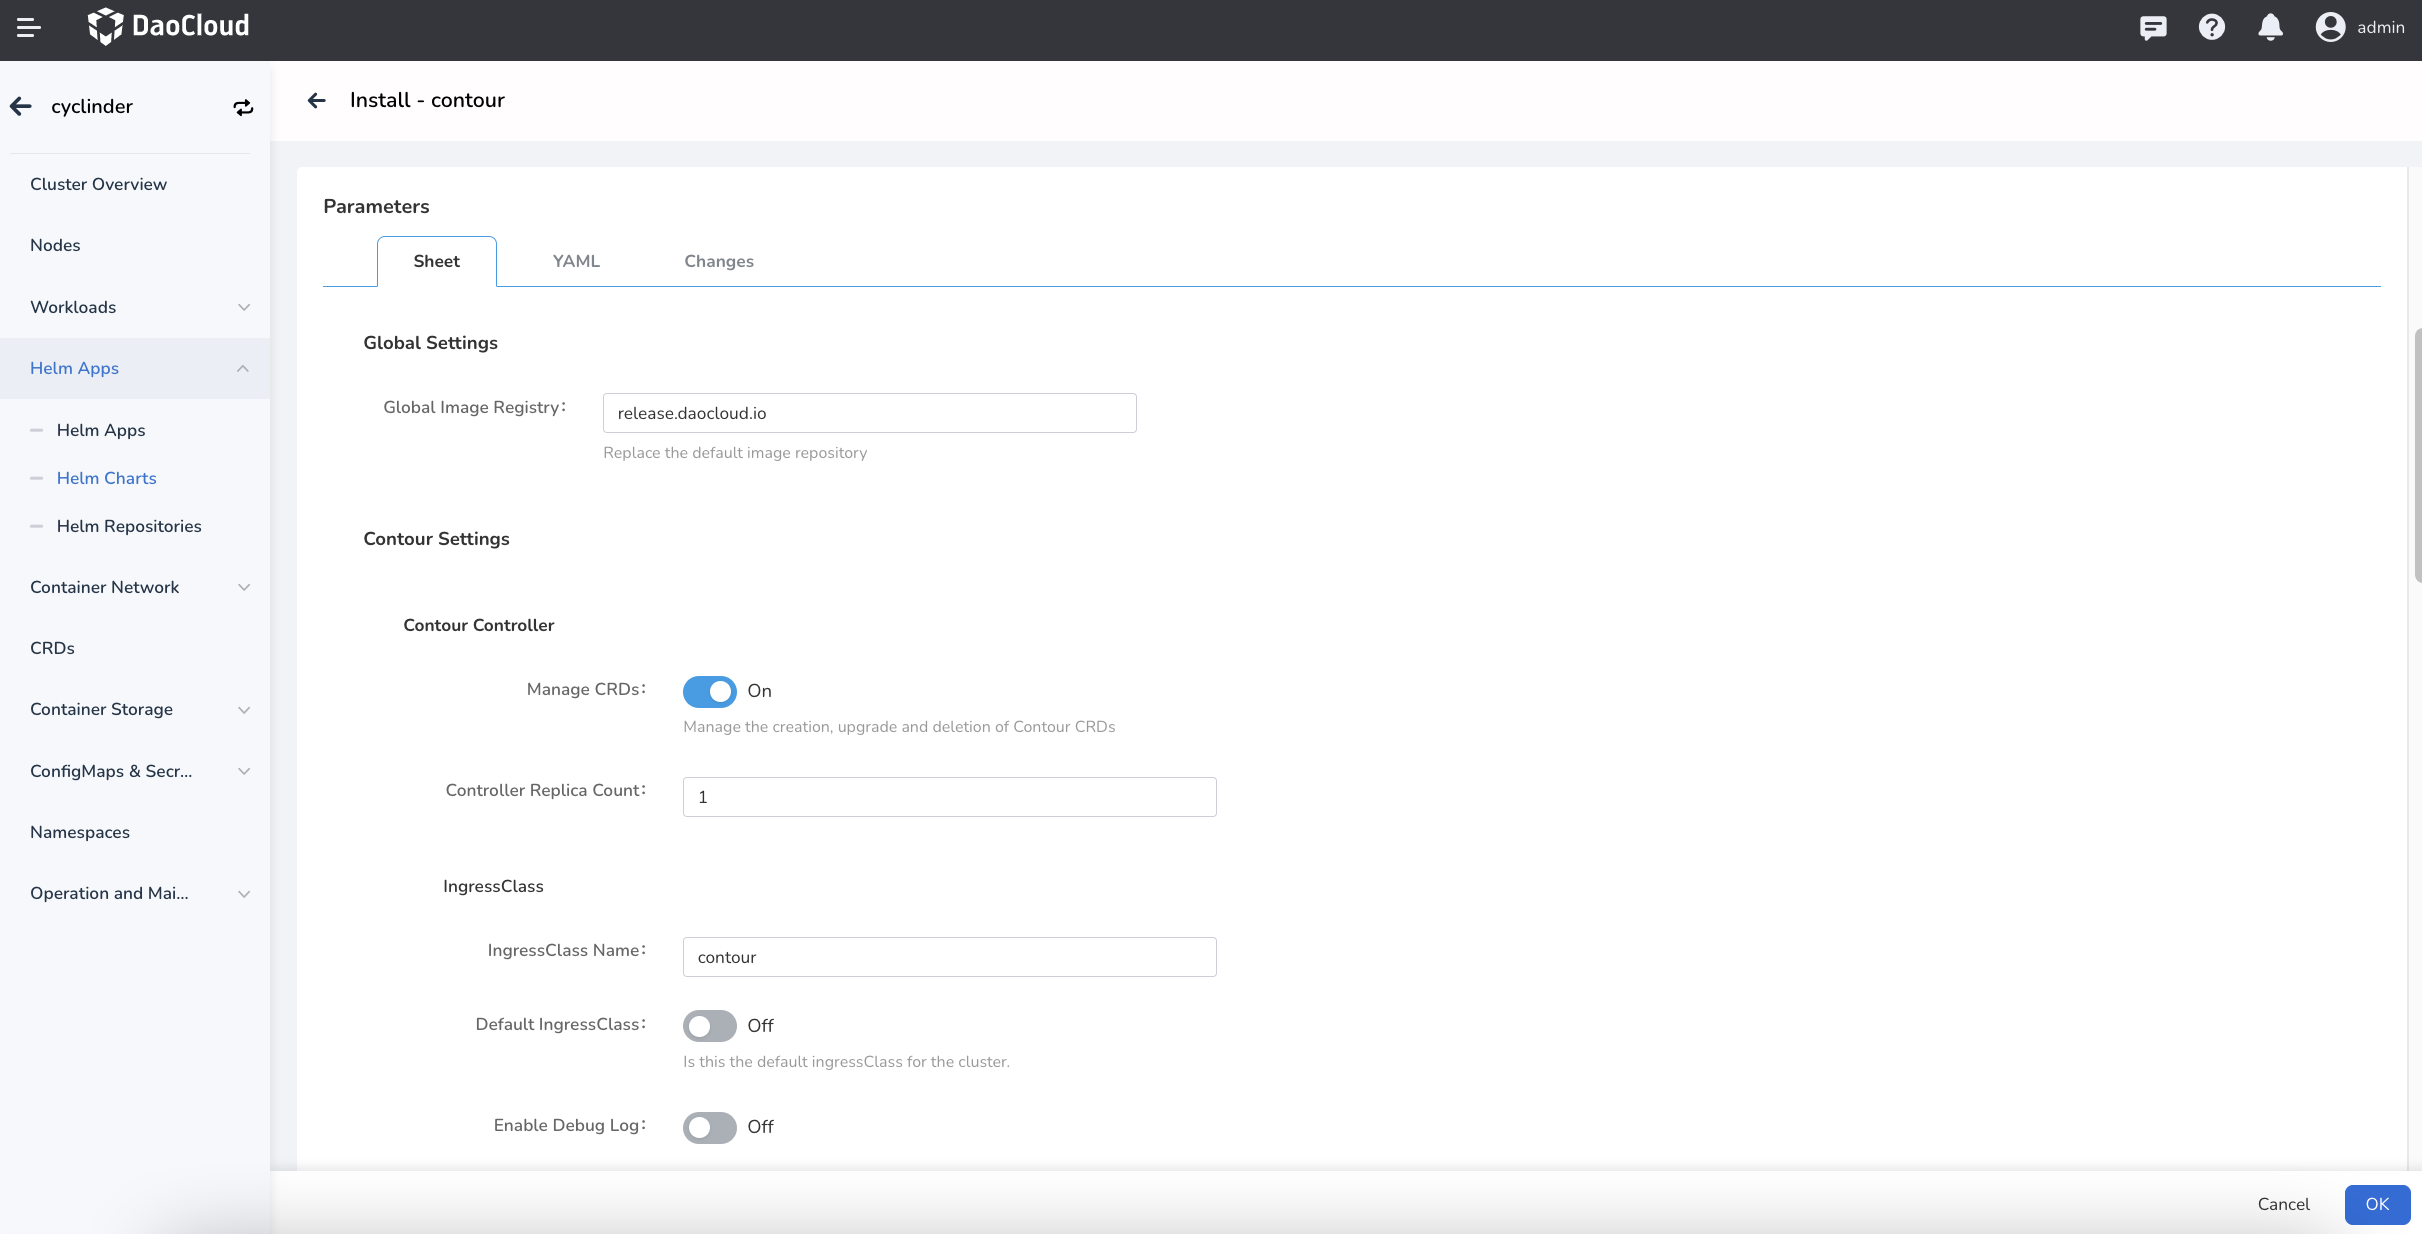
In the screen as above, fill in the following parameters:
contour->Global Settings->Global Container Registry: the container registry address.contour->Contour Settings->Contour Controller->Manage CRDs: CRDs for Contour.contour->Contour Settings->Contour Controller->Controller Replica Count: the number of replicas for the Contour control plane.contour->Contour Settings->IngressClass->IngressClass Name: the Ingress Class name. If the cluster deploys multiple Ingresses, this class can be used to differentiate them, and this field will be set when creating the Ingres CR.contour->Contour Settings->IngressClass->Default IngressClass: the default Ingress.contour->Contour Settings->IngressClass->Enable Debug Log: debug-level log output at the control plane .
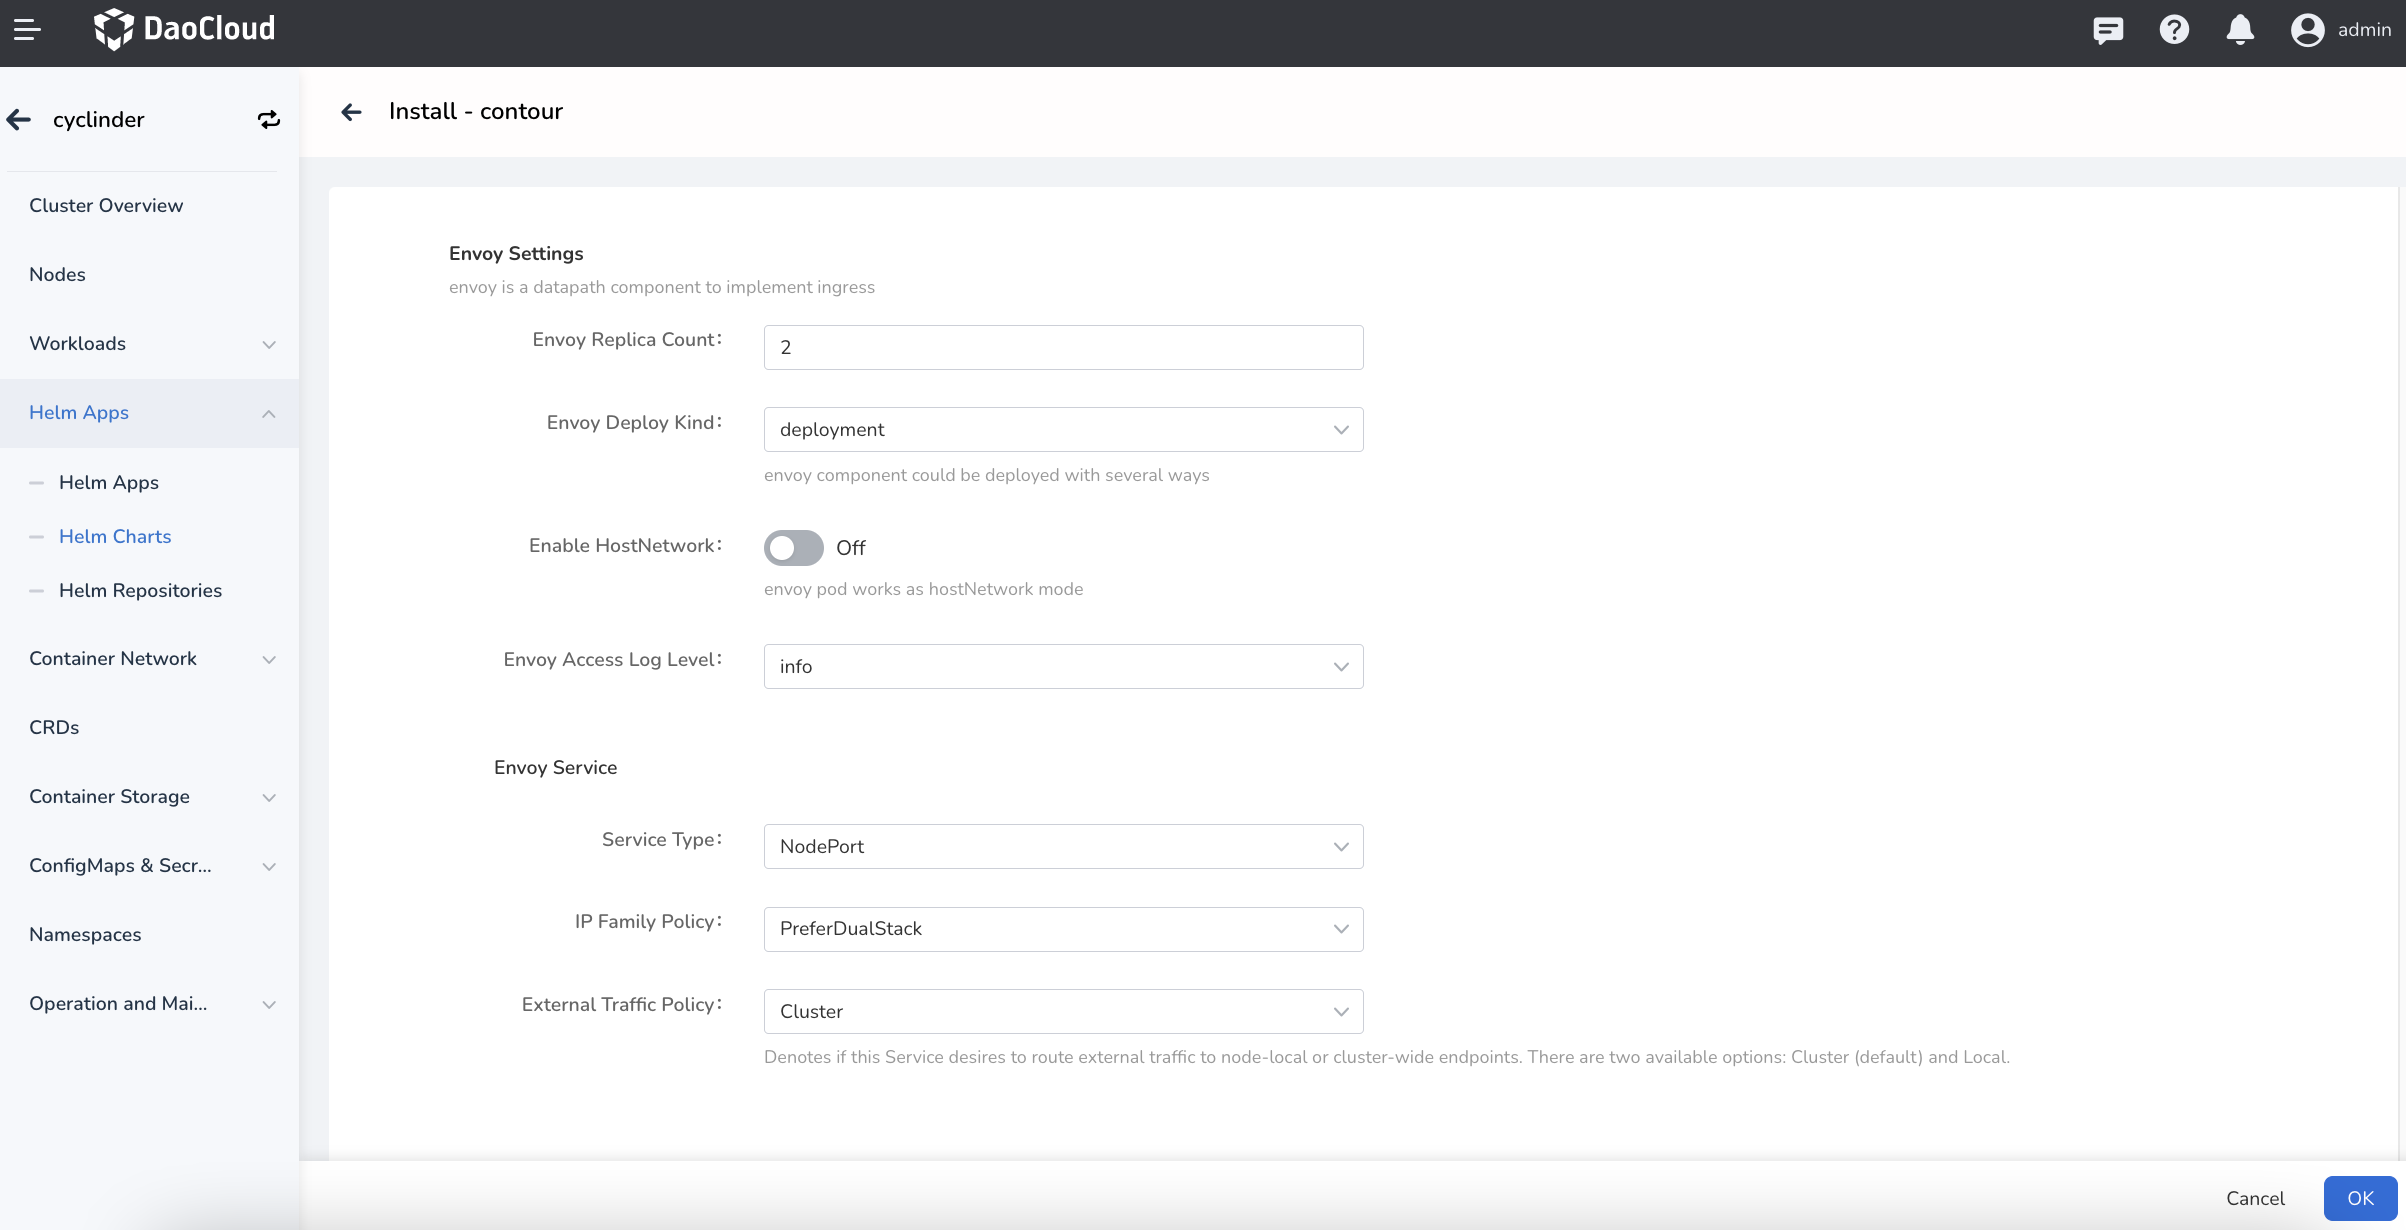
In the screen as above, fill in the following parameters:
contour->Contour Settings->Envoy Settings->Envoy Replica Count: the number of replicas of the data plane Envoy.contour->Contour Settings->Envoy Settings->Envoy Deploy Kind: the application type of Envoy, including Deployment or DaemonSet.contour->Contour Settings->Envoy Settings->Enable HostNetwork: enables Host network, and the default is off. It is not recommended to enable this option if you have no special needs.contour->Contour Settings->Envoy Settings->Envoy Access Log Level: Envoy access log level.contour->Contour Settings->Envoy Settings->Envoy Service->Service Type: the Service type.contour->Contour Settings->Envoy Settings->Envoy Service->IP Family Policy: IP single and dual stack setting. You can turn it on according to your requirement.
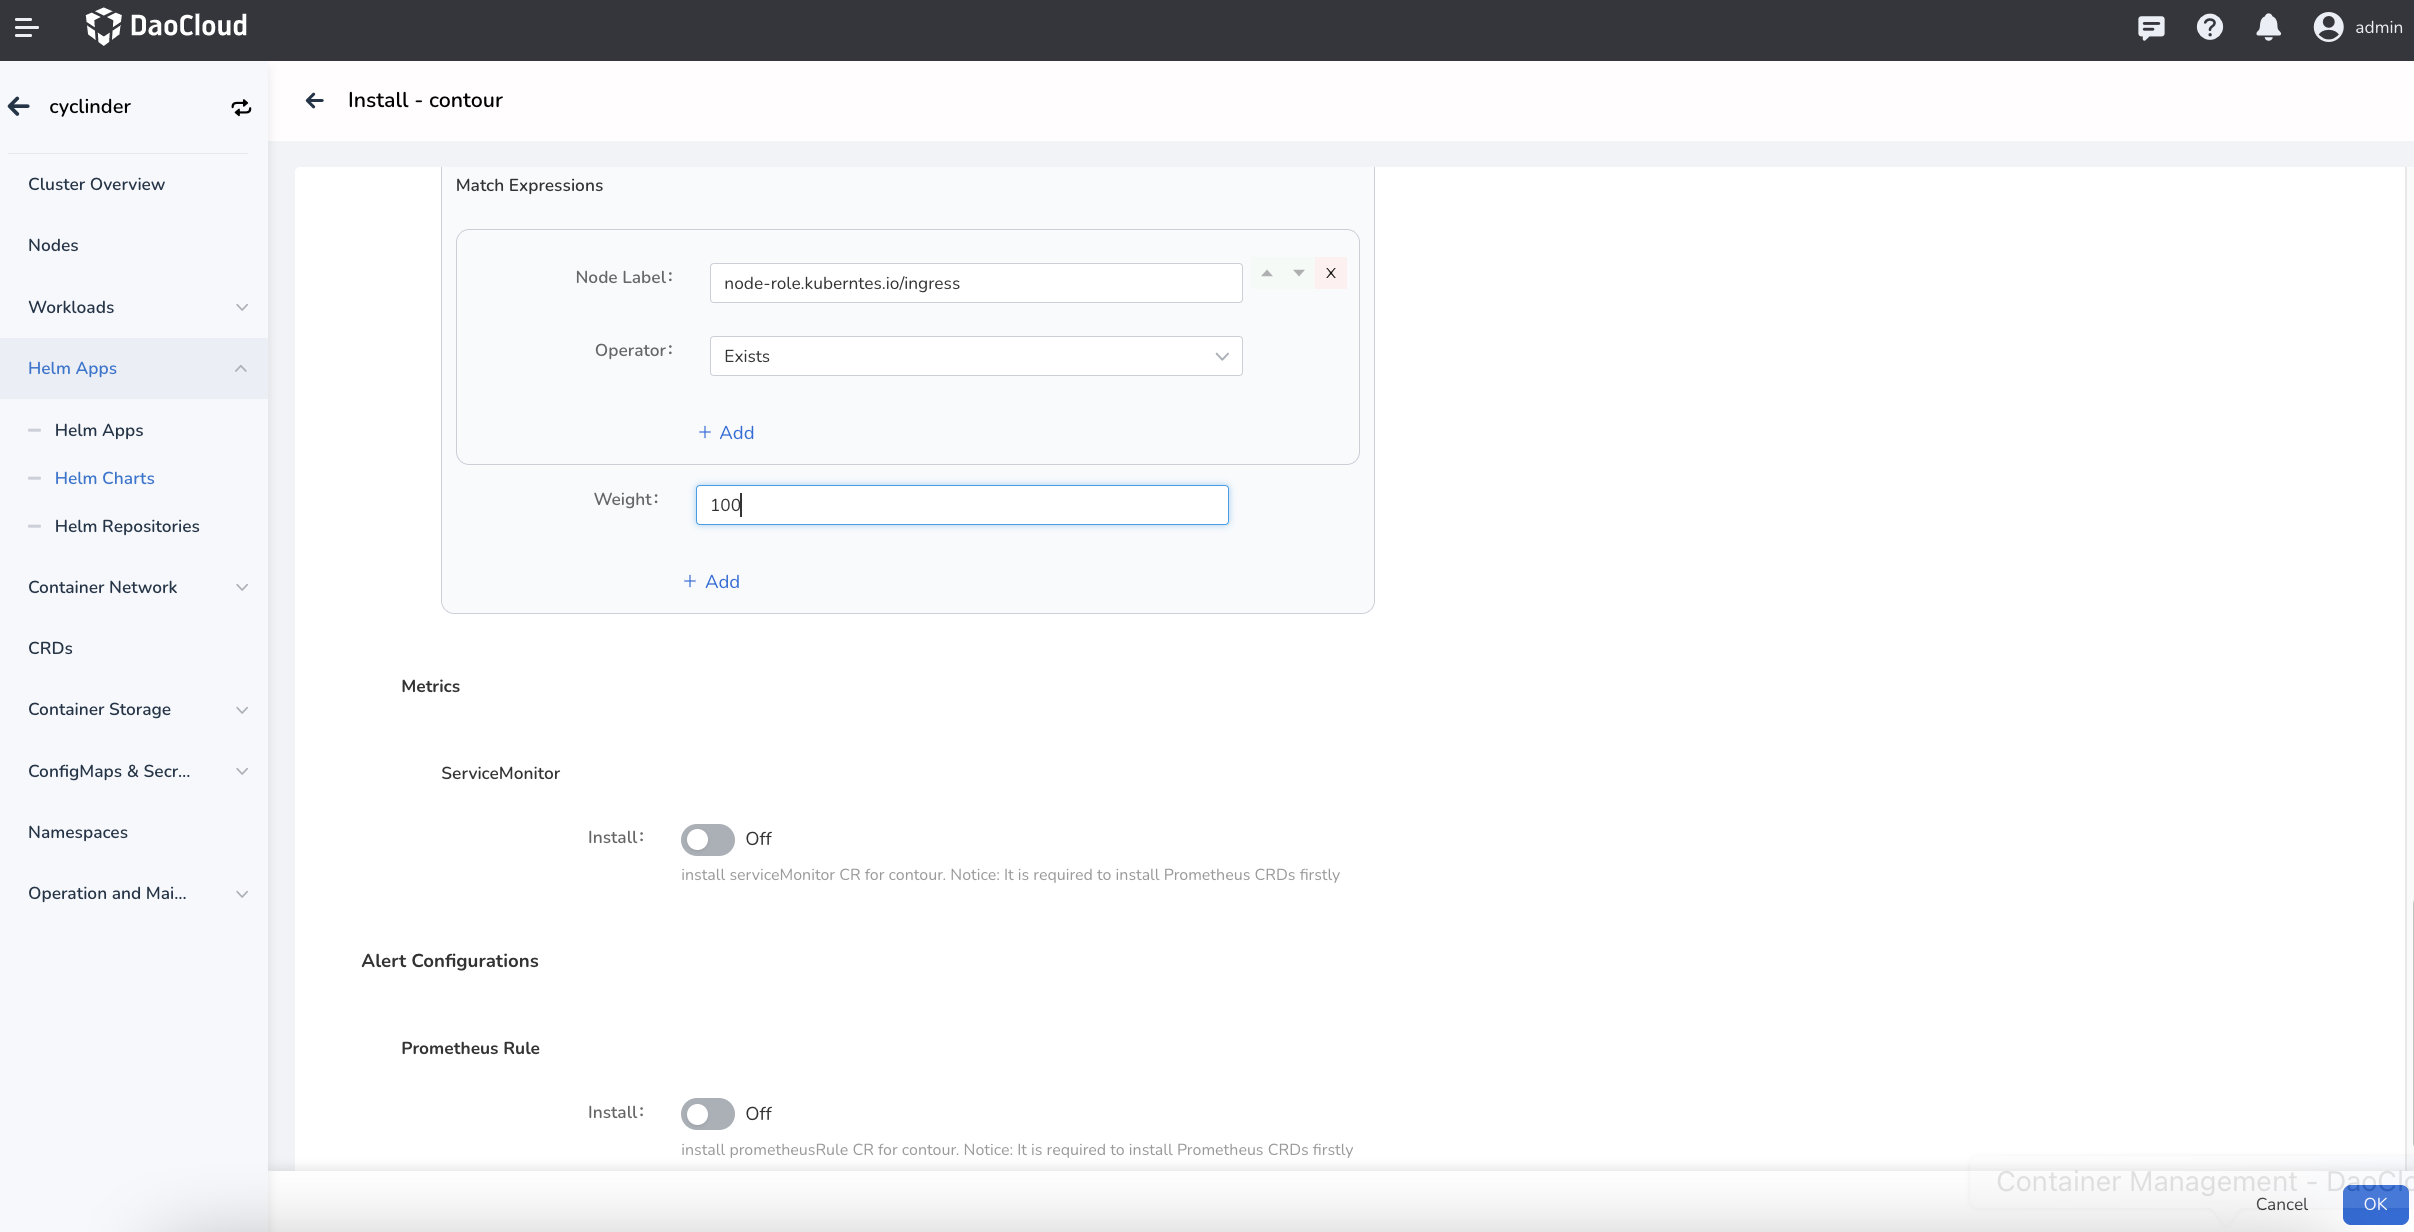
In the screen as above, fill in the following parameters:
contour->Contour Settings->Envoy Settings->Envoy Node Affinity->Match Expressions: scheduling rules by soft affinity.contour->Contour Settings->Envoy Settings->Envoy Node Affinity->Match Expressions->Weight: the weight of the soft affinity scheduling rule.contour->Contour Settings->Metrics->ServiceMonitor: it requires that the cluster has Prometheus Operator deployed in your cluster.contour->Contour Settings->Alert Configurations->Prometheus Rule: ff enabled, create a Prometheus Rule CR with alert rules. It requires that the cluster has Prometheus Operator installed or that the Insight component is deployed.
-
Click the tab
YAMLto perform advanced configuration via YAML. Then, click theOKbutton in the bottom right corner to complete the creation.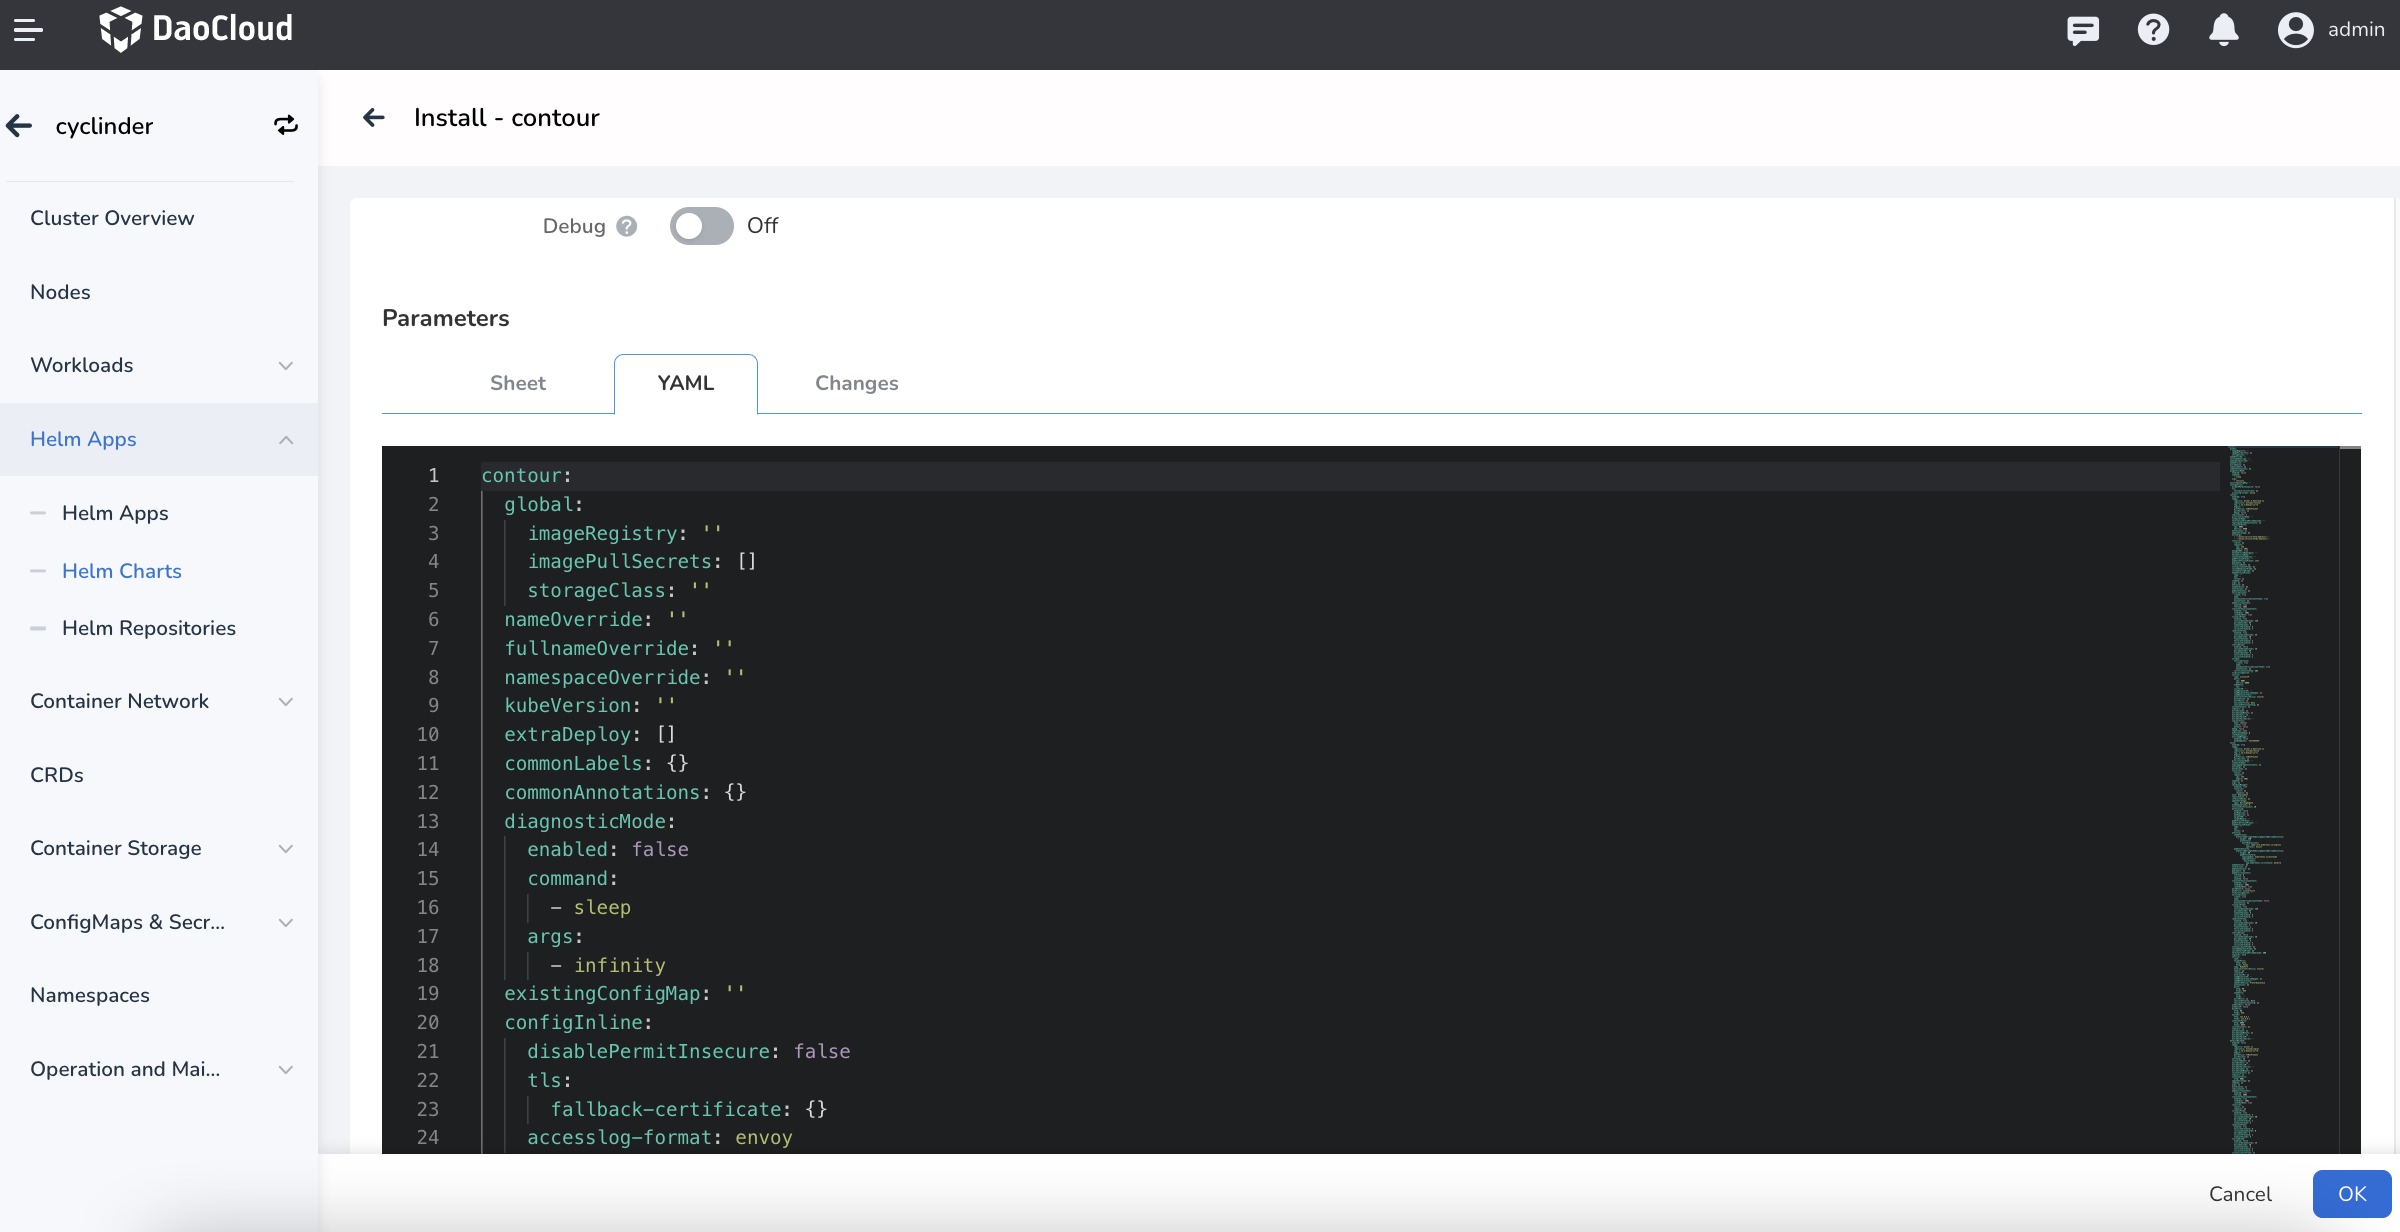
Once created, create the Ingress route and select the Contour instance via Platform Load Balancing. For details, refer to: Create Route