Install Spiderpool
This page describes how to install Spiderpool.
Prerequisites
-
To use SpiderPool in a DCE 5.0 cluster, you need a combination of Calico/Cillium.
-
It is recommended to use Spiderpool version v0.7.0 and above. The new version of Spiderpool supports auto-installation of Multus which can work with Multus CR Management to use Underlay CNIs including Macvlan or SR-IOV, and confirm the network interface and subnet to be used.
How to install Spiderpool
Please confirm that your cluster has successfully connected to the Container Management platform, and then perform the following steps to install Spiderpool.
-
Click
Container Management->Clustersin the left navigation bar and find the cluster name where you want to install Spiderpool. -
Select
Helm Releases->Helm Chartsin the left navigation bar, and then find and clickspiderpool.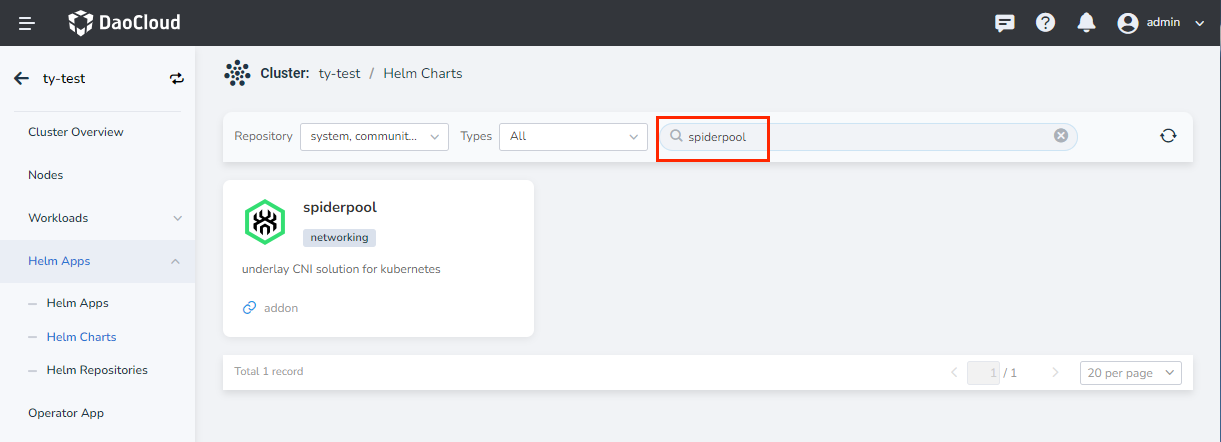
-
Select the version you want to install in
Version, and clickInstall. -
In the installation page, fill in the required parameters, if you need to use RDMA resources, please refer to RDMA installation and usage preparation for more details.
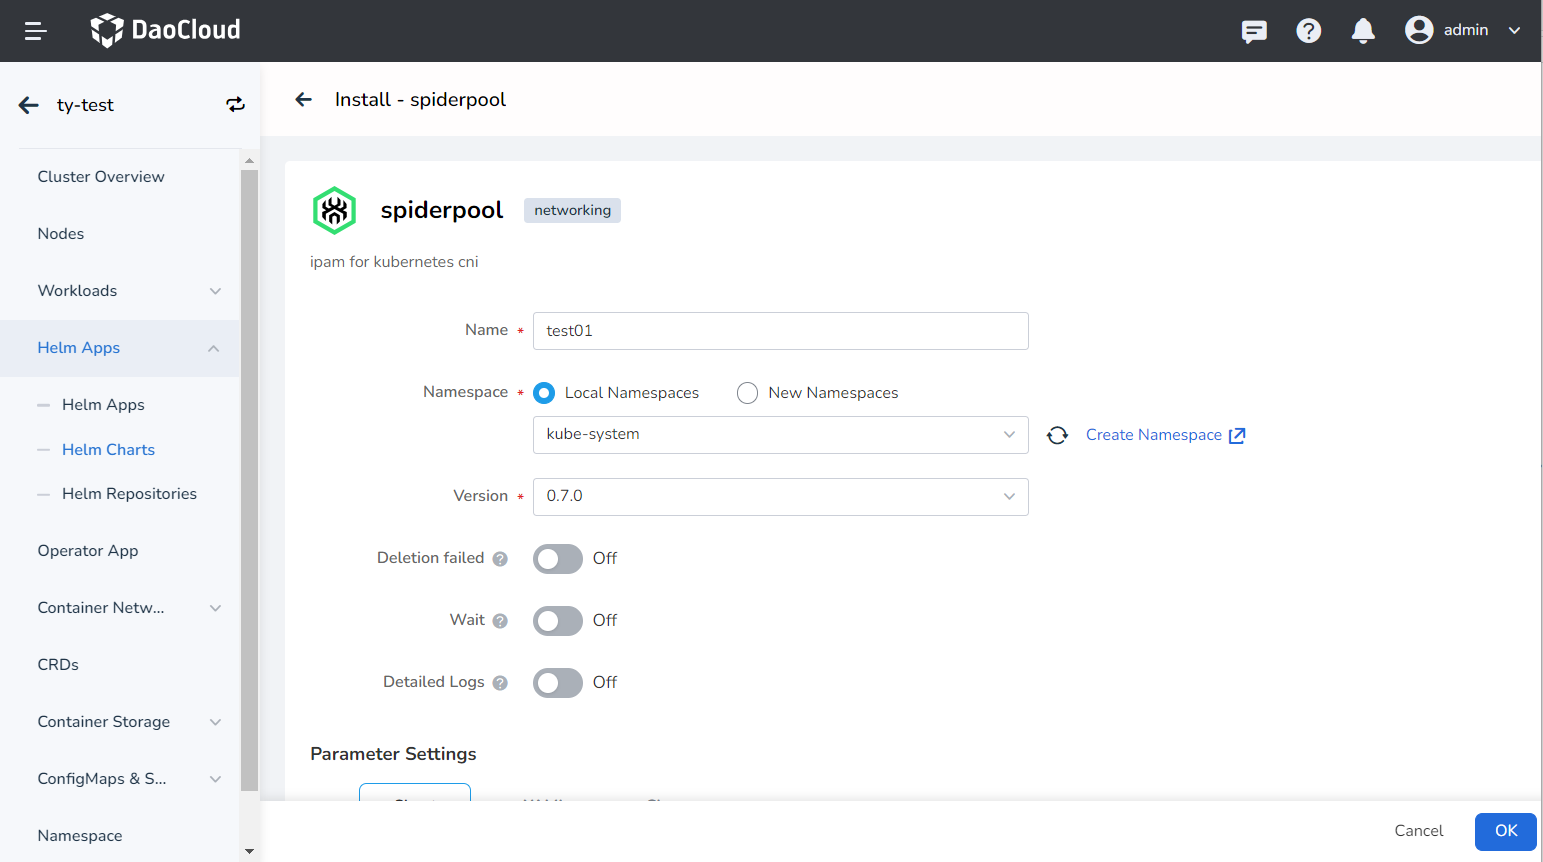

The parameters in the above screens are described as follows:
namespace: The namespace where the SpiderPool components are deployed. The default iskube-system. Changing it to a different namespace may cause the UI to become unavailable.Global Setting->global image Registry: Sets the registry address for all images. A valid online registry is preconfigured by default. For private environments, update it to a private registry address.Spiderpool Agent Setting->registry: Sets the image name, which can use the default value.Spiderpool Agent Setting->Spiderpool Agent Prometheus Setting->Enable Prometheus: Enables monitoring metrics for Spiderpool Agent.Spiderpool Agent Setting->Spiderpool Agent Prometheus Setting->Enable RDMA Metric: Enables RDMA network monitoring metrics in the cluster. Requires the Spiderpool Agent Prometheus option to be enabled.-
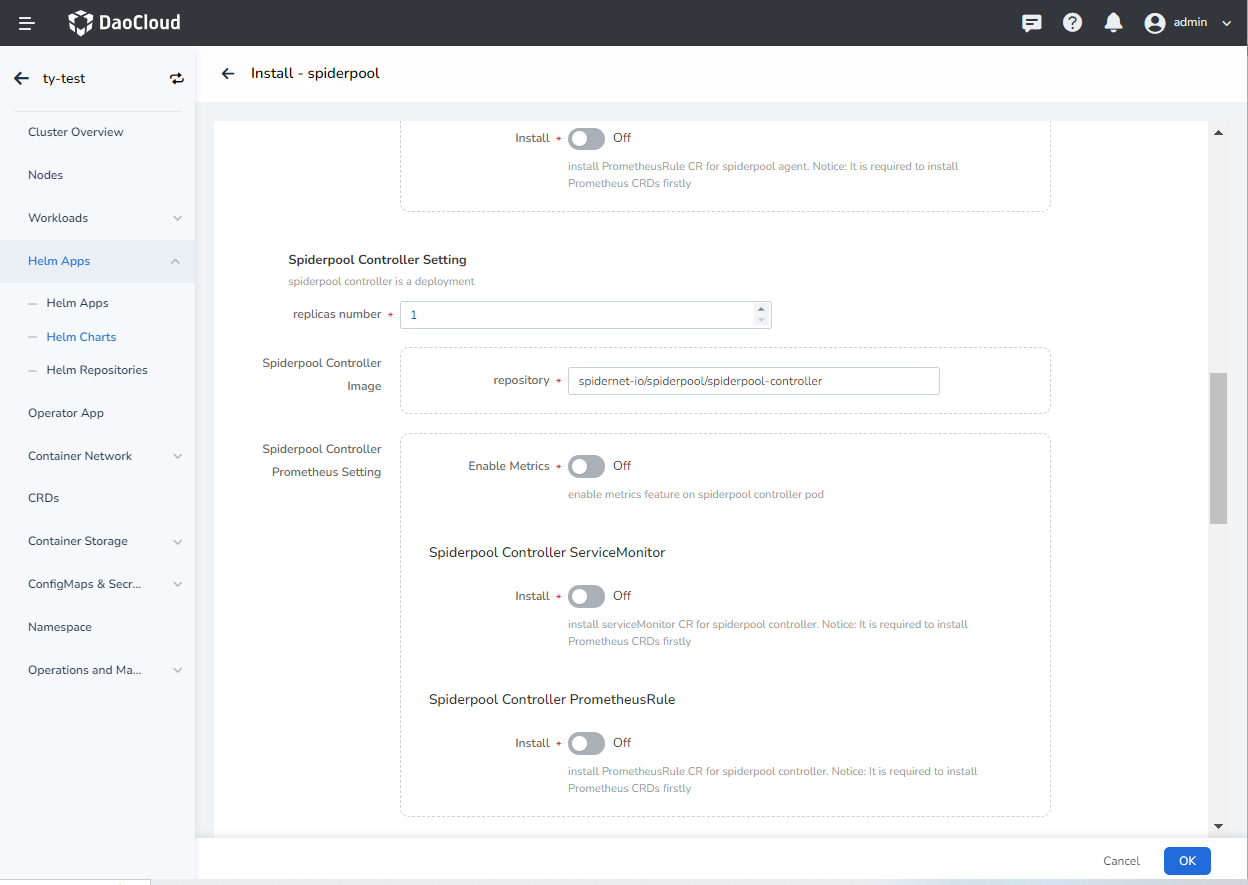
Spiderpool Controller Setting->replicas number: Sets the number of replicas for the Spiderpool Controller, which manages Spiderpool’s controller logic.This Pod runs in
hostNetworkmode and has an anti-affinity rule set between Pods, meaning only one Pod can be scheduled per Node.
If you set the replica count greater than 1, ensure the cluster has enough Nodes. Otherwise, some Pods may fail to schedule. -
Spiderpool Controller Setting->Spiderpool Controller Image->repository: Sets the image name, which can use the default value. Spiderpool Controller Setting->AutoInjectRdmaResource: Enables automatic injection of RDMA network interfaces and RDMA device resources into AI applications via Webhook.
The parameters in the above image are explained as follows:
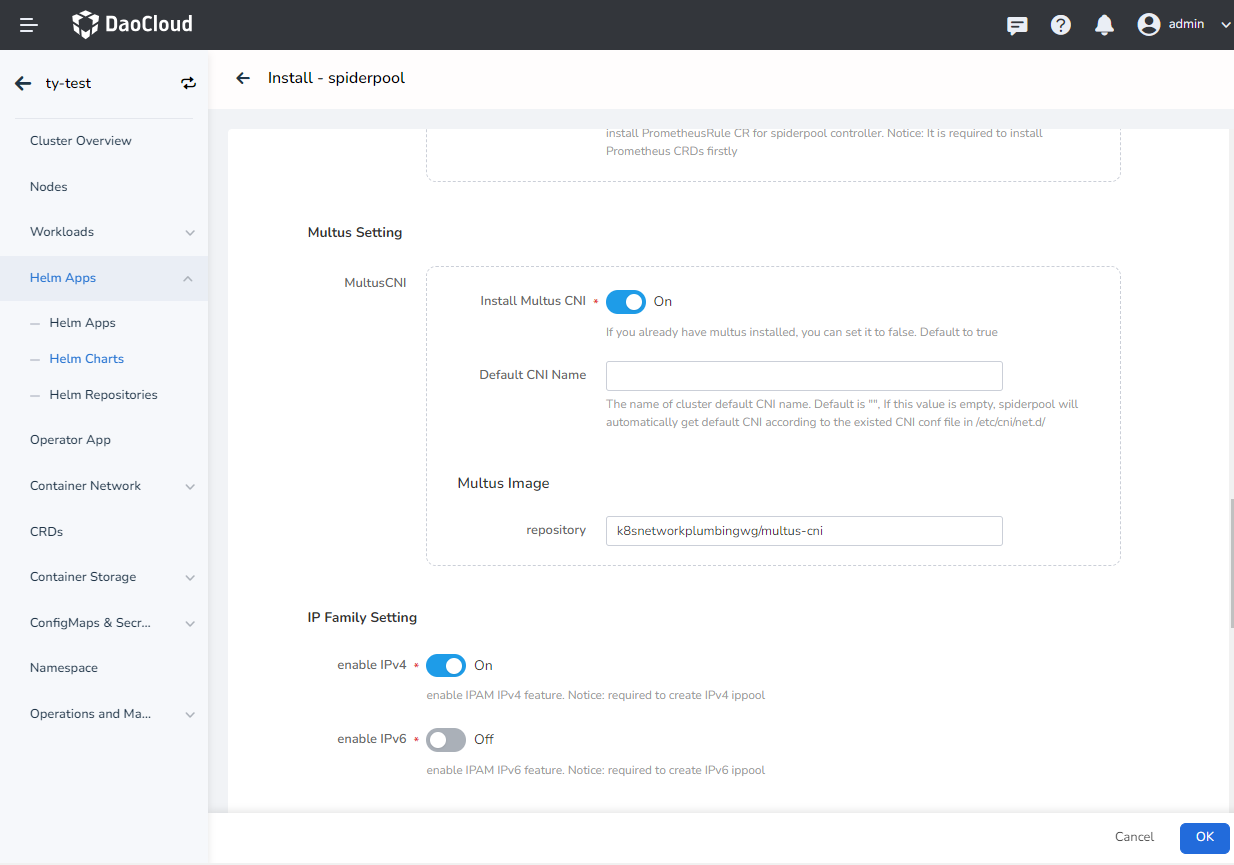
Multus Setting->MultusCNI->Install Multus CNI: Enables Multus installation. If Multus is already installed, this can be set tofalse. The default istrue.Multus Setting->MultusCNI->Default CNI Name: Sets the default CNI name for the cluster. The default is empty. If left empty, SpiderPool will automatically determine the default CNI based on the existing CNI configuration files in/etc/cni/net.d/. For DCE5 clusters, it is recommended to keep this value empty.Multus Setting->Multus Image->repository: Sets the Multus image registry address. A valid online registry is preconfigured by default. For private environments, update it to a private registry address.
The parameters in the above image are explained as follows:
-
Sriov-Operator->Install Sriov-Operator: Enables the installation of Sriov-Operator, which helps install components such assriov-cniandsriov-device-plugin.
If you are setting up an AI cluster and need to provide RDMA communication (including RoCE and InfiniBand) and acceleration capabilities for containers based on SR-IOV technology, installation is recommended.
Note: It is advised not to install Sriov-Operator alongsidek8s-rdma-shared-dev-plugin. -
Sriov-Operator->Image->Operator repository: Sets the image name, which can use the default value. The operator facilitates the installation of all SR-IOV components. Sriov-Operator->Image->SriovCni repository: Sets the image name, which can use the default value. This installs thesriov-cnibinary on each node.Sriov-Operator->Image->SriovDevicePlugin repository: Sets the image name, which can use the default value. This discovers SR-IOV device resources on the host and reports them tokubelet.Sriov-Operator->Image->SriovConfigDaemon repository: Sets the image name, which can use the default value. This configures SR-IOV network settings on the host, such as enabling SR-IOV functionality.Sriov-Operator->Image->IbSriovCni repository: Sets the image name, which can use the default value. This installs theib-sriov-cnibinary on each node.Sriov-Operator->Image->ResourcesInjector repository: Sets the image name, which can use the default value. This webhook-based component automatically updates Pod network resource configurations, primarily for SR-IOV network resources.Sriov-Operator->Image->Webhook repository: Sets the image name, which can use the default value. The webhook component validates and updates resource configurations.
 The parameters in the above figure are described as follows:
The parameters in the above image are explained as follows:
-
Rdma->RdmaSharedDevicePlugin->Install RdmaSharedDevicePlugin: Enables the installation of the RDMAk8s-shared-dev-plugincomponent. It works with Macvlan or IPVlan CNI to share RDMA devices with containers.
If you are setting up an AI cluster, installation is recommended.
Note: It is advised not to installRdmaSharedDevicePluginalongsideSriov-Operator. -
Rdma->RdmaSharedDevicePlugin->Image repository: Sets the image name, which can use the default value. Rdma->RdmaSharedDevicePlugin->RdmaSharedDevicePlugin Config->resourceName: Configures the resource name for thek8s-rdma-shared-dev-plugin, which must be unique within the cluster and is used for assigning RDMA resources to Pods.Rdma->RdmaSharedDevicePlugin->RdmaSharedDevicePlugin Config->vendors: Configures the vendor for RDMA shared devices, which can use the default value. This helps discover RDMA devices on the host.Rdma->RdmaSharedDevicePlugin->RdmaSharedDevicePlugin Config->deviceIDs: Configures the list of RDMA shared device IDs, which can use the default value. This helps discover RDMA devices on the host.
CNI-Plugins->Image->repository: Sets the image name, which can use the default value.install CNI-Plugins: Enables the installation of CNI plugins and installs CNI binaries (such as Macvlan/IPVlan) on each node. Set totrueif you haven’t installed them yet. Default isfalse.IP Family Setting->enable IPv4: Enables IPv4 support. If enabled, IPv4 addresses will be assigned to Pods when they are created. If not enabled, Pods may fail to start.
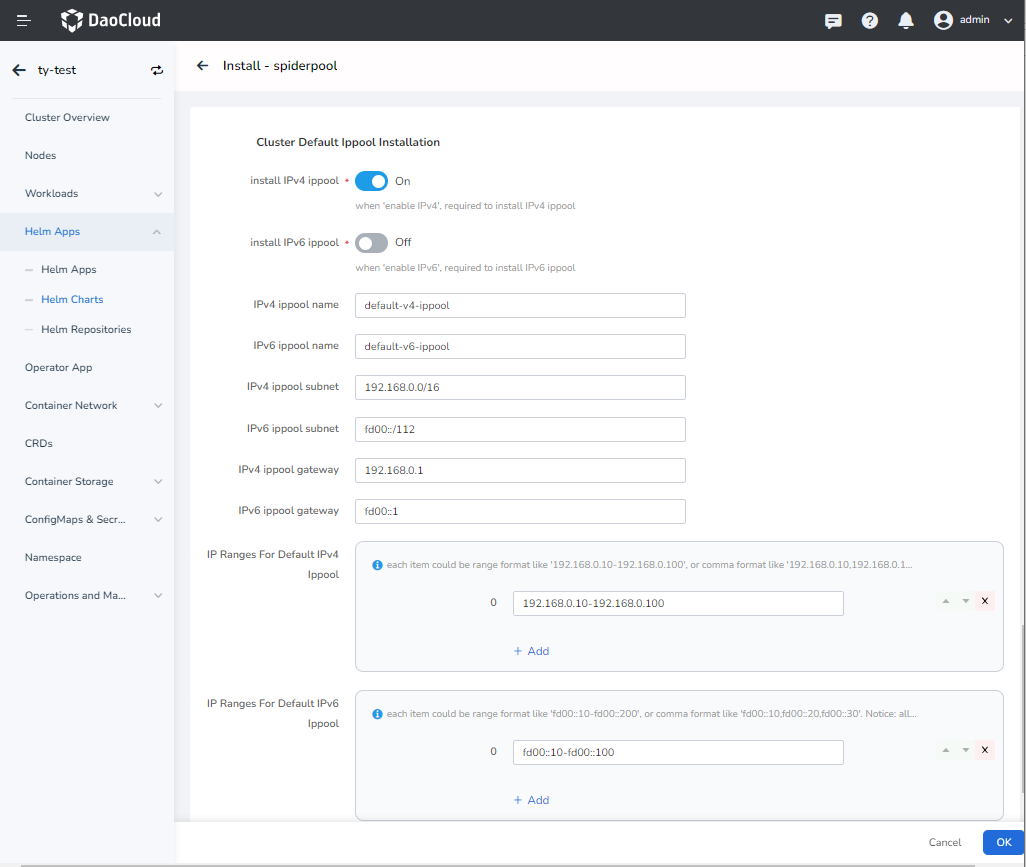
Therefore, enableCluster Default Ippool Installation->install IPv4 ippoolto create the default IPv4 pool.IP Family Setting->enable IPv6: Enables IPv6 support. If enabled, IPv6 addresses will be assigned to Pods when they are created. If not enabled, Pods may fail to start.
Therefore, enableCluster Default Ippool Installation->install IPv6 ippoolto create the default IPv6 pool.
Cluster Default Ippool Installation->install IPv4 ippool: Installs the IPv4 IP pool.Cluster Default Ippool Installation->install IPv6 ippool: Installs the IPv6 IP pool.Cluster Default Ippool Installation->IPv4 ippool subnet: Sets the default IPv4 subnet for the pool. Pre-plan the subnet and gateway, e.g.,192.168.0.0/16. If IPv4 pool installation is not enabled, this option can be ignored.Cluster Default Ippool Installation->IPv6 ippool subnet: Sets the default IPv6 subnet for the pool. Pre-plan the subnet and gateway, e.g.,fd00::/112. If IPv6 pool installation is not enabled, this option can be ignored.Cluster Default Ippool Installation->IPv4 ippool gateway: Sets the IPv4 gateway, e.g.,192.168.0.1, which must belong to theIPv4 ippool subnet. If IPv4 pool installation is not enabled, this option can be ignored.Cluster Default Ippool Installation->IPv6 ippool gateway: Sets the IPv6 gateway, e.g.,fd00::1, which must belong to theIPv6 ippool subnet. If IPv6 pool installation is not enabled, this option can be ignored.Cluster Default Ippool Installation->IP Ranges for default IPv4 ippool: Specifies the IP addresses that can be assigned to Pods. Multiple ranges can be added.
Note
- One format is a range of IPs, such as
192.168.0.10-192.168.0.100. - Another format is a single IP address, such as
192.168.0.200. CIDR format is not supported.
These IP addresses should belong to the
IPv4 ippool subnet. If IPv4 pool installation is not enabled, this option can be ignored. -
Cluster Default Ippool Installation->IP Ranges for default IPv6 ippool: Specifies the IP addresses that can be assigned to Pods, similar to the IPv4 range.Note
- One format is a range of IPs, such as
fd00::10-fd00::100. - Another format is a single IP address, such as
fd00::200. CIDR format is not supported.
These IP addresses should belong to the
IPv6 ippool subnet. If IPv6 pool installation is not enabled, this option can be ignored. - One format is a range of IPs, such as
-
Click the OK button in the bottom right corner to complete the installation. After completion, refer to SpiderPool Usage to use the IP Pool.
Note
During installation, the default subnet and IP pool can be created. After installation, you can create additional subnets and IP pools through the user interface.