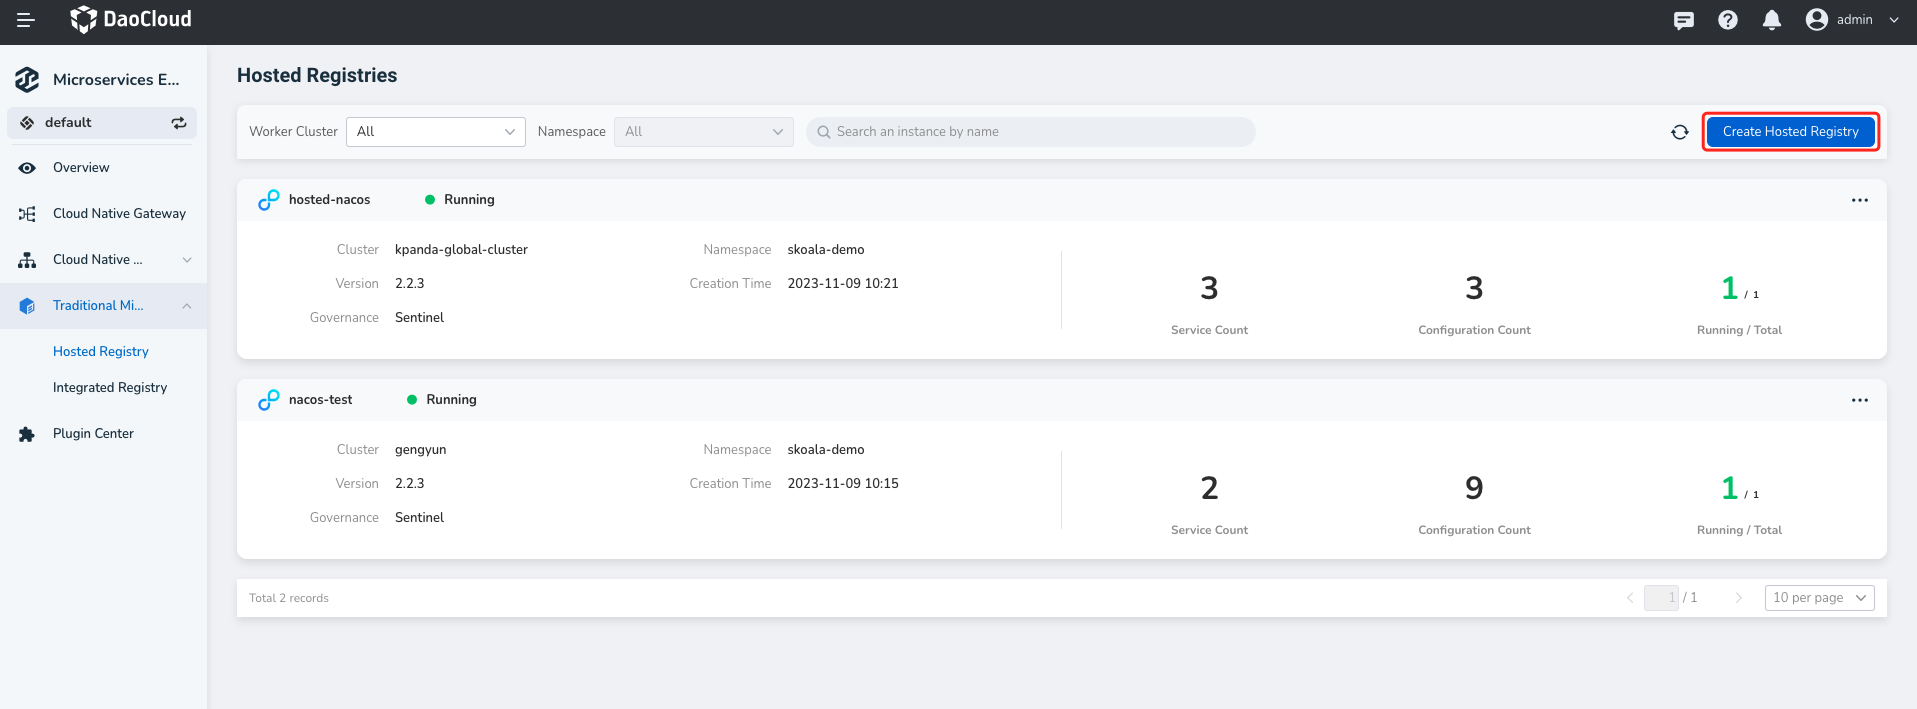
Hosted registry
The microservices engine supports hosting the Nacos registry, which creates a new NacOS-type registry from scratch in the microservices governance Center and can be fully managed through the microservices Governance Center. The hosted registry supports more operations than Integrated Registry, including viewing the basic information of the registry instance, microservice namespace management, microservice list, microservice configuration list, monitoring alerts, log viewing, plug-in center, and more.
Create
Note
- Install the skoala-init component in the ** skoala-system ** namespace of the target cluster. For details, see Manage Helm App.
- If the selected group does not have a ** skoala-system ** namespace, refer to Create Namespace to create a namespace named ** skoala-system **.
The steps to create a hosted registry are as follows.
- Click Traditional Microservices -> Hosted Registry in the left navigation bar, and then click
Create Hosted Registryin the upper right corner of the page to enter the page for creating the hosting registry instance.
-
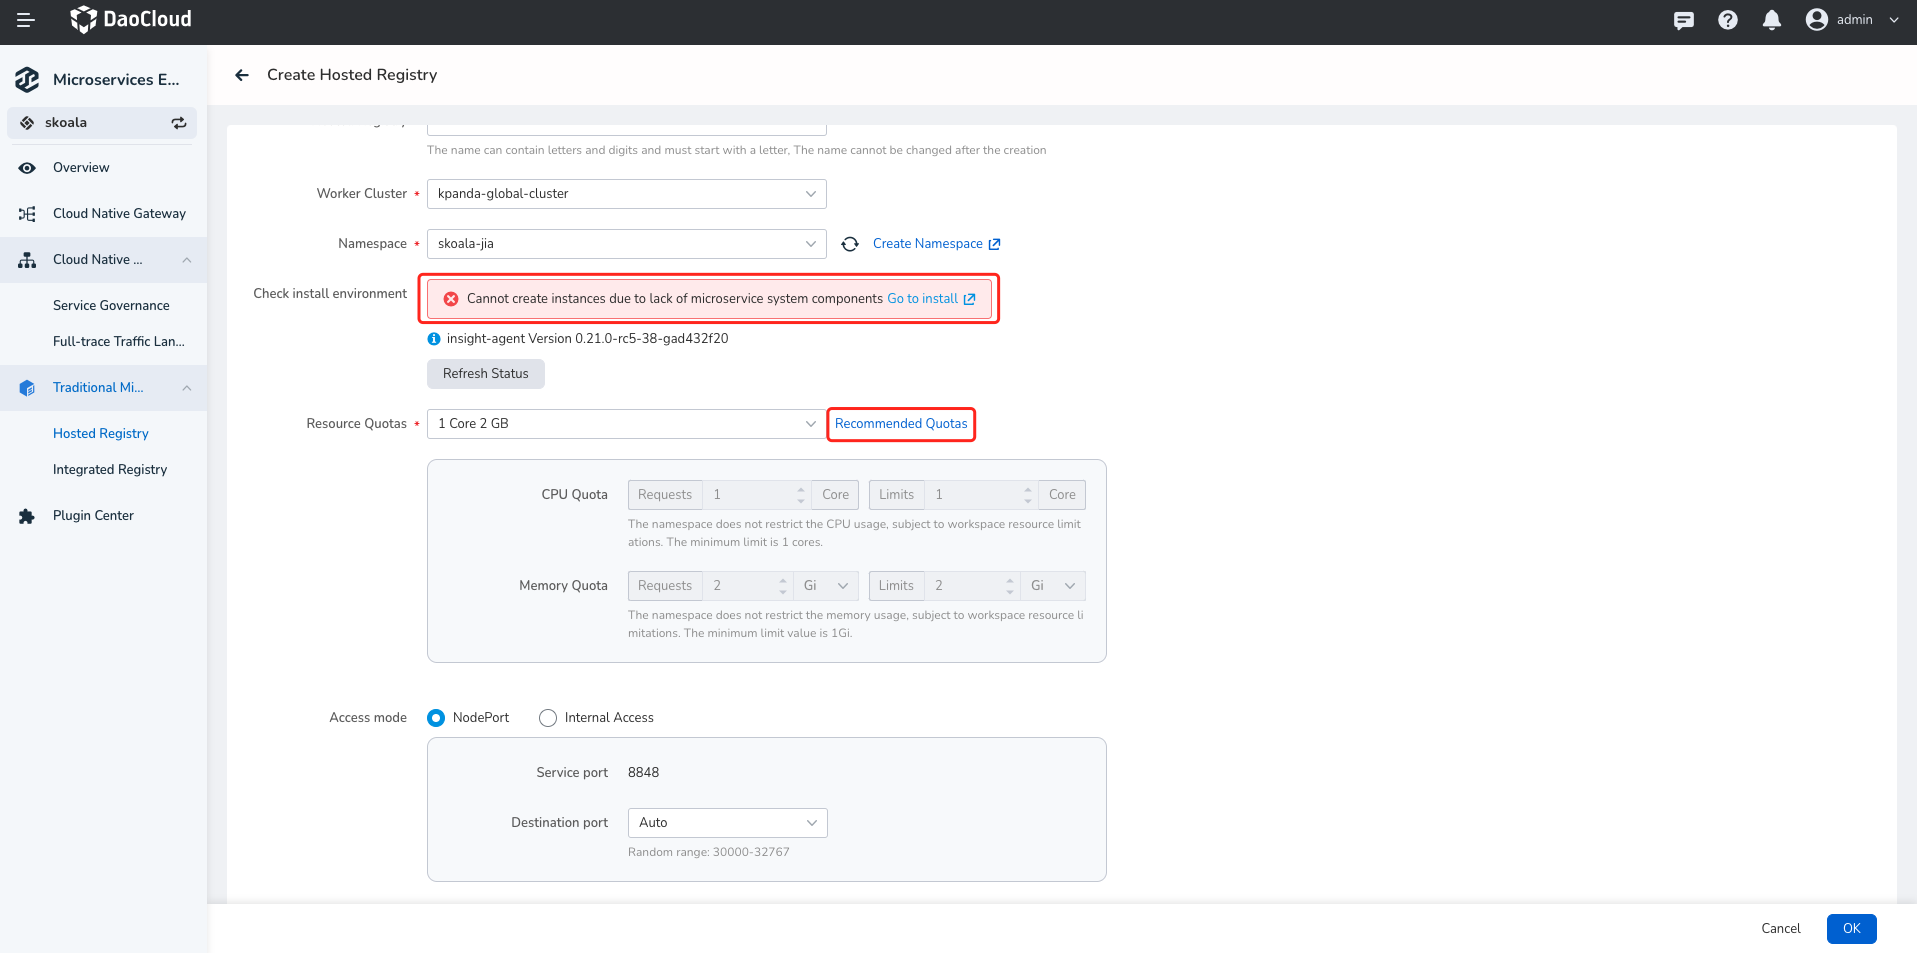
Enter the configuration information.
What should be noted is:
- Registry name: Letters, numbers, and delimiters (-) are supported. The registry name cannot be changed after it is created.
-
Deployment location: The system automatically verifies whether the skoala-init component is installed in the skoala-system namespace of the selected group.
- If it is not installed, the registry cannot be created. Follow the prompts on the page to install the component.
- The deployment location cannot be changed after the registry is created.
-
Resource configuration: You can directly set
1Core2G,2Core4G, or customize the resource quota.-
1Core2Gindicates that the request value and limit value of CPU are 2 cores respectively, the request value and limit value of memory are 2 G respectively, and so on. -
Click Recommended Quotas to see throughput (TPS) for mainstream specifications such as 2 Core 4 GiB, 4 Core 8 GiB, and 8 Core 16 GiB.
-
-
Access mode: If
NodePortis selected, the registry can be accessed externally through Service port + destination port. IfInternal Accessis selected, the registry can be accessed through service ports only in the cluster where the registry resides. The default service port is 8848. -
Deployment mode: If high availability mode is selected, the number of nodes must be at least three. In the production environment, the
High Availabilitymode is recommended.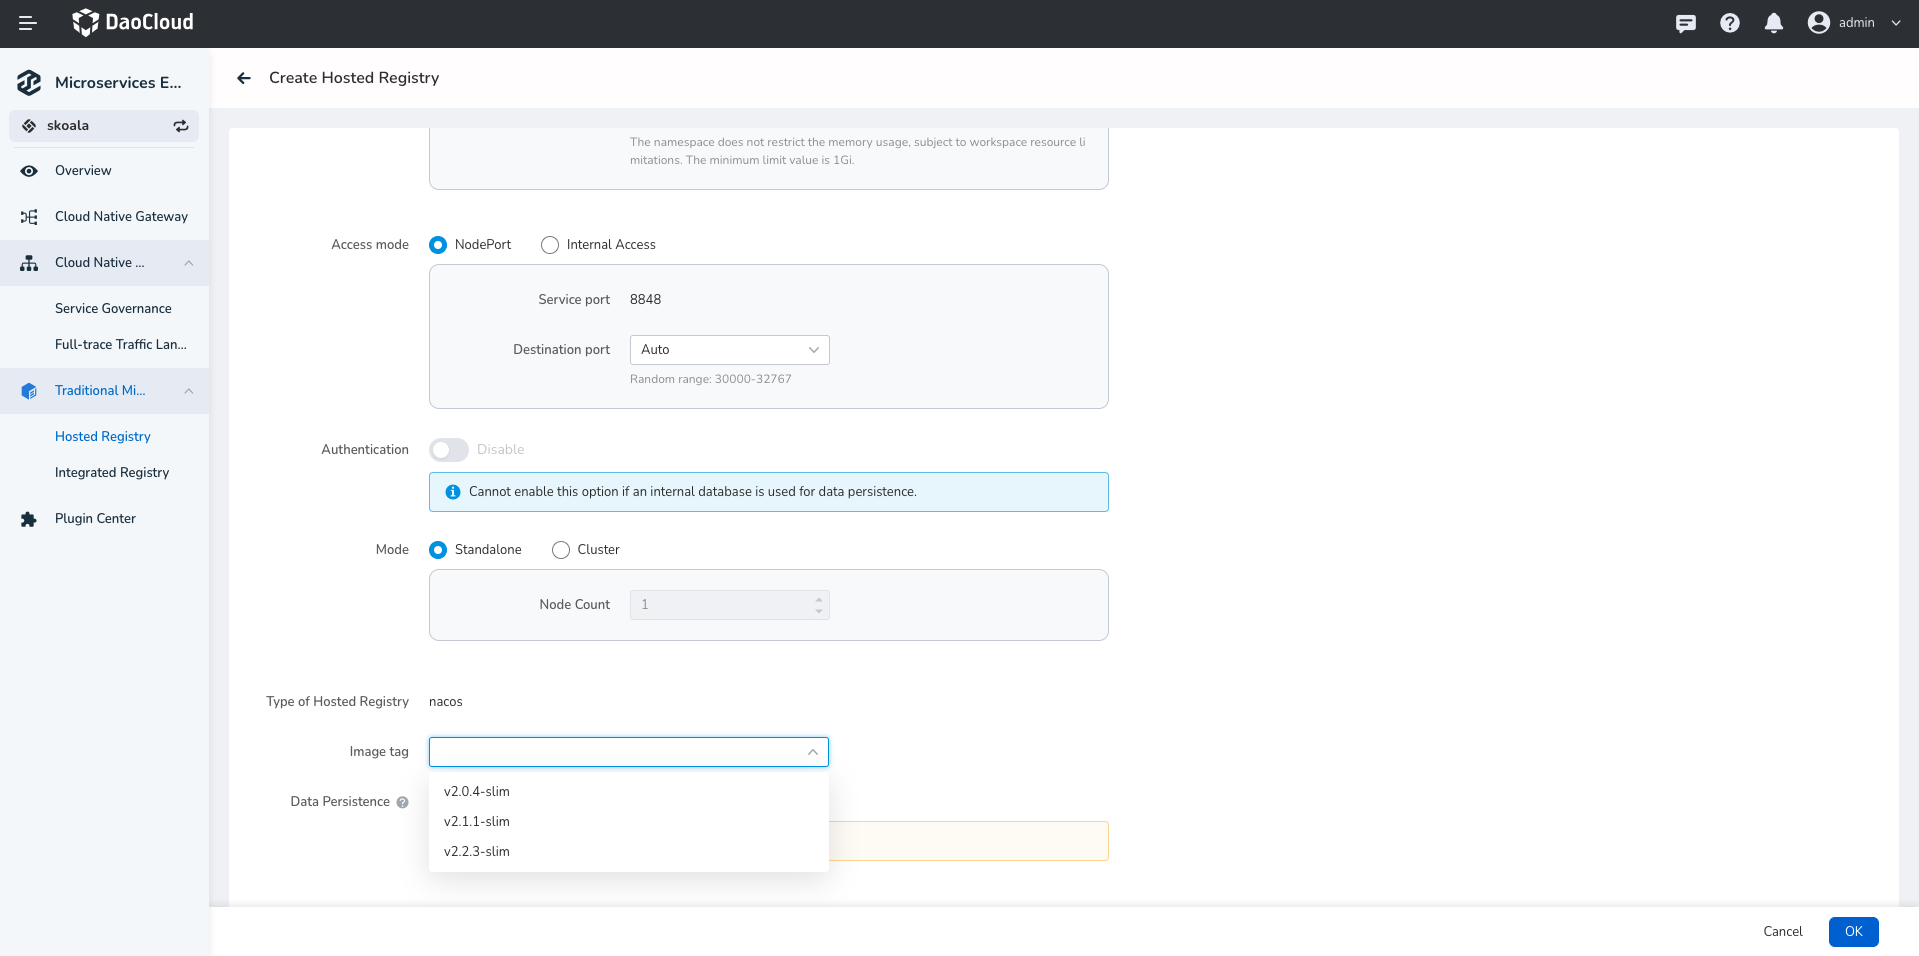
-
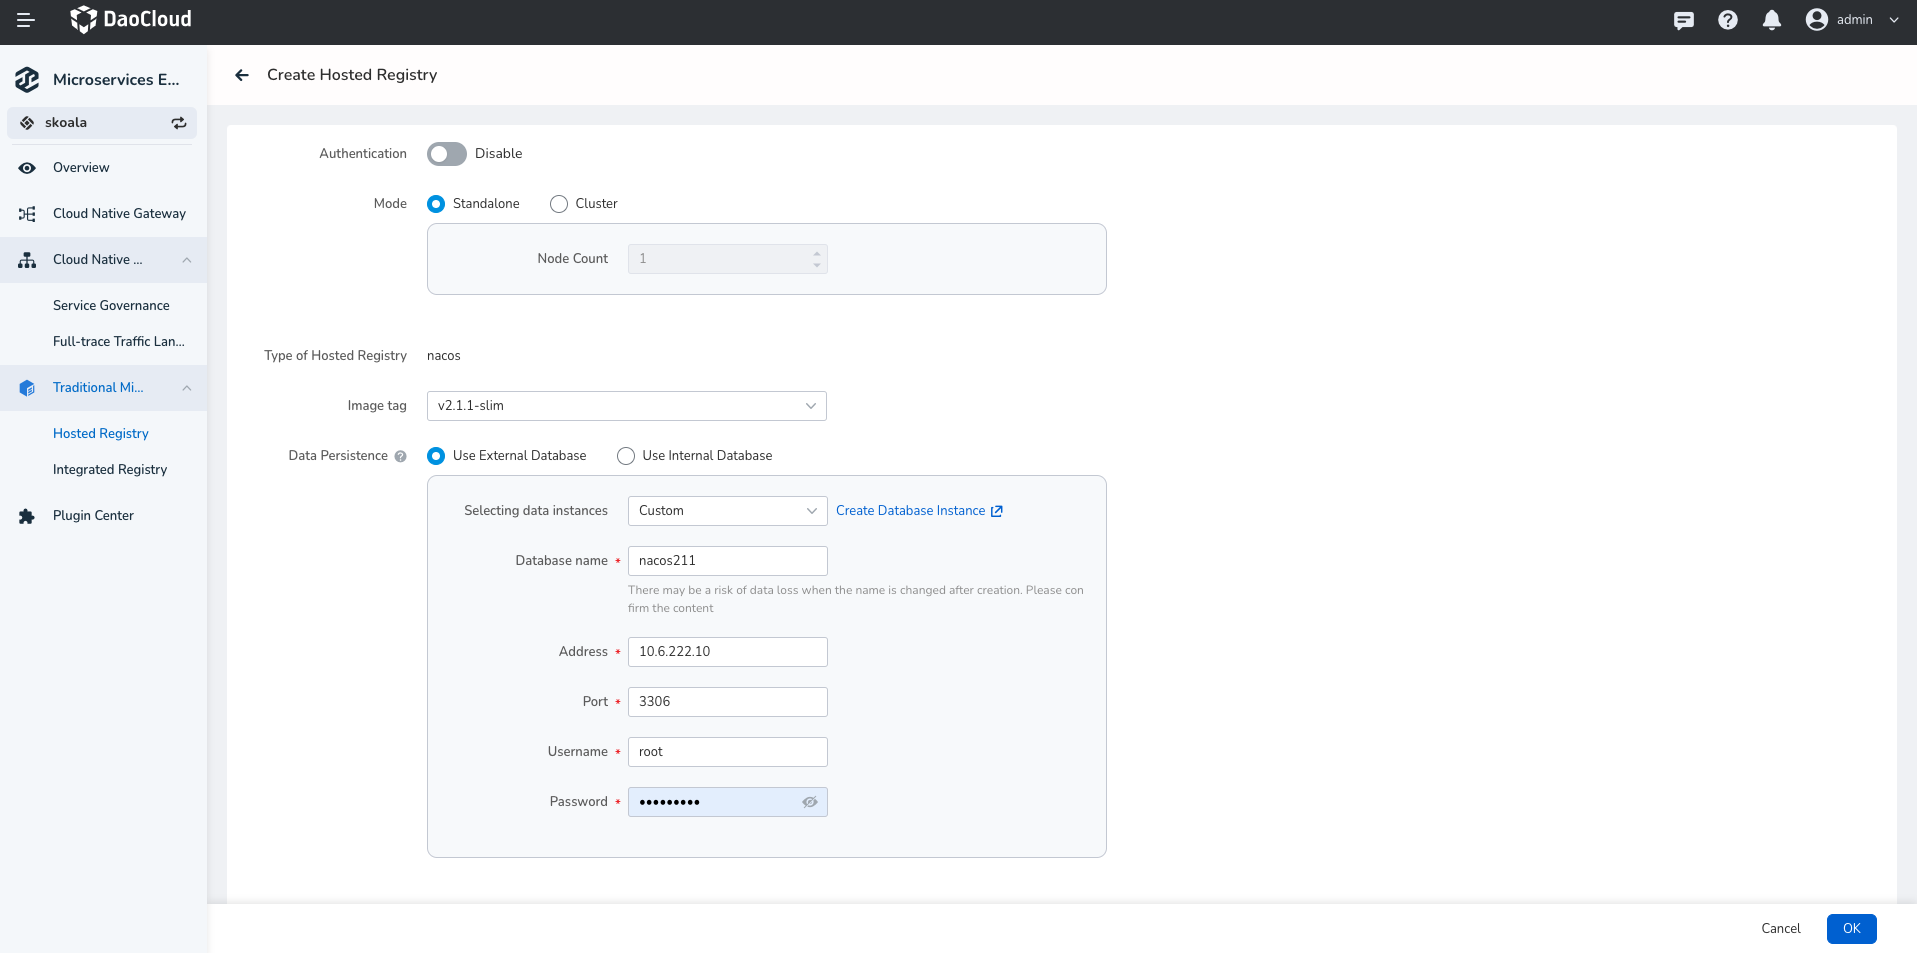
Data persistence: External storage is recommended.
- No external storage is used: The data is stored in the Pod file system where Nacos resides. Data is lost after the Pod restarts, so external storage is recommended.
- Using the database: Enter the name, address, port, username, and password of the database
-
At the bottom of the page click OK .
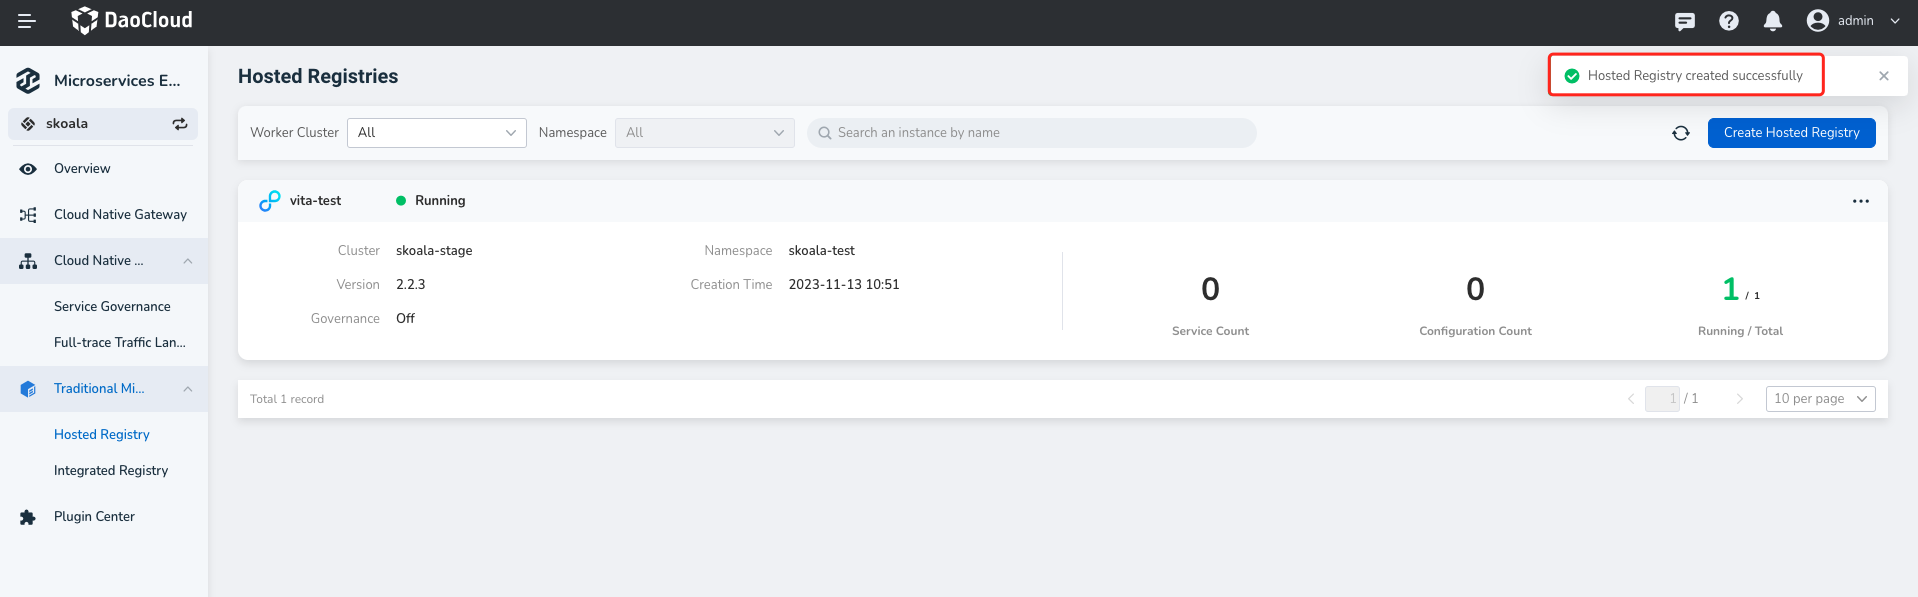
If the operation is correct, a message indicating that the registry is created successfully is displayed in the upper right corner of the page. The hosted registry List page displays the new registry instance.
Info
- A new registry takes a period of time to initialize and is in the "Starting" state. After the initialization, the system enters the Running state.
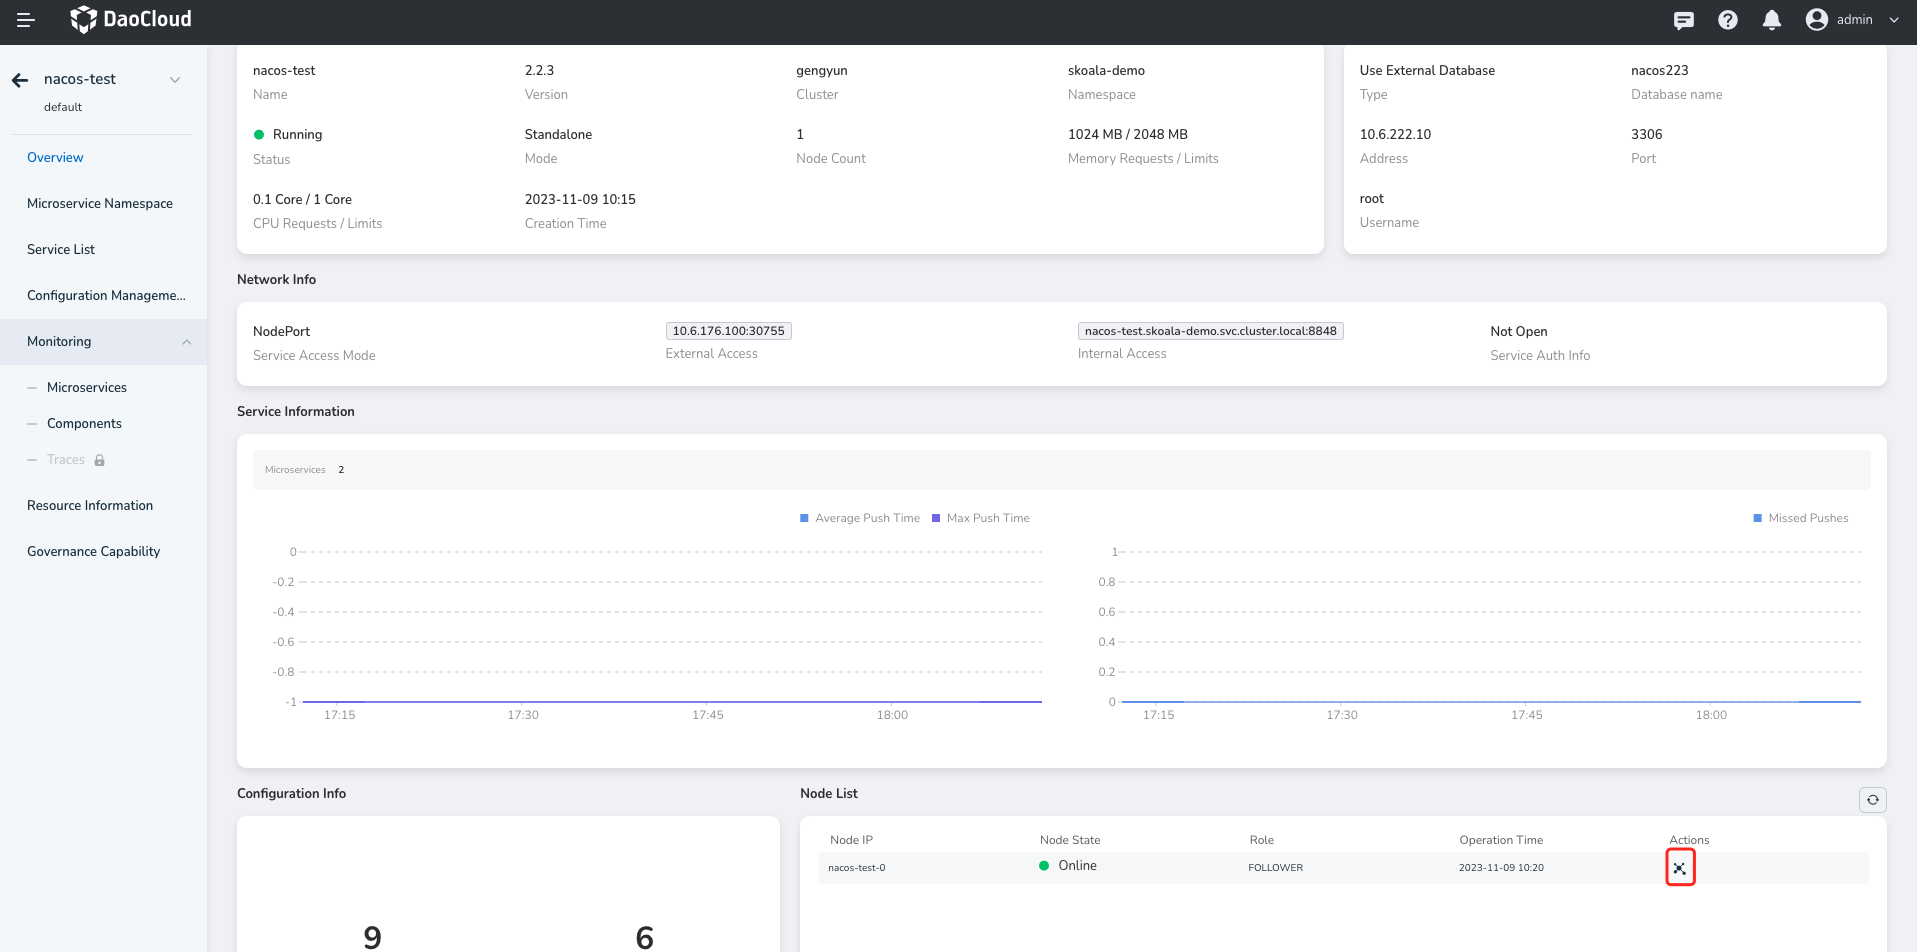
- You can click the registry name to view basic information such as the cluster/namespace, running status, resource quota, service port, storage configuration, and node list.
Update
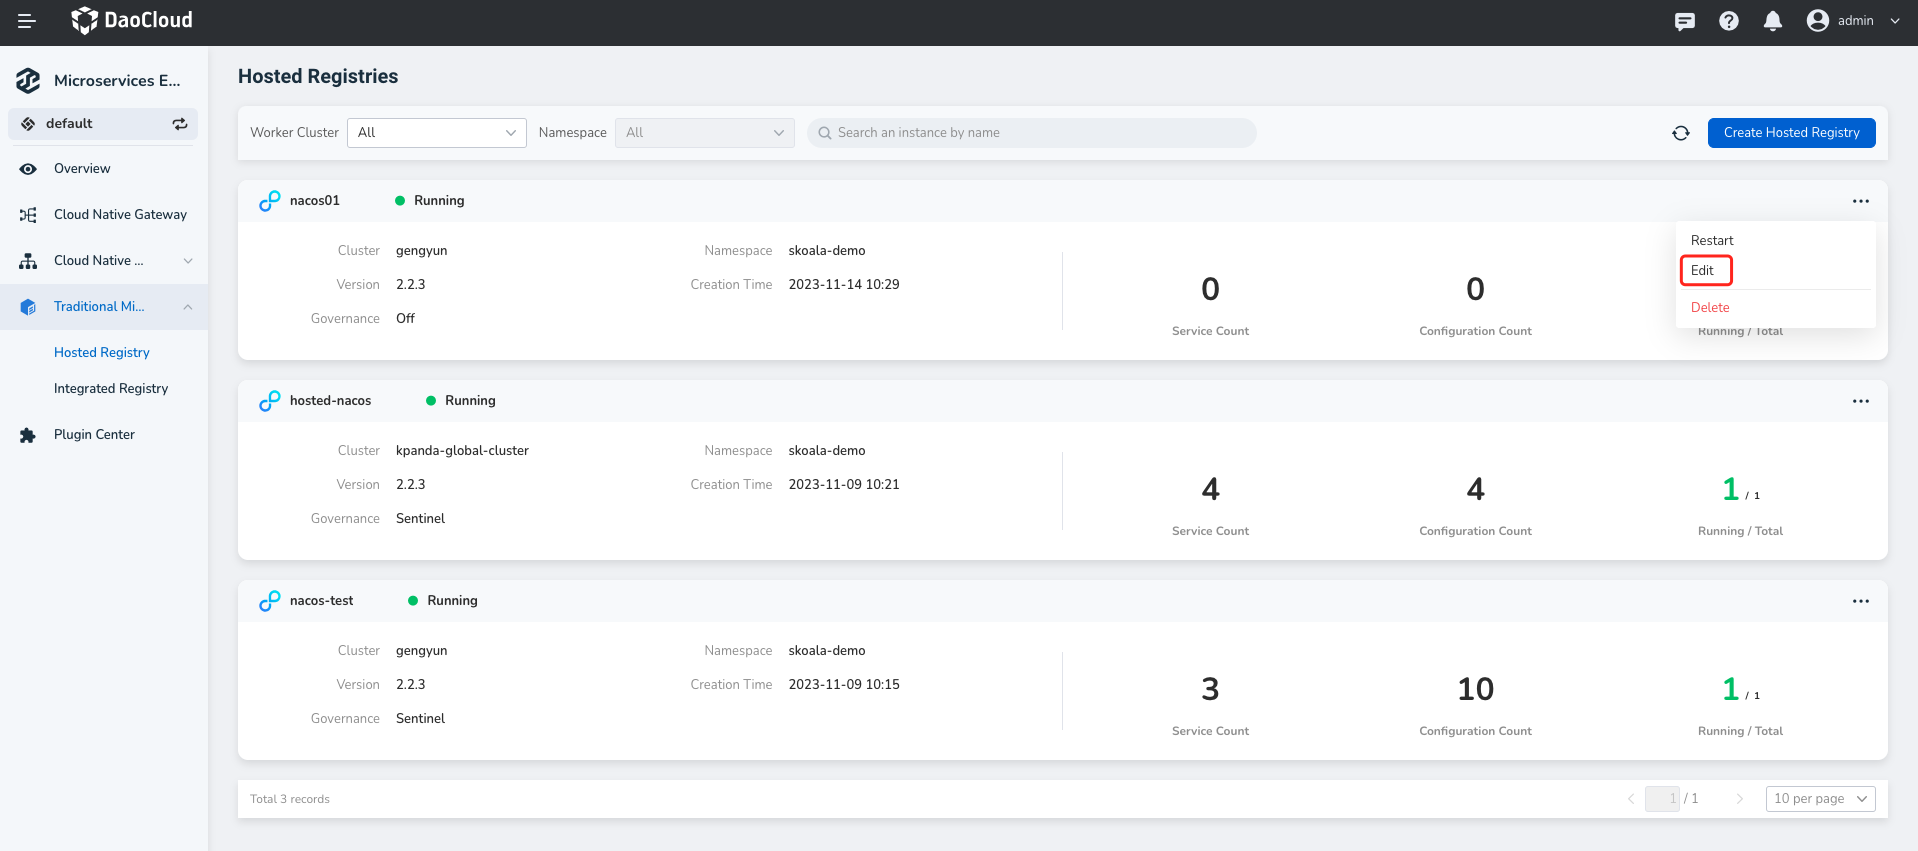
- In the Managed Registry List page choose need to update the registry, on the right side click ⵗ and select Edit .
-
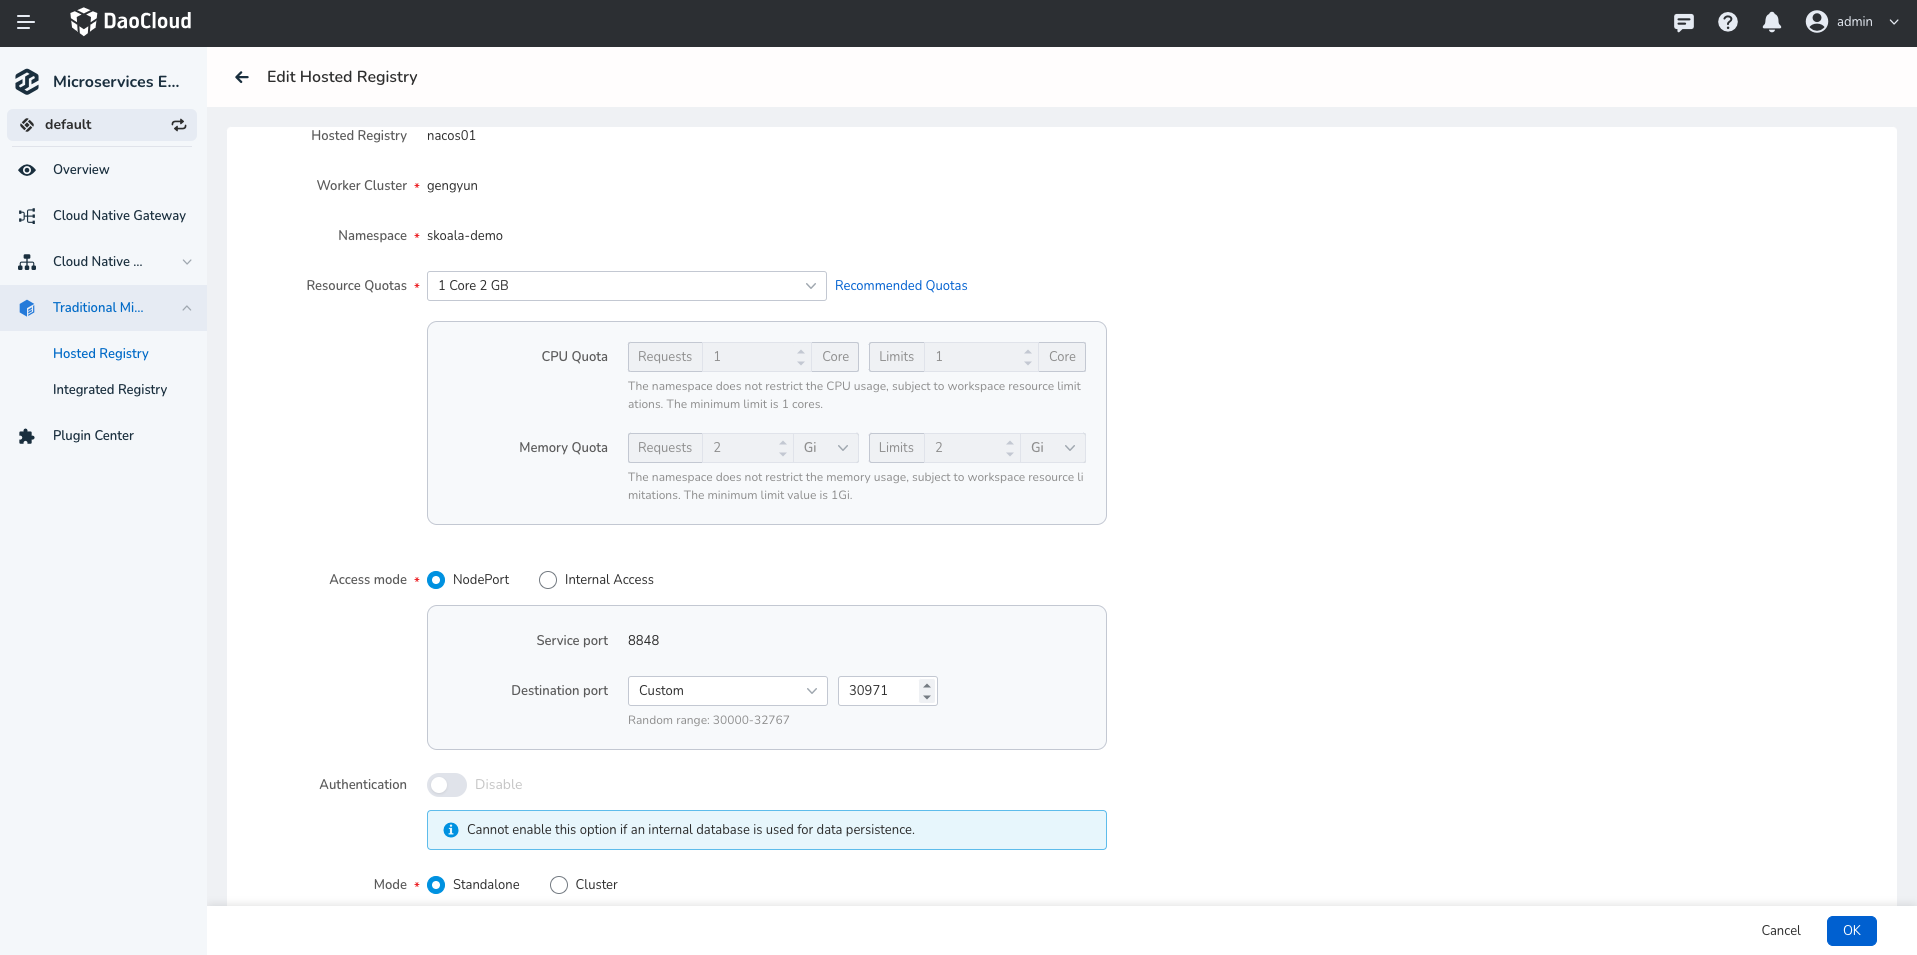
Update the registry configuration, then click OK at the bottom of the page.
Warning
- Modify the StorageClass/database. After the storage location is changed, the previous data will not be migrated.
- The managed registry name and deployment location are not editable.
View
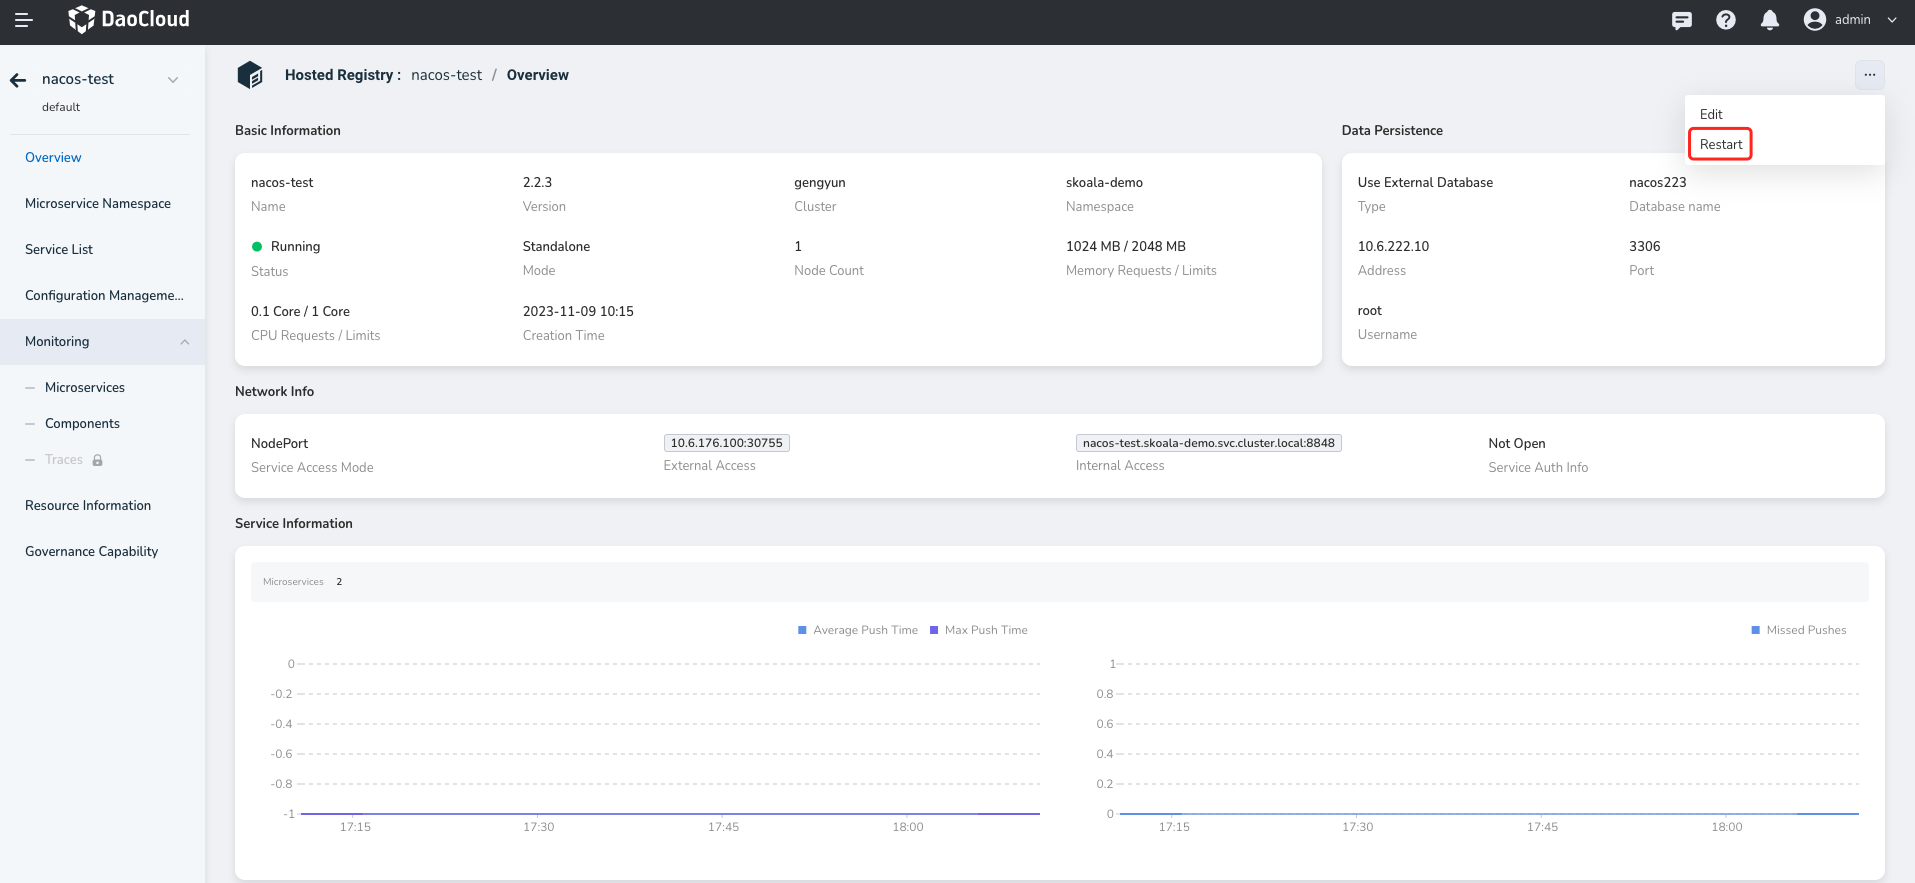
On the Managed Registry list page, locate the registry instance for which you want to view details and click the instance name to go to the Basic information page.
In basic information page to view the registry Basic Info, Governance Info (need to open service governance features), Node List, and Data Persistence information. Health Status is the part of the registry instance information that reflects the status of the registry instance.
Related operation:
-
Restart the registry instance: Click Restart in the upper right corner of the page to restart the entire managed registry instance.
-
View node metadata
Delete
-
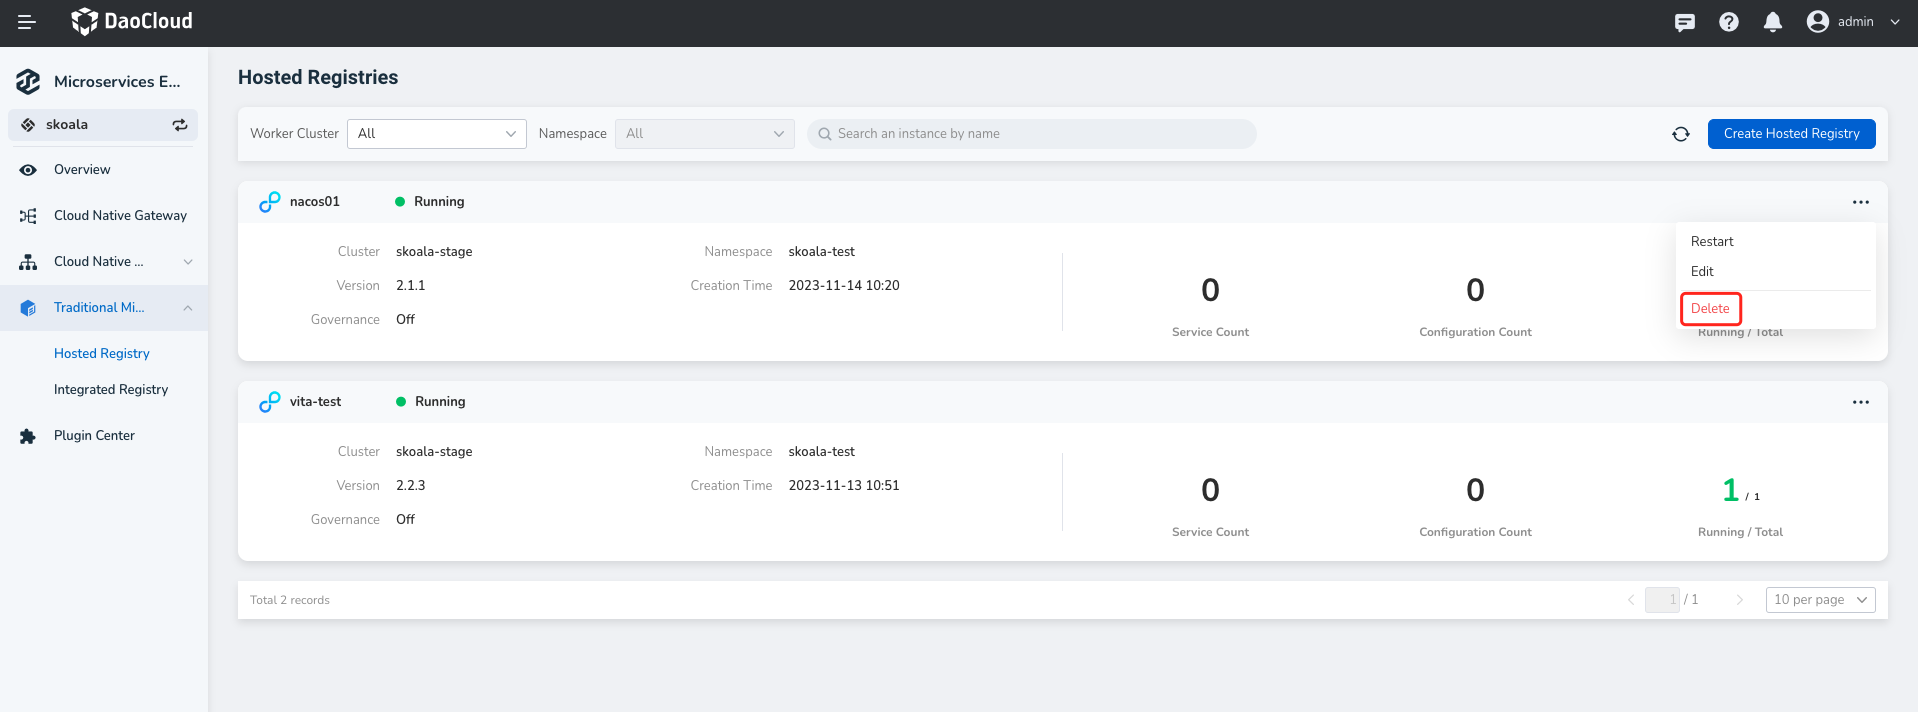
In the Hosted Registries page select need to delete the registry, on the right side click ⵗ and select Delete .
-
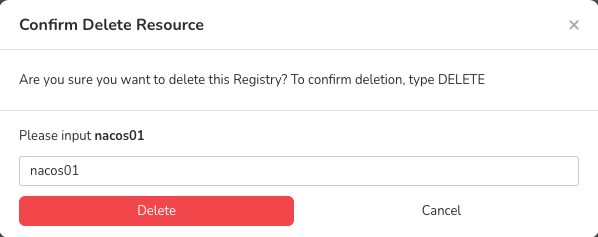
Enter a name for the registry and click Delete .
Note
- Remove: The registry is removed from the DCE 5.0 microservice engine. The original registry and data are not deleted. You can access the registry again later.
- Delete: Deletes the registry and all the data in it. The registry cannot be used again. You need to create a new registry.