Install Token Factory - Admin
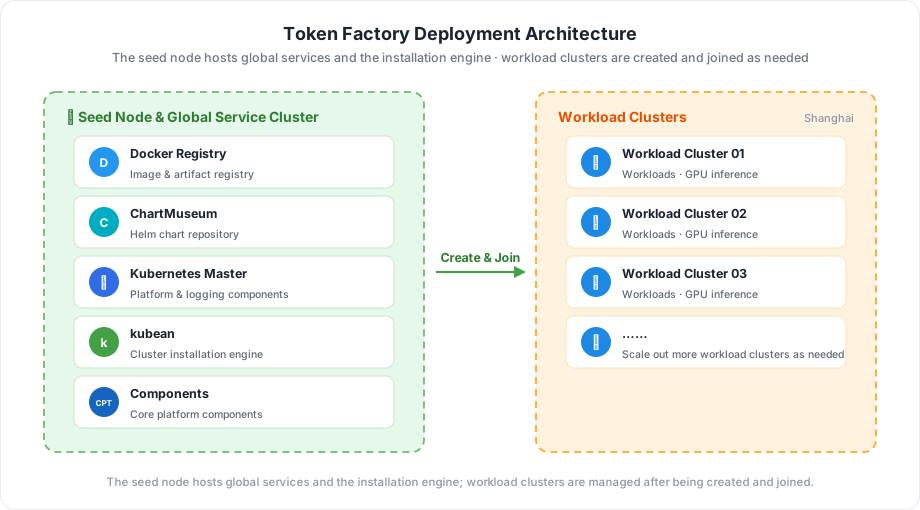
This tutorial walks you through installing Token Factory in an offline environment and signing in to the console with the default account.
Prerequisites
- A machine that meets the deployment requirements to serve as the seed node, with IPv4 forwarding enabled and the firewall disabled.
- The offline image package (e.g.
offline-v0.46.0-amd64.tar) has been downloaded and uploaded to the seed node. - The osPackage offline package for the seed node OS has been downloaded.
Steps
-
Extract the offline image package on the seed node:
-
Edit clusterConfig.yaml in the extracted
offline/sampledirectory to configure the deployment mode, cluster nodes, and ISO image path. To adjust the modules to install, edit manifest-cloud-tokfact.yaml. -
Run the following command to start the installation:
./offline/dce5-installer cluster-create \
  -c ./offline/sample/clusterConfig.yaml \
  -m ./offline/sample/manifest-cloud-tokfact.yaml
Note
-cspecifies the cluster configuration file (required)-mspecifies the product manifest; for Token Factory usemanifest-cloud-tokfact.yaml-zperforms a minimal installation-denables debug mode
The installation takes about 30 minutes, depending on the number of nodes and network conditions.
-
When the installation completes, the command line reports success. Access the console via the URL shown on the screen and sign in with the default username and password
admin/changeme. -
Contact DaoCloud for authorization: email info@daocloud.io or call 400 002 6898. After authorization, go to the console home page and confirm that all modules are in normal status.
Verification
Sign in to the console as admin. You can see the module entries such as Global Management, Container Management, and LLM Studio in the left navigation, which means the installation succeeded.
Next Step
After the installation, continue with Create Users and Workspaces.
For the complete installation workflow and configuration details, see the Installation Guide. If you run into problems, see Installation FAQs.