Import a Virtual Machine with Ubuntu from an External Platform
This page provides a detailed introduction on how to import virtual machines from the external platform VMware into the virtual machines of DCE 5.0 through the command line.
Info
The external virtual platform in this document is VMware vSphere Client, abbreviated as vSphere. Technically, it relies on kubevirt cdi for implementation. Before proceeding, the virtual machine imported on vSphere needs to be shut down. Take a virtual machine of the Ubuntu operating system as an example.
Fetch Basic Information of vSphere Virtual Machine
-
vSphere URL: Fetch information on the URL of the target platform
-
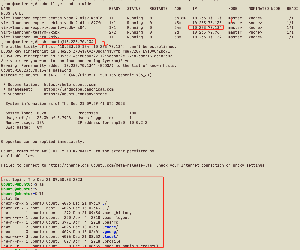
vSphere SSL Certificate Thumbprint: Need to be fetched using openssl
Output will be similar to:openssl s_client -connect 10.64.56.11:443 </dev/null | openssl x509 -in /dev/stdin -fingerprint -sha1 -nooutCan't use SSL_get_servername depth=0 CN = vcsa.daocloud.io verify error:num=20:unable to get local issuer certificate verify return:1 depth=0 CN = vcsa.daocloud.io verify error:num=21:unable to verify the first certificate verify return:1 depth=0 CN = vcsa.daocloud.io verify return:1 DONE sha1 Fingerprint=C3:9D:D7:55:6A:43:11:2B:DE:BA:27:EA:3B:C2:13:AF:E4:12:62:4D # Value needed -
vSphere Account: Fetch account information for vSphere, and pay attention to permissions
-
vSphere Password: Fetch password information for vSphere
-
UUID of the virtual machine to be imported: Need to be fetched on the web page of vSphere
-
Access the Vsphere page, go to the details page of the virtual machine to be imported, click Edit Settings , open the browser's developer console at this point, click Network -> Headers , find the URL as shown in the image below.
-
Click Response , locate vmConfigContext -> config , and finally find the target value uuid .
-
-
Path of the vmdk file of the virtual machine to be imported
Fetch Basic Information of vSphere Virtual Machine
-
Prepare vddk Image
-
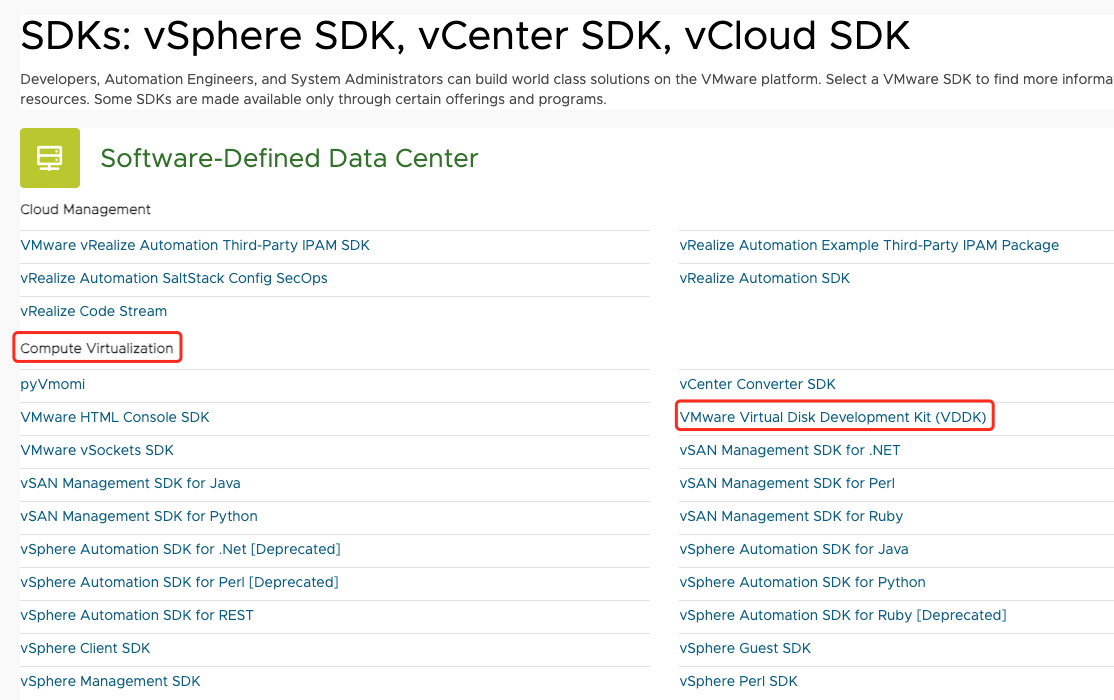
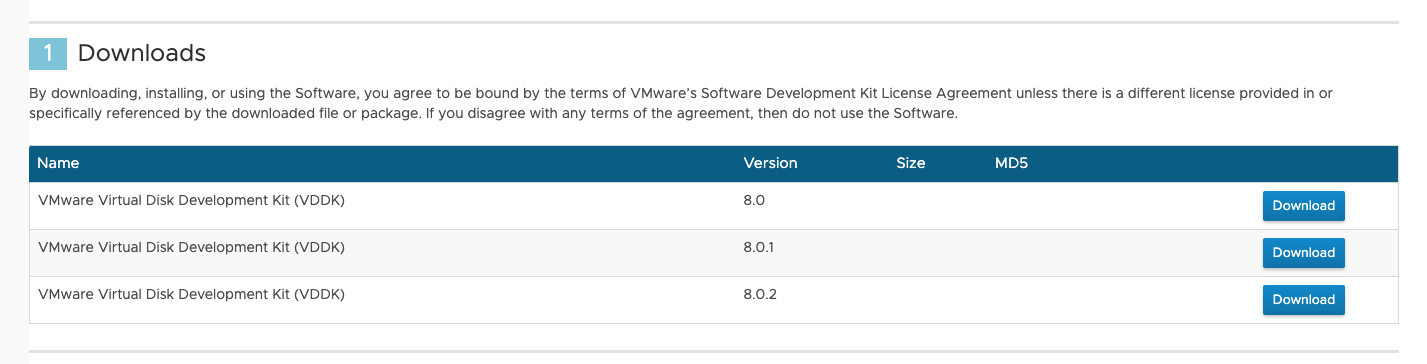
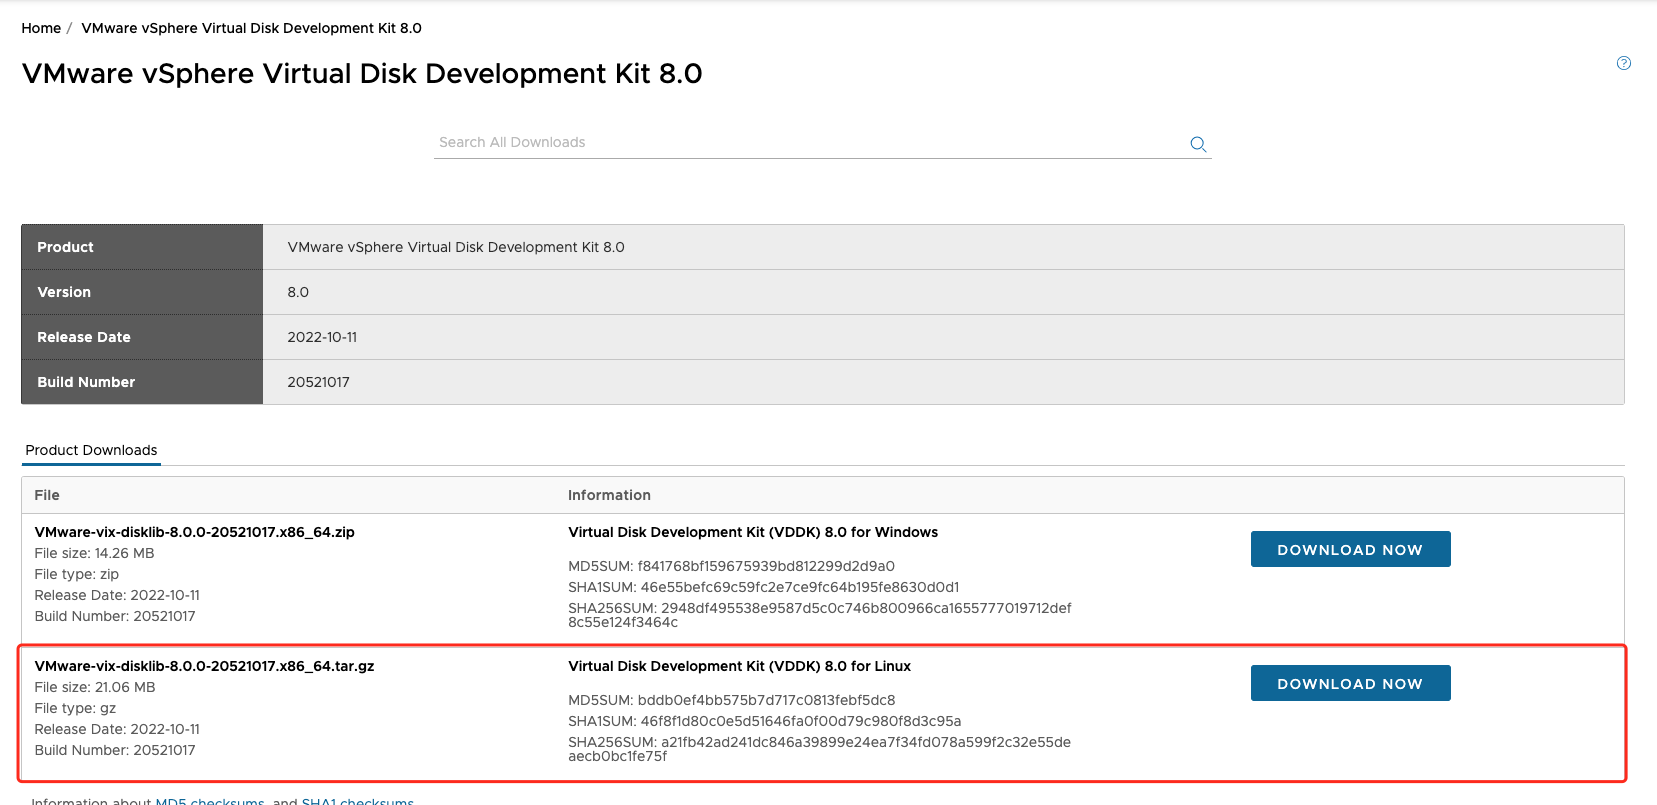
Download vddk: Need to register an account on the VMware website to download
Go to SDKs, click Compute Virtualization in the section, and select the appropriate version of "VMware Virtual Disk Development Kit (VDDK)" for downloading.
-
Unpack and build into an image:
-
Unpack
-
Create a Dockerfile
-
Push the image to the repository
-
-
Network Configuration
Different information needs to be configured based on the chosen network mode. If a fixed IP address is required, you should select the Bridge network mode.
- Create a Multus CR of the ovs type. Refer to Creating a Multus CR.
-
Create subnets and IP pools. Refer to Creating Subnets and IP Pools.
apiVersion: spiderpool.spidernet.io/v2beta1
kind: SpiderIPPool
metadata:
  name: test2
spec:
  ips:
  - 10.20.3.90
  subnet: 10.20.0.0/16
  gateway: 10.20.0.1

---
apiVersion: spiderpool.spidernet.io/v2beta1
kind: SpiderIPPool
metadata:
  name: test3
spec:
  ips:
  - 10.20.240.1
  subnet: 10.20.0.0/16
  gateway: 10.20.0.1

---
apiVersion: spiderpool.spidernet.io/v2beta1
kind: SpiderMultusConfig
metadata:
  name: test1
  namespace: kube-system
spec:
  cniType: ovs
  coordinator:
    detectGateway: false
    detectIPConflict: false
    mode: auto
    tunePodRoutes: true
  disableIPAM: false
  enableCoordinator: true
  ovs:
    bridge: br-1
    ippools:
    ipv4:
    - test1
    - test2
Fetch vSphere Account Password Secret
apiVersion: v1
kind: Secret
metadata:
  name: vsphere   # Can be changed
  labels:
    app: containerized-data-importer  # Do not change
    type: Opaque
    data:
      accessKeyId: "username-base64"
      secretKey: "password-base64"
Configure kubevirt cdi configmap (vddk)
-
During the process of importing vSphere virtual machines into KubeVirt with CDI, the vddk component needs to be used.
-
Ensure that the namespace of the configmap is consistent with the namespace where CDI is located (the default namespace of Virtnest Agent is virtnest-system, in this example it is cdi).
Write a KubeVirt VM YAML to create VM
Tip
If a fixed IP address is required, the YAML configuration differs slightly from the one used for the default network. These differences have been highlighted.
apiVersion: kubevirt.io/v1
kind: VirtualMachine
metadata:
  annotations:
    kubevirt.io/latest-observed-api-version: v1
    kubevirt.io/storage-observed-api-version: v1
    virtnest.io/alias-name: ""
    virtnest.io/image-secret: ""
  creationTimestamp: "2024-05-23T06:46:28Z"
  finalizers:
  - kubevirt.io/virtualMachineControllerFinalize
  generation: 1
  labels:
    virtnest.io/os-family: Ubuntu
    virtnest.io/os-version: "22.04"
  name: export-ubuntu
  namespace: default
spec:
  dataVolumeTemplates:
  - metadata:
      creationTimestamp: null
      name: export-ubuntu-rootdisk
      namespace: default
    spec:
      pvc:
        accessModes:
        - ReadWriteOnce
        resources:
          requests:
            storage: 10Gi
        storageClassName: local-path
      source:
        vddk:
          backingFile: "[A05-09-ShangPu-Local-DataStore] virtnest-export-ubuntu/virtnest-export-ubuntu.vmdk"
          url: "https://10.64.56.21"
          uuid: "421d6135-4edb-df80-ee54-8c5b10cc4e78"
          thumbprint: "D7:C4:22:E3:6F:69:DA:72:50:81:12:FA:42:18:3F:29:5C:7F:41:CA"
          secretRef: "vsphere"
  runStrategy: Manual
  template:
    metadata:
      annotations:
        ipam.spidernet.io/ippools: '[{"cleangateway":false,"ipv4":["test2"]}]'  // Add spiderpool network here
      creationTimestamp: null
    spec:
      architecture: amd64
      domain:
        devices:
          disks:
          - bootOrder: 1
            disk:
              bus: virtio
            name: rootdisk
          interfaces:                                                          // Modify the network configuration
          - bridge: {}
            name: ovs-bridge0
        machine:
          type: q35
        resources:
          requests:
            memory: 4Gi
      networks:                                                                // Modify the network configuration
      - multus:
          default: true
          networkName: kube-system/test1
        name: ovs-bridge0
      volumes:
      - dataVolume:
          name: export-ubuntu-rootdisk
        name: rootdisk
Access VNC to verify successful operation
-
Modify the network configuration of the virtual machine
-
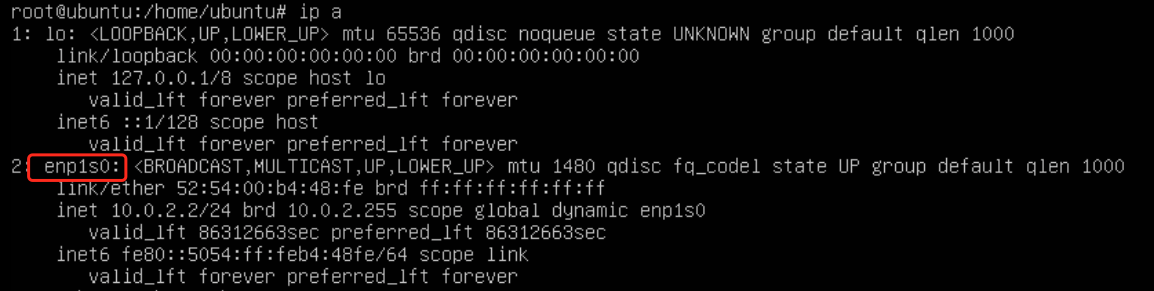
Check the current network
When the actual import is completed, the configuration shown in the image below has been completed. However, it should be noted that the enp1s0 interface does not contain the inet field, so it cannot connect to the external network.
-
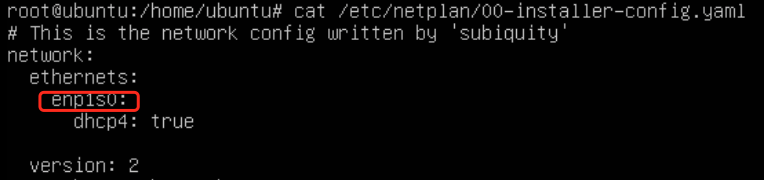
Configure netplan
In the configuration shown in the image above, change the objects in ethernets to enp1s0 and obtain an IP address using DHCP.
-
Apply the netplan configuration to the system network configuration
-
Perform a ping test on the external network

-
Access the virtual machine on the node via SSH.