Create Virtual Machines via Templates
This guide explains how to create virtual machines using templates.
With internal templates and custom templates, users can easily create new virtual machines. Additionally, we provide the ability to convert existing virtual machines into templates, allowing users to manage and utilize resources more flexibly.
Create with Template
Follow these steps to create a virtual machine using a template.
-
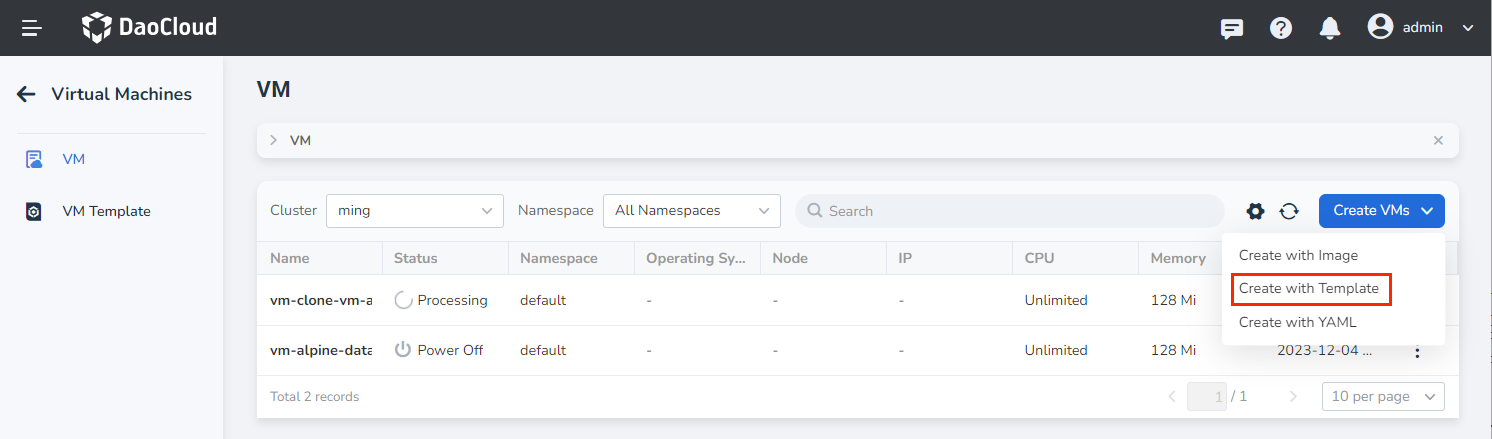
Click Container Management in the left navigation menu, then click Virtual Machines to access the Virtual Machine Management page. On the virtual machine list page, click Create Virtual Machine and select Create with Template .
-
On the template creation page, fill in the required information, including Basic Information, Template Config, Storage and Network, and Login Settings. Then, click OK in the bottom-right corner to complete the creation.
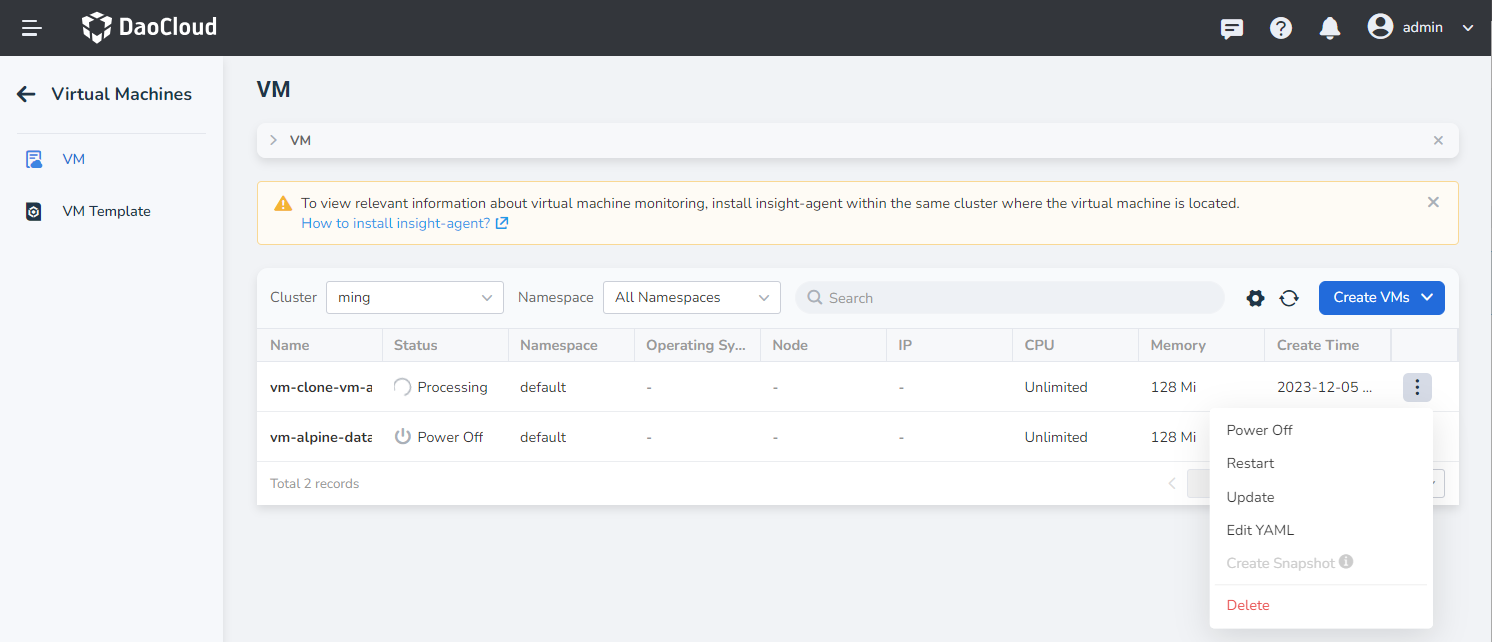
The system will automatically return to the virtual machine list. By clicking ┇ on the right side of the list, you can perform operations such as power off/restart, clone, update, create snapshot, convert to template, console access (VNC), and delete. The ability to clone and create snapshots depends on the selected storage pool.
Basic Information
On the Create VMs page, enter the information according to the table below and click Next .
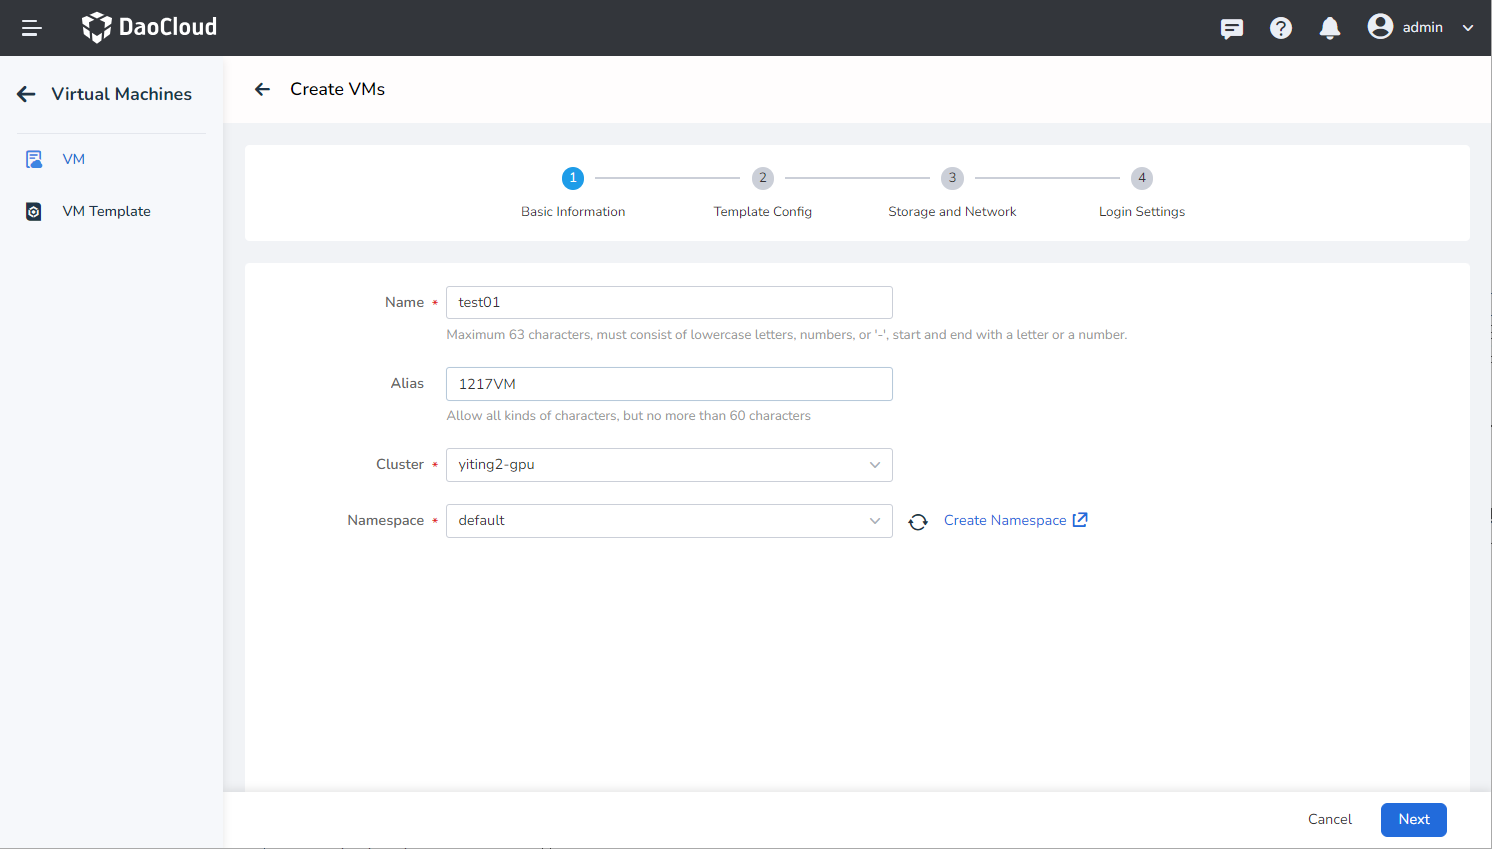
- Name: Can contain up to 63 characters and can only include lowercase letters, numbers, and hyphens ( - ). The name must start and end with a lowercase letter or number. Names must be unique within the same namespace, and the name cannot be changed after the virtual machine is created.
- Alias: Can include any characters, up to 60 characters in length.
- Cluster: Select the cluster where the new virtual machine will be deployed.
- Namespace: Select the namespace where the new virtual machine will be deployed. If the desired namespace is not found, you can follow the instructions on the page to create a new namespace.
Template Config
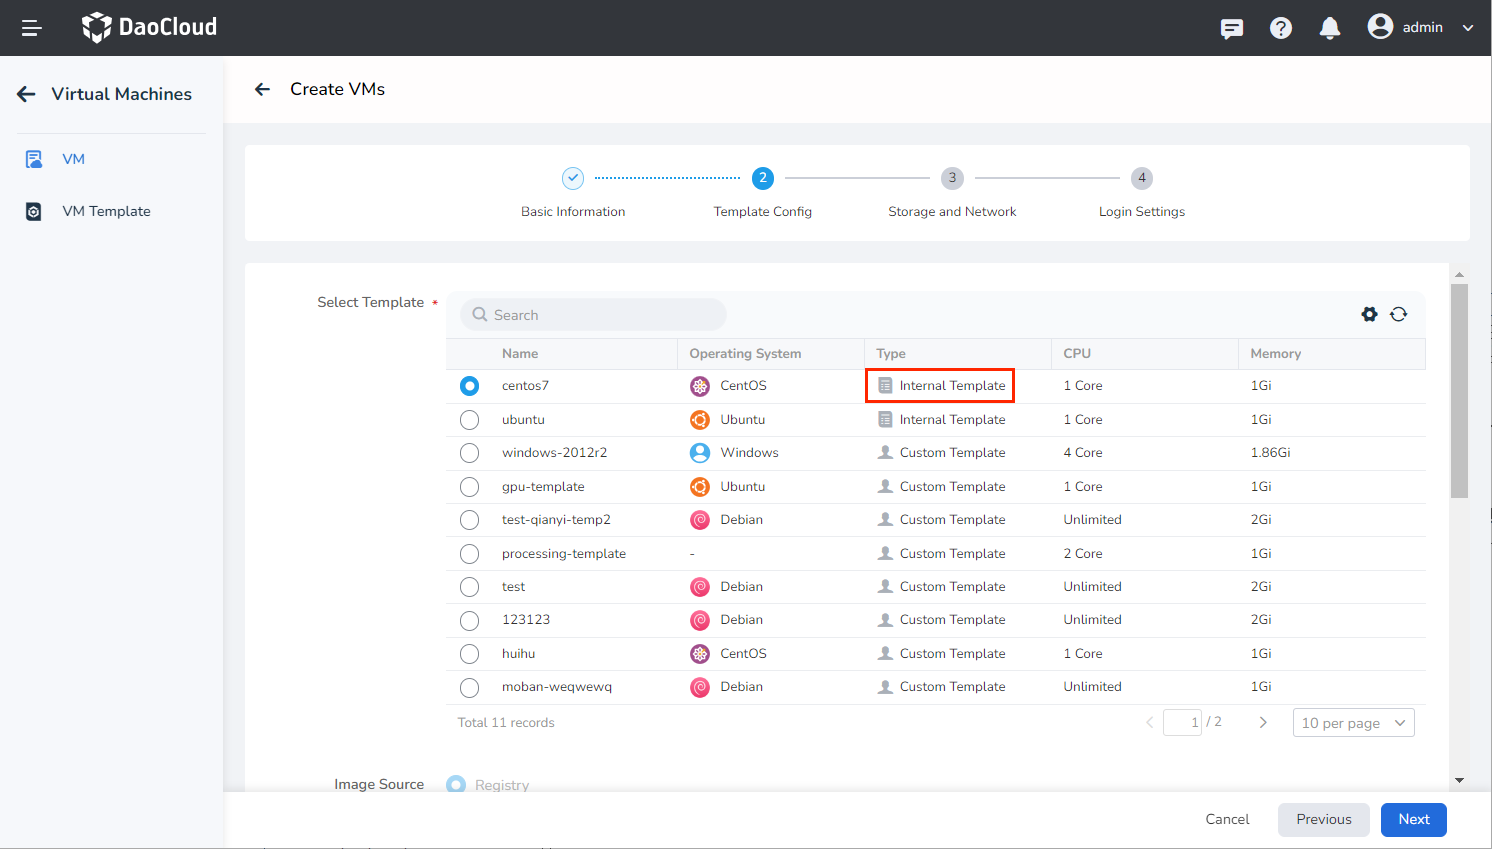
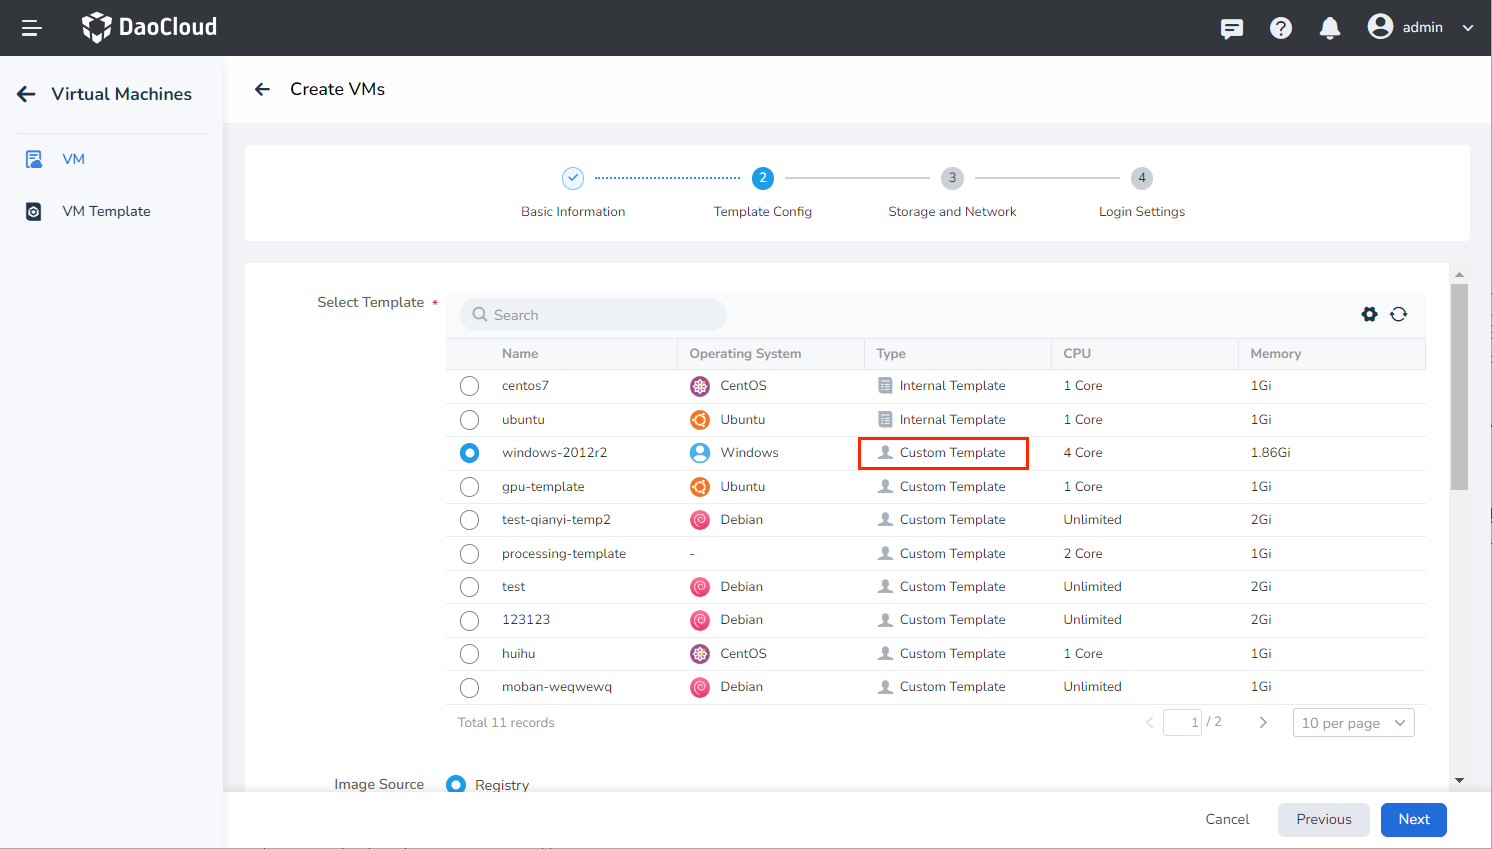
The template list will appear, and you can choose either an internal template or a custom template based on your needs.
-
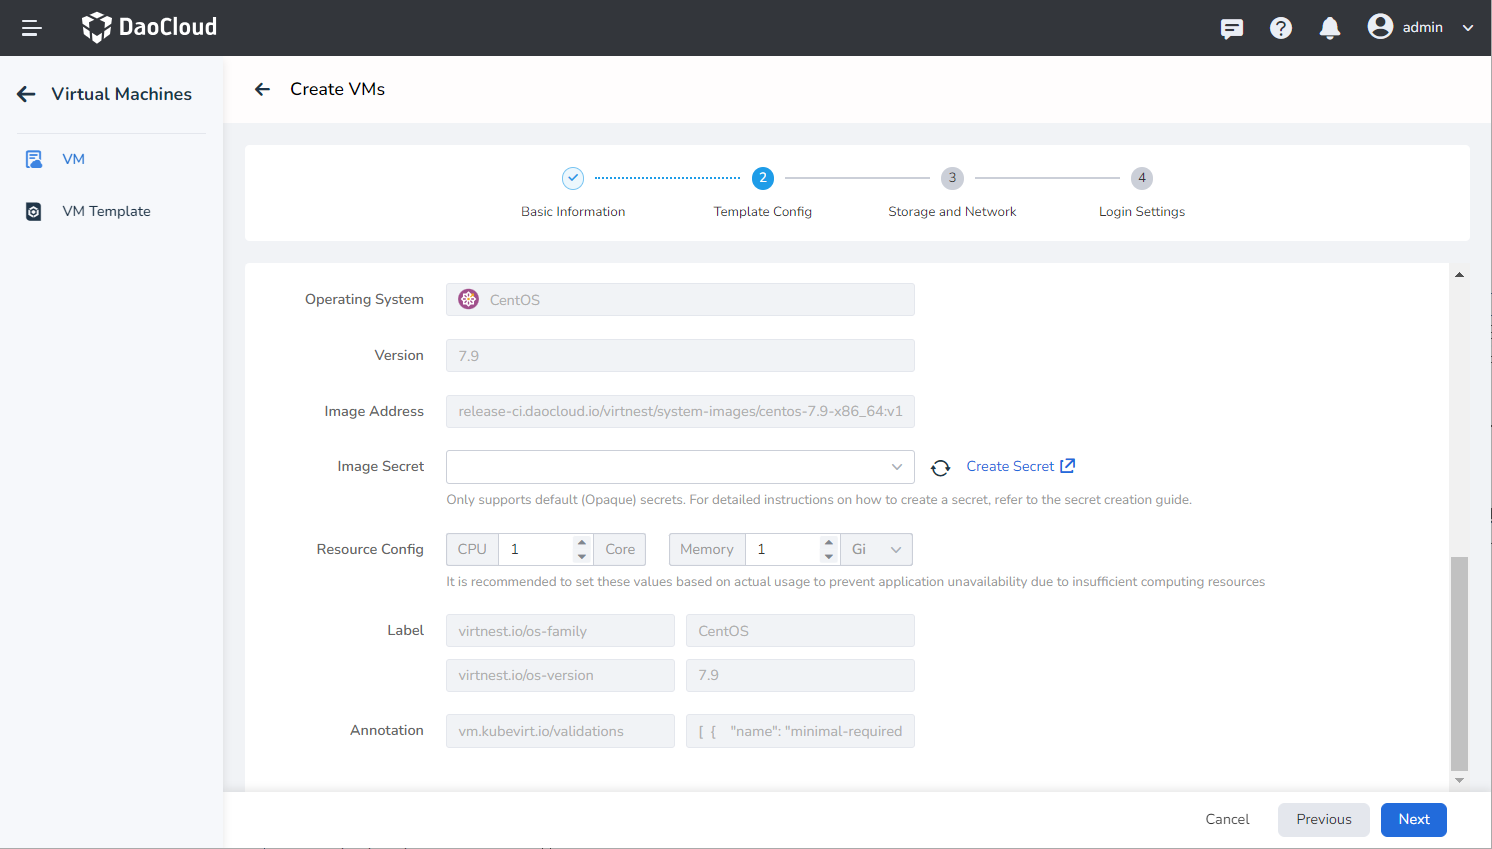
Select an Internal Template: DCE Virtual Machine provides several standard templates that cannot be edited or deleted. When selecting an internal template, the image source, operating system, image address, and other information will be based on the template and cannot be modified. GPU quota will also be based on the template but can be modified.
-
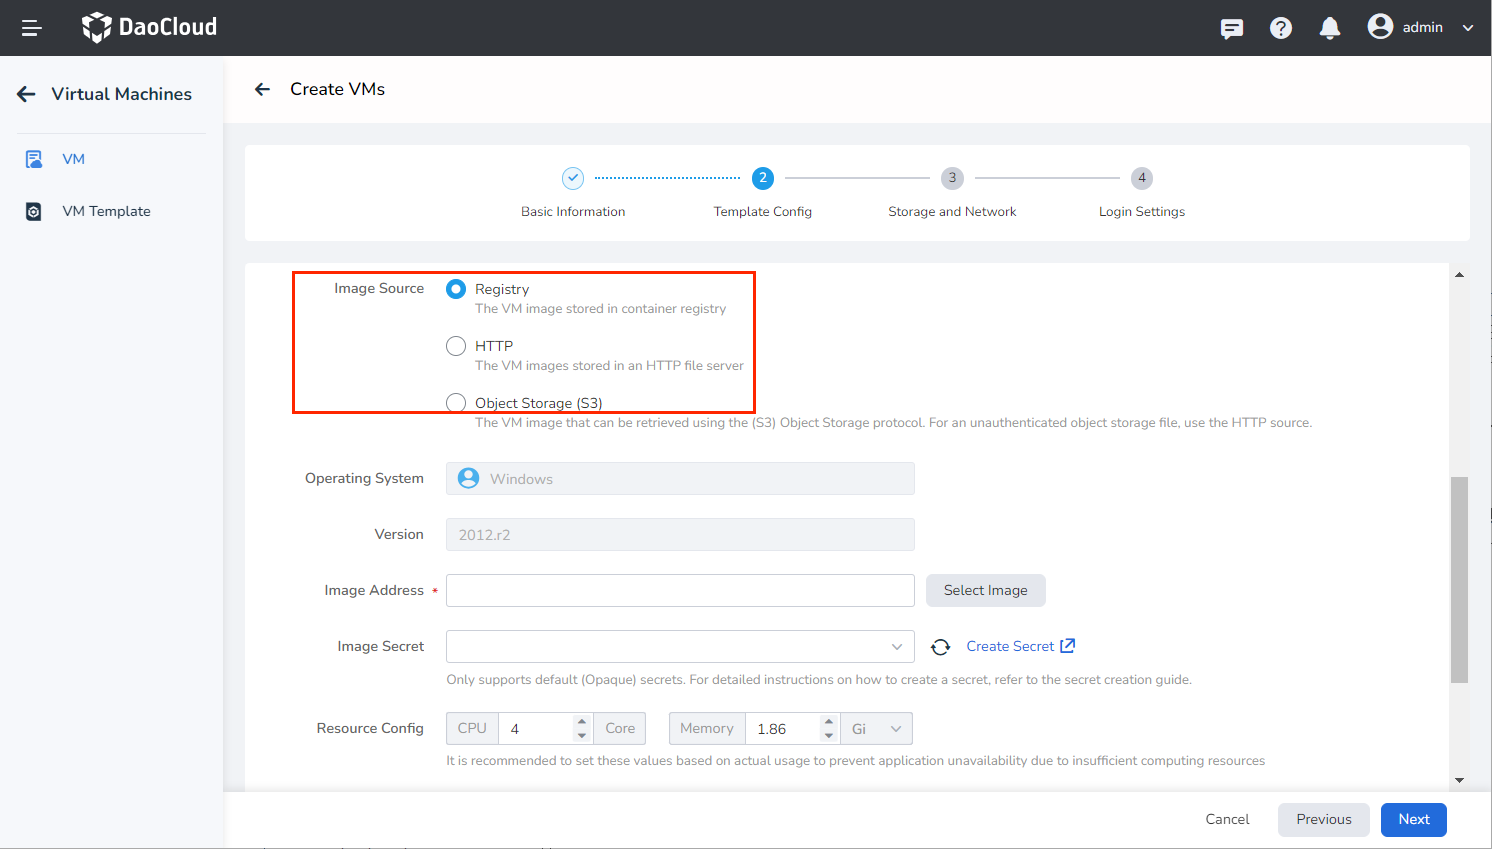
Select a Custom Template: These templates are created from virtual machine configurations and can be edited or deleted. When using a custom template, you can modify the image source and other information based on your specific requirements.
Storage and Network
-
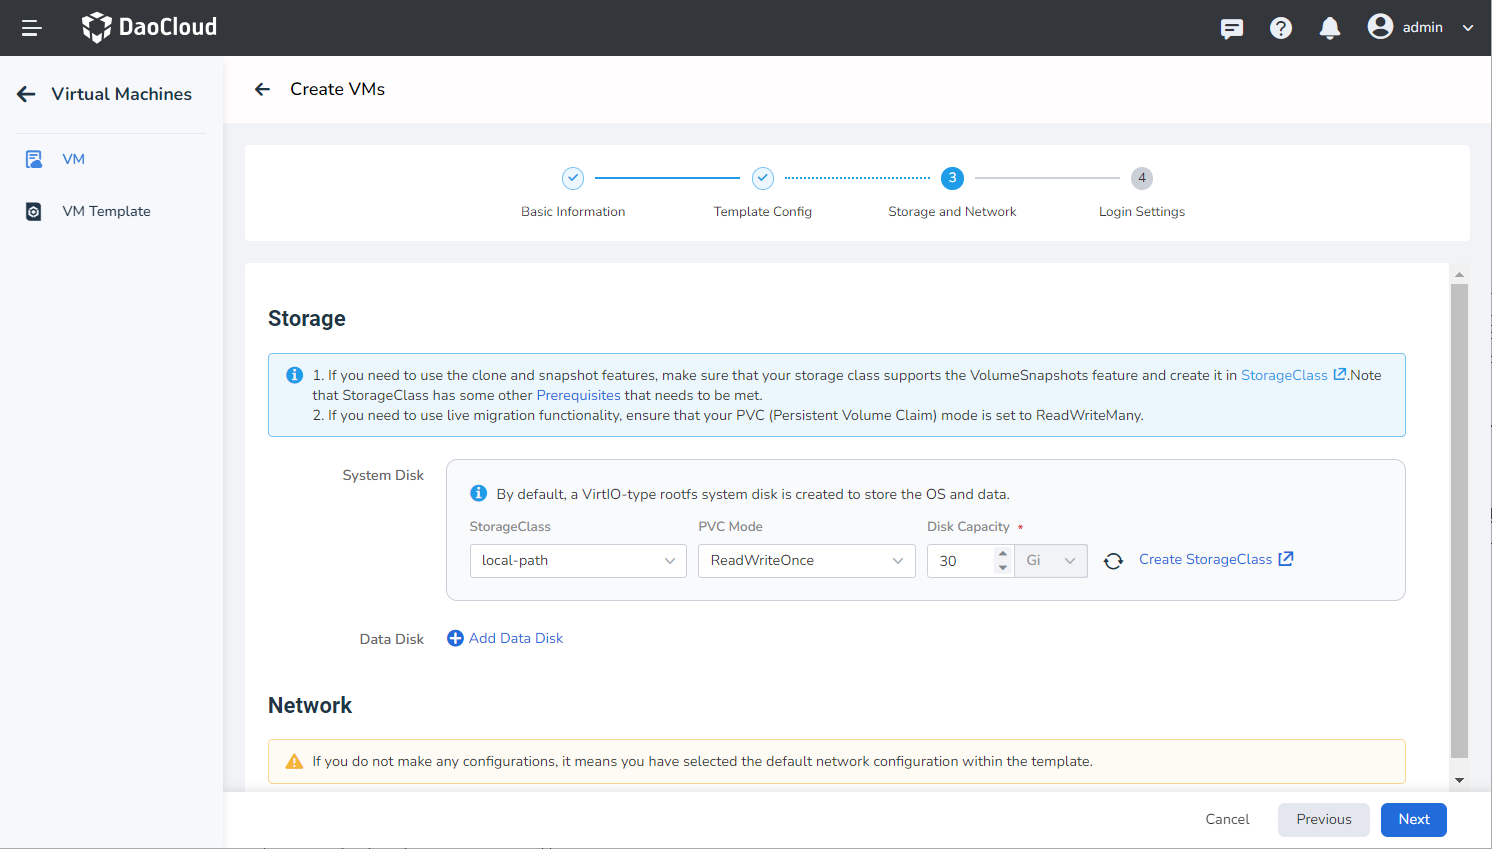
Storage: By default, the system creates a rootfs system disk of VirtIO type for storing the operating system and data. Block storage is used by default. If you need to use clone and snapshot functionality, make sure your storage pool supports the VolumeSnapshots feature and create it in the storage pool (SC). Please note that the storage pool (SC) has additional prerequisites that need to be met.
-
Prerequisites:
- KubeVirt utilizes the VolumeSnapshot feature of the Kubernetes CSI driver to capture the persistent state of virtual machines. Therefore, you need to ensure that your virtual machine uses a StorageClass that supports VolumeSnapshots and is configured with the correct VolumeSnapshotClass.
- Check the created SnapshotClass and confirm that the provisioner property matches the Driver property in the storage pool.
-
Supports adding one system disk and multiple data disks.
-
-
Network: If no configuration is made, the system will create a VirtIO type network by default.
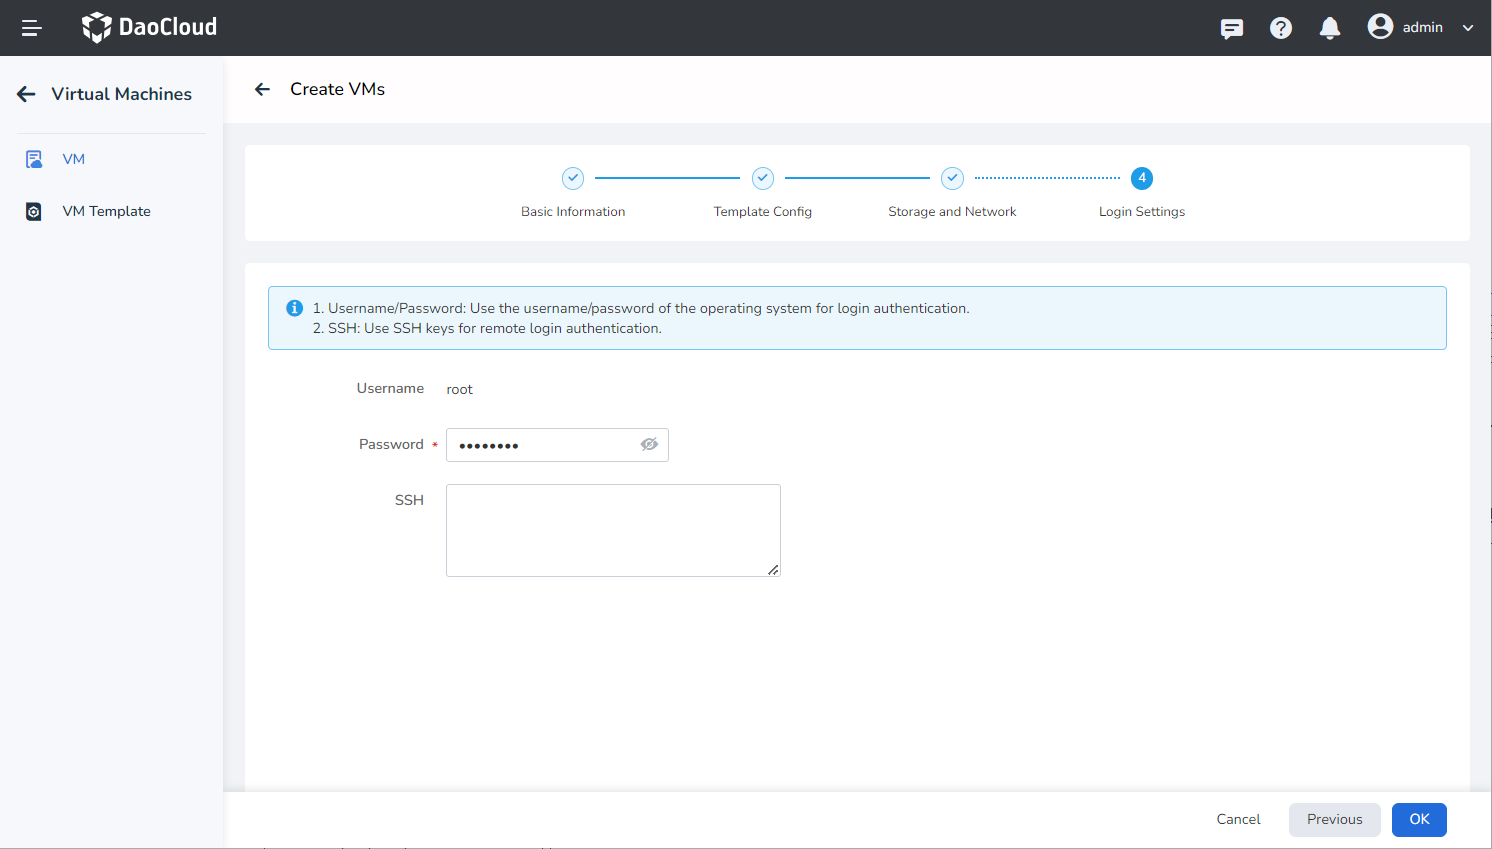
Login Settings
- Username/Password: You can log in to the virtual machine using a username and password.
- SSH: When selecting SSH login, you can bind an SSH key to the virtual machine for future login purposes.
Batch Create Virtual Machines
You can create multiple virtual machines with the same configuration based on a virtual machine template.
-
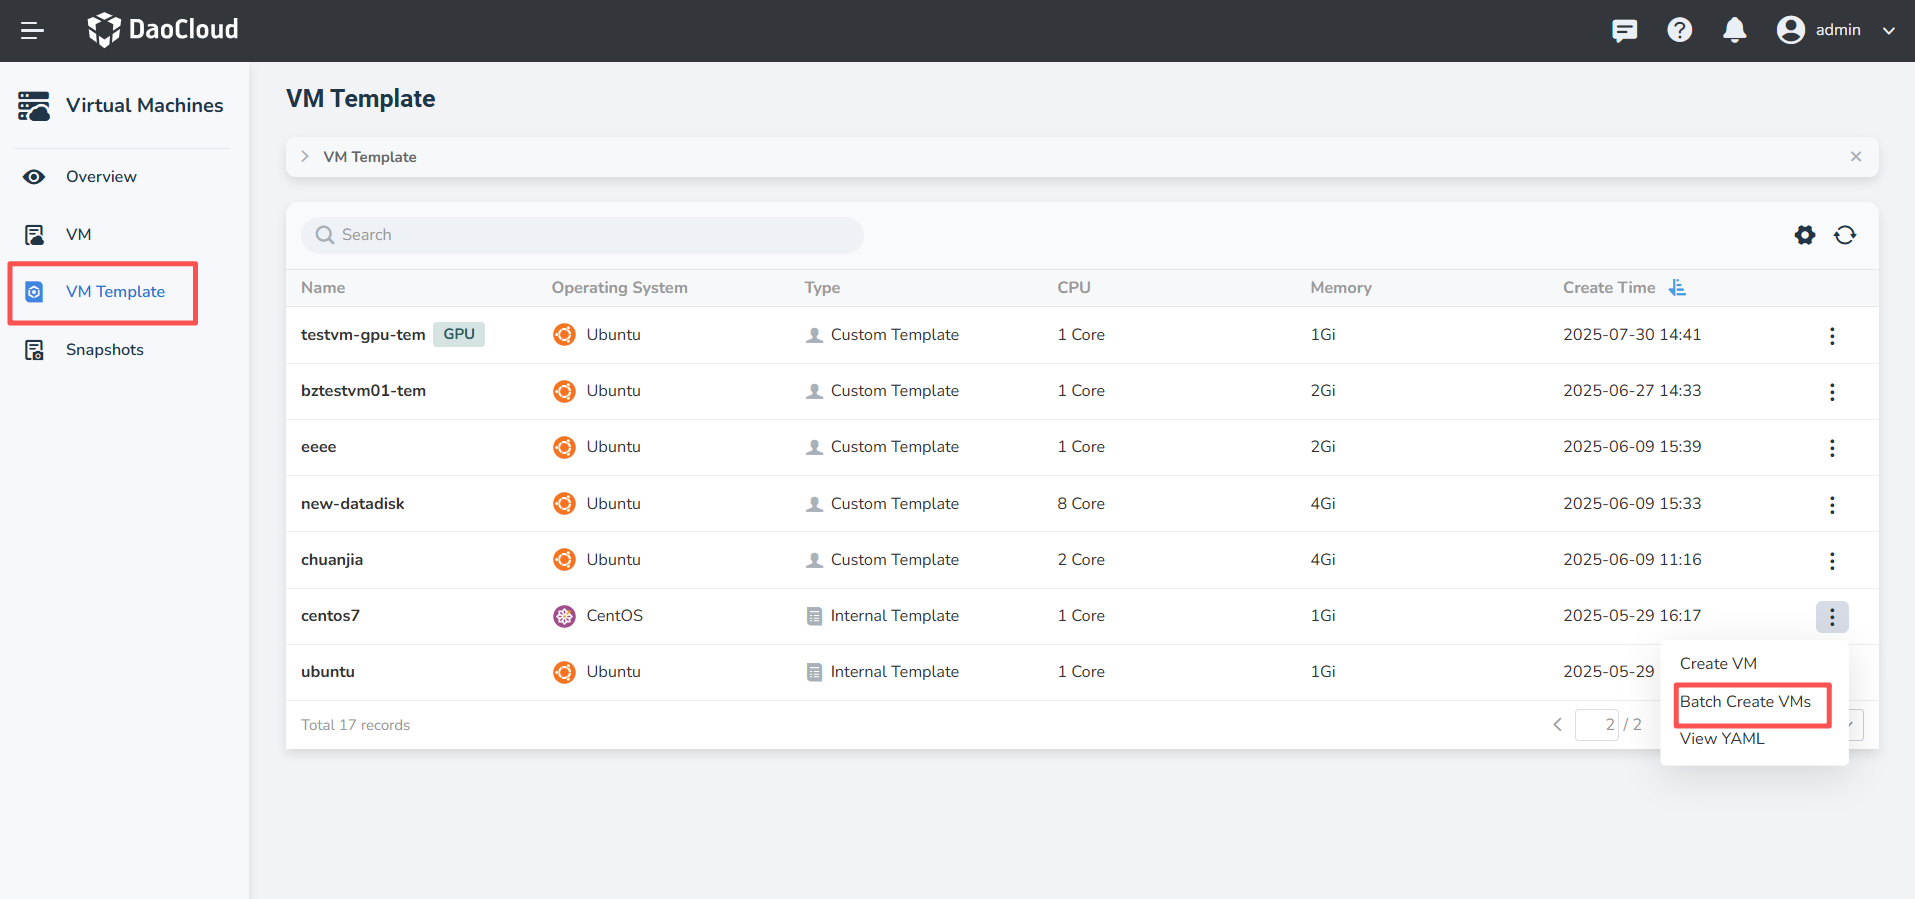
In the left navigation menu, click Virtual Machines -> VM Template to open the VM Template list.
-
Find the target virtual machine template, click ┇ on the right, and select Batch Create VMs.
-
Configure the batch creation parameters:
- Prefix: Used to generate virtual machine names.
- Cluster: Select the cluster where the virtual machines will run.
- Namespace: Select the namespace to which the virtual machines belong.
- Number of VMs: Specify the number of virtual machines to create. Up to 10 virtual machines can be created at a time.
- Custom Password: Set the login password for the virtual machines created in this batch.
- Storage Pool: Select the storage pool used by the virtual machines.
- PVC Read Mode: Select the PVC read mode.
-
Click OK. The system creates the specified number of virtual machines simultaneously and names them in the format
prefix-number, for example,demo-1,demo-2, anddemo-3. After creation succeeds, the virtual machines enter the running state. Each virtual machine name must not exceed 60 characters.
The virtual machines created in a batch use the same template configuration and the cluster, namespace, storage, and network settings specified on the batch creation page. The network supports masquerade and bridge modes. IP addresses are randomly assigned from the IP pool. Batch creation fails if the IP pool has no available IP addresses.