如何在集群中部署第二调度器 scheduler-plugins
本文介绍如何在集群中部署第二个调度器 scheduler-plugins。
为什么需要 scheduler-plugins?
通过平台创建的集群中会安装 K8s 原生的调度器,但是原生的调度器存在很多的局限性:
- 原生的调度器无法满足调度需求,你可以选择使用 CoScheduling、 CapacityScheduling 等 scheduler-plugins 插件。
- 在特殊的场景,需要新的调度器来完成调度任务而不影响原生调度器的流程。
- 区分不同功能的调度器,通过切换调度器名称来实现不同的调度场景。
本文以使用 vgpu 调度器的同时,想结合 scheduler-plugins 的 coscheduling 插件能力的场景为示例,介绍如何安装并使用 scheduler-plugins。
安装 scheduler-plugins
前置条件
- kubean 是在 v0.13.0 版本推出的新功能,选择管理集群时请确保版本不低于此版本。
- 安装 scheduler-plugins 版本为 v0.27.8,请确保集群版本是否与它兼容。 参考文档 Compatibility Matrix。
安装流程
-
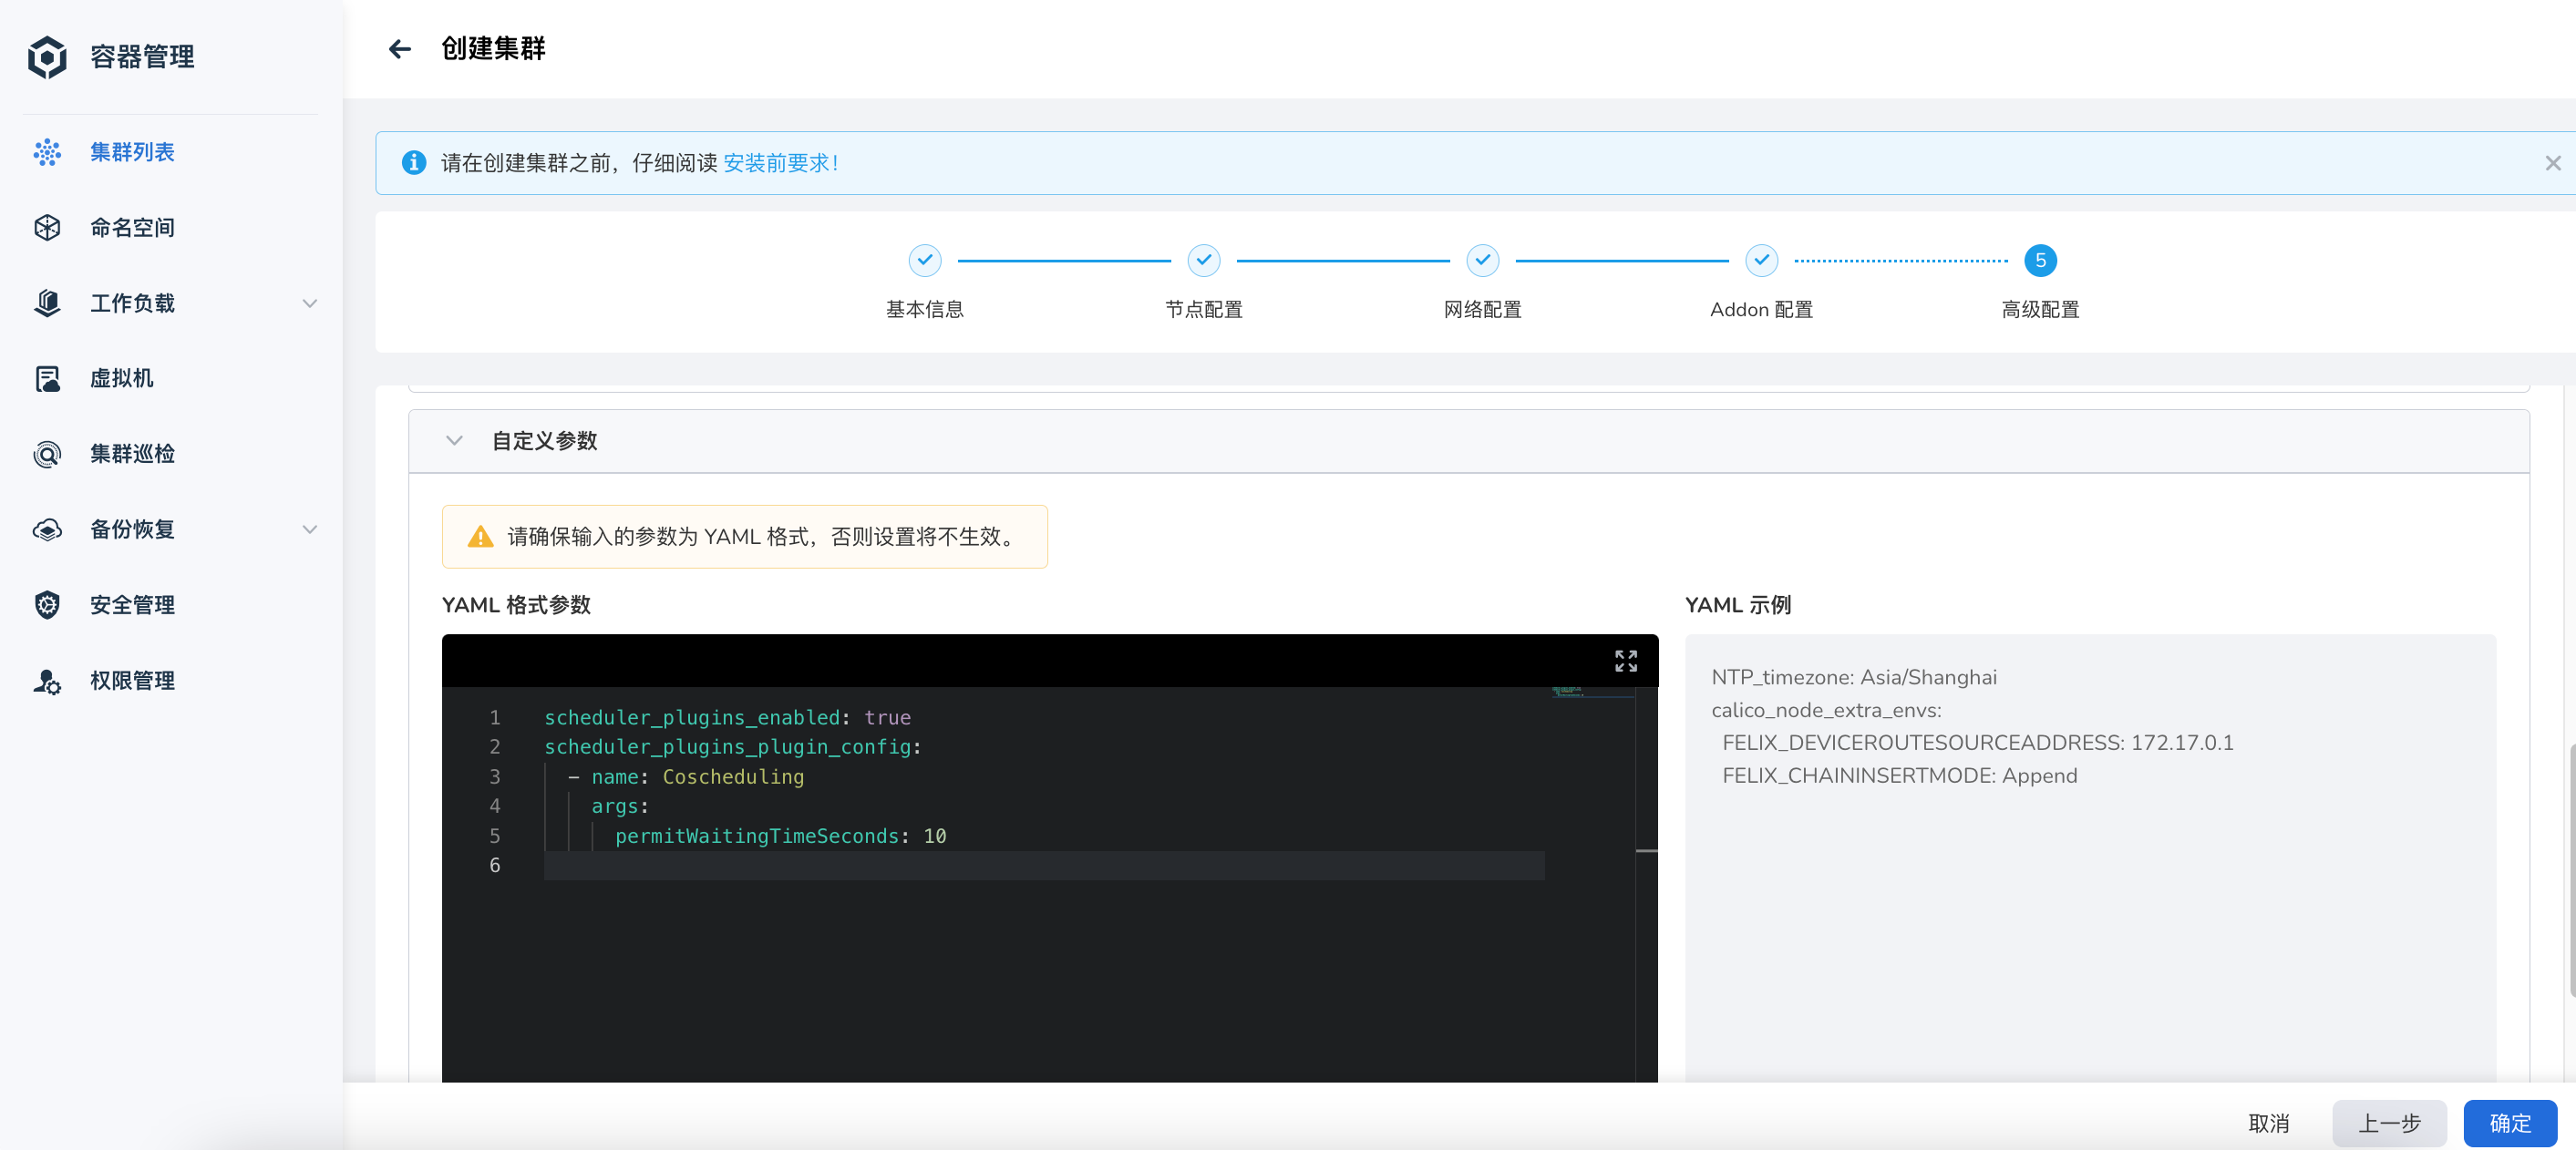
在 创建集群 -> 高级配置 -> 自定义参数 中添加 scheduler-plugins 参数
scheduler_plugins_enabled:true
scheduler_plugins_plugin_config:
  - name: Coscheduling
    args:
      permitWaitingTimeSeconds: 10 # default is 60
参数说明:
scheduler_plugins_enabled设置为 true 时,开启 scheduler-plugins 插件能力。- 您可以通过设置
scheduler_plugins_enabled_plugins或scheduler_plugins_disabled_plugins选项来启用或禁用某些插件。 参阅 K8s 官方插件名称。 - 如果需要设置自定义插件的参数请配置 scheduler_plugins_plugin_config,例如:设置 coscheduling 的 permitWaitingTimeoutSeconds 参数。 参阅 K8s 官方插件配置项
-
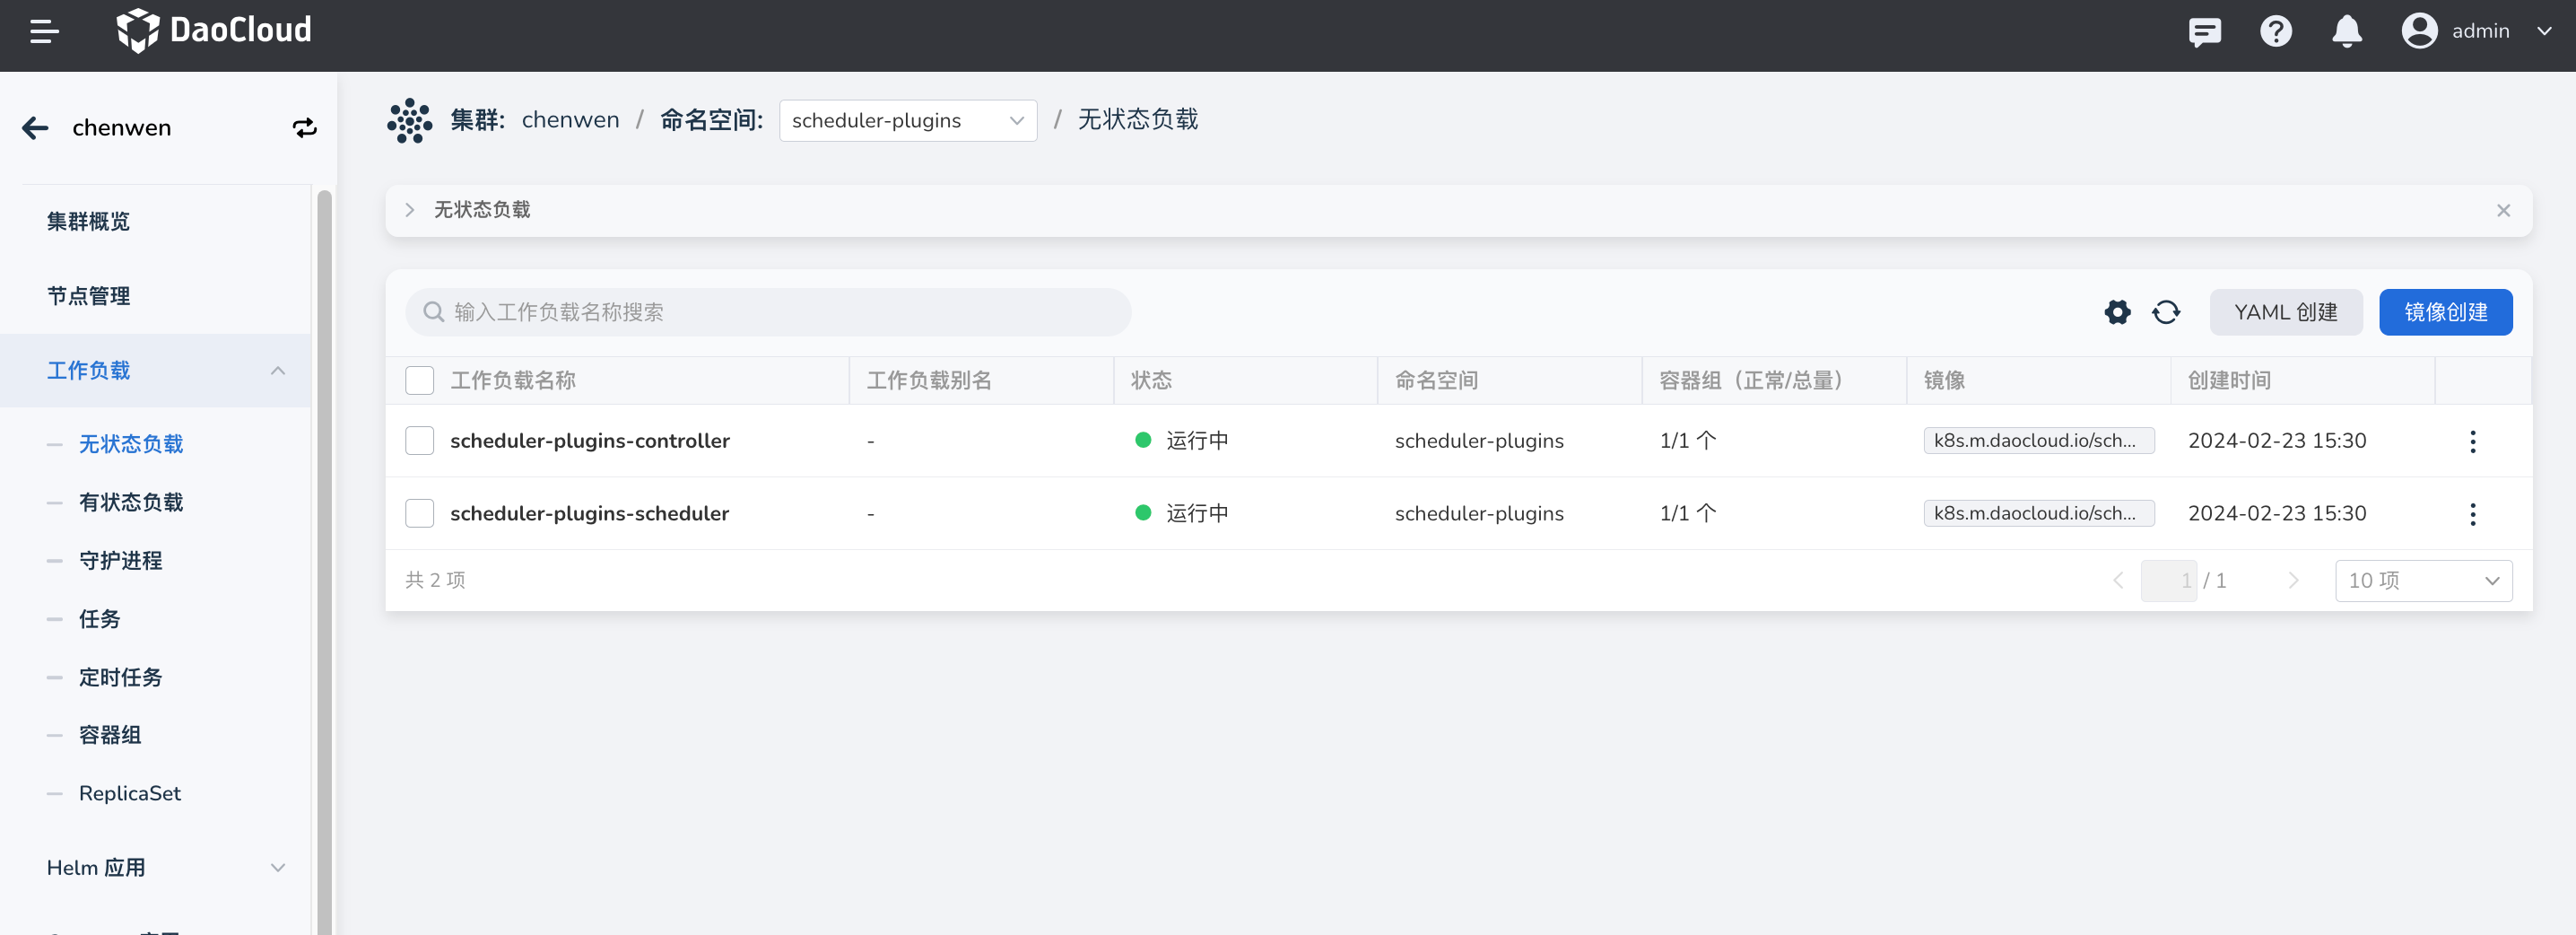
集群创建成功后系统会自动安装 scheduler-plugins 和 controller 组件负载,可以在对应集群的无状态负载中查看负载状态。
使用 scheduler-plugins
以下以使用 vgpu 调度器的同时,想结合 scheduler-plugins 的 coscheduling 插件能力场景为示例,介绍如何使用 scheduler-plugins。
-
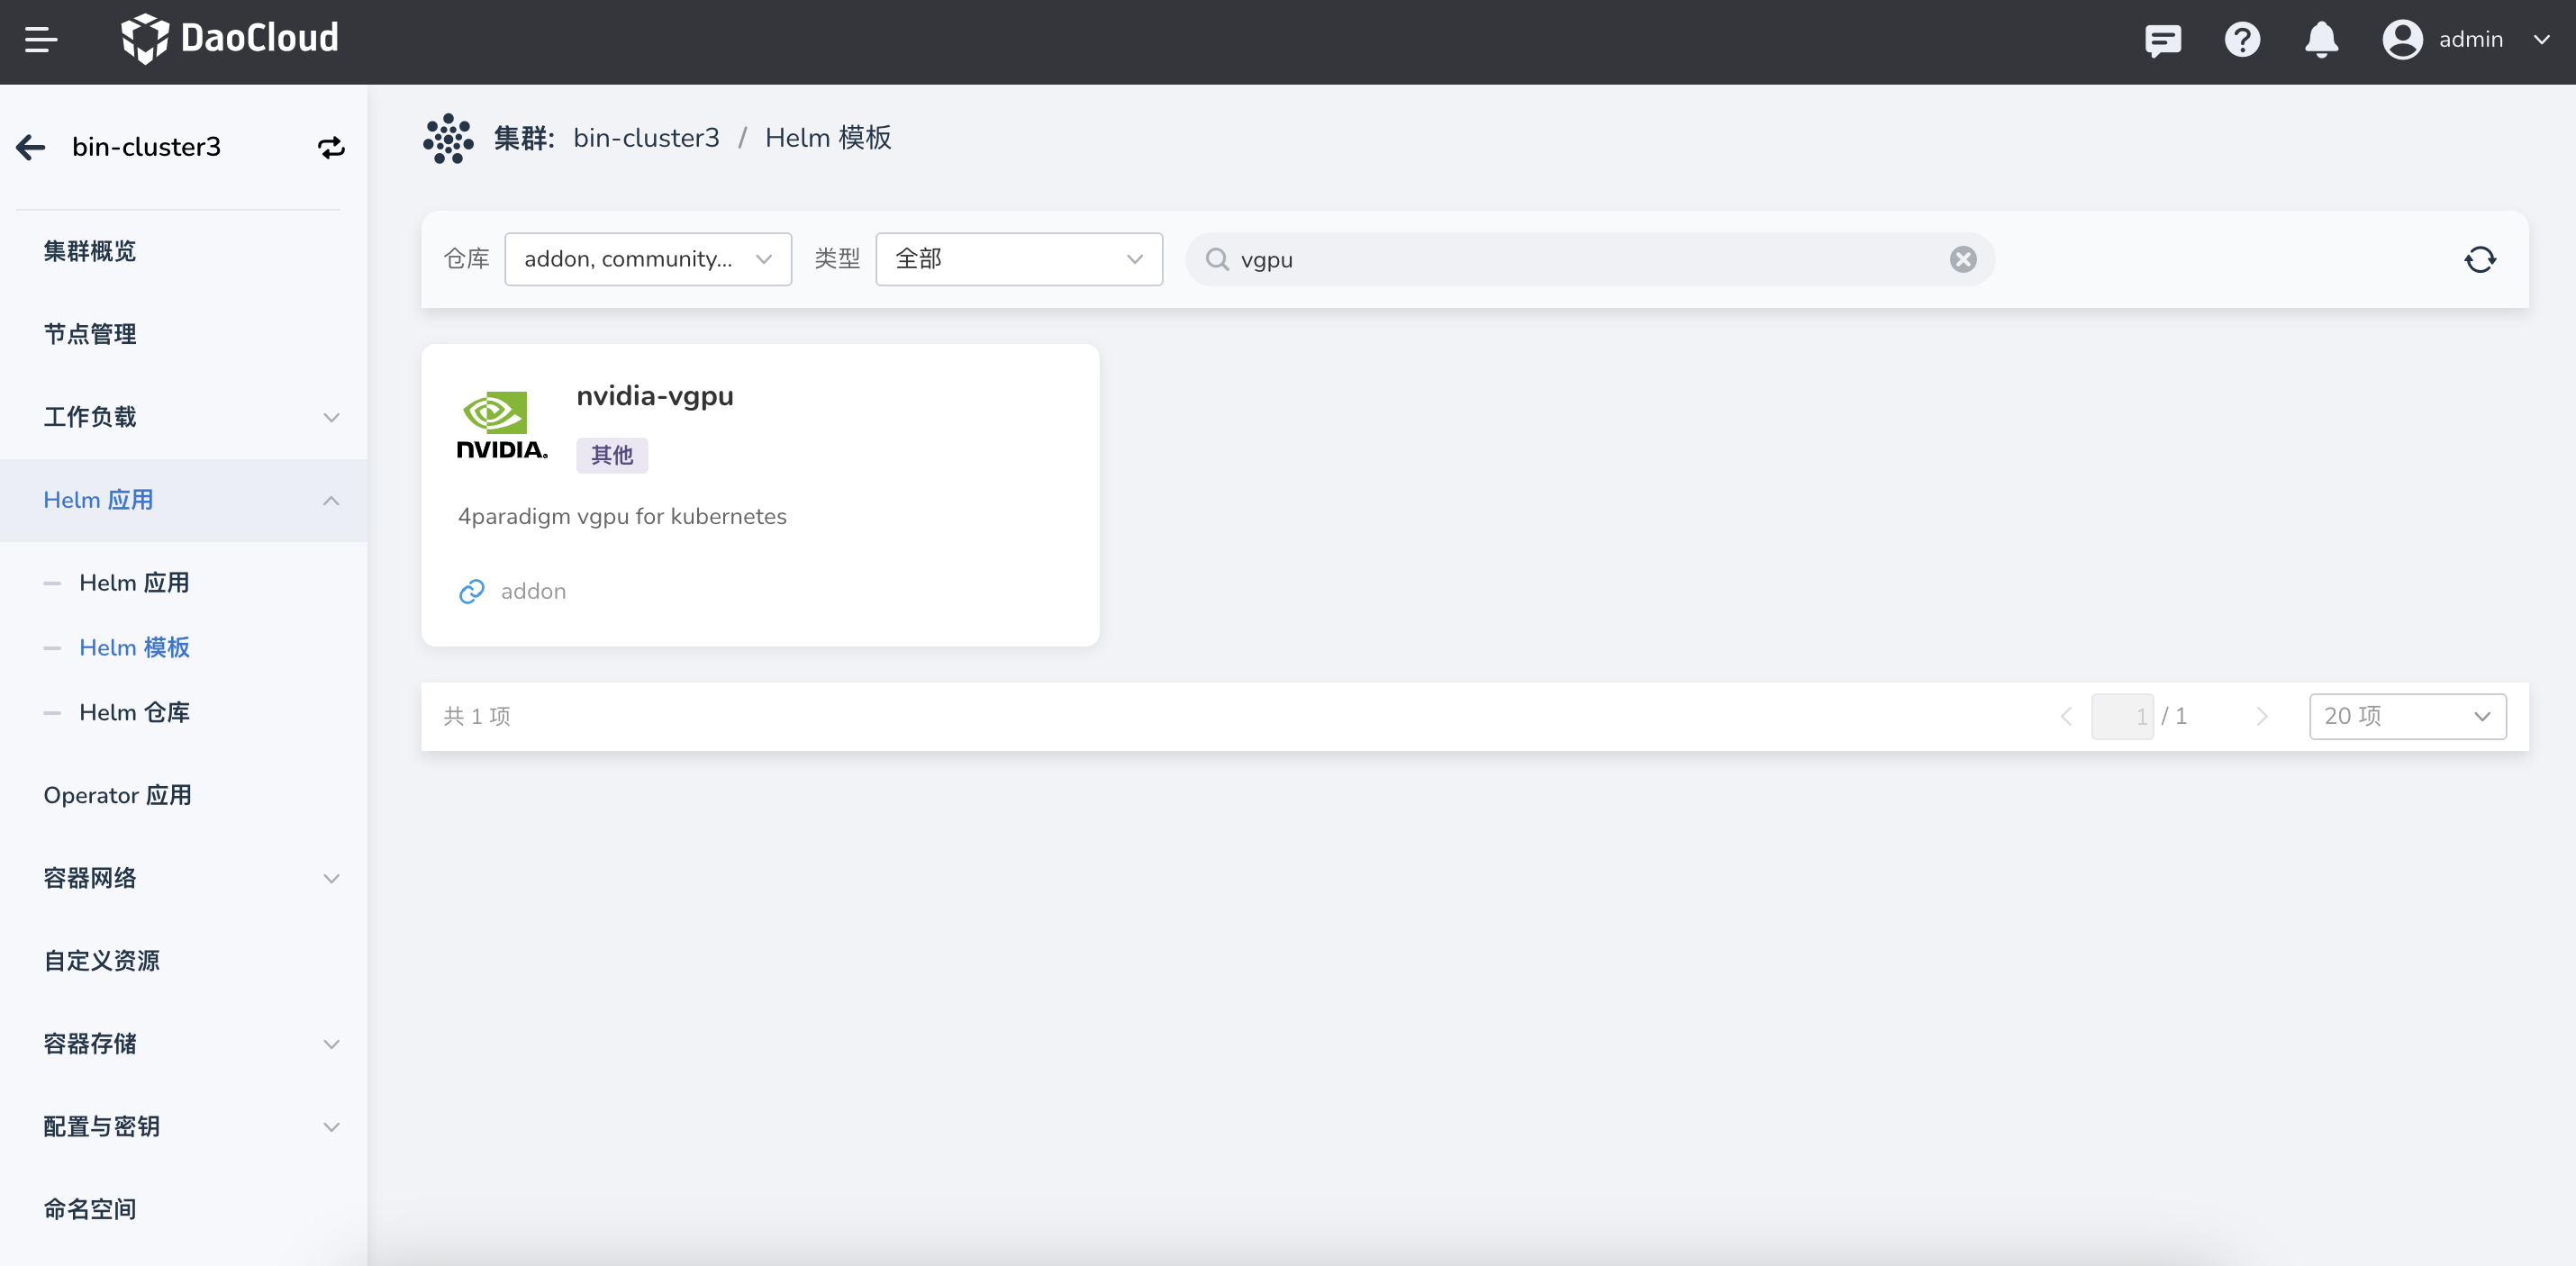
在 Helm 模板中安装 vgpu,设置 values.yaml 参数。
schedulerName: scheduler-plugins-scheduler,这是 kubean 默认安装的 scheduler-plugins 的 scheduler 名称,目前不能修改。scheduler.kubeScheduler.enabled: false,不安装 kube-scheduler,将 vgpu-scheduler 作为单独的 extender。
-
在 scheduler-plugins 上扩展 vgpu-scheduler。
[root@master01 charts]# kubectl get cm -n scheduler-plugins scheduler-config -ojsonpath="{.data.scheduler-config\.yaml}"apiVersion: kubescheduler.config.k8s.io/v1 kind: KubeSchedulerConfiguration leaderElection: leaderElect: false profiles: # Compose all plugins in one profile - schedulerName: scheduler-plugins-scheduler plugins: multiPoint: enabled: - name: Coscheduling - name: CapacityScheduling - name: NodeResourceTopologyMatch - name: NodeResourcesAllocatable disabled: - name: PrioritySort pluginConfig: - args: permitWaitingTimeSeconds: 10 name: Coscheduling修改 scheduler-plugins 的 scheduler-config 的 configmap 参数,如下:
[root@master01 charts]# kubectl get cm -n scheduler-plugins scheduler-config -ojsonpath="{.data.scheduler-config\.yaml}"apiVersion: kubescheduler.config.k8s.io/v1 kind: KubeSchedulerConfiguration leaderElection: leaderElect: false profiles: # Compose all plugins in one profile - schedulerName: scheduler-plugins-scheduler plugins: multiPoint: enabled: - name: Coscheduling - name: CapacityScheduling - name: NodeResourceTopologyMatch - name: NodeResourcesAllocatable disabled: - name: PrioritySort pluginConfig: - args: permitWaitingTimeSeconds: 10 name: Coscheduling extenders: - urlPrefix: "${urlPrefix}" filterVerb: filter bindVerb: bind nodeCacheCapable: true ignorable: true httpTimeout: 30s weight: 1 enableHTTPS: true tlsConfig: insecure: true managedResources: - name: nvidia.com/vgpu ignoredByScheduler: true - name: nvidia.com/gpumem ignoredByScheduler: true - name: nvidia.com/gpucores ignoredByScheduler: true - name: nvidia.com/gpumem-percentage ignoredByScheduler: true - name: nvidia.com/priority ignoredByScheduler: true - name: cambricon.com/mlunum ignoredByScheduler: true -
安装完 vgpu-scheduler 后,系统会自动创建 svc,urlPrefix 指定 svc 的 URL。
-
将 scheduler-plugins 的 scheduler Pod 重启,加载新的配置文件。
Note
在创建 vgpu 应用时不需要指定调度器名称,vgpu-scheduler 的 Webhook 会自动将 Scheduler 的名称修改为 scheduler-plugins-scheduler,不用手动指定。