应用使用昇腾(Ascend)NPU
本节介绍如何在 DCE 5.0 平台使用昇腾 GPU。
前提条件
- 当前集群已安装昇腾(Ascend) NPU 驱动。
- 当前集群内 NPU 卡未进行任何虚拟化操作或被其它应用占用。
快速使用
本文使用昇腾示例库中的 AscentCL 图片分类应用示例。
-
下载昇腾代码库
运行以下命令下载昇腾 Demo 示例代码库,并且请记住代码存放的位置,后续需要使用。
-
准备基础镜像
此例使用 Ascent-pytorch 基础镜像,可访问昇腾镜像仓库获取。
-
准备 YAML
ascend-demo.yamlapiVersion: batch/v1 kind: Job metadata: name: resnetinfer1-1-1usoc spec: template: spec: containers: - image: ascendhub.huawei.com/public-ascendhub/ascend-pytorch:23.0.RC2-ubuntu18.04 # Inference image name imagePullPolicy: IfNotPresent name: resnet50infer securityContext: runAsUser: 0 command: - "/bin/bash" - "-c" - | source /usr/local/Ascend/ascend-toolkit/set_env.sh && TEMP_DIR=/root/samples_copy_$(date '+%Y%m%d_%H%M%S_%N') && cp -r /root/samples "$TEMP_DIR" && cd "$TEMP_DIR"/inference/modelInference/sampleResnetQuickStart/python/model && wget https://obs-9be7.obs.cn-east-2.myhuaweicloud.com/003_Atc_Models/resnet50/resnet50.onnx && atc --model=resnet50.onnx --framework=5 --output=resnet50 --input_shape="actual_input_1:1,3,224,224" --soc_version=Ascend910 && cd ../data && wget https://obs-9be7.obs.cn-east-2.myhuaweicloud.com/models/aclsample/dog1_1024_683.jpg && cd ../scripts && bash sample_run.sh resources: requests: huawei.com/Ascend910: 1 # Number of the Ascend 910 Processors. limits: huawei.com/Ascend910: 1 # The value should be the same as that of requests . volumeMounts: - name: hiai-driver mountPath: /usr/local/Ascend/driver readOnly: true - name: slog mountPath: /var/log/npu/conf/slog/slog.conf - name: localtime # The container time must be the same as the host time. mountPath: /etc/localtime - name: dmp mountPath: /var/dmp_daemon - name: slogd mountPath: /var/slogd - name: hbasic mountPath: /etc/hdcBasic.cfg - name: sys-version mountPath: /etc/sys_version.conf - name: aicpu mountPath: /usr/lib64/aicpu_kernels - name: tfso mountPath: /usr/lib64/libtensorflow.so - name: sample-path mountPath: /root/samples volumes: - name: hiai-driver hostPath: path: /usr/local/Ascend/driver - name: slog hostPath: path: /var/log/npu/conf/slog/slog.conf - name: localtime hostPath: path: /etc/localtime - name: dmp hostPath: path: /var/dmp_daemon - name: slogd hostPath: path: /var/slogd - name: hbasic hostPath: path: /etc/hdcBasic.cfg - name: sys-version hostPath: path: /etc/sys_version.conf - name: aicpu hostPath: path: /usr/lib64/aicpu_kernels - name: tfso hostPath: path: /usr/lib64/libtensorflow.so - name: sample-path hostPath: path: /root/samples restartPolicy: OnFailure以上 YAML 中有一些字段需要根据实际情况进行修改:
- atc ... --soc_version=Ascend910 使用的是 Ascend910 ,请以实际情况为主 您可以使用 npu-smi info 命令查看显卡型号然后加上 Ascend 前缀即可
- samples-path 以实际情况为准
- resources 以实际情况为准
-
部署 Job 并查看结果
使用如下命令创建 Job:
查看 Pod 运行状态:

Pod 成功运行后,查看日志结果。在屏幕上的关键提示信息示例如下图,提示信息中的 Label 表示类别标识,Conf 表示该分类的最大置信度,Class 表示所属类别。这些值可能会根据版本、环境有所不同,请以实际情况为准:
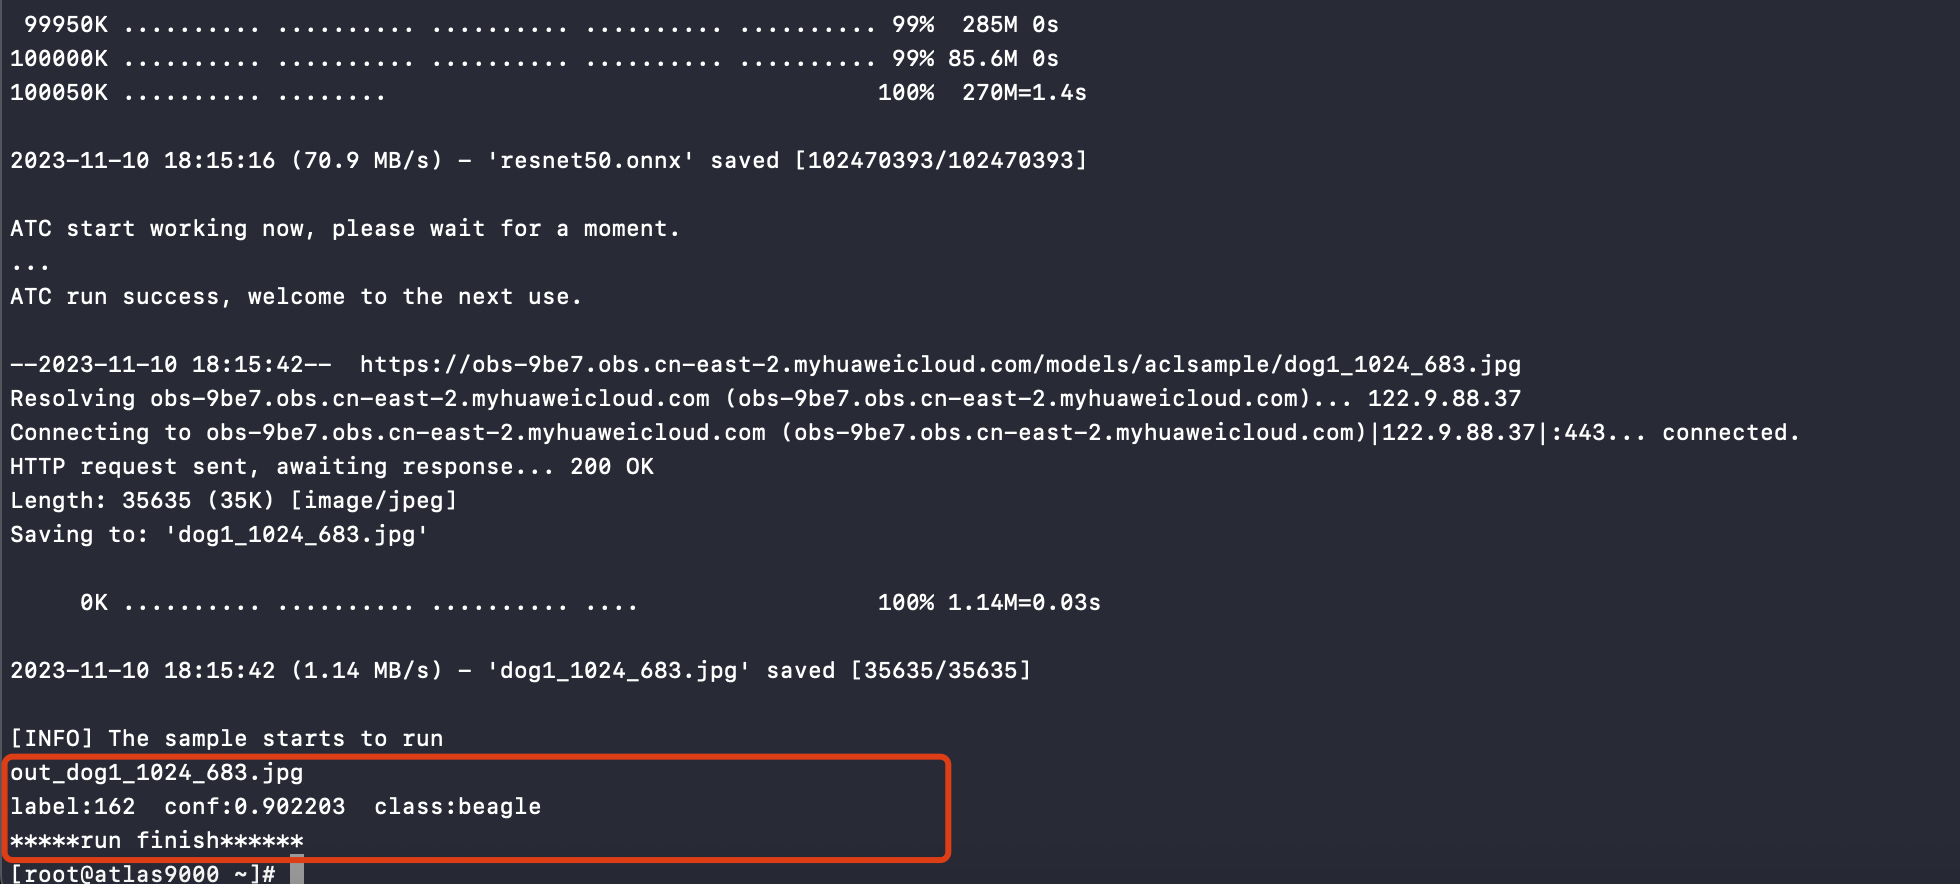
结果图片展示:

界面使用
-
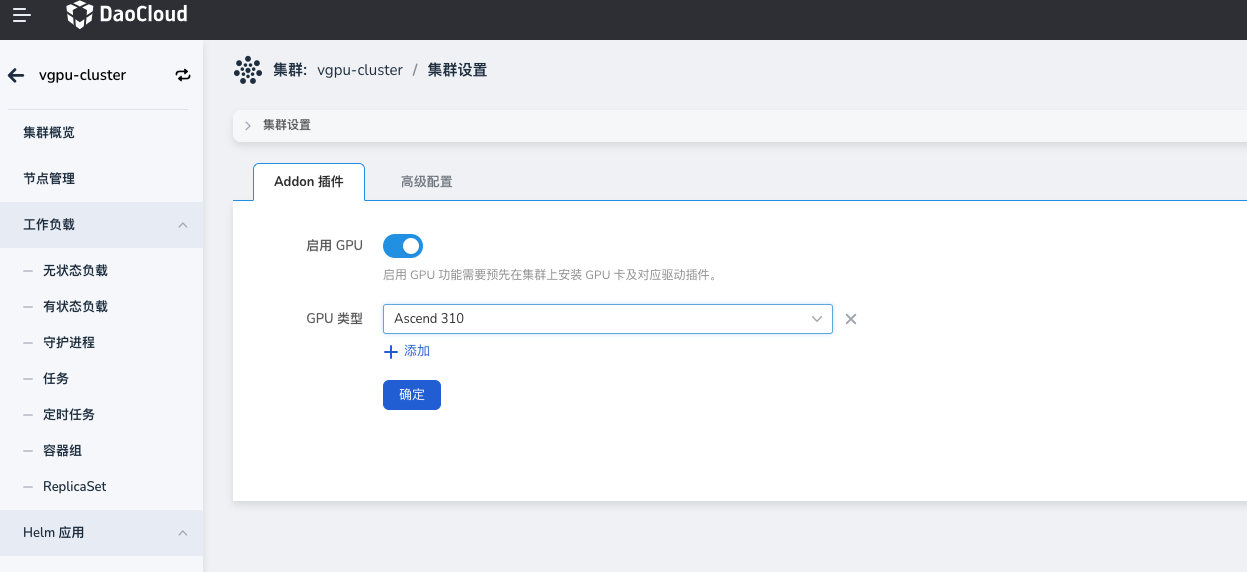
确认集群是否已检测 GPU 卡。点击对应 集群 -> 集群设置 -> Addon 插件 ,查看是否已自动启用并自动检测对应 GPU 类型。 目前集群会自动启用 GPU ,并且设置 GPU 类型为 Ascend 。
-
部署工作负载,点击对应 集群 -> 工作负载 ,通过镜像方式部署工作负载,选择类型(Ascend)之后,需要配置应用使用的物理卡数量:
物理卡数量(huawei.com/Ascend910) :表示当前 Pod 需要挂载几张物理卡,输入值必须为整数且**小于等于**宿主机上的卡数量。
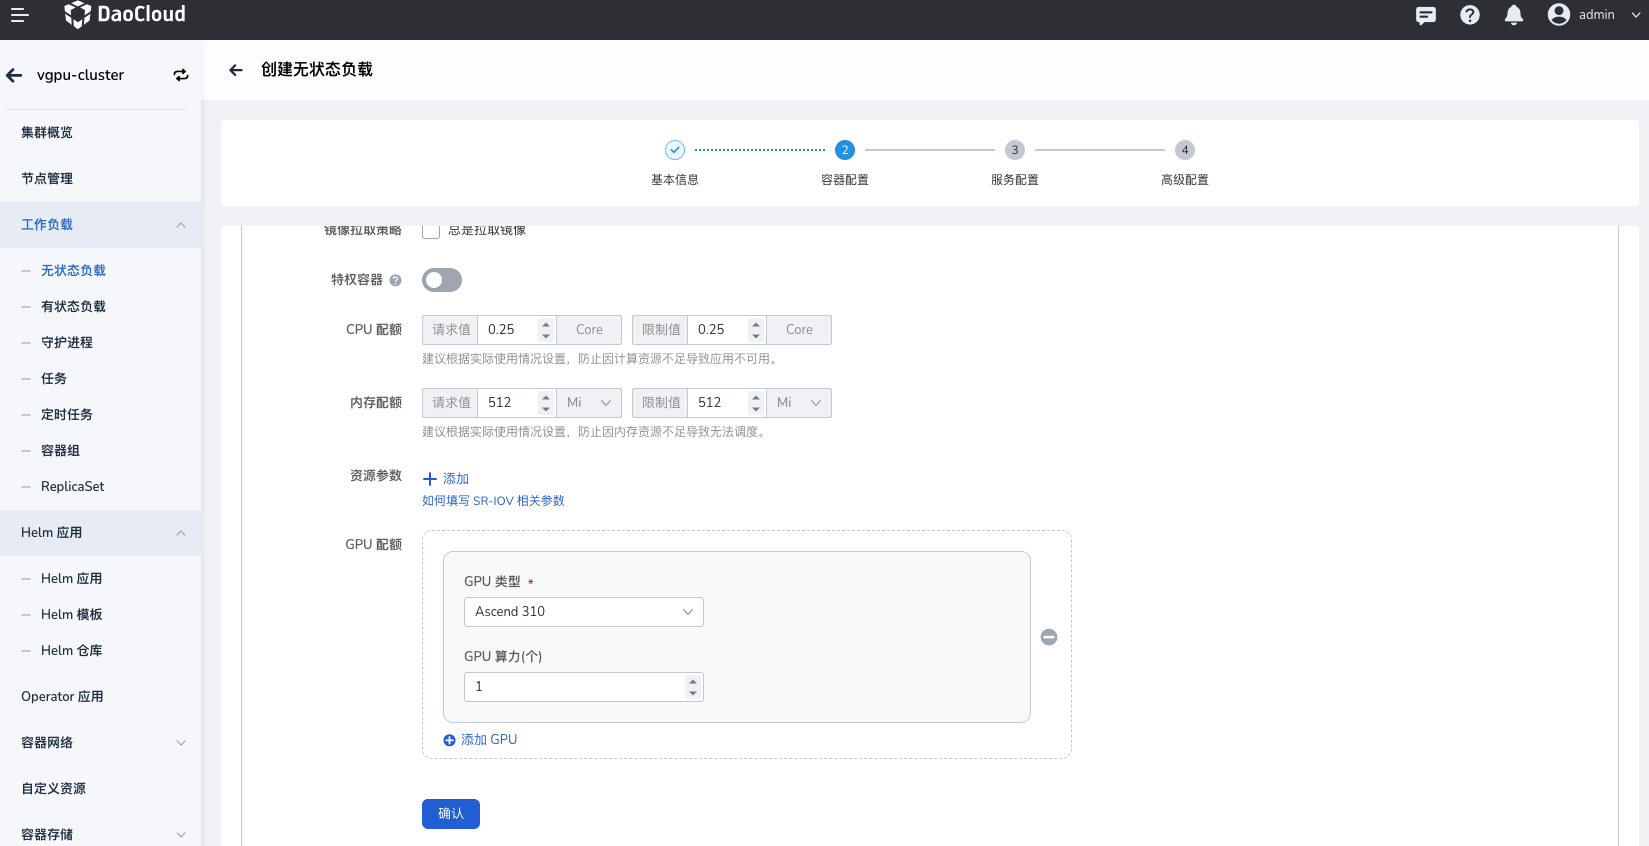
如果上述值配置的有问题则会出现调度失败,资源分配不了的情况。