Cilium 网络通信加速
本章节介绍如何配置 Cilium 通信加速能力,本章节提供 2 种方式配置,可根据需要进行选择。
前提条件
请确认操作系统 Kernel 版本号 >= v4.9.17,推荐 v5.10+。查看并安装升级最新的 Linux 内核版本,您可以按照如下命令进行操作:
-
查看当前内核版本:
-
安装 ELRepo 存储库,ELRepo 存储库中提供的最新 Linux 内核版本:
-
安装最新的 Linux 内核版本:
kernel-ml是最新文档版内核,您可以根据需要选择其他版本。 -
更新 GRUB 配置,以便在启动时使用新内核版本:
注意手动更新内核可能有风险,生产环境谨慎操作。
方式一:创建集群时配置
-
点击 容器管理 -> 集群列表 ,点击 创建集群 ,输入集群 基本信息 、 节点配置 信息后,进入 网络配置 进行如下配置。
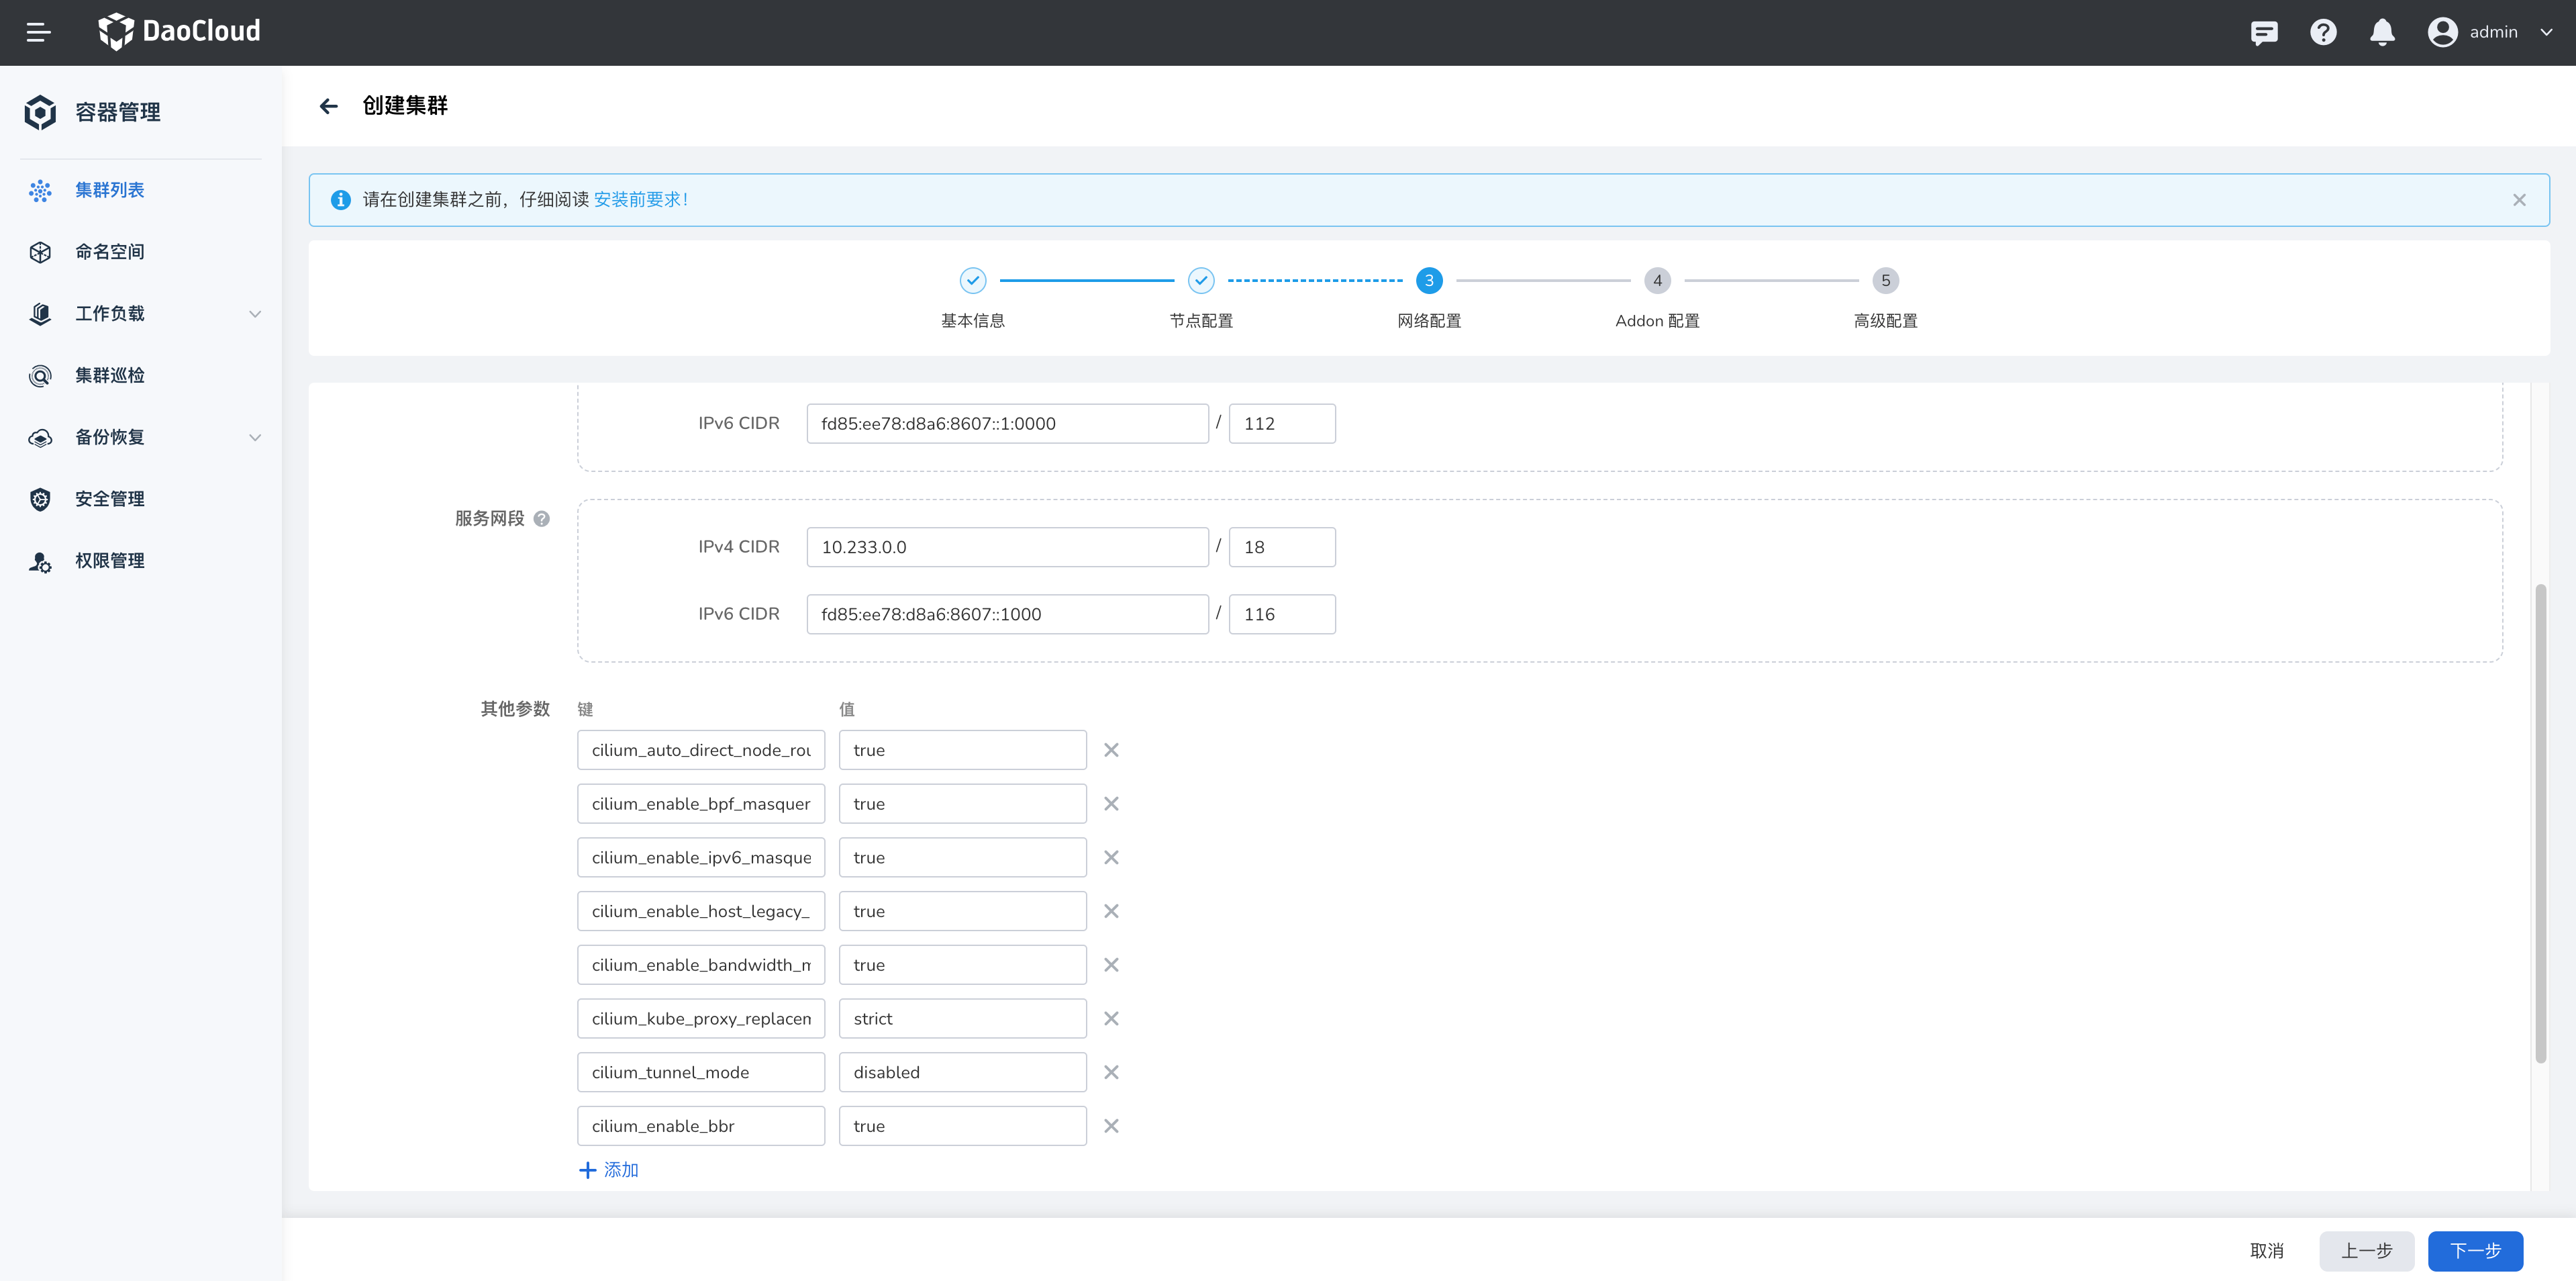
- 集群的网络插件选择 cilium
-
添加 其他参数 如下:
cilium_auto_direct_node_routes: "true" #路由模式下必须设置为 True, 否则无法路由跨节点流量 cilium_enable_bpf_masquerade: "true" #设置该参数为 true 之后,如果使用了 masquerading 特性,那么会基于 eBPF 来替代 iptables 的实现,需要内核 5.10 及之后版本,否则就算开启也会降级到 iptables 实现 cilium_enable_ipv6_masquerade: "false" #对于 POD 访问外界的流量做源地址转换,如果使用 tunnel 模式需要开启,如果是通过 BGP 打通了物理网络则禁用 cilium_enable_host_legacy_routing: "false" # 关闭可以主机处理数据包时绕过其内核协议栈,加快数据转发。默认情况下打开,但如果主机内核不支持,则回退到传统行为 cilium_enable_bandwidth_manager: "true # 打开bandwidth_manager,提高tcp、udp的性能 cilium_kube_proxy_replacement: strict # 启用 kube_proxy replacement 功能,需要删除 kube_proxy 组件 cilium_tunnel_mode: disabled # 关闭隧道模式 cilium_enable_bbr: "true" #(可选) bbr网络阻塞控制,提供更高的带宽及更低的延时。要求内核大于5.18 -
其他均使用默认配置项
-
点击 创建集群 完成创建。
方式二:修改 Cilium Config 配置
如集群已经创建,需要开启加速参数,可修改 Cilium-Config 文件。
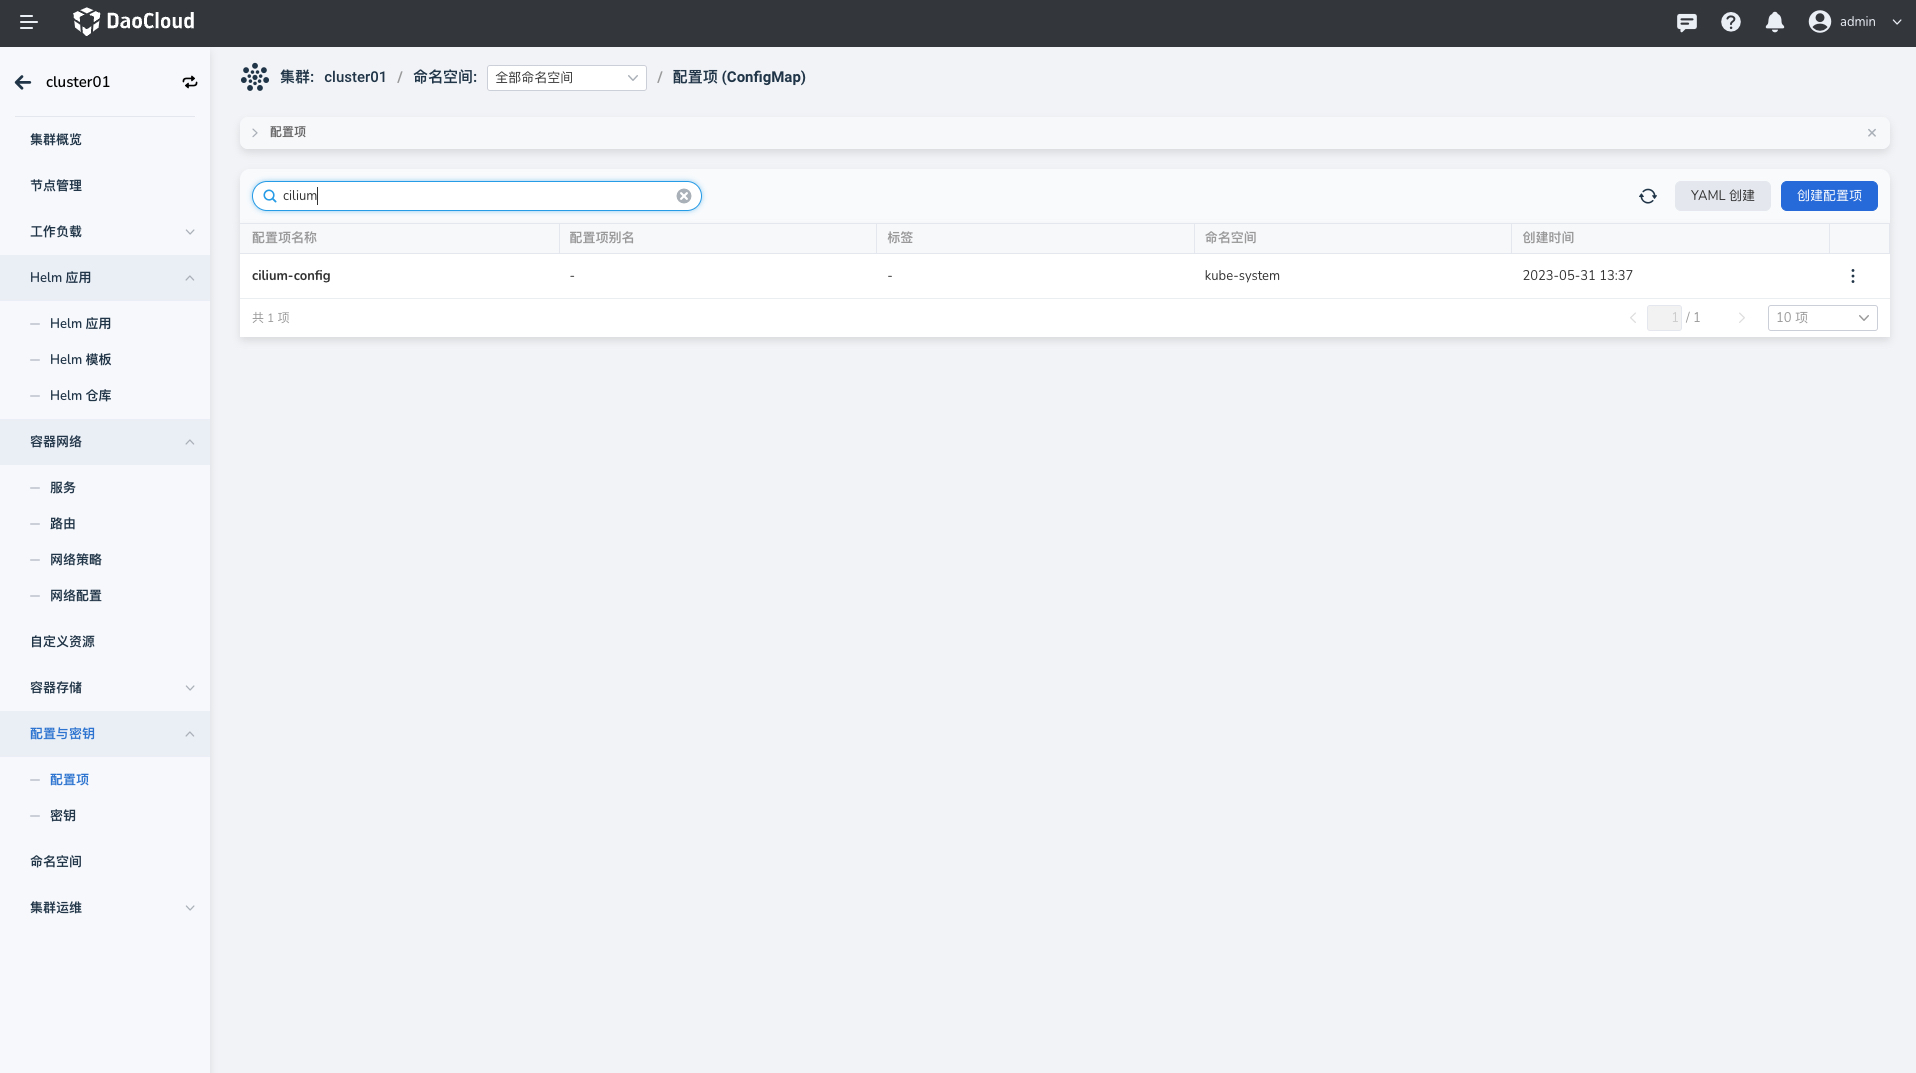
点击 容器管理 -> 集群列表 ,点击已创建的集群名称,进入详情后,点击 配置与秘钥 ,选择 配置项 ,找到 cilium-config 点击编辑,输入上述加速参数:
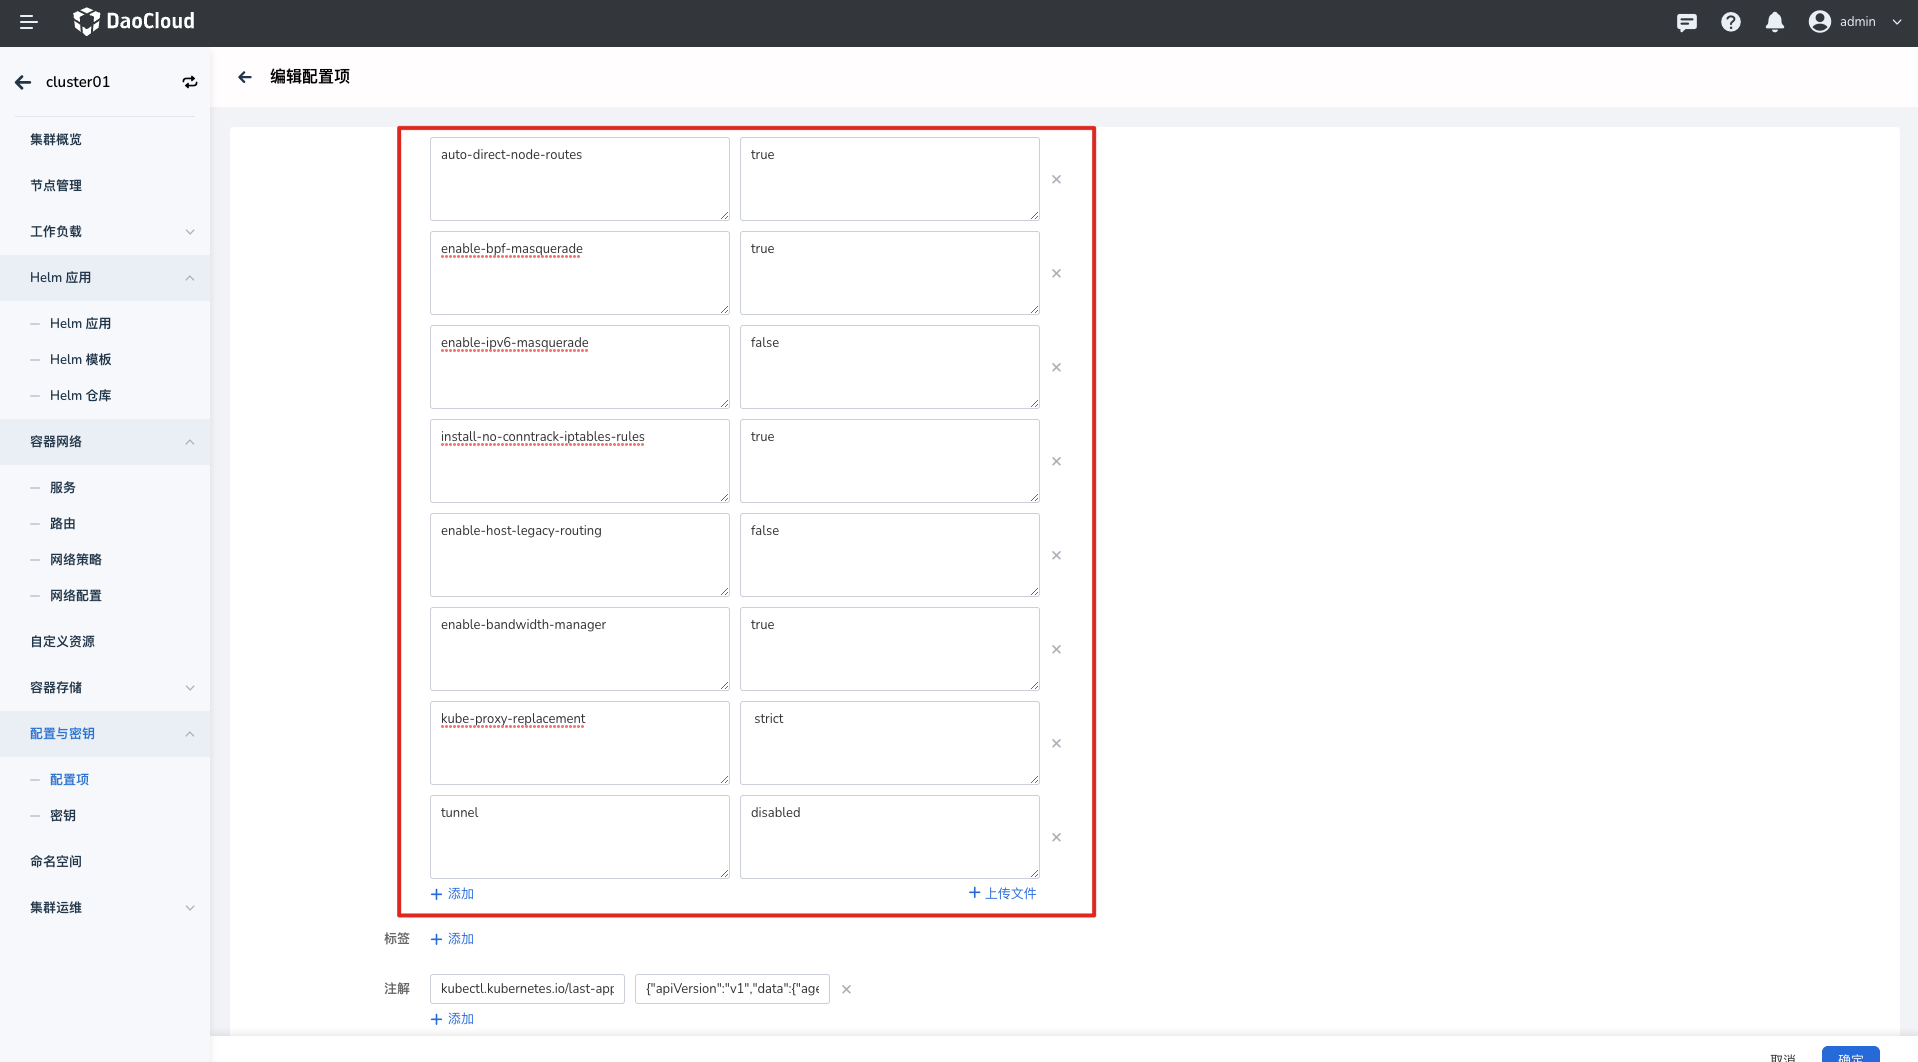
参数编写完成后,点击完成。检查 cilium agent Daemonset(cilium-agent 的 containers)是否存在以下 ENV。如果没有,需要手动添加:
- name: KUBERNETES_SERVICE_HOST
  value: <YOUR_K8S_APISERVER_IP>
- name: KUBERNETES_SERVICE_PORT
  value: "6443"
添加完成后重启 Cilium agent pod。